When did we all decide to stop wearing ugly Christmas sweaters ironically and switch to wearing them sincerely? Either way, I love a good ugly sweater during the holidays. The tackier, the better, in my opinion! I have my own that I whip out for parties, decked out in kittens and distractingly noisy jingle bells. I decided to celebrate this kitschy theme by making a decorative garland out of mini little sweaters. Turns out, shrinking things only makes them cuter, not uglier!

I, as a full-grown adult, had a blast making this ugly sweater garland, but it’s also a great project for kids. All you have to do is provide a few pre-cut sweater shapes, and little hands are good to go to work.
The Magic of a Handmade Christmas Garland
‘Tis the season for creating magic, and what better way to do that than with a handmade Christmas garland? There is something truly special about crafting your own holiday decorations. It brings a sense of joy, pride, and a touch of nostalgia to your home.
A handmade Christmas garland has a certain magic that store-bought garlands simply cannot replicate. It is a reflection of your creativity, your style, and your personal touch. Each stitch, each embellishment, and each material choice comes together to create a unique masterpiece that perfectly represents you and your holiday spirit.
When you hang a handmade Christmas garland in your home, you are not only adding a festive touch, but you are also adding a piece of yourself. It becomes a symbol of love, warmth, and the joy of the holiday season. And every time you catch a glimpse of your creation, you can’t help but feel a little burst of happiness.
Not only does a handmade Christmas garland add a magical touch to your space, but it also allows you to connect with the traditions of generations past. Handcrafted decorations have been a part of holiday celebrations for centuries, passed down through families and cherished for their sentimental value. By creating your own garland, you are continuing this beautiful tradition and making memories that will be treasured for years to come.
So, let the magic unfold as you pick up your scissors and let your imagination run wild with this DIY felt Christmas garland.
Unleashing Your Creativity with Material Choices
When it comes to making your own DIY Christmas garland, the possibilities are endless. Unleash your creativity by exploring a wide range of material choices that will make your garland truly unique. From felt and fabric to paper and even unconventional materials like buttons or bottle caps, the options are endless.
One way to add a cozy and rustic feel to your garland is by using burlap or twine as the sweater base. This natural and textured material will give your garland a charming and rustic touch. Combine it with pinecones, dried berries, or even small ornaments for a festive twist.
If you prefer a more vibrant and colorful look, consider using brightly colored felt or fabric. Cut out shapes like stars, hearts, or Christmas trees and sew or glue them onto a string or ribbon. Mix and match different colors and patterns to create a playful and eye-catching garland that will bring joy to any room.
For a whimsical touch, consider using paper to create origami shapes or folded rosettes. Experiment with different patterns, colors, and sizes to create a visually stunning and dimensional garland. Hang it across a mantel or drape it along a staircase for a stunning statement piece.
Remember, the key is to let your imagination run wild. Explore your local craft store, repurpose old materials, or even gather items from nature to add an organic touch. The sky is the limit when it comes to material choices, so have fun and let your creativity shine through in every stitch, fold, or glue.
Materials Needed For Felt Garland
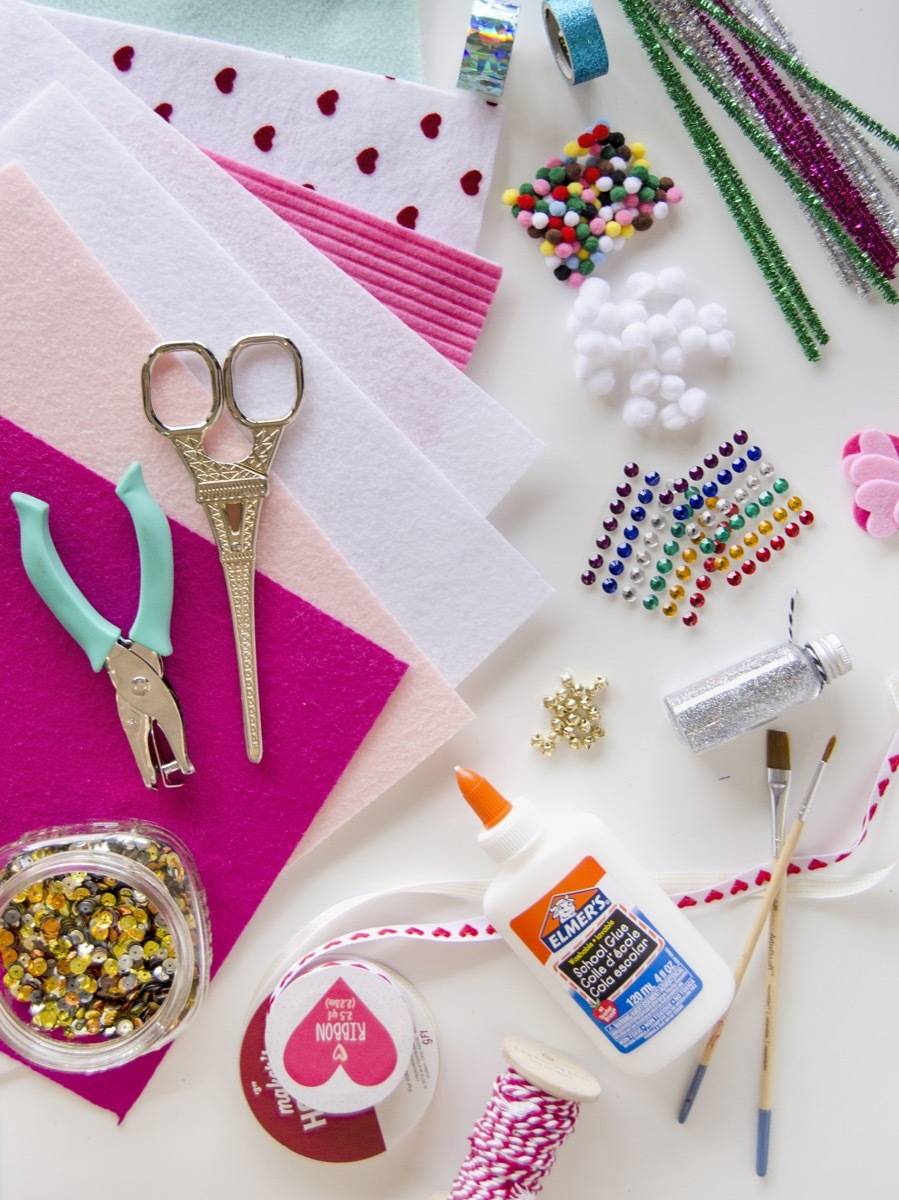
- Felt in a variety of colors
- Scissors
- Hot glue (or white glue if making this project with kids)
- Twine, string, or ribbon to form garland
- Decorations such as paint, pom-poms, sequins, rhinestones, glitter, felt balls, and pipe cleaners
Making Ugly Sweater Christmas Garland
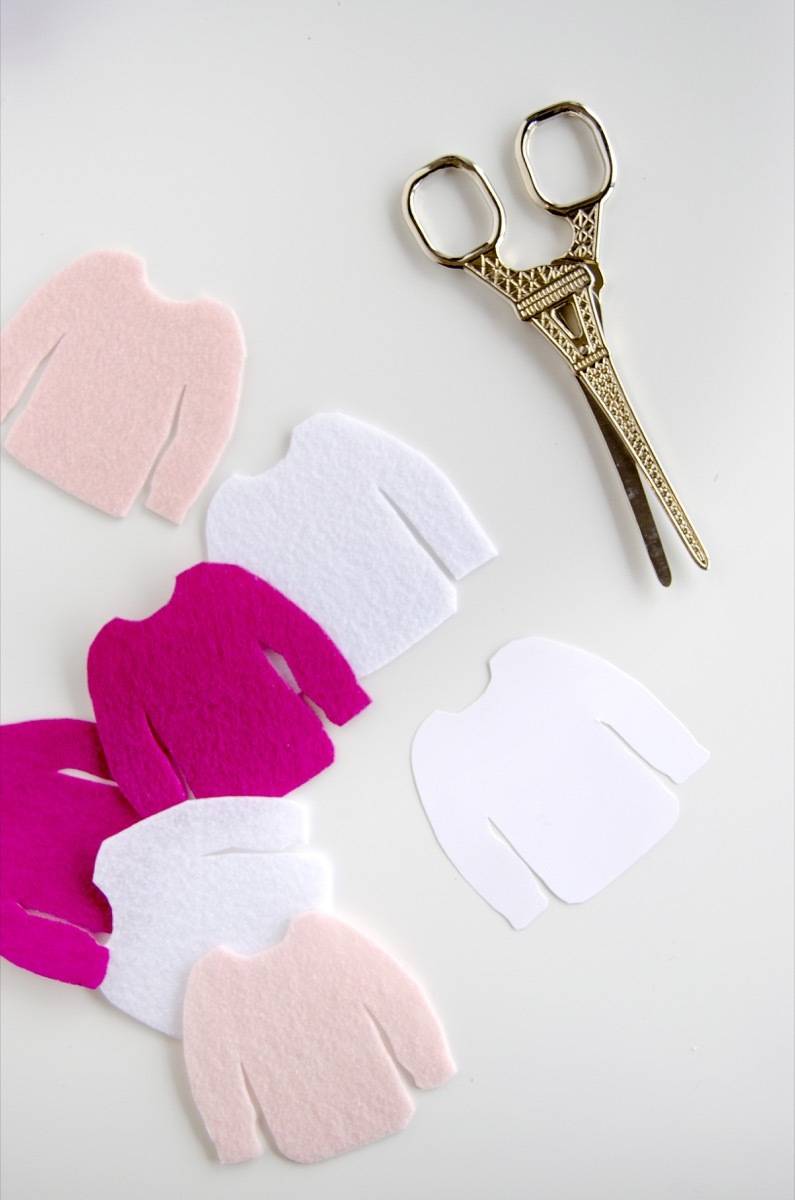
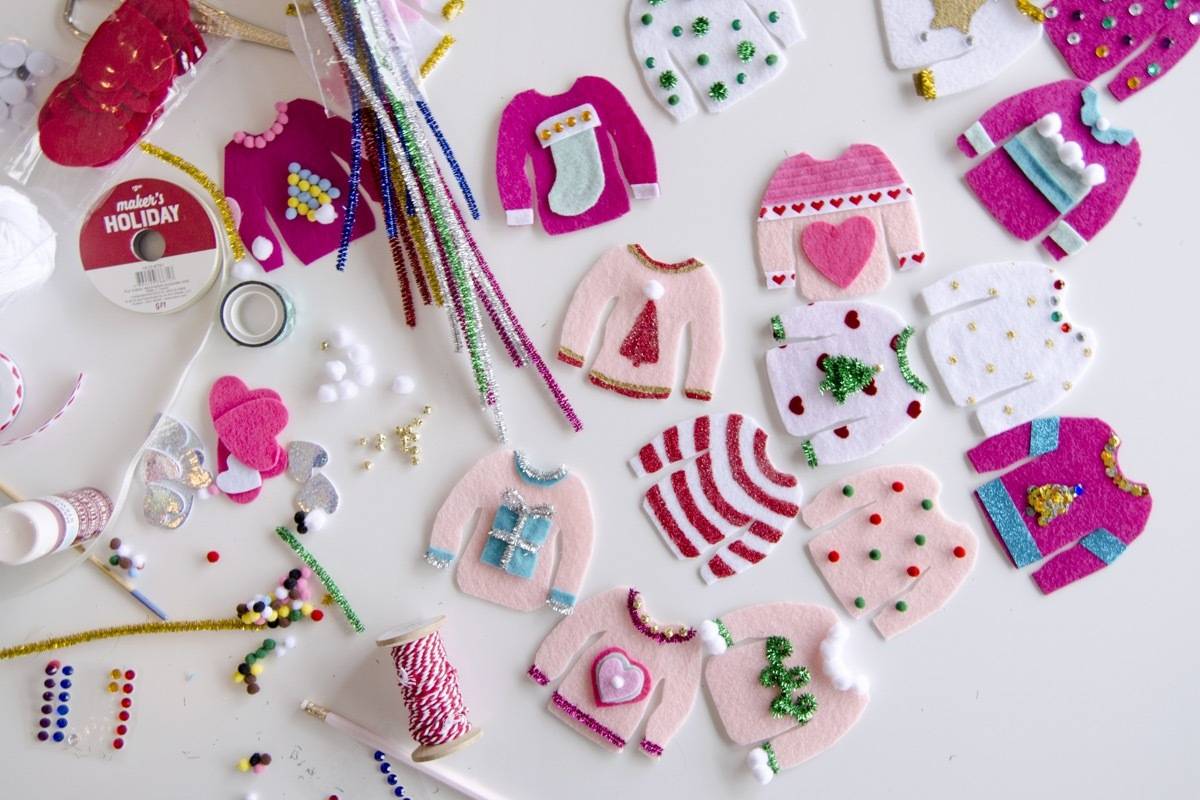
You will need a few ugly sweater shapes in felt to begin. To keep my shapes roughly the same, I traced a sweater shape on a piece of paper and used that as a template for my other shapes.
To create a nice sweater shape, keep the arms of the shirt shorter than the shirt itself, and don’t forget a scoop for the neck!
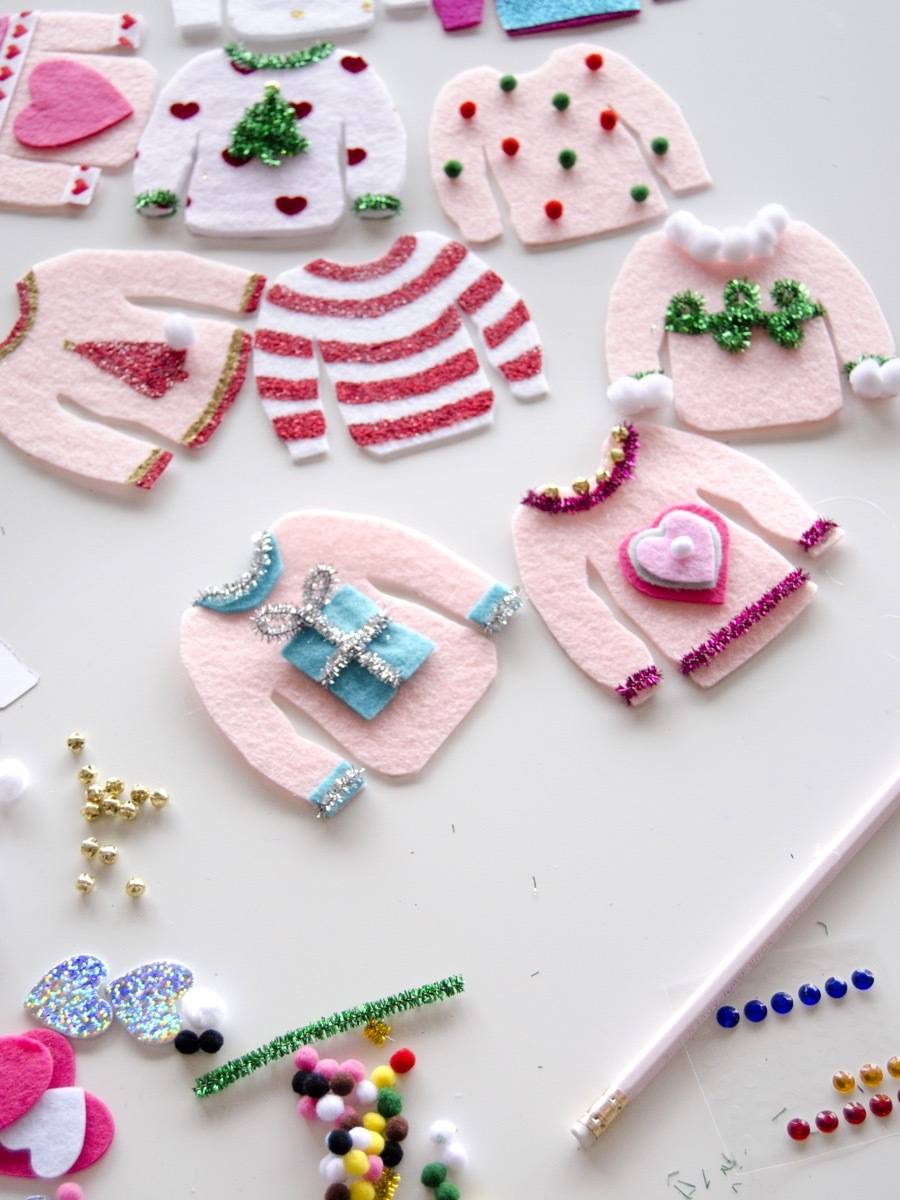
The rest of this project is pretty straight-forward… you just decorate!
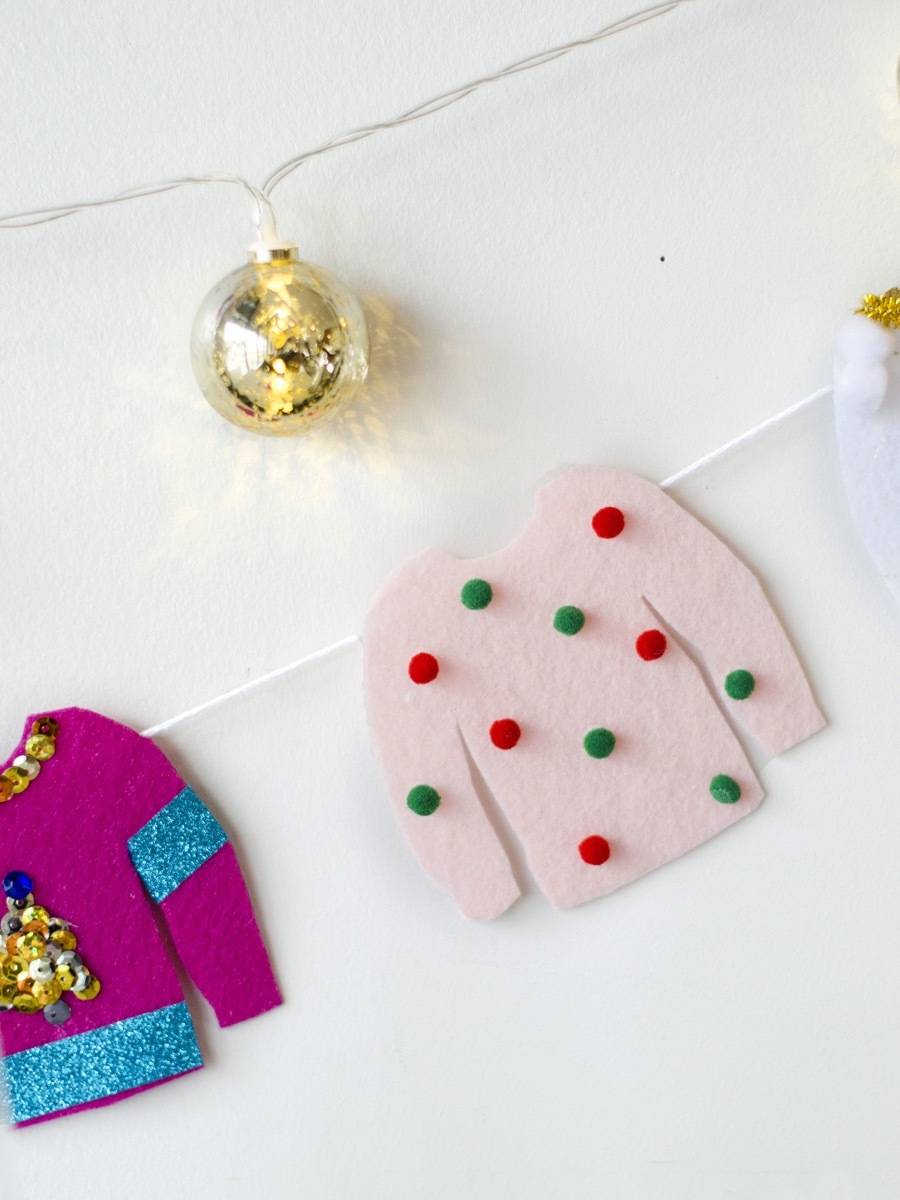
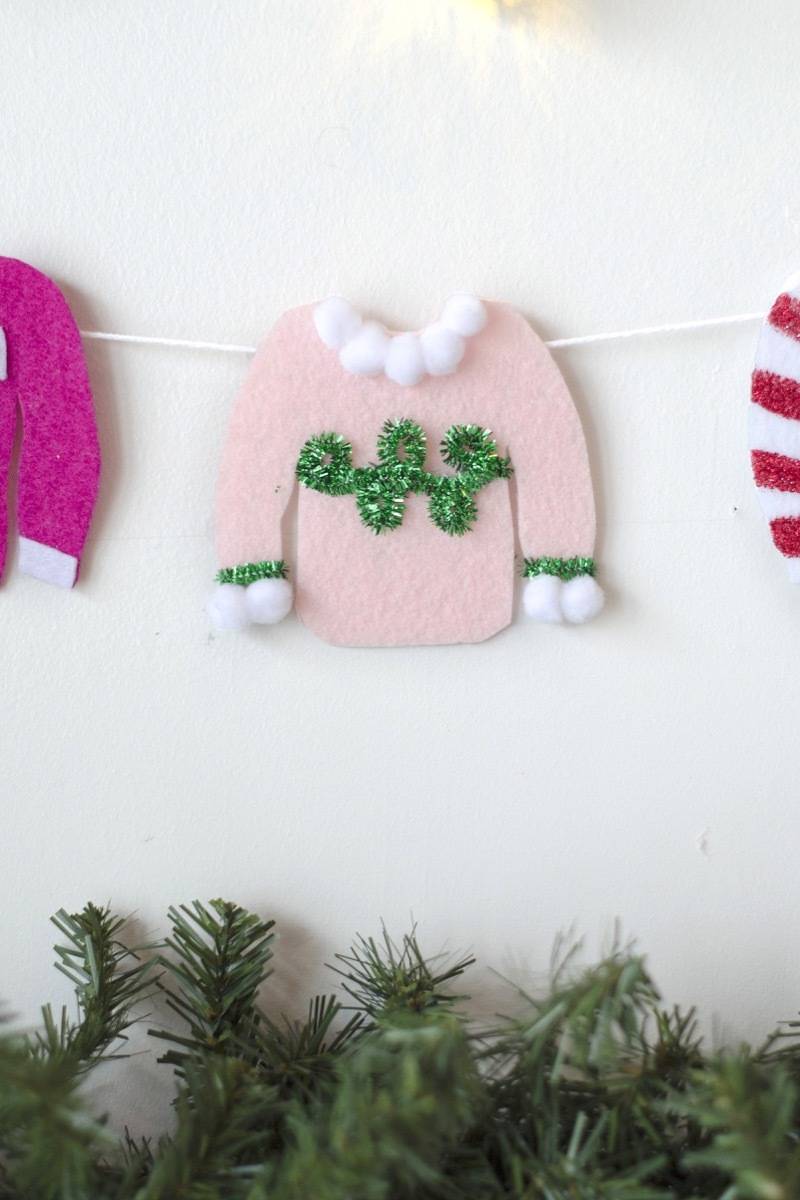
Cut pieces of felt and glue them to the sweaters – like a stocking, present, tree, or star shape.
Glue pom-poms to collars and cuffs for extra fluff. Pipe cleaners are great for creating shapes as you can bend and manipulate them into pretty much anything.
A little glitter paint goes a long way, too, in ugly-fying your little sweaters.
Luckily, this is an ugly sweater garland, emphasis on ugly. So don’t fret over the details. The kookier and weirder, the better.
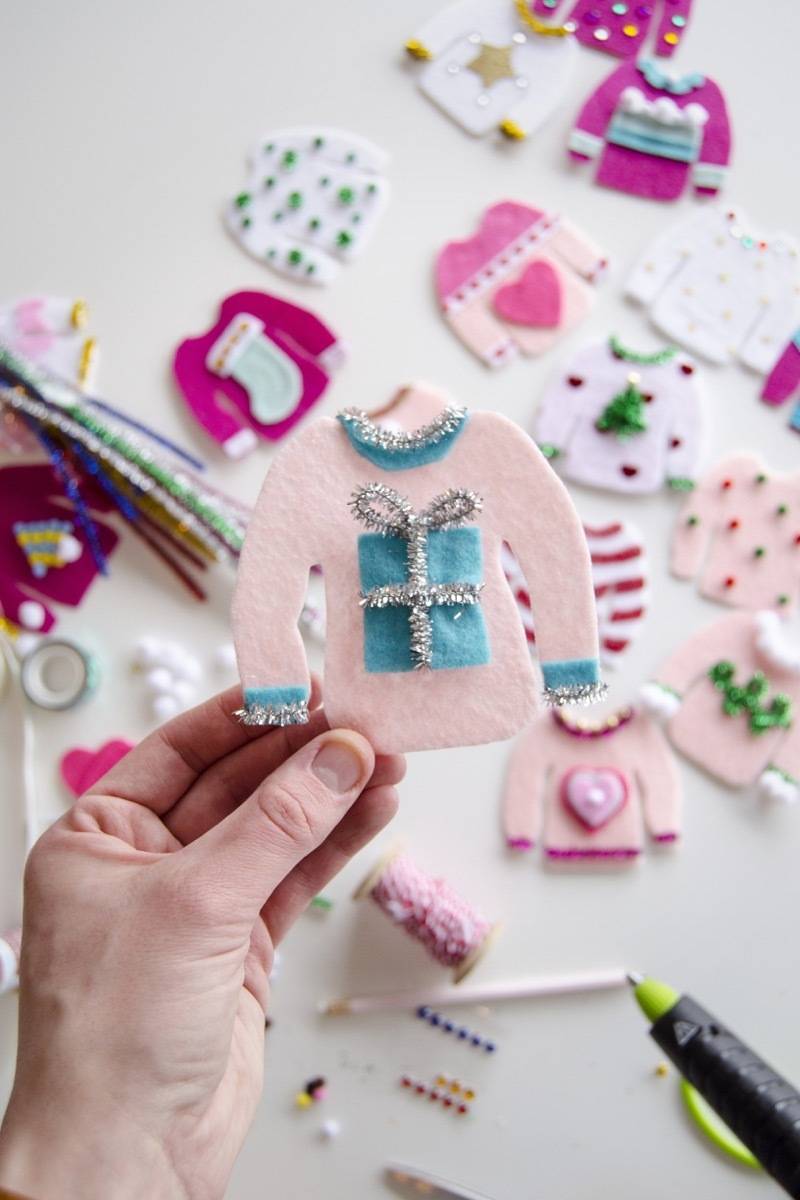
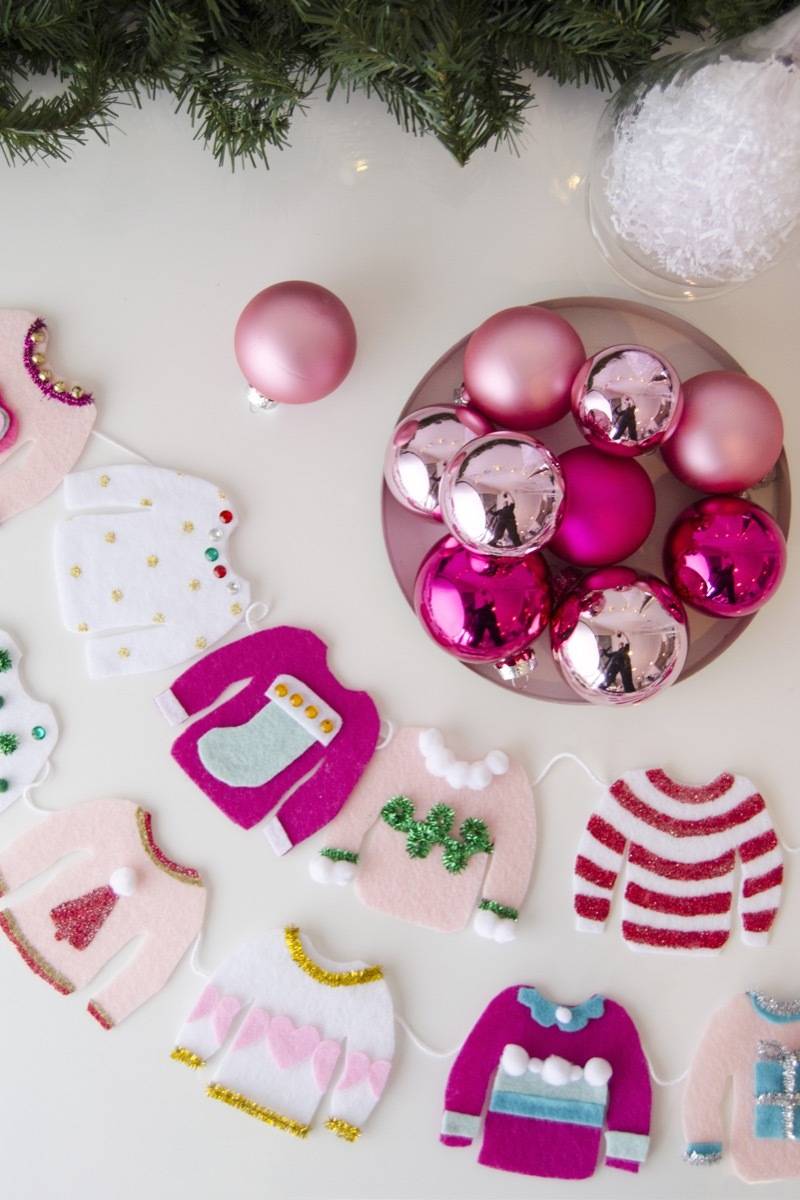
Once all your lovely little sweaters have dried completely, string them together with a big of twine and hot glue on the backs of each piece. Hang, and admire your craftiness.

Decorating Your Home with Your Unique Christmas Garland
Once you’ve crafted your beautifully unique DIY Christmas garland, it’s time to spread holiday cheer throughout your home and decorate with your creation. Your handmade garland will become the centerpiece of your holiday decor, adding a touch of magic and personalization to every room.
Start by finding the perfect spot to hang your garland. Whether it’s across a mantel, draped along a staircase, or hung on a wall, make sure it’s visible and can be appreciated by all. You can even get creative and drape it over a mirror or weave it through your Christmas tree for an extra festive touch.
Consider pairing your garland with other decorations to create a cohesive look. Hang stockings or ornaments that match the colors and style of your garland. Add twinkling fairy lights or candles to create a warm and cozy ambiance.
Don’t be afraid to think outside the box and get creative with your placement. Wrap your garland around banisters, frame doorways, or even hang it in unexpected places like on a bookshelf or above a doorway.
Lastly, let your garland inspire the rest of your holiday decor. Coordinate your table settings, wreaths, and other decorations to complement the colors and themes of your garland. By incorporating your DIY creation into your overall holiday design, you’ll create a cohesive and visually stunning space that reflects your unique style.
With your beautifully unique DIY Christmas garland on display, your home will radiate joy and holiday spirit. Enjoy the fruits of your creativity and let your handmade masterpiece shine throughout the festive season. Happy decorating!

I just love tiny things, and had so much fun making this tacky Christmas sweater garland while I listened to holiday music. Sometimes you just have to whip out that hot glue gun and a bag of rhinestones and get to crafting to make it really feel like Christmas.
How To Make DIY Ugly Sweater Christmas Garland

Making a garland of shrunken ugly sweaters because they're actually cuter that way!
Materials
- Felt in a variety of colors
- Scissors
- Hot glue (or white glue if making this project with kids)
- Twine, string, or ribbon to form garland
- Decorations such as paint, pom-poms, sequins, rhinestones, glitter, and pipe cleaners
Instructions
Creating the stencil
- Trace a sweater shape on a piece of paper or card stock.
- Cut out the shape for it to be used as a stencil.
Creating the sweaters
- Trace the sweater shape onto the felt pieces using the stencil.
- Cut out sweater shapes using the scissors.
Decorate
- Cut pieces of felt and glue them to the sweaters - like a stocking, present, tree, or star shape.
- Glue pom-poms to collars and cuffs for extra fluff.
- Use pipe cleaners for creating shapes, as you can bend and manipulate them into pretty much anything.
- Glitter paint goes a long way, too, in ugly-fying your little sweaters.
Assemble
- Once all your little sweaters have dried completely, string them together with a bit of twine and hot glue on the backs of each sweater.
- Hang, and enjoy.
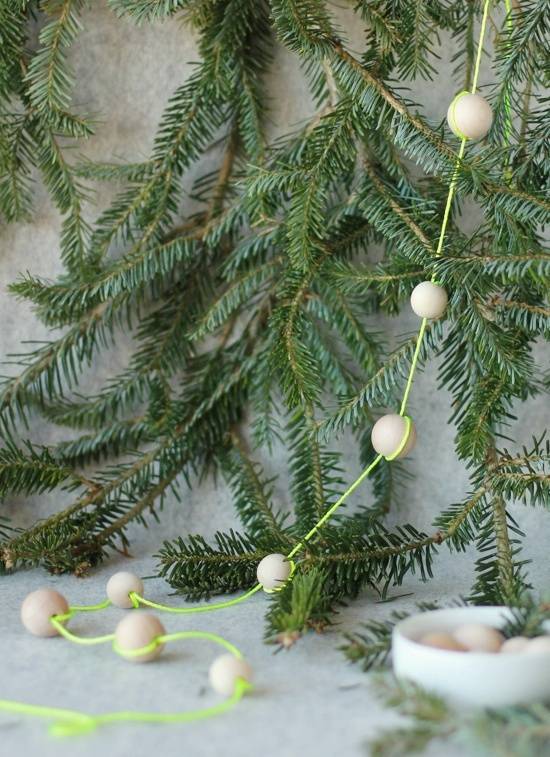
Need a cute garland to accompany your ugly sweater banner? Check out this stunning project you can complete in five minutes!


THANKS FOR SHARING THESE ideas. I WILL USE THIS WHEN I CELEBRATE MY XMAS WITH EUROPE TOUR OPERATORS.