Decorating for the holidays can be an exciting time, especially when it comes to adorning your home with a festive garland or two!
But choosing the wrong type of garland could be disastrous. Real garland is made from natural materials, such as pine needles, while fake garland is usually composed of synthetic materials.
Both types of garland have their advantages and disadvantages, and understanding the difference between the two is essential to making the best choice for your Christmas decorations.

In this blog post, we will look at the pros and cons of real and fake garland, and show how to make a fake garland look more expensive.

Table of contents
Do you love Christmas decor?
The Christmas tree, pine cones, ribbon, lights, and of course, the garland.
Garland is great to drape on doorways, the fireplace, and even the staircase banister.
If you have ever decided to buy all fresh evergreen lengths of Christmas garland and worked hard to drape them everywhere, following all the instructions to make sure they’d last. Only for two weeks later, the garlands are dead and done.
Then you understand why this project is a game changer.
The heater vents and the heat from fireplace fires will kill greenery dead. So the solution is to take an inexpensive garland and make it look full, expensive, and as real as fake could possibly look.
Let’s talk about real versus fake garland.
What are the Different Kinds of Garlands?
Garland is a decorative item used to enhance the festive ambiance of the holiday season. It is typically made by intertwining various materials, such as evergreen branches, berries, flowers, or ornaments.
Garland can be draped along banisters, hung on mantels, or wrapped around staircases to create a vibrant and welcoming atmosphere in your home.
The purpose of garland is to bring nature’s beauty indoors and evoke a sense of warmth and tradition. It is often associated with Christmas, as the evergreen branches symbolize eternal life and the hope of a new beginning.
Garland is a versatile decoration that can be customized to fit any theme or style, whether you prefer a rustic and natural look or a glamorous and sparkling aesthetic.
Real Garland
Real garland is a timeless and classic choice for holiday decorations. Made from natural materials like pine needles, real garland adds an authentic touch to your home.
One of the biggest advantages of real garland is its fresh and aromatic scent that fills the air with the essence of the season. It also has a more rustic and organic appearance compared to its fake counterparts.
Real garland can be easily shaped and draped around banisters, mantels, and staircases, allowing for endless creative possibilities. However, it’s important to note that real garland requires more maintenance and care.
It tends to dry out over time and may shed needles, so regular misting and watering can help prolong its lifespan. Despite these considerations, the charm and natural beauty of real garland make it a popular choice for those seeking a traditional and authentic Christmas ambiance in their homes.
Fake Garland
If you’re looking for an alternative to real garland, fake garland, or faux garland, may be the way to go.
Fake garland is typically made from synthetic materials like plastic or PVC. One of the main advantages of fake garland is its durability.
Unlike real garland, which tends to dry out and shed needles over time, fake garland stays fresh and vibrant throughout the entire holiday season. Another benefit of fake garland is that it requires very little maintenance.
You don’t need to water or mist it, and it won’t leave a mess of fallen needles on your floor. Fake garland also comes in a variety of styles and colors, allowing you to find the perfect match for your Christmas decor.
While it may not have the same natural scent and rustic appearance as real garland, fake garland offers a convenient and long-lasting option for those who prefer low-maintenance decorations.
The Pros and Cons of Real and Fake Garland
When it comes to choosing between real and fake garland for your Christmas decorations, there are definitely pros and cons to consider.
Real garland has a charming and natural beauty with its fresh scent and rustic appearance. It can add an authentic touch to your home and create a traditional Christmas ambiance.
However, real garland requires more maintenance and may shed needles over time. On the other hand, fake garland offers convenience and durability. It stays fresh and vibrant throughout the entire holiday season and requires minimal maintenance.
While it may not have the same natural scent or organic look as real garland, fake garland offers a long-lasting and low-maintenance option. Ultimately, the choice between real and fake garland comes down to personal preference and the desired look and feel for your holiday decor.
How to Choose the Right Garland for You
When it comes to choosing the right garland for your Christmas decorations, there are a few factors to consider.
First, think about the overall style and theme you want to achieve. If you’re going for a traditional and authentic look, real garland may be the best choice. Its natural beauty and fresh scent can create a cozy and festive atmosphere.
On the other hand, if you prefer a low-maintenance option that will last throughout the entire holiday season, fake garland might be more suitable.
Consider the level of maintenance you’re willing to undertake, as real garland requires misting and watering to stay fresh. Ultimately, the decision comes down to your personal preferences and the desired look and feel for your holiday decor.
How Long Does Real Garland Last?
Real garland is a beautiful and festive addition to your holiday decor, but how long does it actually last? Well, the lifespan of a real garland depends on a few factors.
Generally, real garland can last anywhere from a couple of weeks to a month if properly cared for.
Regular misting and watering can help keep the garland fresh and prevent it from drying out too quickly. However, it’s important to note that as the garland ages, it may start to dry out and shed needles.
So, while real garland adds a natural touch to your Christmas decorations, it does require a bit more maintenance to ensure it lasts throughout the holiday season.
With that said, let’s make this fake, cheap garland look expensive and more like a real garland.
How to Make a Fake Garland Look More Expensive
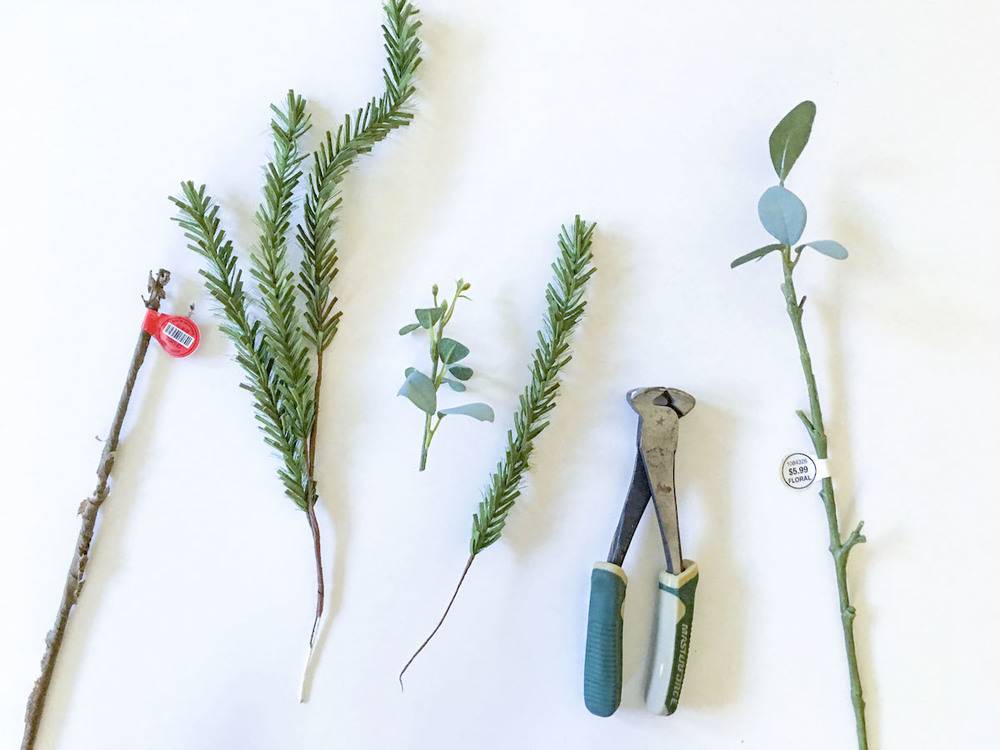
Materials Needed
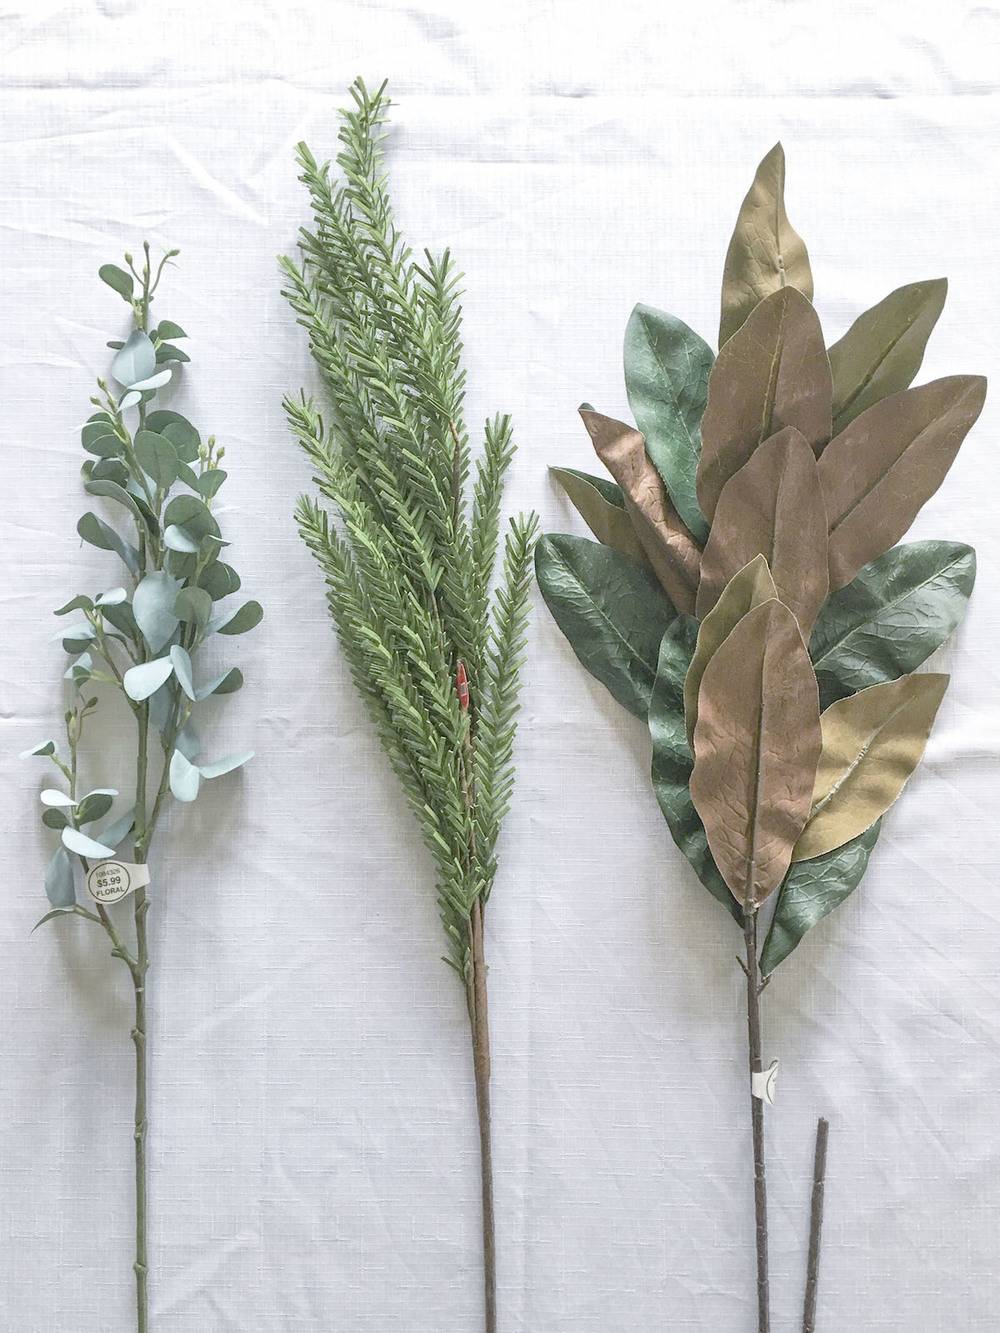
- 1-2 Magnolia leaf florals
- 1-2 Evergreen/ Pine Christmas floral
- 1-2 Eucalyptus leaf florals
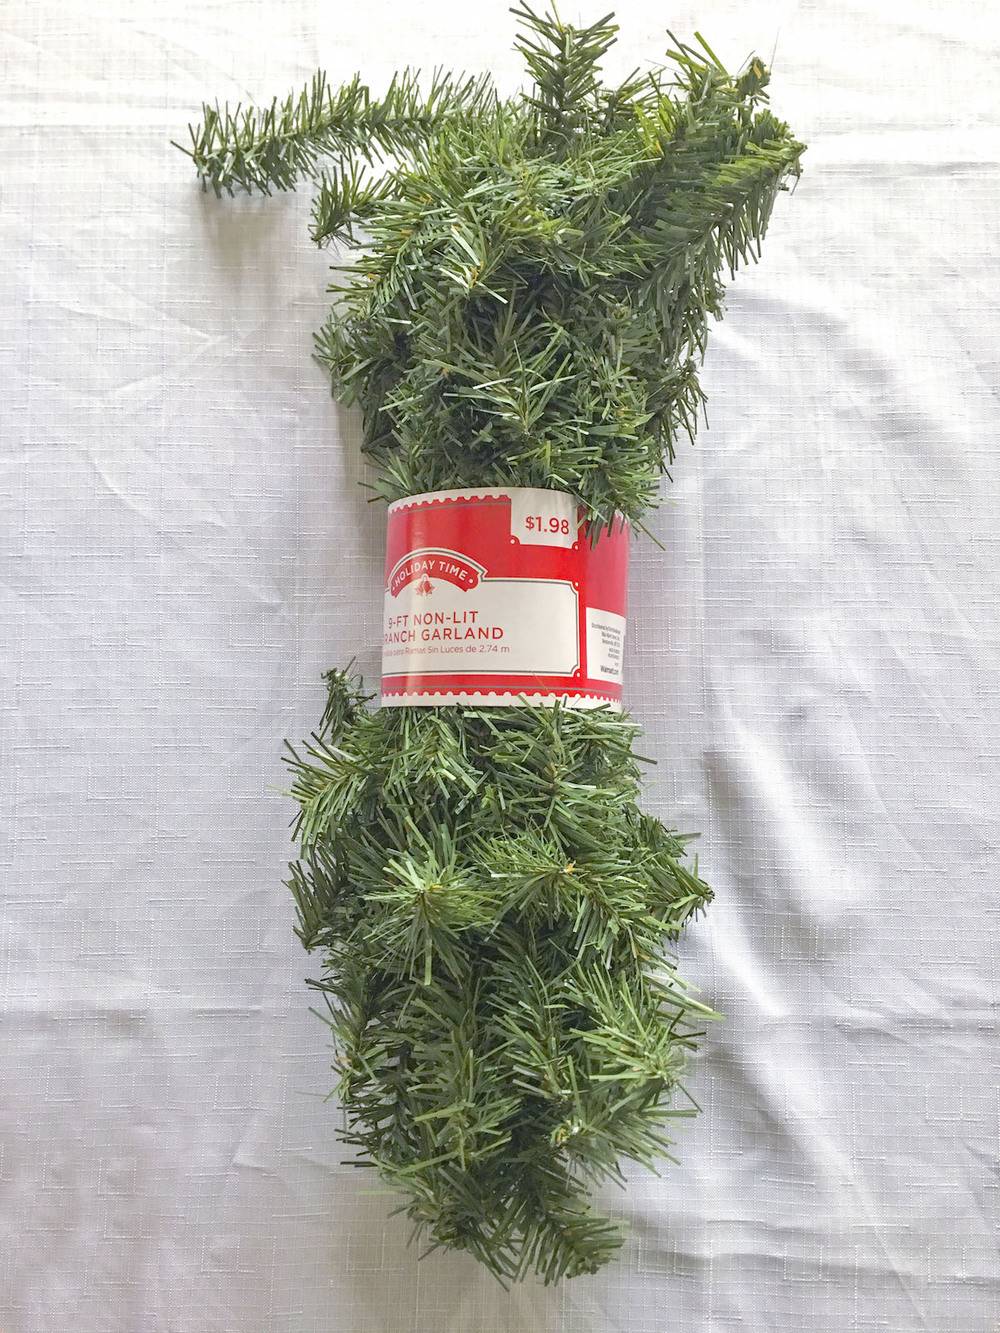
- Inexpensive Christmas garland (You can find it at Hobby Lobby, Michaels, Home Depot and maybe even the dollar store)
- Wire clippers
- Hot glue
- Glue gun
The inexpensive Christmas garland will be your base. You need at least two because really cheap garland is typically very skinny (you’ll be twisting them together). If you happen to have a huge fireplace mantel you could use as many as 4 garlands for your base, like we did

Create garland length
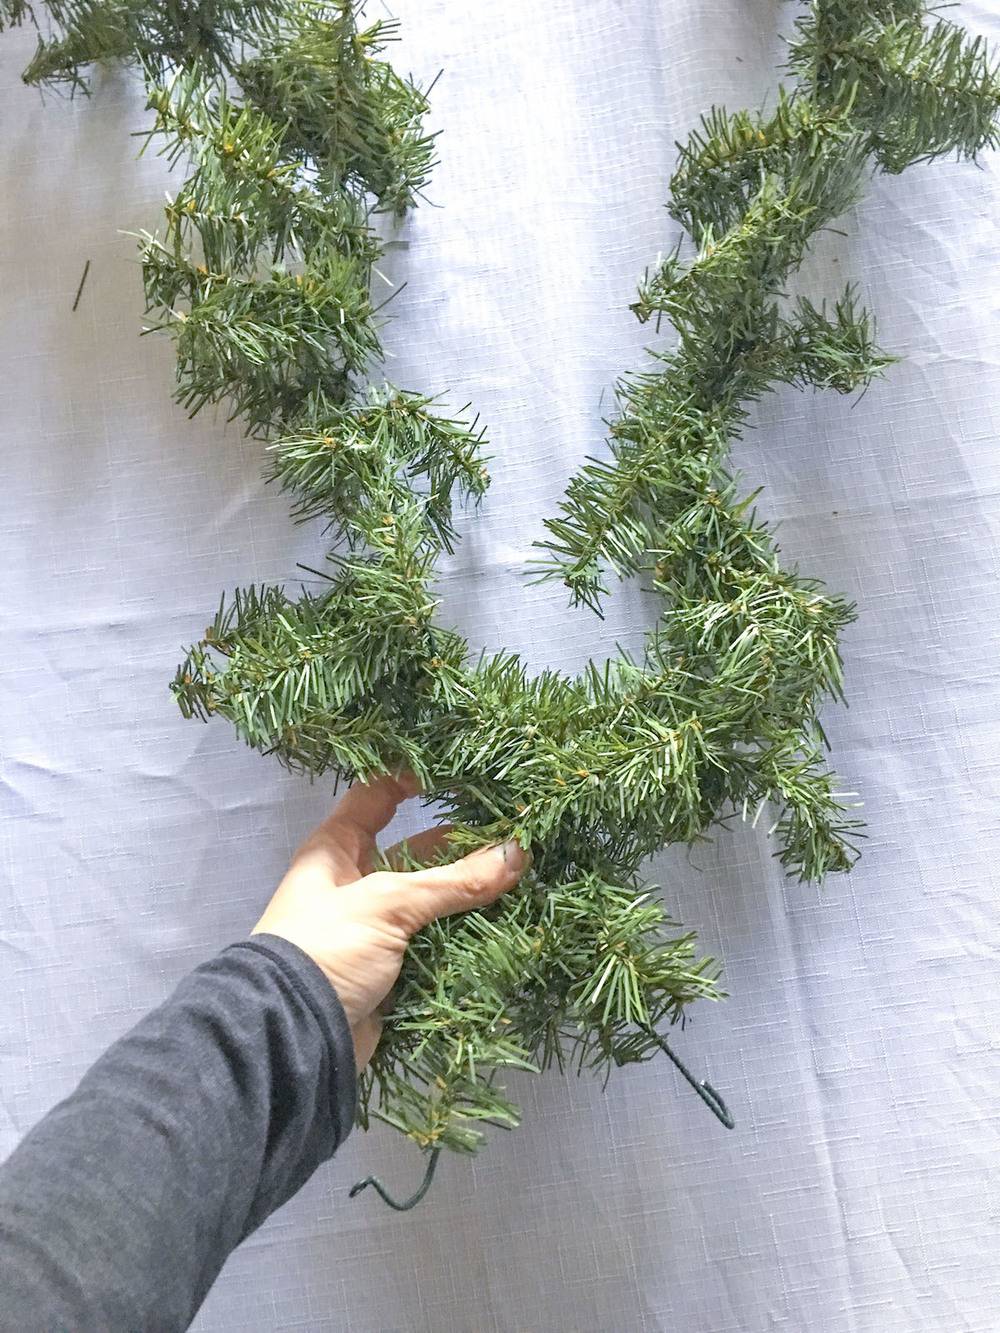
Unwrap your garlands and lay them side by side. Twist your garlands together. Begin and end your garland by twisting, but to keep the middle together, you can use green floral wire and wrap it around the base wire of the other garland. Once your two garlands become one, fluff the garland.
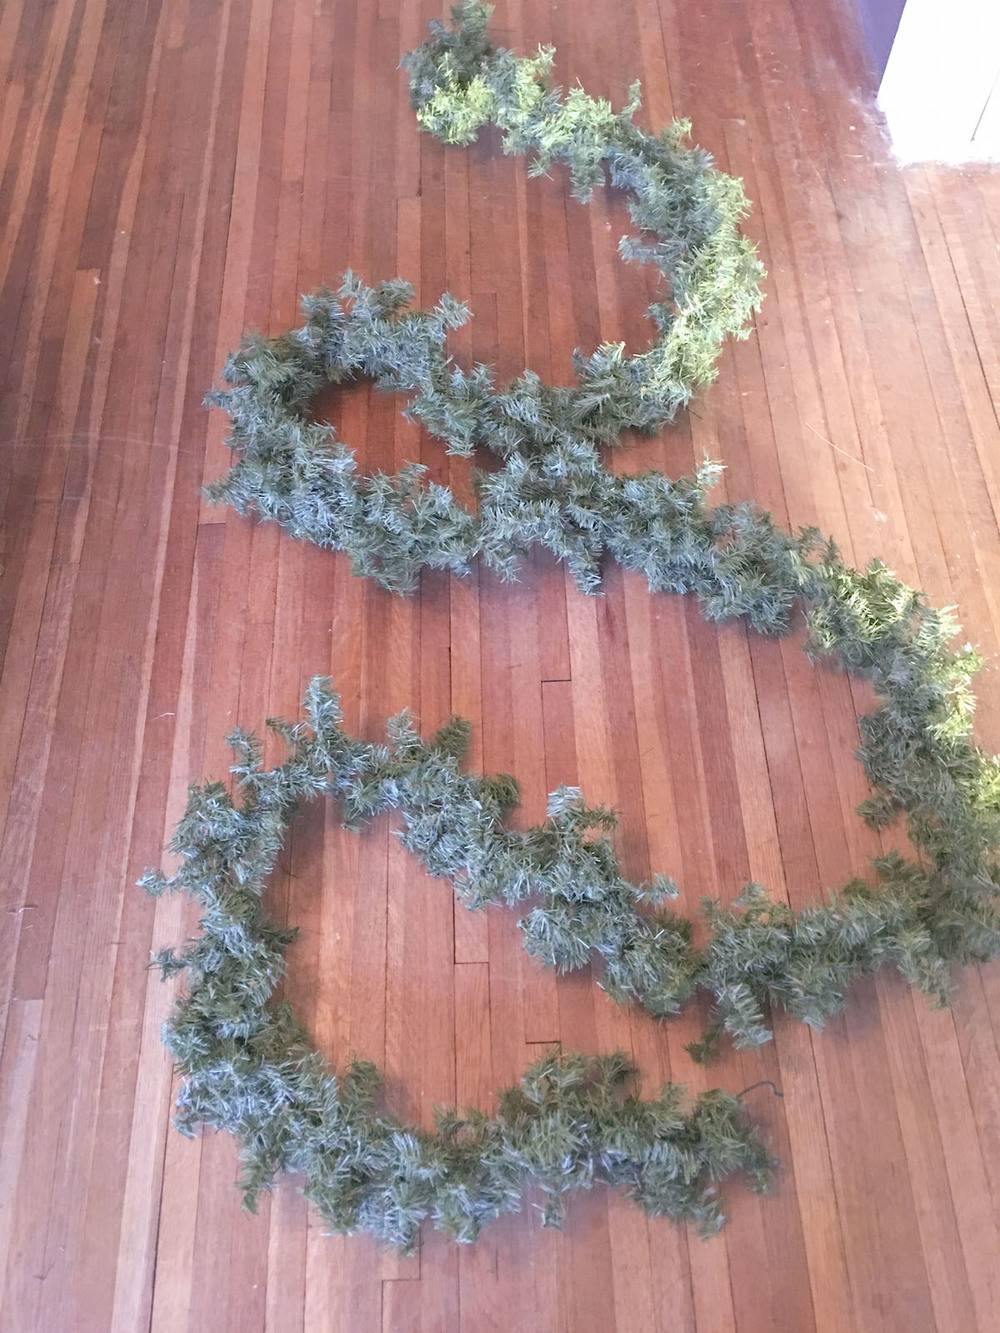
18-foot garland after the first step.
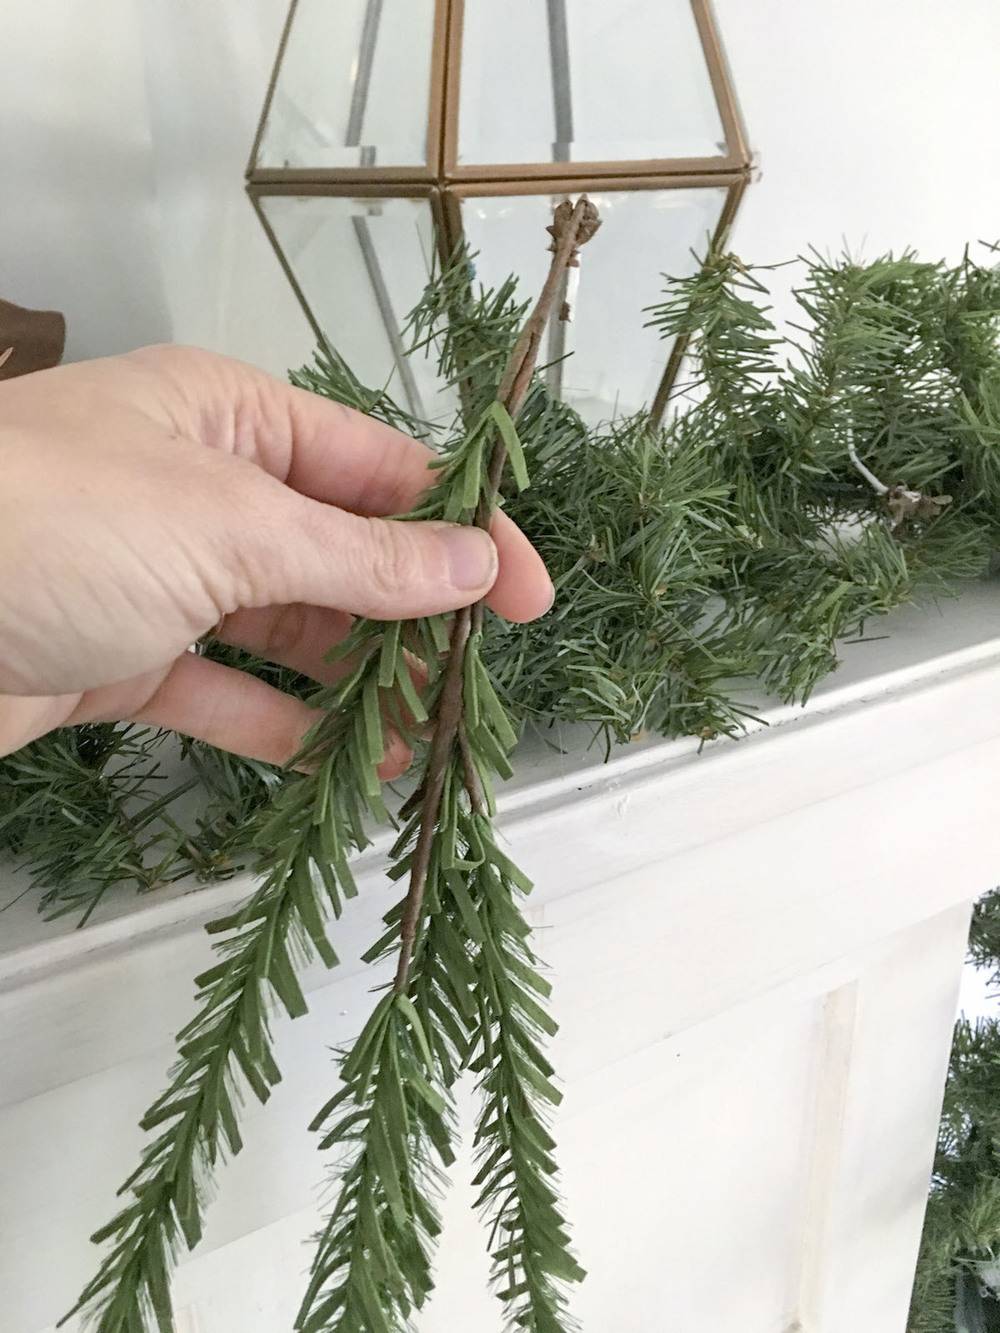
Prepare Stems
Clip apart your stems. Do this randomly, keeping some in a cluster and some as singles. But this all depends on how your garland rests; you’ll have to play with it a little to get it just right.
Tip: Hang your garland from the first step on your mantel and secure it into place first, then add the cut floral stems.
Add Evergreen
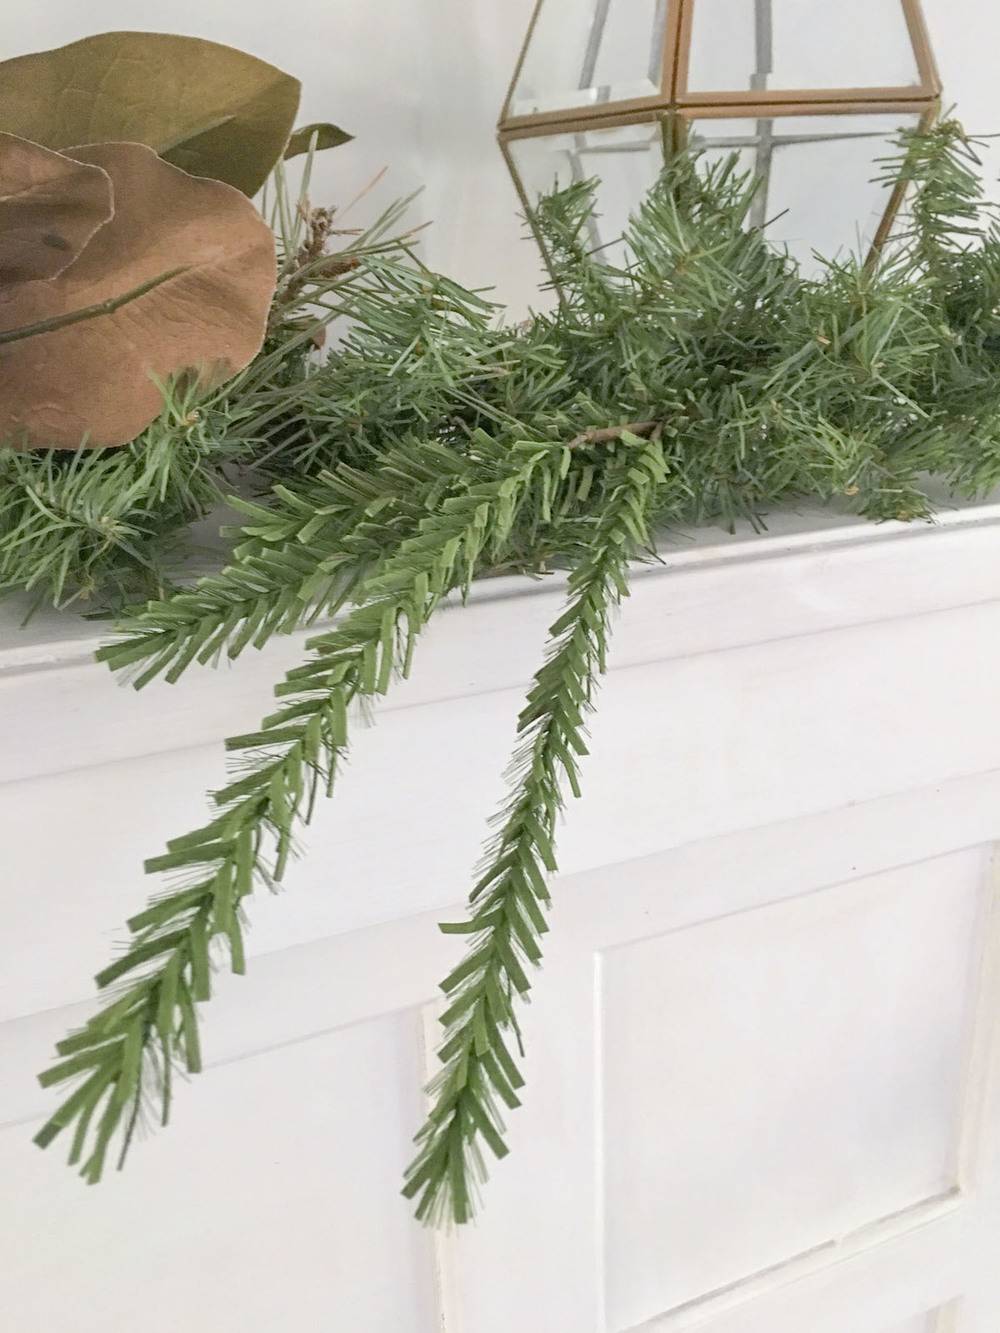
Add your draping evergreen. I added it in the places I wanted it to go along just the top of my mantel first. Save some for your sides.
Add Magnolia Leaves
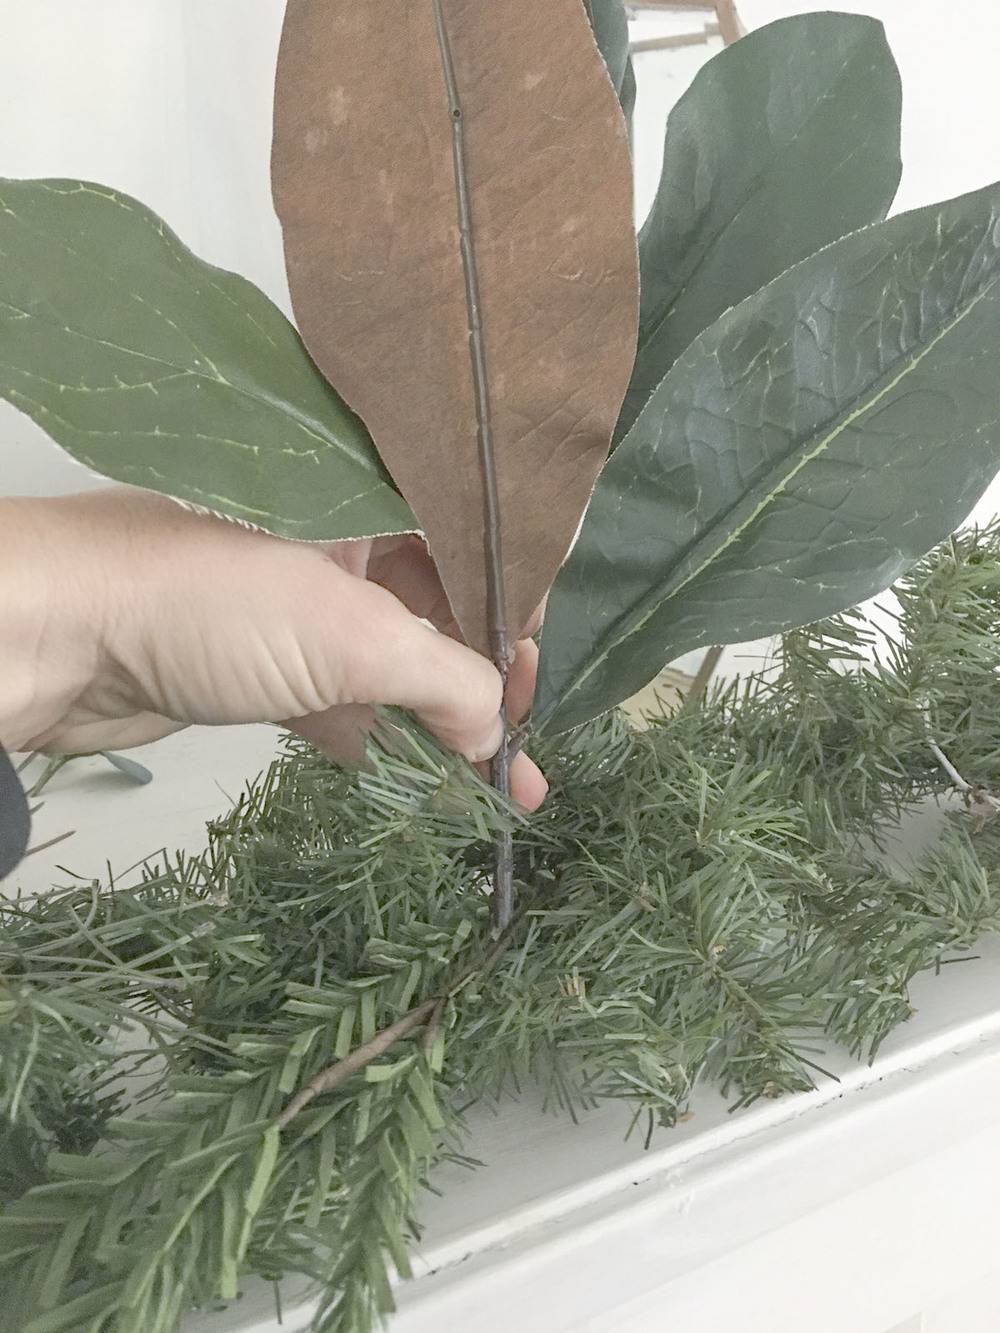
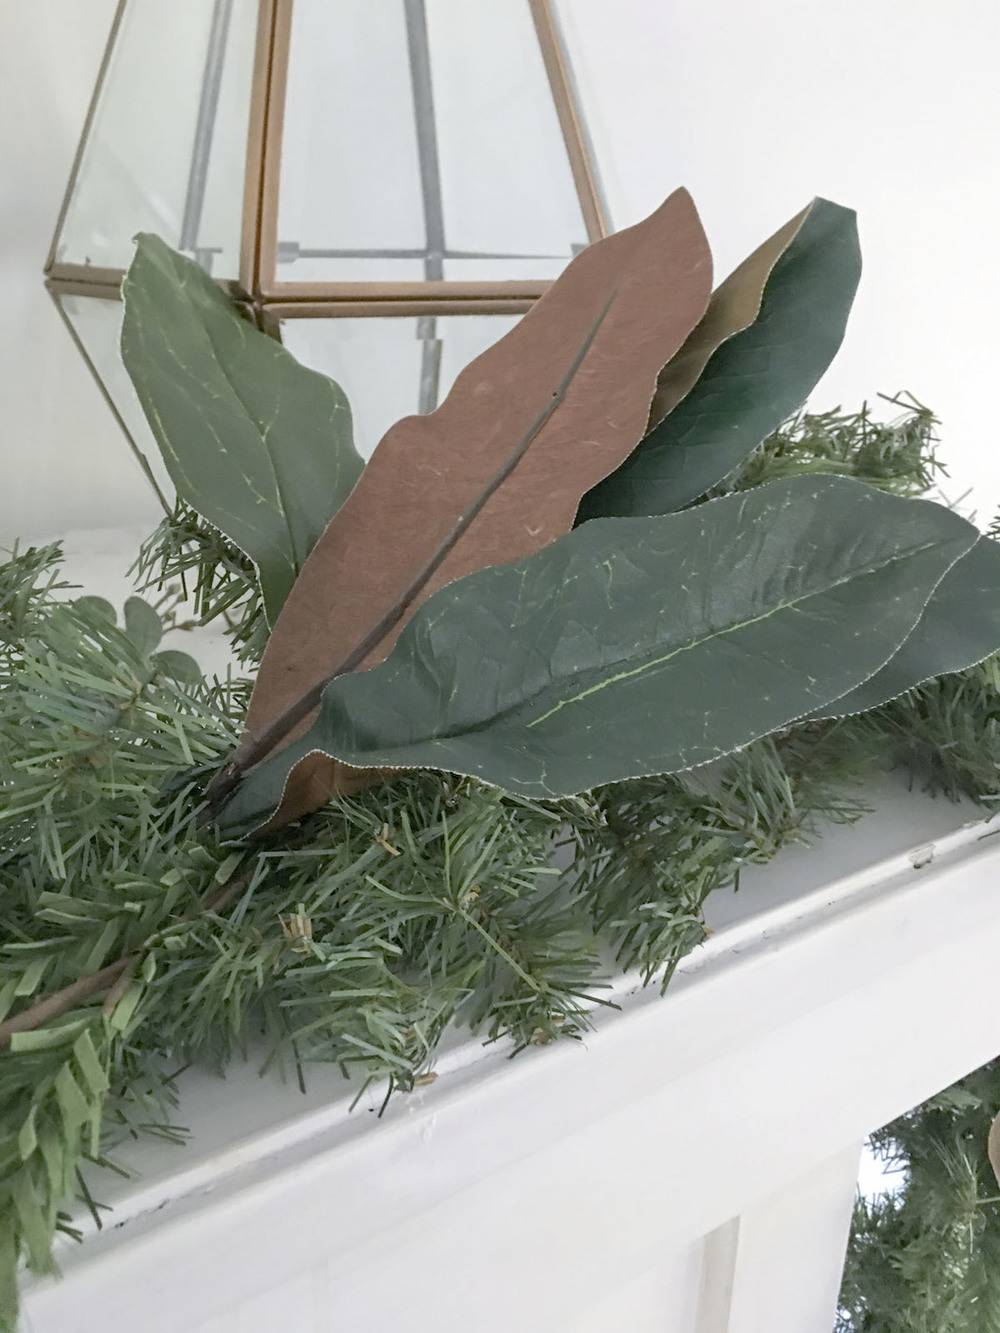
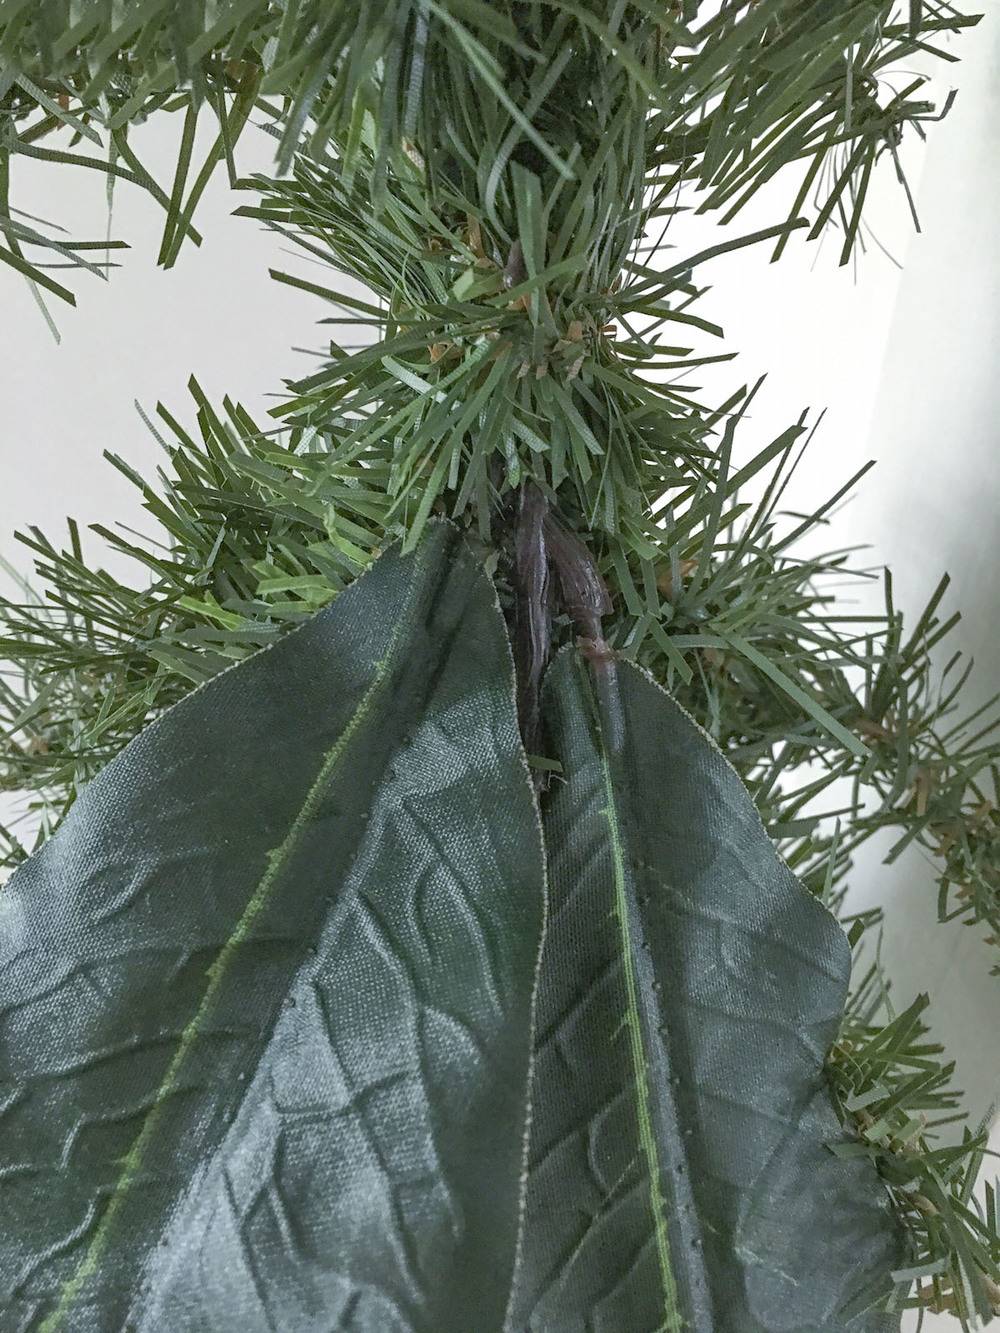
Next, cut bunches off your magnolia leaves from the stem and slip them into the greenery where you have placed your draping evergreen. You can secure them with hot glue. I just simply wrapped the excess stem of the magnolia bunch around the middle wire of the garland then fluffed the pine stems to hide it.
Do this for the entire garland.
Add Floral Stem
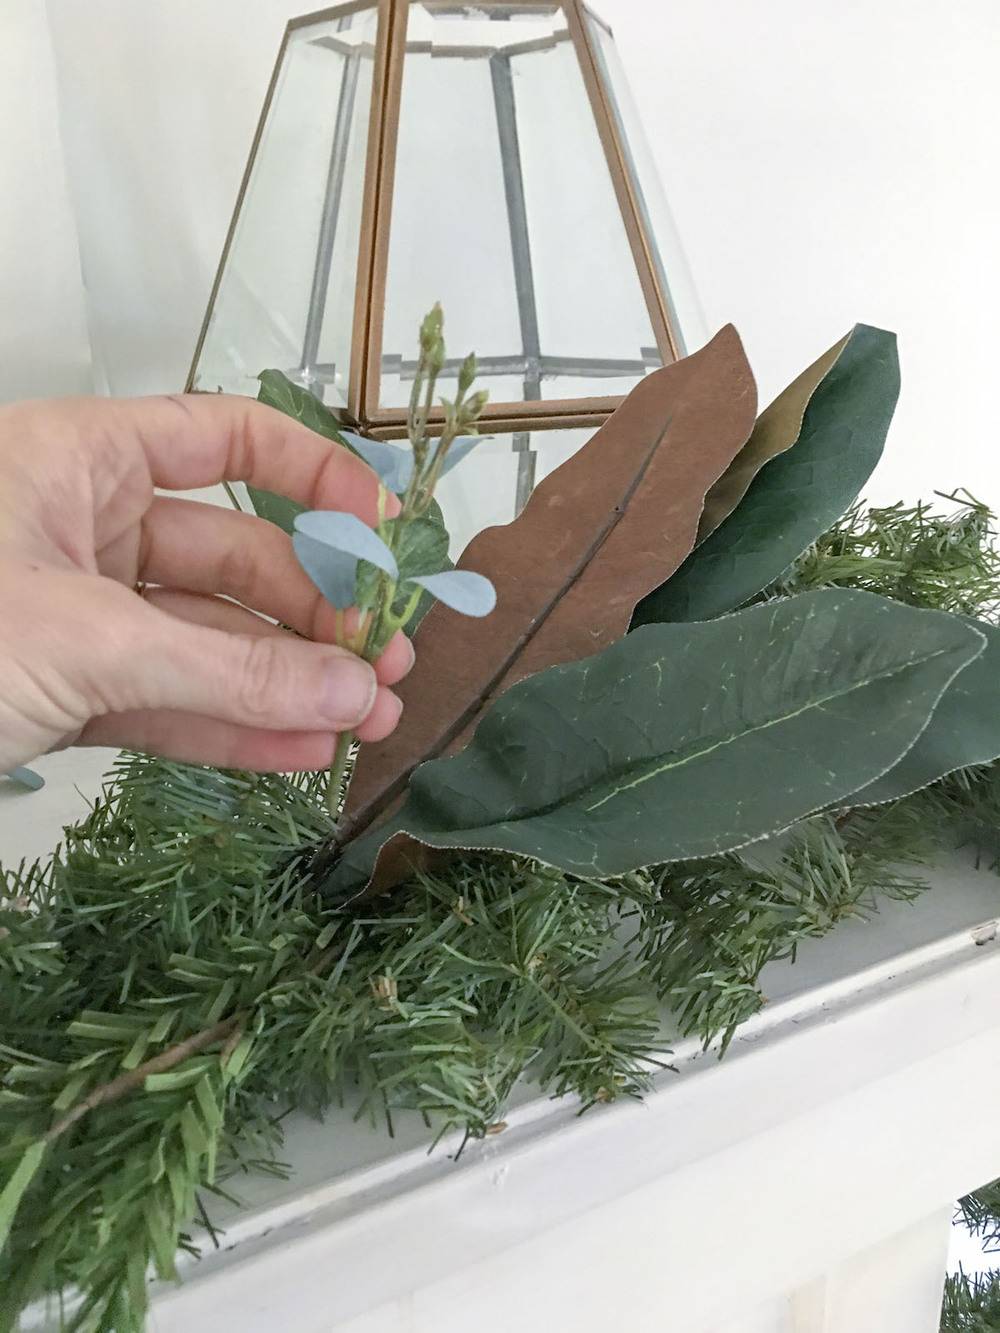
Add a little sprig of the Eucalyptus floral.

This was what each of the “bunches” looked like. Some were bigger and some were smaller.
Glue Single Leaves
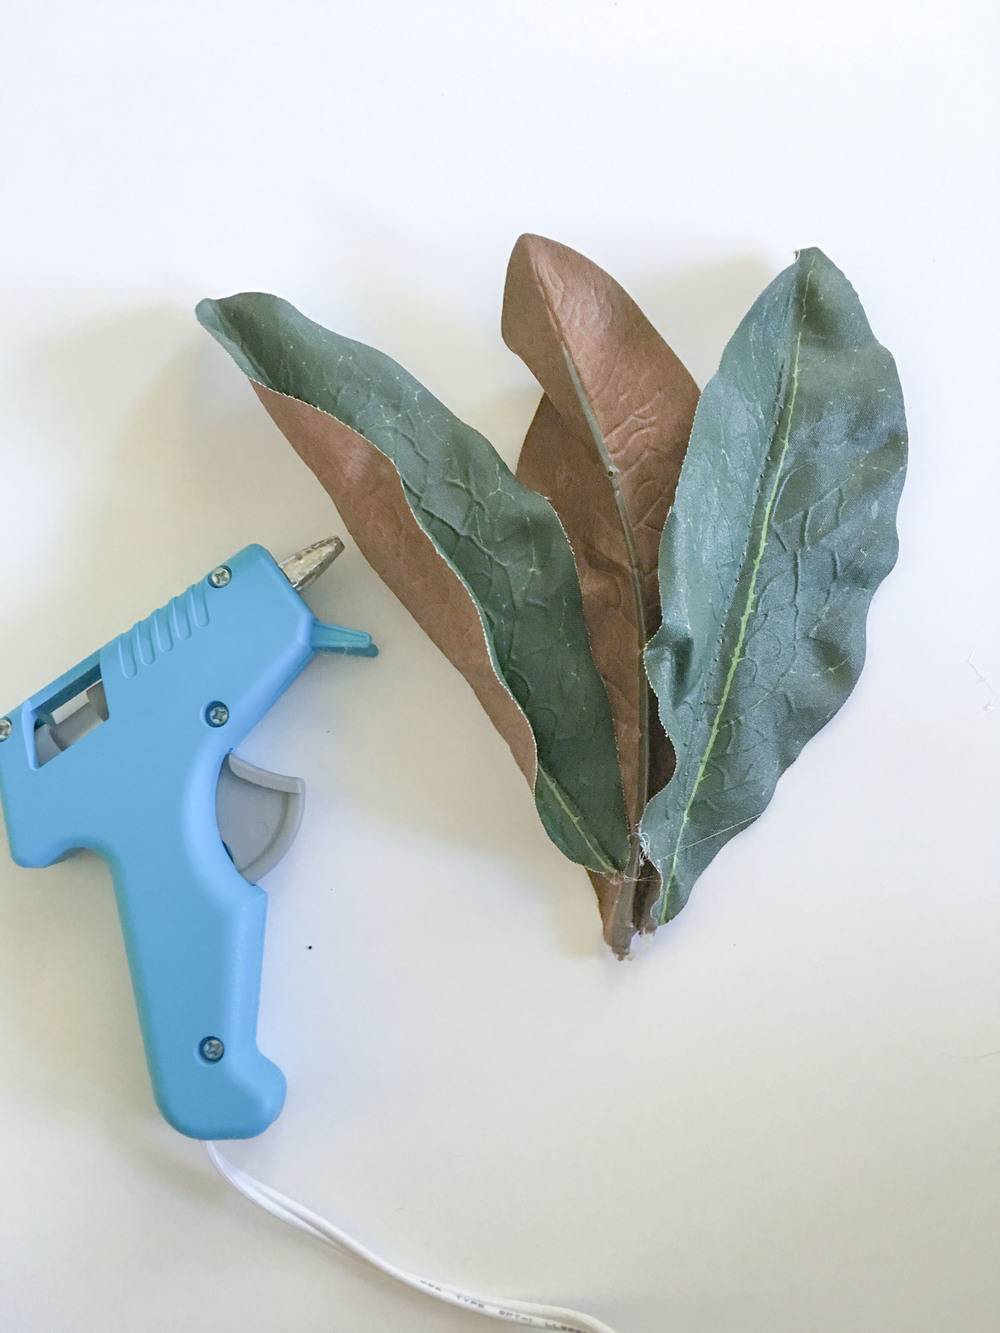
To make use of the single leaves we took off from a larger bunch, I glued them together in twos or threes.

After gluing, I would add them to the garland. If they are not staying in place, you could add a little dab of hot glue to your base garland.
Hanging The Garland
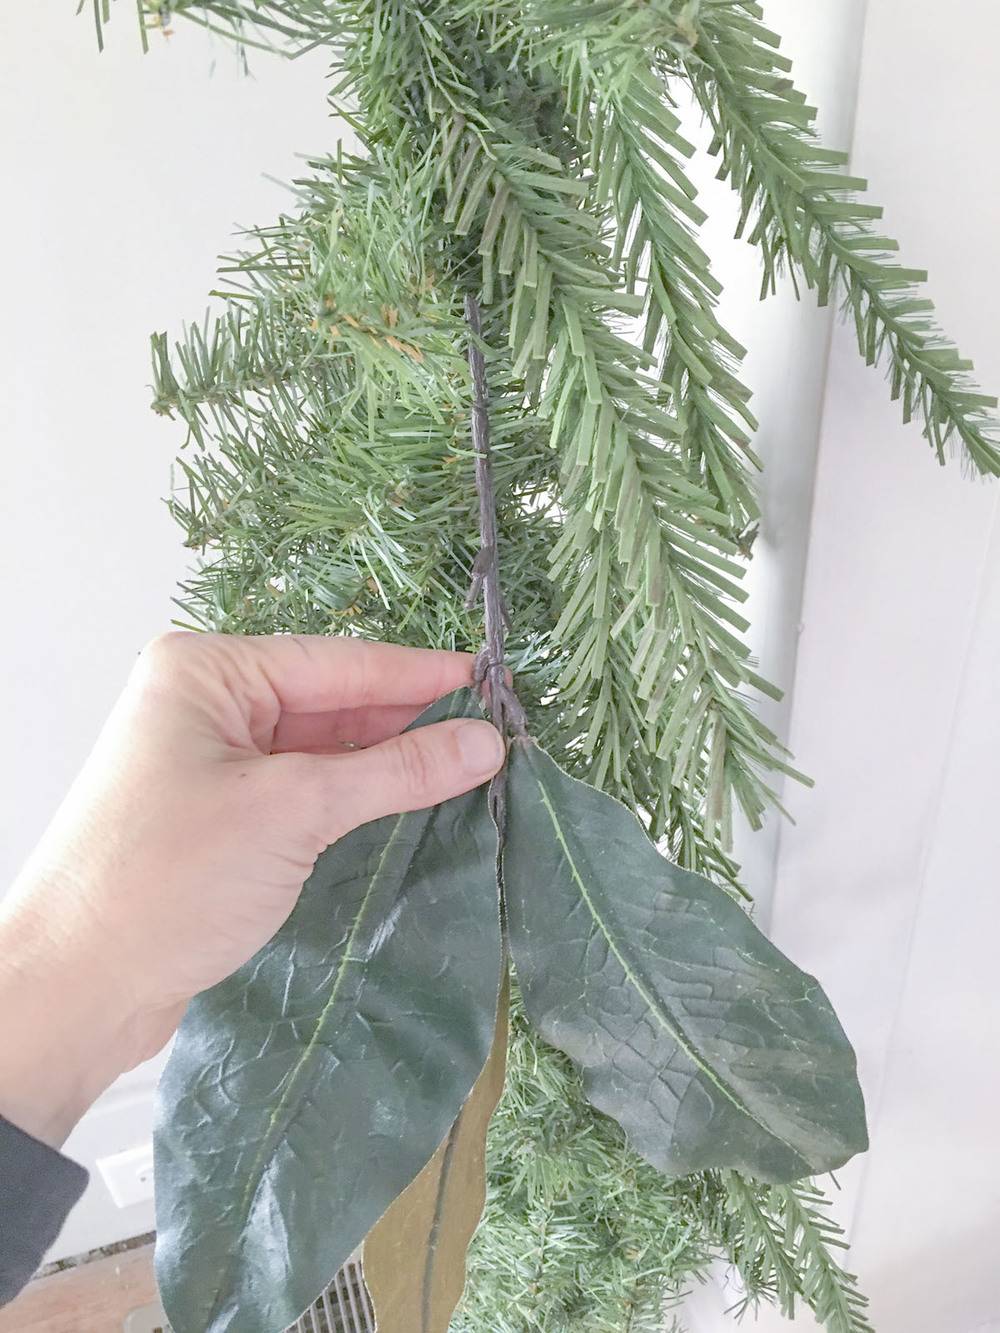
Now it’s time to add to the hanging part of the garland. For the draping evergreen and the Magnolia leaves, I simply wrapped a single pine stem around the cut stem of the floral. Fluff around the twisted stem to hide it. (Has anyone counted how many times I have used the word “fluff” in this post?)
Finishing Glue
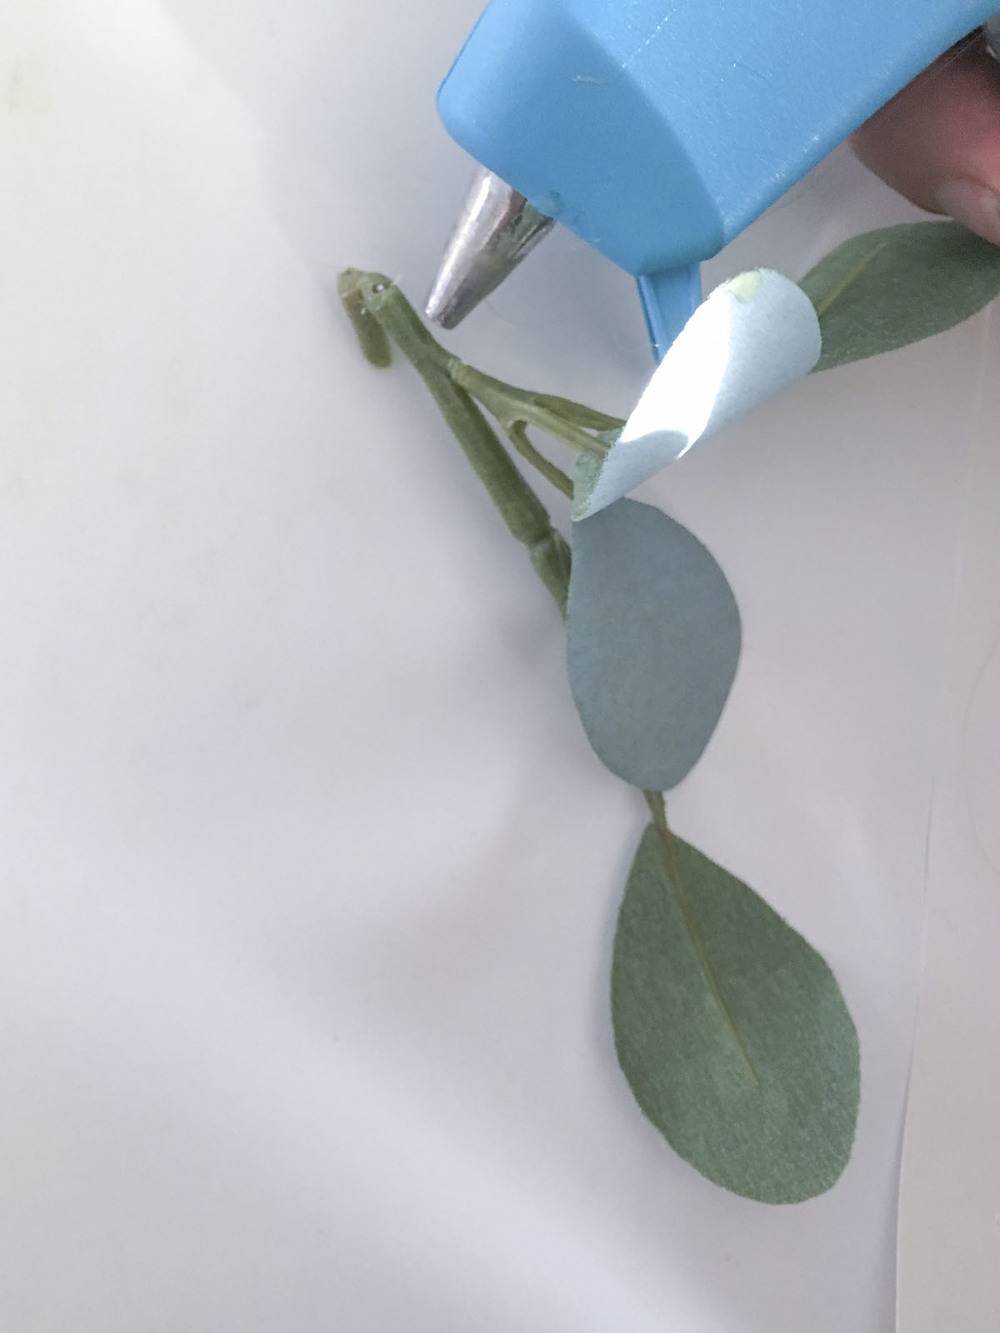

To keep the Eucalyptus stem in place you will have to add a little dab of hot glue.

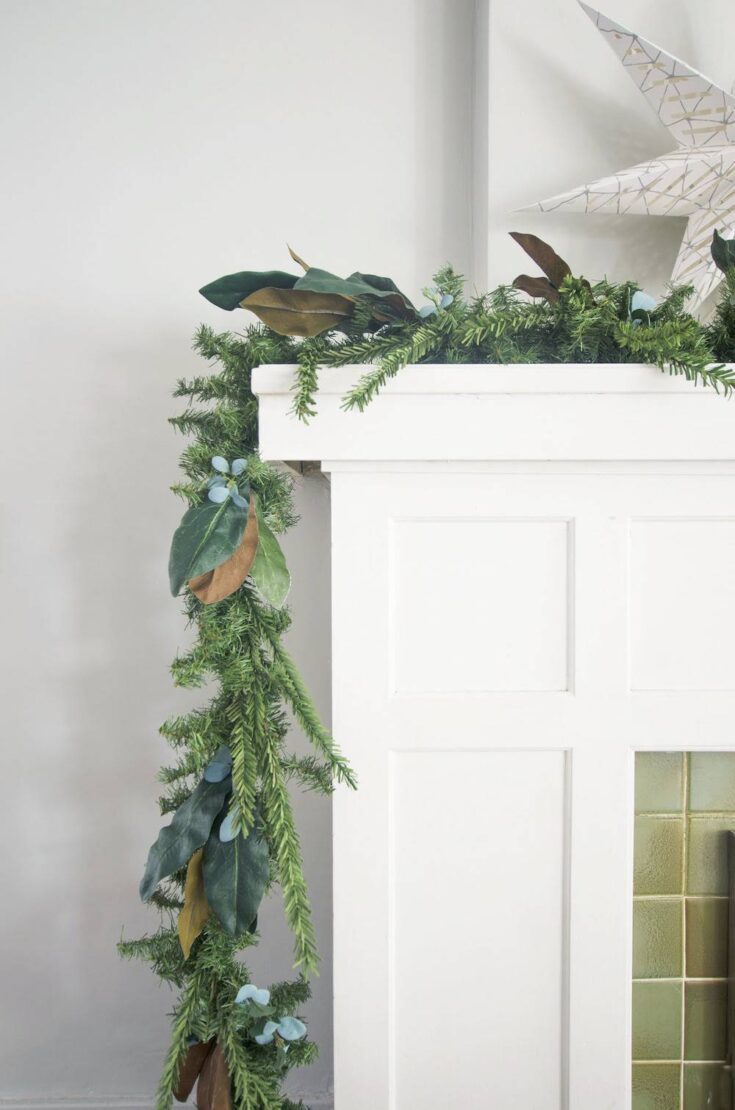
We love the way the garland turned out. It is unique and inexpensive.

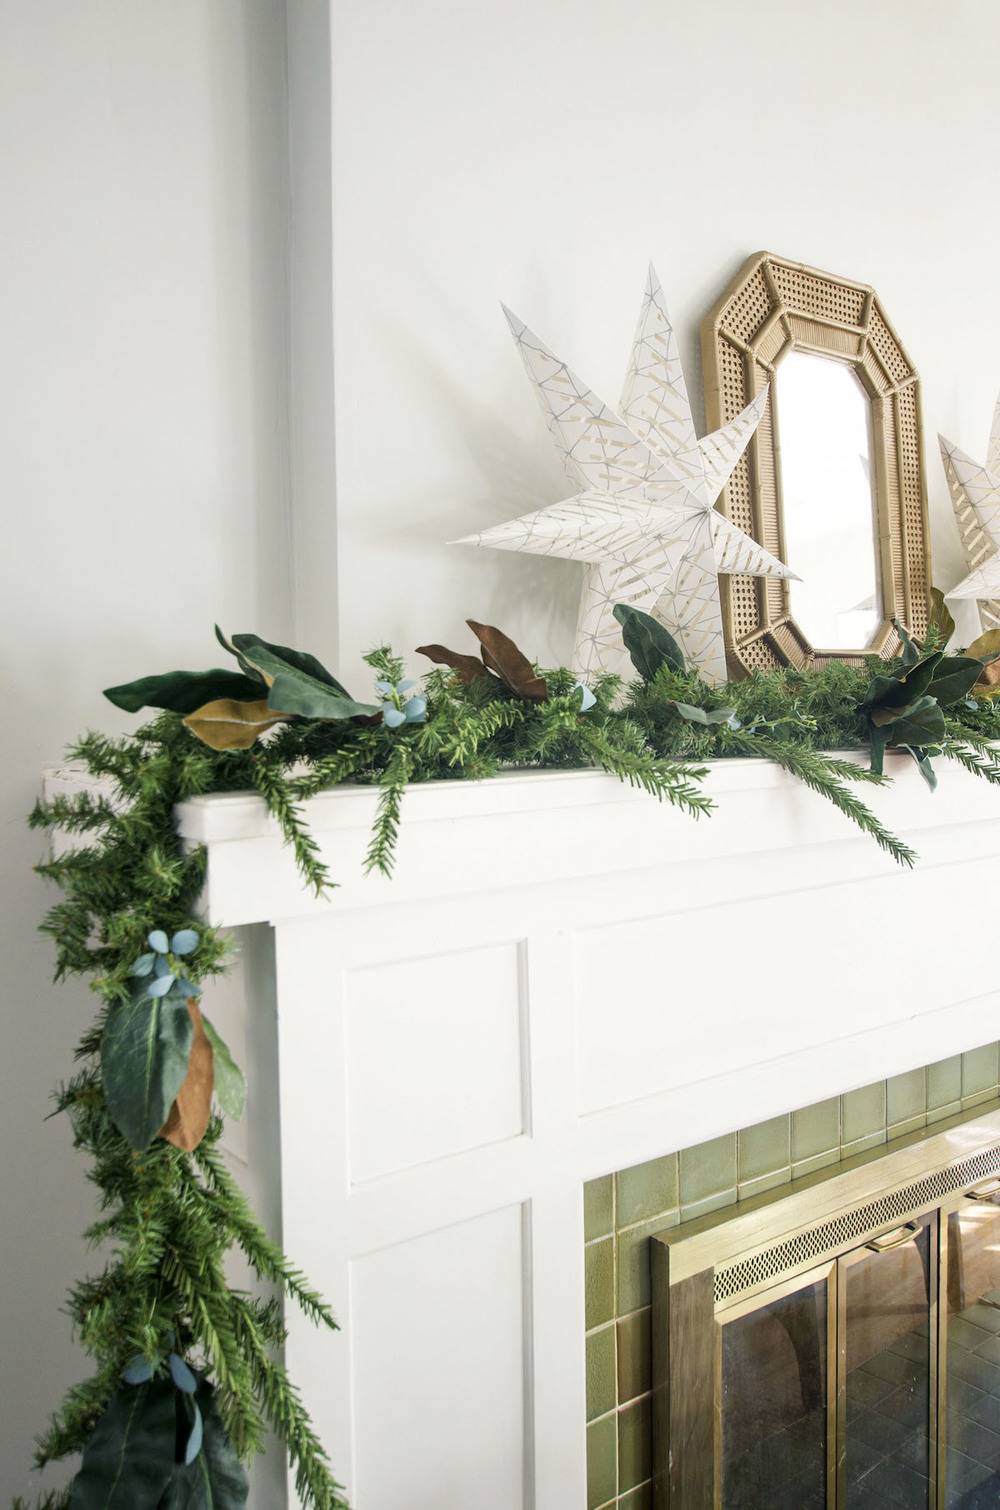
Yes, it is fake, but adding in the layered stems really helps to make it look real.

When Christmas is over, you can deconstruct it (what is not glued) and store it all together. And maybe even add to it next year. These paper magnolia flowers would be a pretty addition.

How To Make Artificial Garland Look Real
Materials
- 1-2 Magnolia leaf florals
- 1-2 Evergreen/ Pine Christmas floral
- 1-2 Eucalyptus leaf florals
- Inexpensive Christmas garland
- Wire clippers
- Hot glue and gun - You might not need this if your garland is only going to rest on top of your mantel and not on drape on the sides.
Instructions
- Find inspiration for how you would like your garland to look.
- Unwrap your garlands and lay them side by side. Twist your garlands together. Begin and end your garland by twisting, but to keep the middle together, you can switch to using a single wired pine stem from one garland and wrapping it around the base wire of the other garland. Once your two garlands become one, fluff the garland. *See notes
- Clip apart your stems. This will be done randomly, keeping some in a cluster and some as singles. But this all depends on how your garland rests; you’ll have to play with it a little to get it just right.
- Add your draping evergreen. I added it in the places I wanted it to go along, just the top of my mantel first. Save some for your sides.
- Next, cut bunches off your magnolia leaves from the stem and slip them into the greenery where you have placed your draping evergreen. You can secure them with hot glue. Wrap the excess stem of the magnolia bunch around the middle wire of the garland, then fluffed the pine stems to hide it. Do this for the entire garland.**
- Use the single leaves from a larger bunch, and glue them together in twos or threes. If they are not staying in place you could add a little dab of hot glue to your base garland.
- Wrap a single pine stem around the cut stem of the floral. Fluff It around the twisted stem to hide it.
Notes
*If you need to make the Christmas garland longer, before you twist, use the wire on the end to wrap around the connecting garland’s middle wire, then fluff your pine needles around it. After this, start twisting your two longer garlands together. Also, we didn’t want lights in our garland but if you do, at this point you want to add your lights.
**You can easily take off the leaves of the magnolia bunch. I thought more than 4-5 leaves in a bunch looked a little crowded so I just simply took a few off. I used those single leaves as well.
Have you had better experiences than I have with making real garland greenery last in a heated home? Please comment your tips below!
Very pretty. Now if I just had a mantle.
Great ideas!!
This is fabulous!! I have been looking for something like this and so excited to try!