Crafting your own DIY garden markers or plant markers offers a creative way to organize your garden or indoor plants. This tutorial will show you how to make your very own clay garden markers.

Gardening can be incredibly rewarding, yet keeping track of your garden plants or the flowers in your flower beds, often presents a challenge, particularly when cultivating various herbs, vegetables, and flowers.
This is where a plant marker becomes especially useful. They allow you to easily identify plants, especially new plants, while adding a personal touch to your garden space.
Whether you’re planning a veggie garden or an herb garden, these simple-to-make markers are ideal for indoor or outdoor use.
Table of contents
 Lexy Ward
Materials Needed for DIY Plant Markers
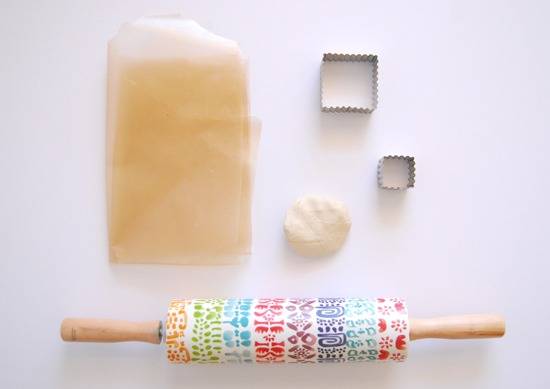
To make your own garden markers, you’ll need a few basic materials. If you don’t have any of the materials, they are all easily available for purchase.
Air dry clay is a fantastic choice and can be found at any craft store. You’ll also need a rolling pin to flatten the clay to your desired thickness. Using wax paper underneath the clay while rolling it out will make cleanup easier and prevent sticking.
For shaping your markers, assorted cookie cutters come in handy, allowing you to create various fun and unique shapes. Choose shapes that complement your garden’s style, whether it’s simple circles or more intricate designs.
These basic supplies will set you up for creating durable and attractive garden markers tailored to your specific plants and garden aesthetic.
Step-by-Step Guide to Making Garden Markers
 Lexy Ward
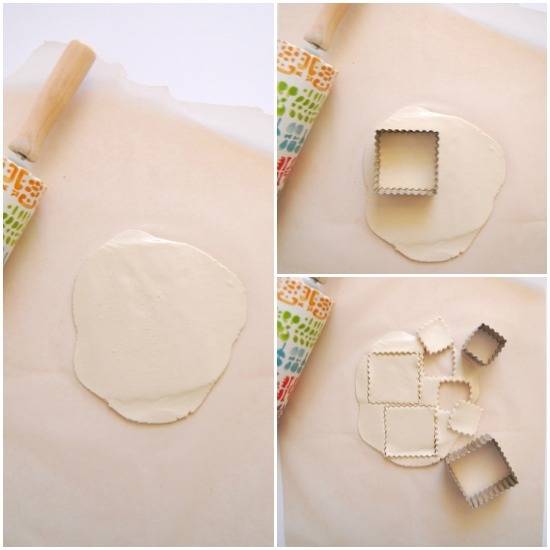
Start by rolling out a large slab of clay to a thickness of about 1/4 inch using a rolling pin. Make sure to lay down sheets of wax paper beneath the clay to prevent sticking and make cleanup easier.
 Lexy Ward
Once the clay is rolled out, use assorted cookie cutters to cut out various shapes and sizes for your garden markers. Lay the cut shapes flat on more wax paper.
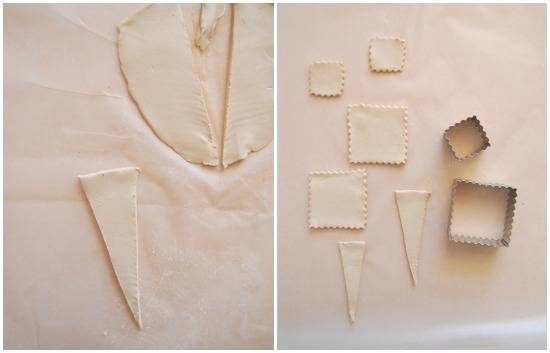
Next, use a sharp knife— a butter knife also works well, especially if doing this with kids— to cut out small triangles from the clay. You’ll need one triangle for each marker shape you’ve cut. These triangles will serve as stakes to secure the markers in the soil.
 Lexy Ward
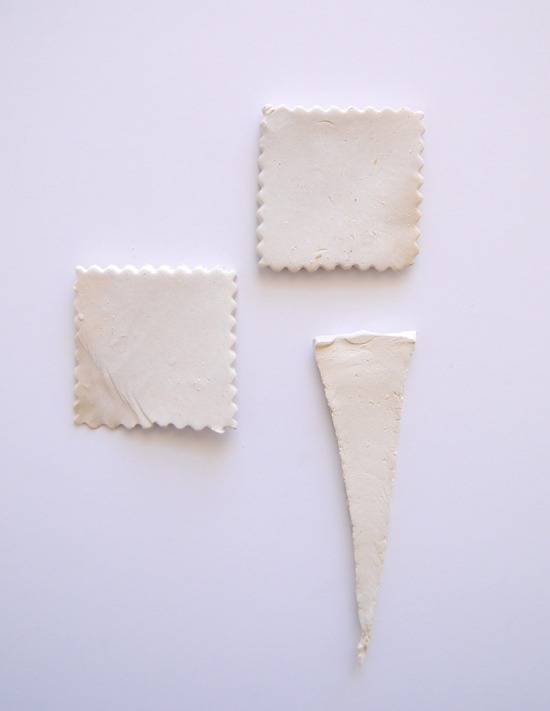
Allow the clay shapes and triangles to dry for about 48 hours. Place them in a sunny, dry location where they can sit safely and thoroughly.
 Lexy Ward
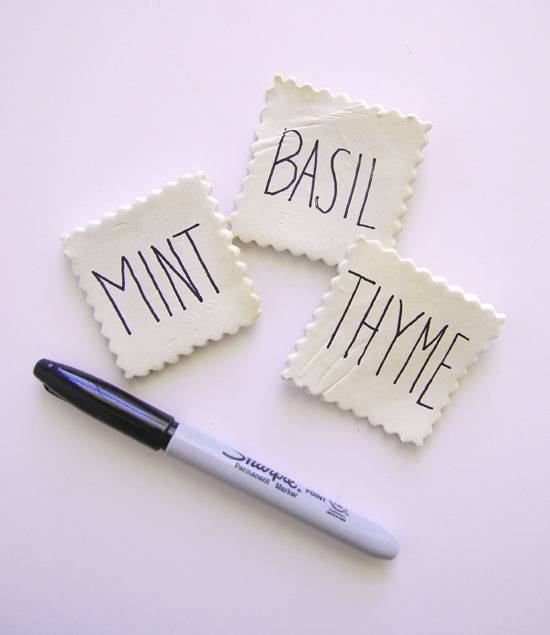
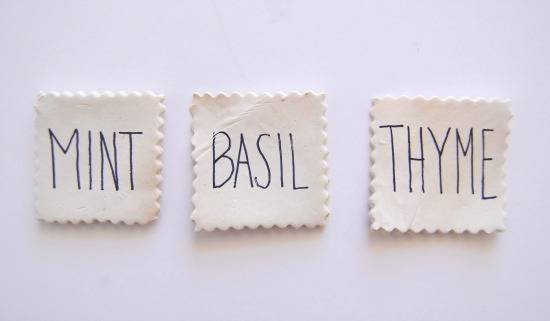
Once the clay is completely dry, use a permanent marker like a Sharpie to write the names of your herbs, vegetables, or other plants on the markers. Opt for tall, skinny letters to ensure the name of your plant is legible.
 Lexy Ward
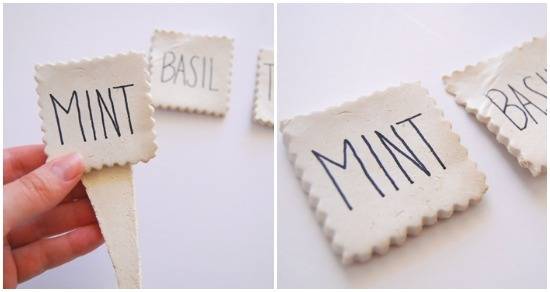
After labeling the markers, attach a triangle to the back of each one using a small dab of hot glue. The triangles will function as stakes, making it easy to place the markers into the soil.
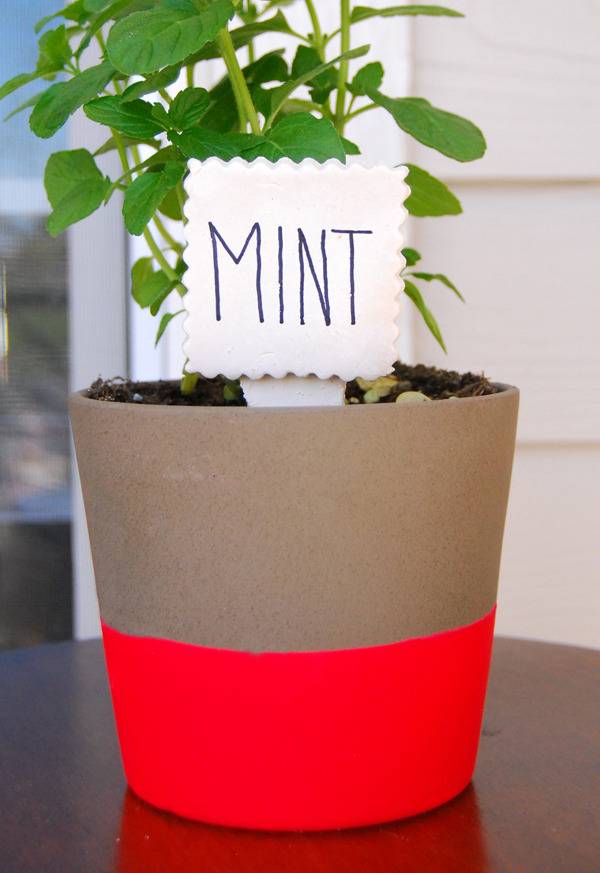
Finally, positioning your plant labels next to their corresponding plants is your last step. Adding both functionality and a personal touch to your garden.
Tips for Long-lasting Plant and Garden Markers
After taking the time to make these cute garden markers, you will definitely want them to last. These tips will help make sure they are around for years to come.
Consider the weather conditions of your area
To ensure your DIY plant markers last through various weather conditions, start by selecting sturdy materials.
Clay and stone are excellent options as they endure outdoor elements effectively.
If you opt for wooden markers, applying a clear sealant can significantly improve their resistance to moisture.
Labeling properly
When it comes to labeling, opt for fade-resistant inks or weatherproof paint pens to maintain readability over time.
If you’re using metal markers, make sure they are rust-resistant to avoid deterioration.
Adding protective coating
For added durability, consider double-coating your markers.
First, apply your base color or design, then add a clear protective layer. This extra step helps shield the markers from rain and sun exposure.
Placement is also crucial
Ensure your markers are securely placed in the soil to prevent them from being blown away by strong winds.
Consider anchoring them deeper into the ground or using small rocks to hold them in place.
Maintain markers when needed
It’s beneficial to check your markers for signs of wear periodically.
Reapply protective coatings or touch up paint as needed. Keeping some extra markers on hand can also be a good strategy, allowing for quick replacements if any become damaged.
For those in colder climates, consider bringing your markers indoors at the end of the season. Keeping them inside or covered during off-season periods can extend their lifespan. This simple action can prevent them from cracking or fading due to harsh winter conditions.
By taking these steps, your DIY garden markers will not only be functional but will also retain their aesthetic appeal throughout the growing season.
 Lexy Ward
Inspiration and Ideas for Creative Markers
Looking to add a personal touch to your garden markers? Here are some creative ways you can add some flare to your plant and garden markers.
Consider using bright acrylic paints to add color and flair.
You can paint fun patterns, like polka dots or stripes, to make each marker stand out.
Chalkboard paint
For your indoor plants, you could consider using chalkboard paint on the clay, which allows you to easily use and reuse them by changing the label using chalk.
Add whimsical flare
For a whimsical touch, consider adding small drawings or symbols next to the plant names, like a tiny tomato next to your plant marker for your tomatoes.
Stamps and stencils
You can also use stamps or stencils to achieve a more uniform look.
If you have kids, involving them in the decorating process can make it a fun family activity.
Whether you go for a modern, colorful approach or a more earthy, natural vibe, the possibilities for creative garden markers are endless.
How To Make DIY Garden Markers
Create simple and clean garden markers using a few simple items!
Materials
- air dry clay (found at any craft store)
- rolling pin
- wax paper
- assorted cookie cutters
Instructions
- Working with a large slab of clay, roll it out with the rolling pin. Roll clay to 1/4″ thick. Cut out different shapes and sizes and lay flat on sheets of wax paper.
- Cut out small triangles with a knife. A butter knife or plastic knife will work just fine. One triangle should be cut for each cookie shape.
- The clay needs about 48 hours to dry. Lay it flat in a sunny and dry place where it can set safely.
- Once the clay is dry, write the names of your herbs and other plants in tall skinny letters with a sharpie or other permanent marker.
- Attach the triangle to the back of each marker with a small dab of hot glue. The triangle will act as a stake,, allowing you to secure the marker in the soil around each plant.
- Place each marker next to their coordinating plant and admire your beautiful and easy to navigate garden!