Brittni Mehlhoff

When you’re renting, wall art can be a sensitive subject. Usually, it involves a whole lot of holes in the wall or a whole lot of painting, only to have to spackle and paint the walls again when you move out. Luckily, I have a solution that won’t harm your walls and definitely makes a big impact, without a single hole or drop of paint.
 Brittni Mehlhoff
This project will take the better part of an afternoon to complete, but if you have help the whole process will go by much faster.
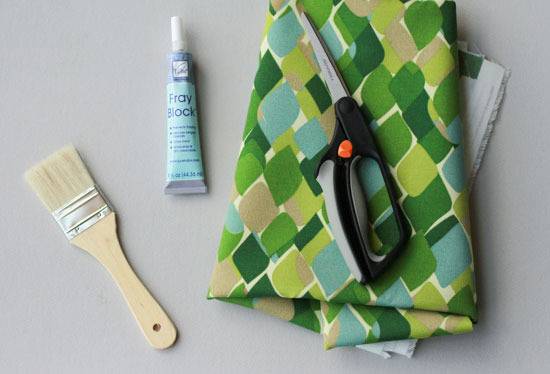
Supplies
- one to two yards of fabric (depending on the size of your letters)
- fabric scissors
- fabric fray block
- paint brush
- a pencil for tracing
- 1/4 cup of corn starch
- 4 1/2 cups of water
- one medium-sized pot for boiling the water
- a level and painter’s tape
 Brittni Mehlhoff
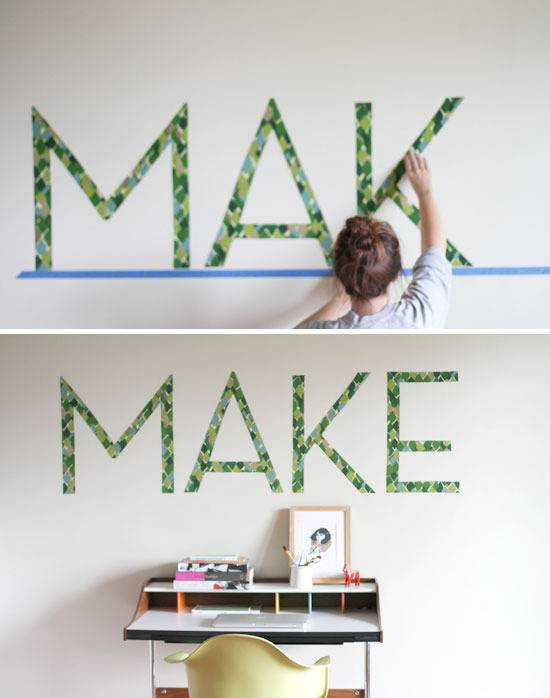
How-To
Step
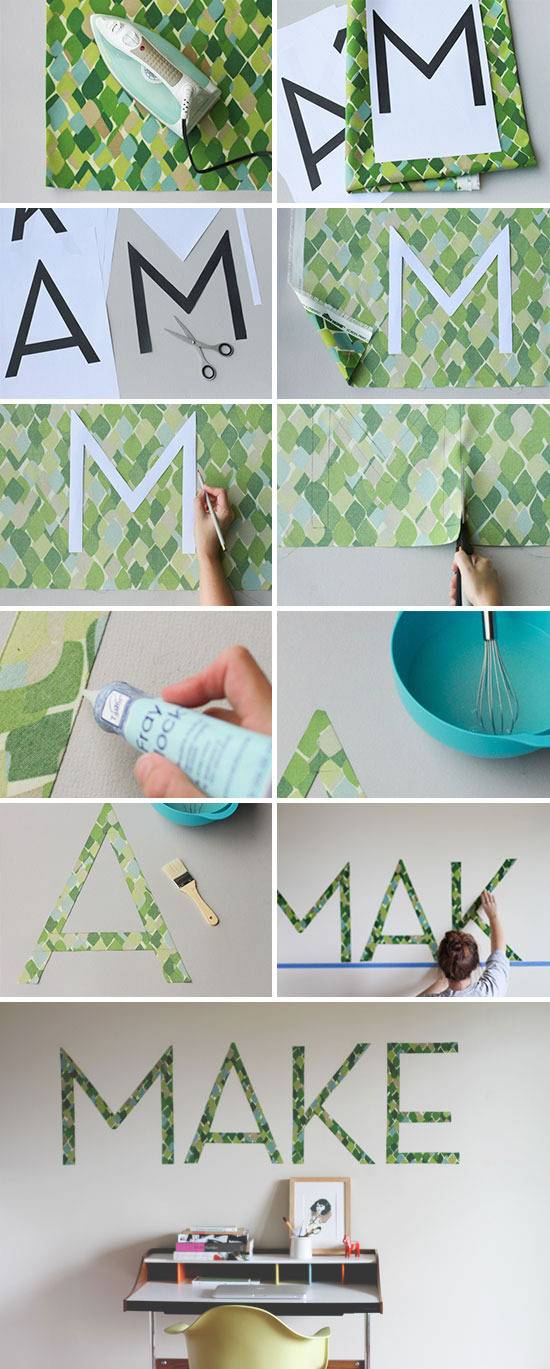
Select a font that you really like and have it printed to the size that you want your final piece to be.
Step
Next, lay out your fabric and run an iron over it a few times to steam out any wrinkles.
Step
Cut out your letters carefully and then flip your fabric over, so the wrong side is facing up. You’ll map out the letters on this side to hide the pencil marks.
Step
Since you are writing on the backside of the fabric, be sure to also flip your cut- out letters over to match. Trace each letter and then cut each one out carefully with fabric scissors.
Step
Use a very small amount of fray block on the outer edges of each letter to make sure that you don’t have any fly-aways.
Step
Now it’s time to mix your ‘glue’. A simple corn starch and water recipe will adhere the letters to your wall without damaging the paint. And the best part is, you can easily pull the fabric right off if you move, or if you want to switch things up!
I used this recipe from How About Orange (Bring four cups of water to a boil. In a separate bowl, mix 1/4 cup of corn starch with 1/2 cup of cold water. Then add all of the boiling water to the mixture and stir.).
Step
Using a level and some painter’s tape, create a straight line on the wall to act as your guide for the letters.
Step
Next, apply the corn starch mixture to the back of your first fabric letter generously with a paint brush.
Step
Position your first letter on the wall where you want it, using your tape line as a guide. Press down firmly, smoothing out any bubbles or air pockets, and apply a top -coat of the corn starch mixture to keep it in place.
Step
Repeat this process for the remaining letters until the word or phrase is complete.
Step
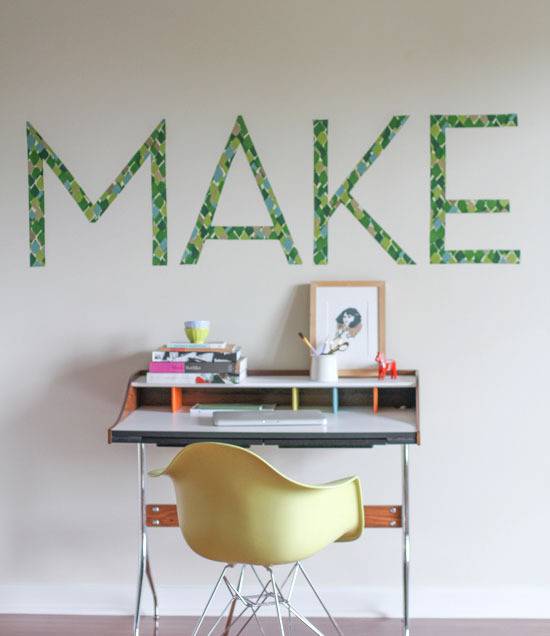
Remove the painter’s tape and enjoy your new wall art.
 Brittni Mehlhoff
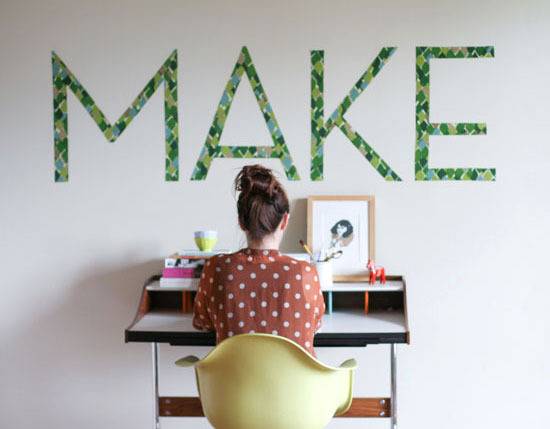
So what do you think? Want to tackle a typography project this weekend?
 Brittni Mehlhoff
 Brittni Mehlhoff
More renter-friendly updates and ideas from Curbly:
So, this peels off no problem, correct? I would be doing this in my dorm, which has weak paint (in that even the dye on clothes can rub off on it). However, the sterile white is quite boring and I would love to use this technique 🙂
Amanda – it’s pretty strong, so I would guess that it will last as long as you want it to, as long as it’s not disturbed.
Brittany – Yes, it peels off with no problem whenever you’re ready to remove it. The only residue that was left on the wall when I took mine down was from the glue. I was able to wipe down the wall with water and a tiny bit of soap to remove the residue. If your walls get scuffed up very easily, as you descirbed, I would just recommend being careful with the fabric you choose. Some fabrics could potentially bleed through to the wall when attached with the glue. I purchased my fabric from JoAnn’s and had no problems with that at all. Good luck!
I would suggest washing/drying the fabric before the project if you’re worried about the colors bleeding onto your wall
will this work on cinderblock walls as well?