
Photo: Brittni Mehlhoff
In an effort to get organized early in the new year, I’ve been making myself little desk accessories to get excited about computer work. And I’m happy to say, it’s actually working. So, I thought I would share one of the projects that I recently made, for a jumbo wood block perpetual calendar. The larger size makes this calendar a statment piece and adds a fun playfulness to the typically bland work station. Click through for the step by step tutorial.
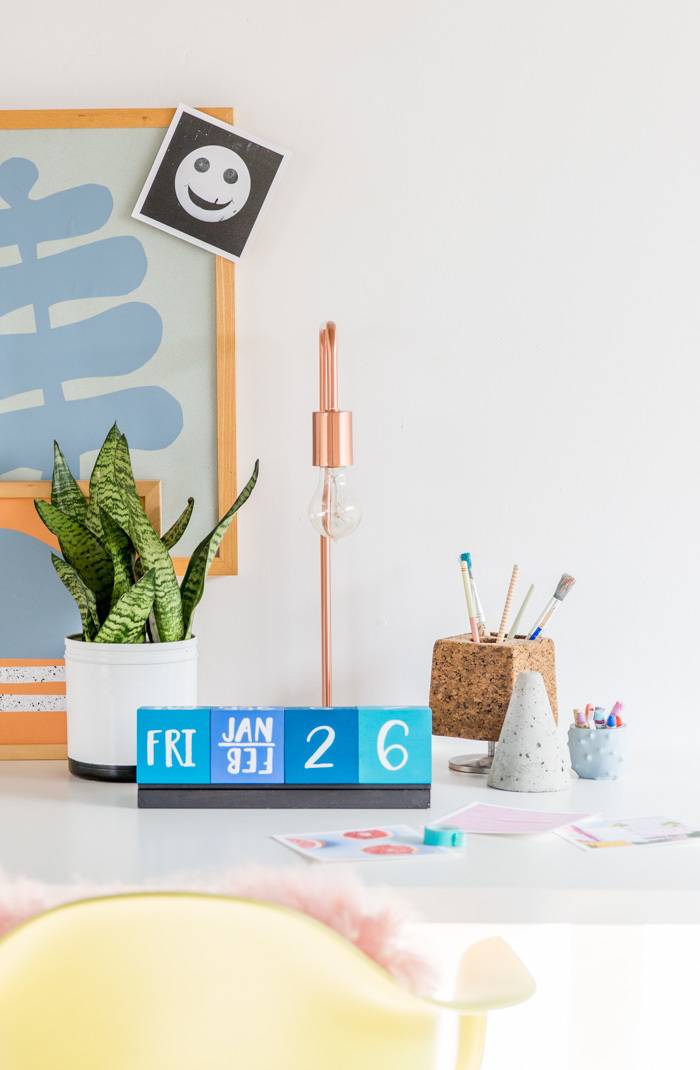
Photo: Brittni Mehlhoff
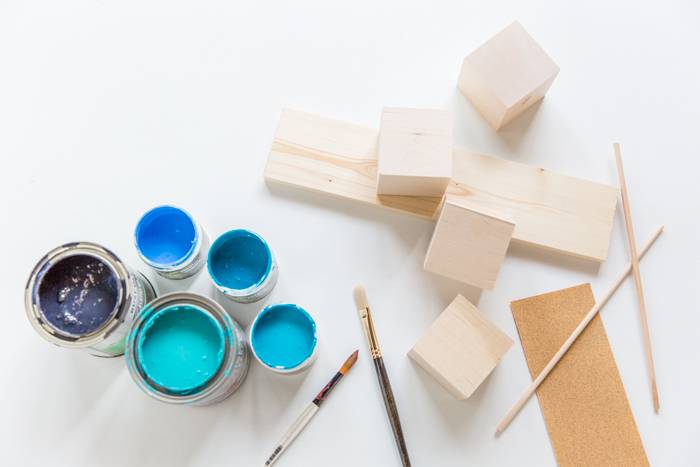
Photo: Brittni Mehlhoff
Materials:
- 3 inch wood blocks (mine are from here) – 4 total
- scrap piece of 1×4 wood (12 inches or longer)
- 1/4 inch dowel rods (12 inches long – which is a standard length) – 2 total
- paint (I used 5 paint colors total – use paint and primer in one paints to save yourself from priming separately)
- paint brush
- paint pens (I used white paint pens)
- wood glue
- saw (if you don’t have a piece of wood that is exactly 12 inches)
- clamps
Instructions:
1. Start by painting each of the 4 wood blocks a difefrent color. You’ll want to paint all sides of each block. And come back with a second coat if necessary. Tip: Be sure to use a paint and primer in one to save yourself the extra step of having to prime the blocks first.

Photo: Brittni Mehlhoff
2. While the blocks are drying, cut a piece of 1×4 scrap wood down to 12 inches in length. This will keep the base length lined up with the dowel rods. *If you already have a piece of scrap wood that is 12 inches in length, you can skip this step.
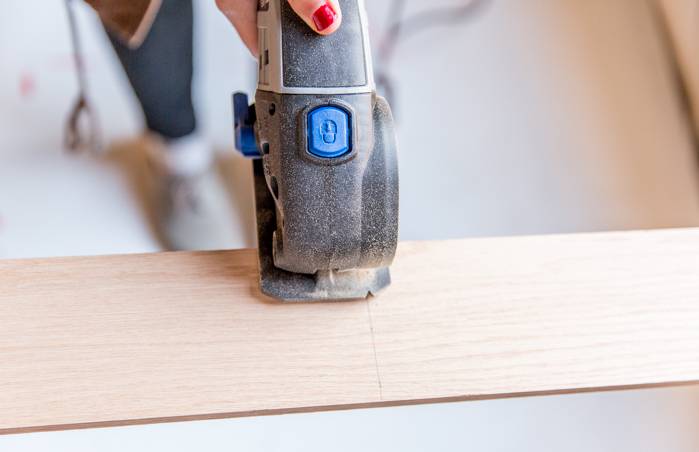
Photo: Brittni Mehlhoff
3. Next, paint the pieces that you’ll be using as the base all one color (wood dowels and 1×4 wood from step 2). I went with black for mine, if you’re looking for suggestions. Set aside and wait for the paint to dry completely before adding another coat (if necessary).
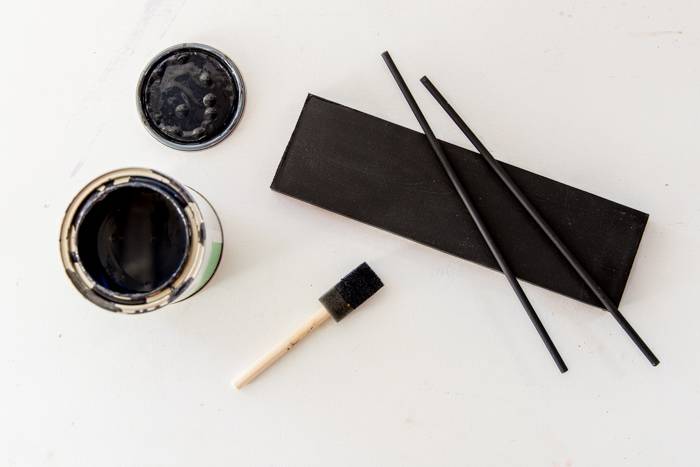
Photo: Brittni Mehlhoff
4. Once the wood blocks from step 1 are completely dry, it’s time to start the lettering process with a paint pen. If you don’t have great handwriting, find a friend! That’s what I did.…Lettering for this project was done by Rachel Brewer.
Knowing exactly what numbers, days, etc to put on each block can be a little tricky. So, I’ve included exactly what you’ll need to write on each block to take out the guess work…
Day Block: Write Sat / Sun together on one side of the first block. Then Monday, Tuesday, Wednesday, Thursday, and Friday each on their own sides.
Month Block: Write these month combinations each on their own side of block two: Jan / Feb, Mar / Apr, May / Jun, Jul / Aug, Sep / Oct, Nov / Dec. And be sure to write the second month in each combination upside down from the first. This will make more sense if you refernce the photos.
Number Block One: On the first number block, write the following numbers (each number on it’s own side of the block): 0, 1, 2, 3, 4, 5.
Number Block Two: On the second number block, write the following numbers (each number on it’s own side of the block): 0, 1, 2, 6, 7, 8 (an upside 6 will make a 9).
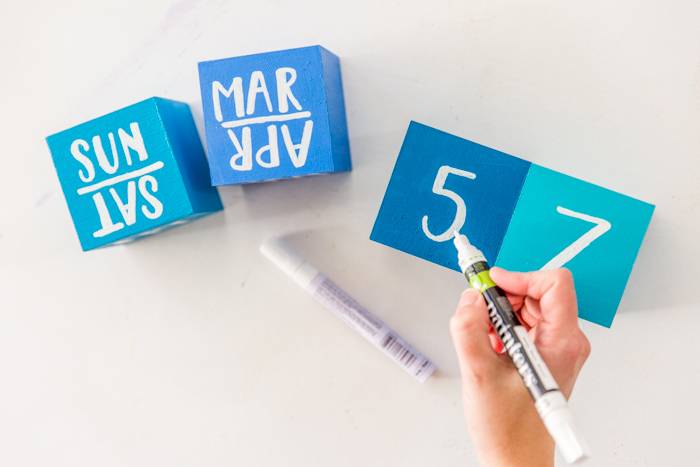
Photo: Brittni Mehlhoff
5. Once the blocks are finished, set them aside. Then, using wood glue, glue the painted dowels to the painted wood. And clamp the rods to the wood for at least 30 minutes to insure proper adhesion. *One dowel will be on the edge of each long side of the wood. This will keep the wood blocks resting comfortably inside the lip, instead of just sticking on a regular block of wood.
Note: If after the glue has dried, the blocks don’t perfectly fit inside the rails, no worries. The blocks can also rest on top of the front rail (dowel rod), for an elevated look.
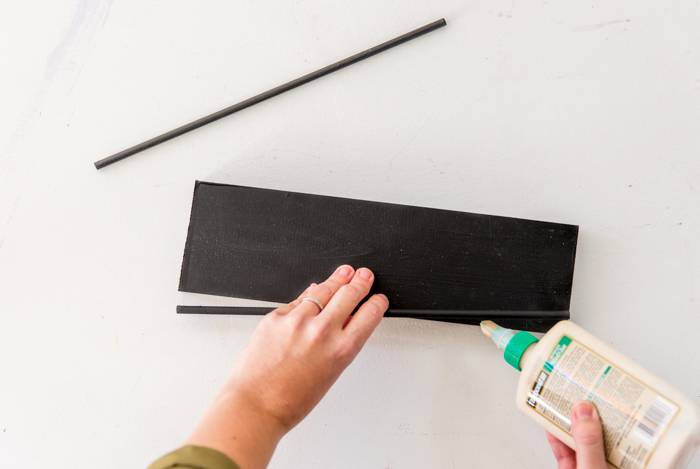
Photo: Brittni Mehlhoff
6. Lastly, now that the blocks and base have been completed, place the blocks into the base and place on your desk. And each day, you can switch out the proper date, day, etc.
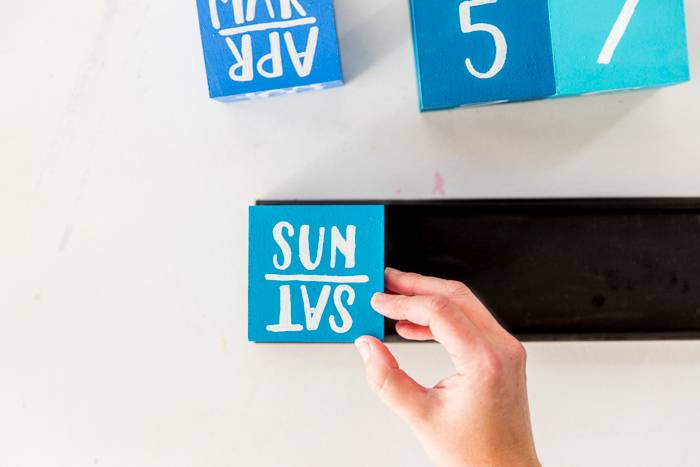
Photo: Brittni Mehlhoff
And that’s all there is to it. Pretty simple. Right?
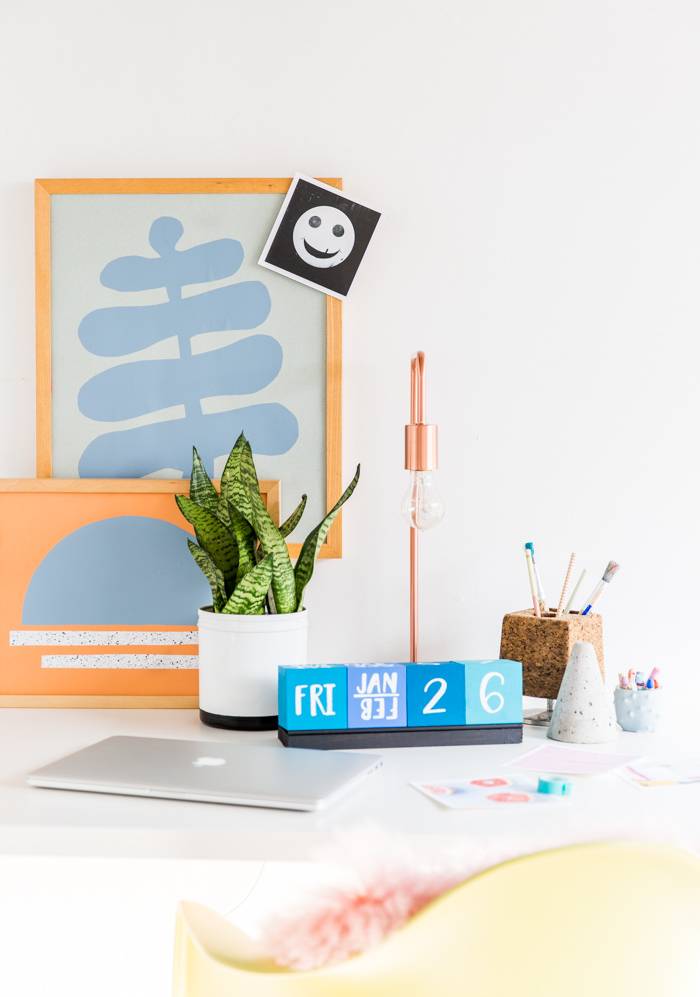
Photo: Brittni Mehlhoff

Photo: Brittni Mehlhoff
What do you think of this project? Think it might be something you’ll tackle in your own home or office?
P.S. You may recognize the artwork in this post from this 30 minute DIY art project I shared last month.