Now that I have a little one to care for, I’ve come to realize just how wonderful story time can be. Sharing books with Lauren is one of my favorite pastimes… especially the books that I used to read when I was a kid (those are my favorites!).
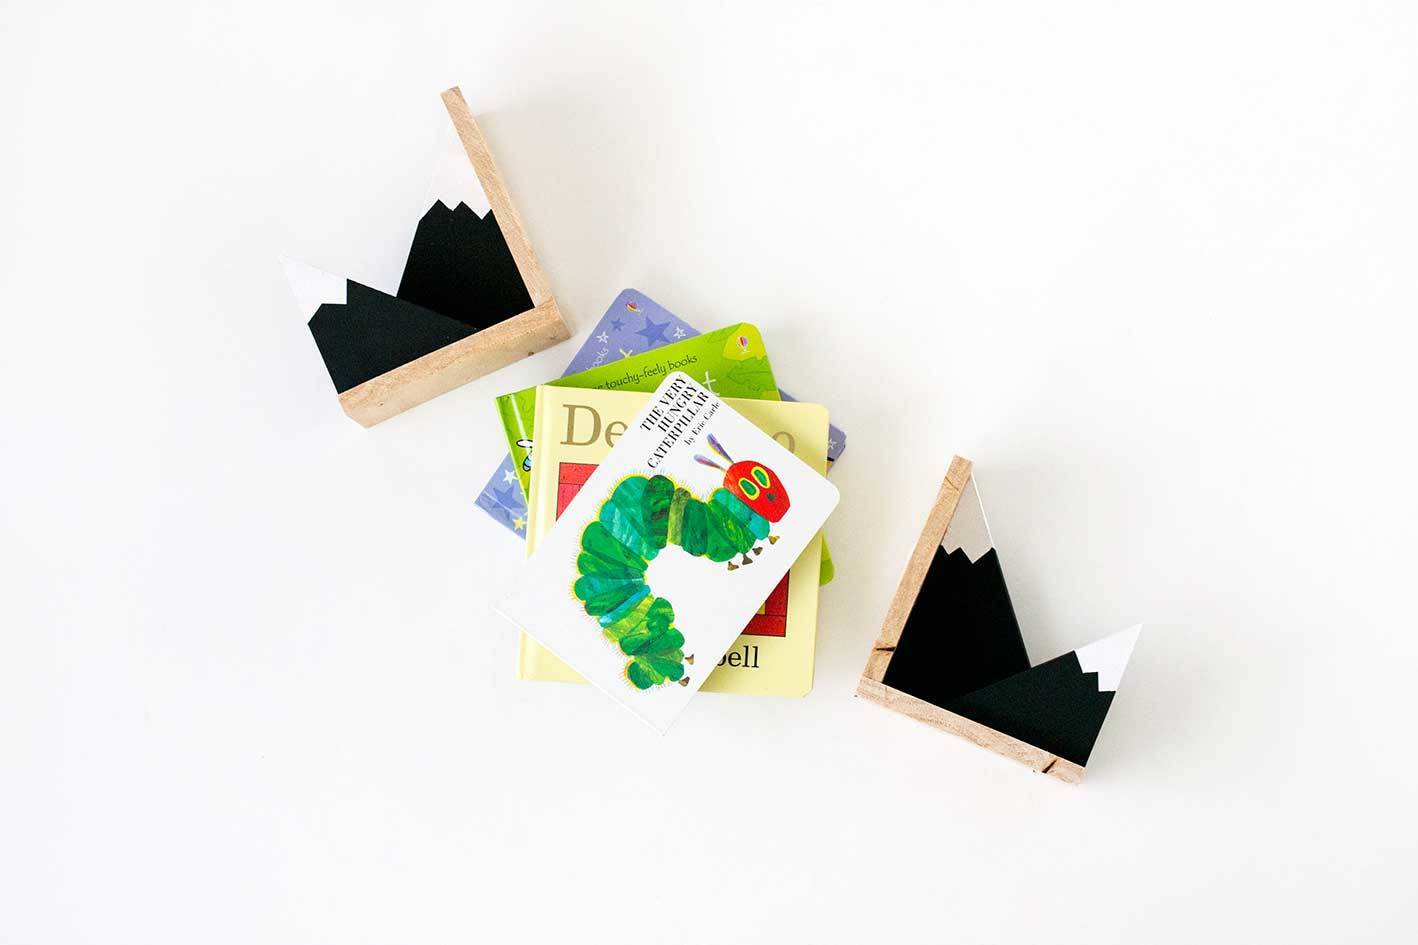
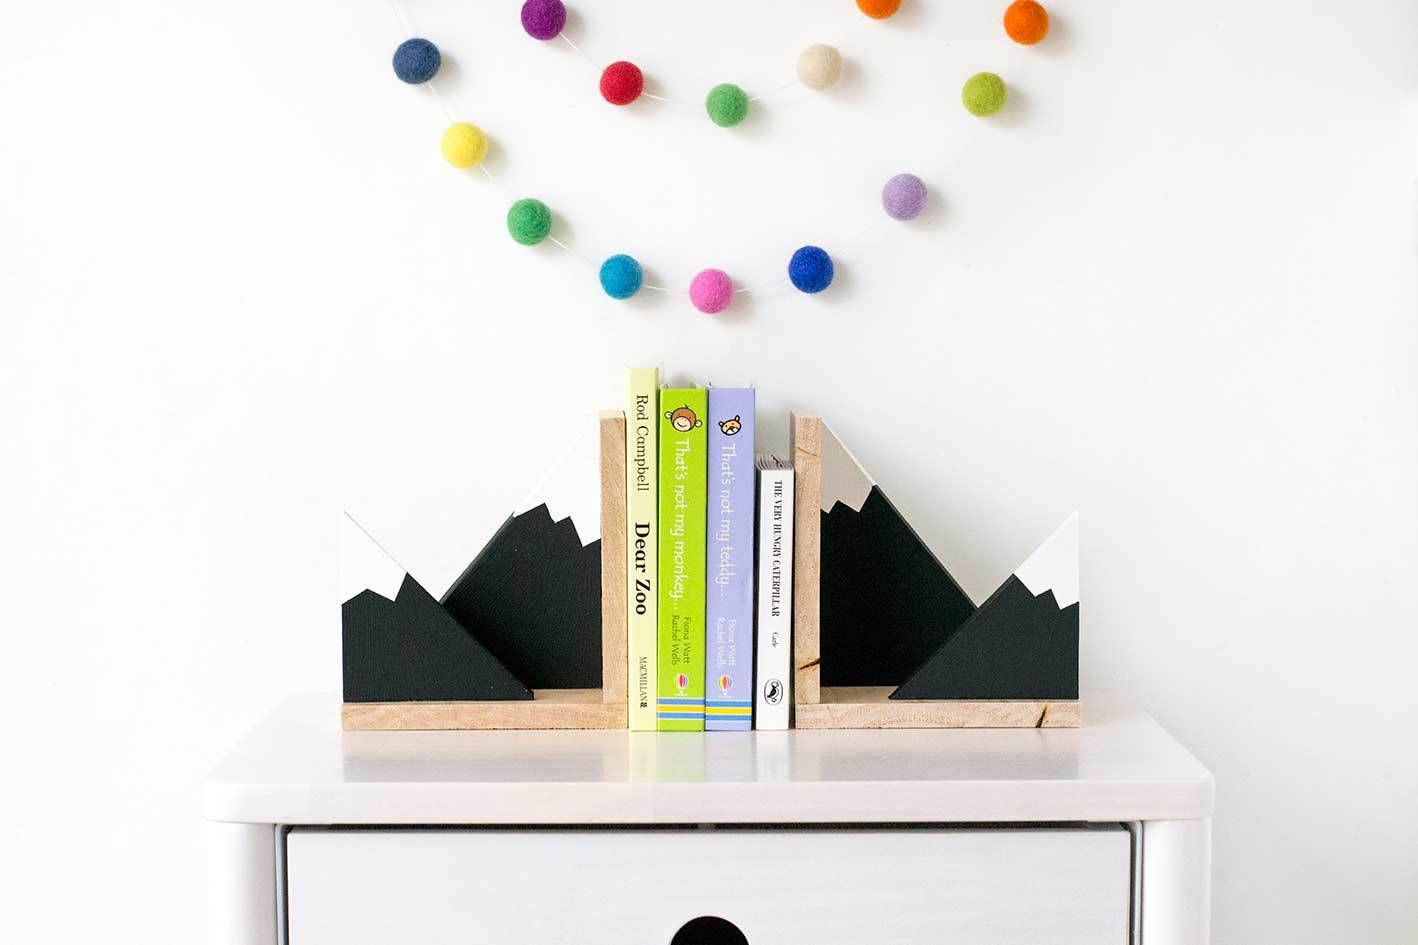
Of course, with a well-stocked bookshelf comes the need for some nice bookends to hold everything in place. So I decided to whip up these pretties for bubba’s room, and they’re so easy to make, I just had to share these DIY mountain bookends with you too!

Materials
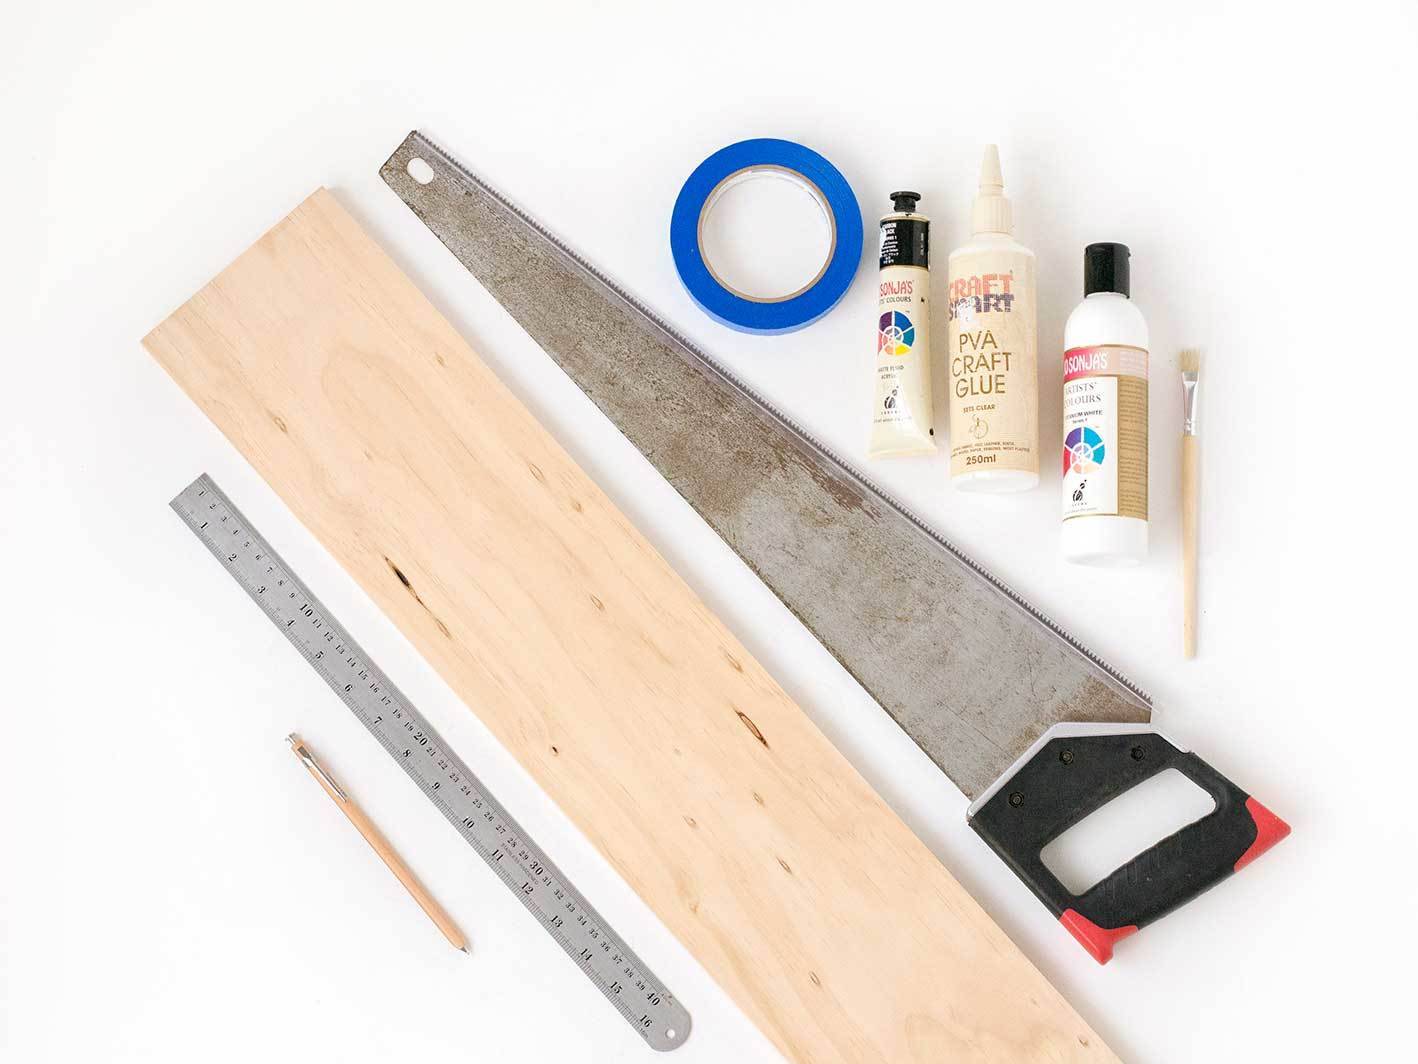
- Wood (I used pine)
- Ruler and pencil
- Hand saw
- Mitre box
- Wood glue
- Painter’s tape
- Primer
- Acrylic paint in white and black
- Paintbrush
Step
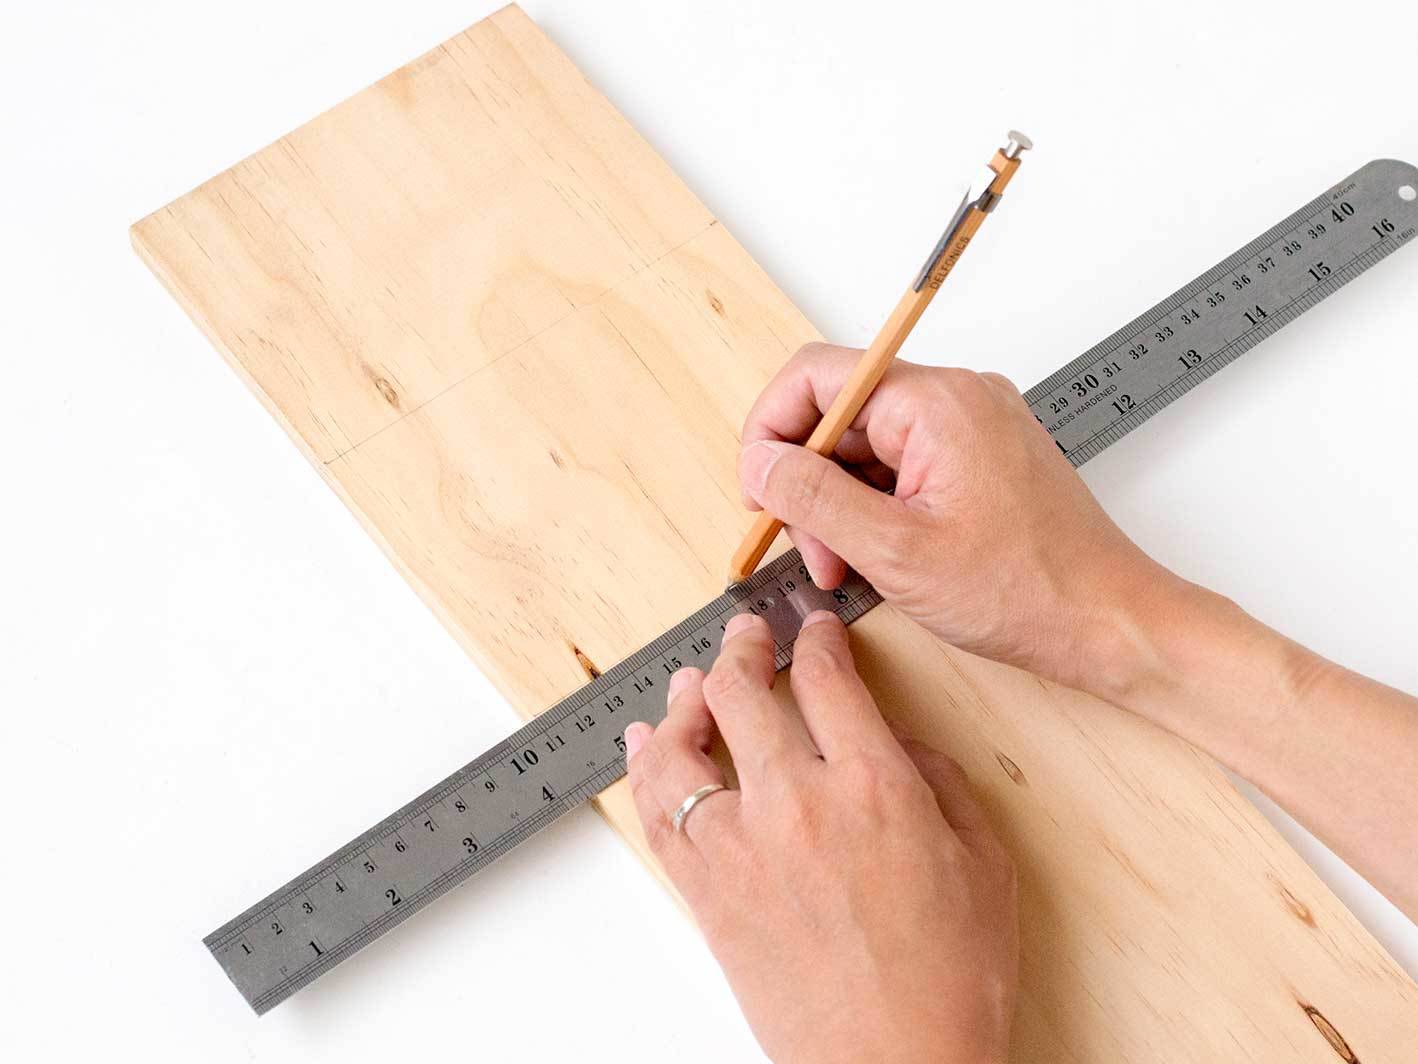
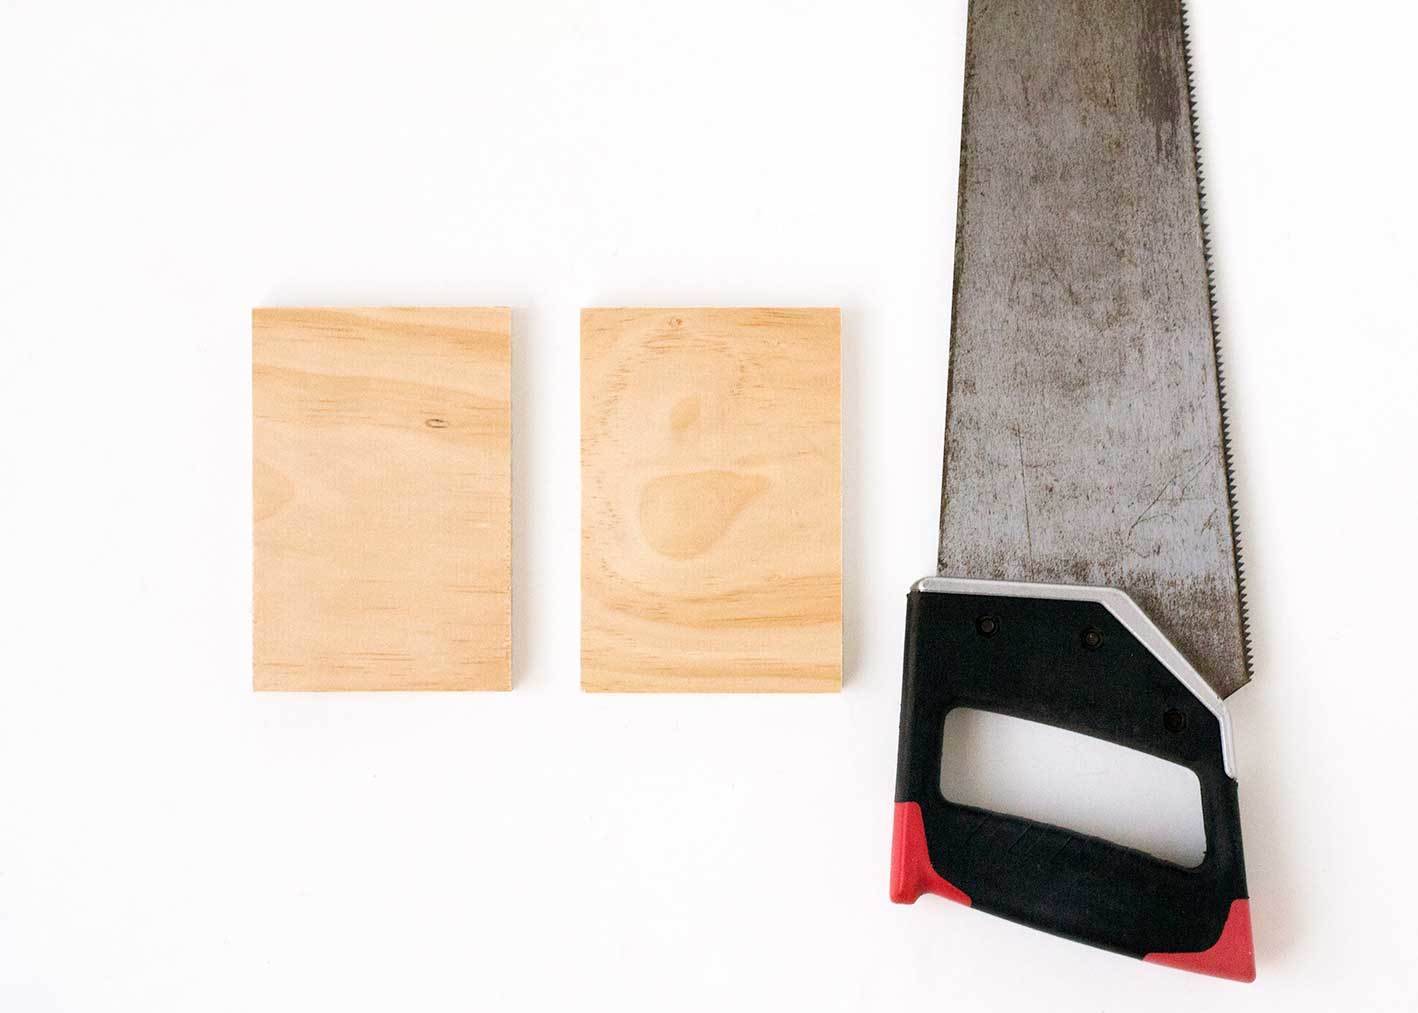
Measure and mark out two rectangular pieces of wood with a ruler and pencil, then cut out the pieces with a handsaw.
My pieces for my DIY mountain bookends measured 5.5 inches (140mm) tall and 4 inches (100mm) wide. You can make them any length and width that you like, as long as they’re big enough to hold your books upright.
Step
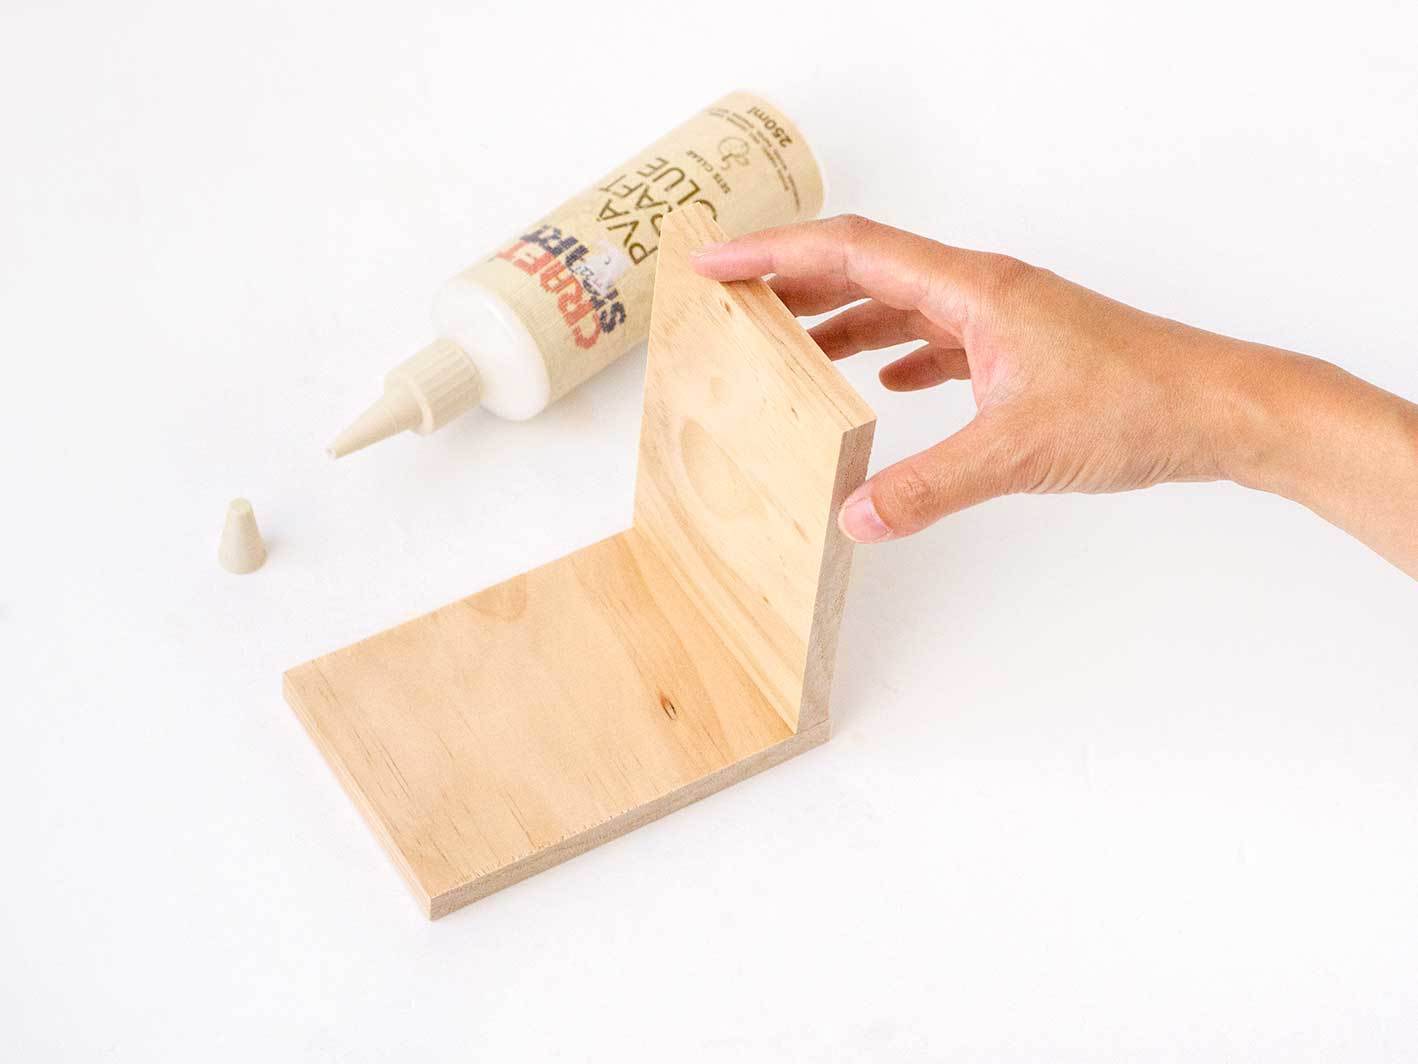
Apply wood glue to the end of one rectangle and attach it to the other so that the two form a right angle.
You should now have a basic ‘L’ shaped bookend.
Step
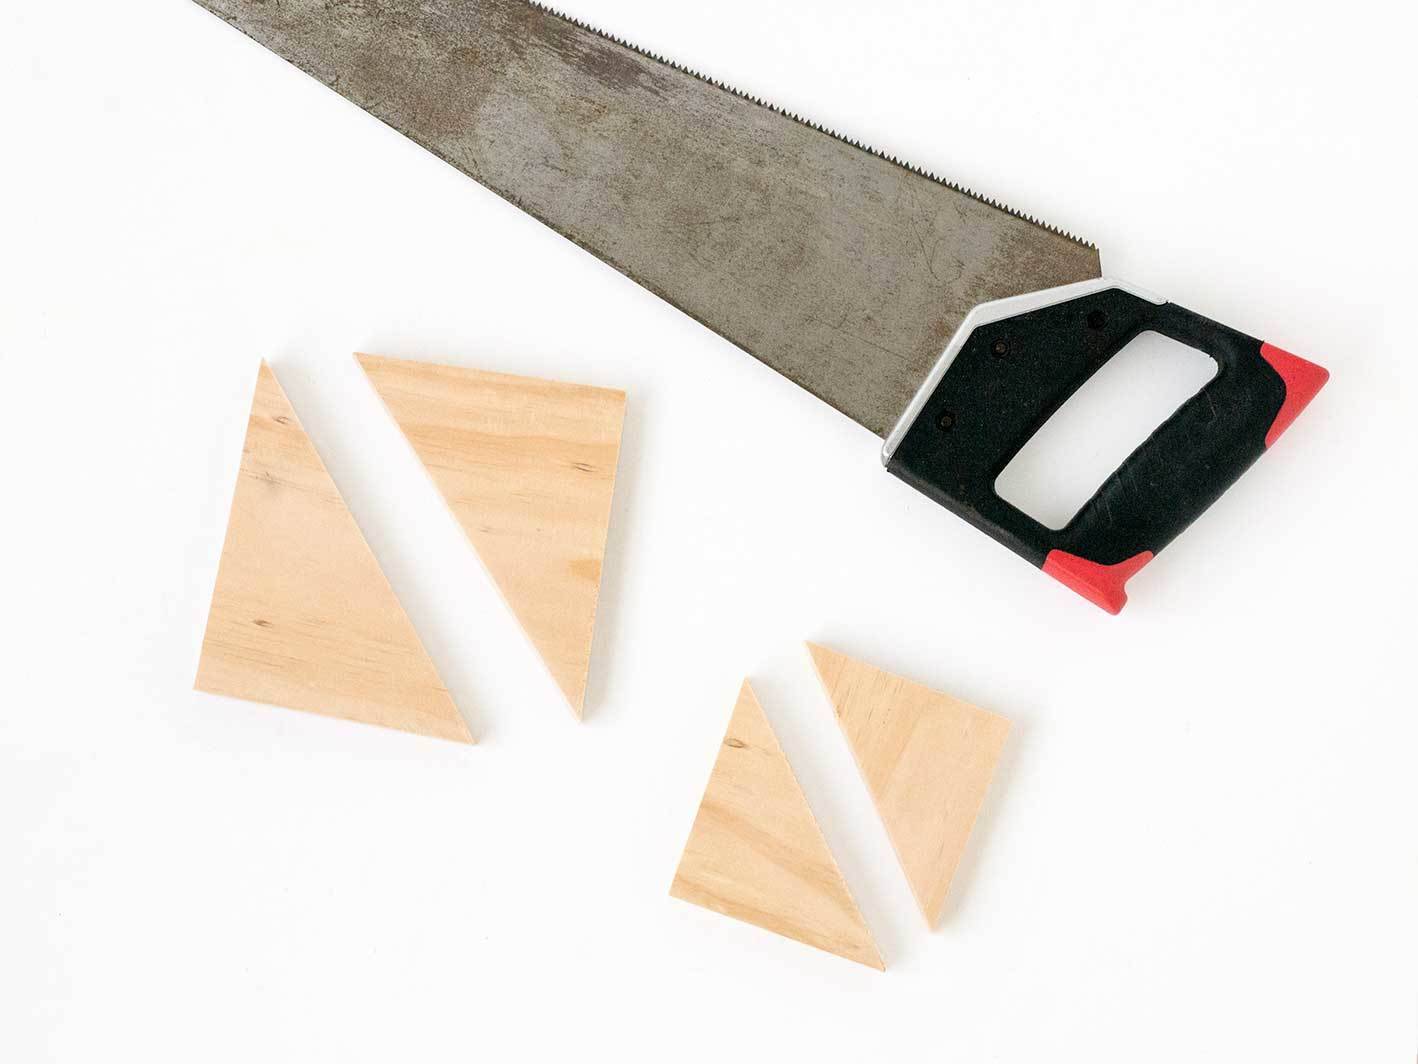
Using a hand saw and mitre box (or mitre saw if you have one), cut 2 wood squares (one large and one small) and then divide them in half again to form 4 triangles.
These triangles will be the mountains and you’ll use one large triangle and one small one for each bookend.
Step

Apply painter’s tape to the tips of your triangles in a jagged fashion.
Step

Apply a coat of primer and then paint the tips of your triangles white. This will be the ‘snow’ on your mountains.
Step
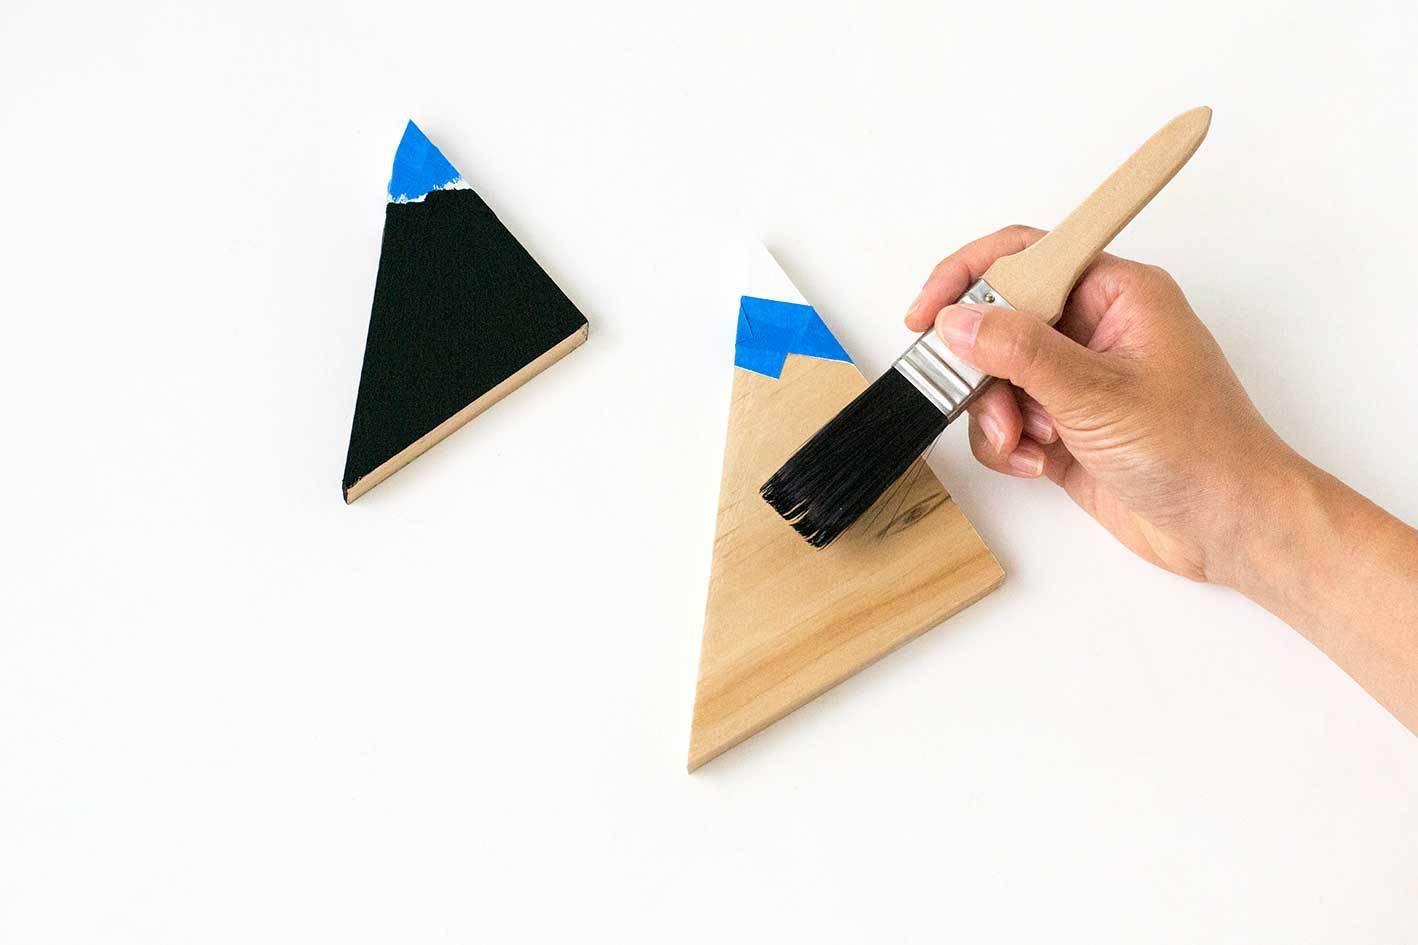
Once the white paint has dried, reverse the painter’s tape so that it covers the white tips and paint the rest of your triangles black.
Step
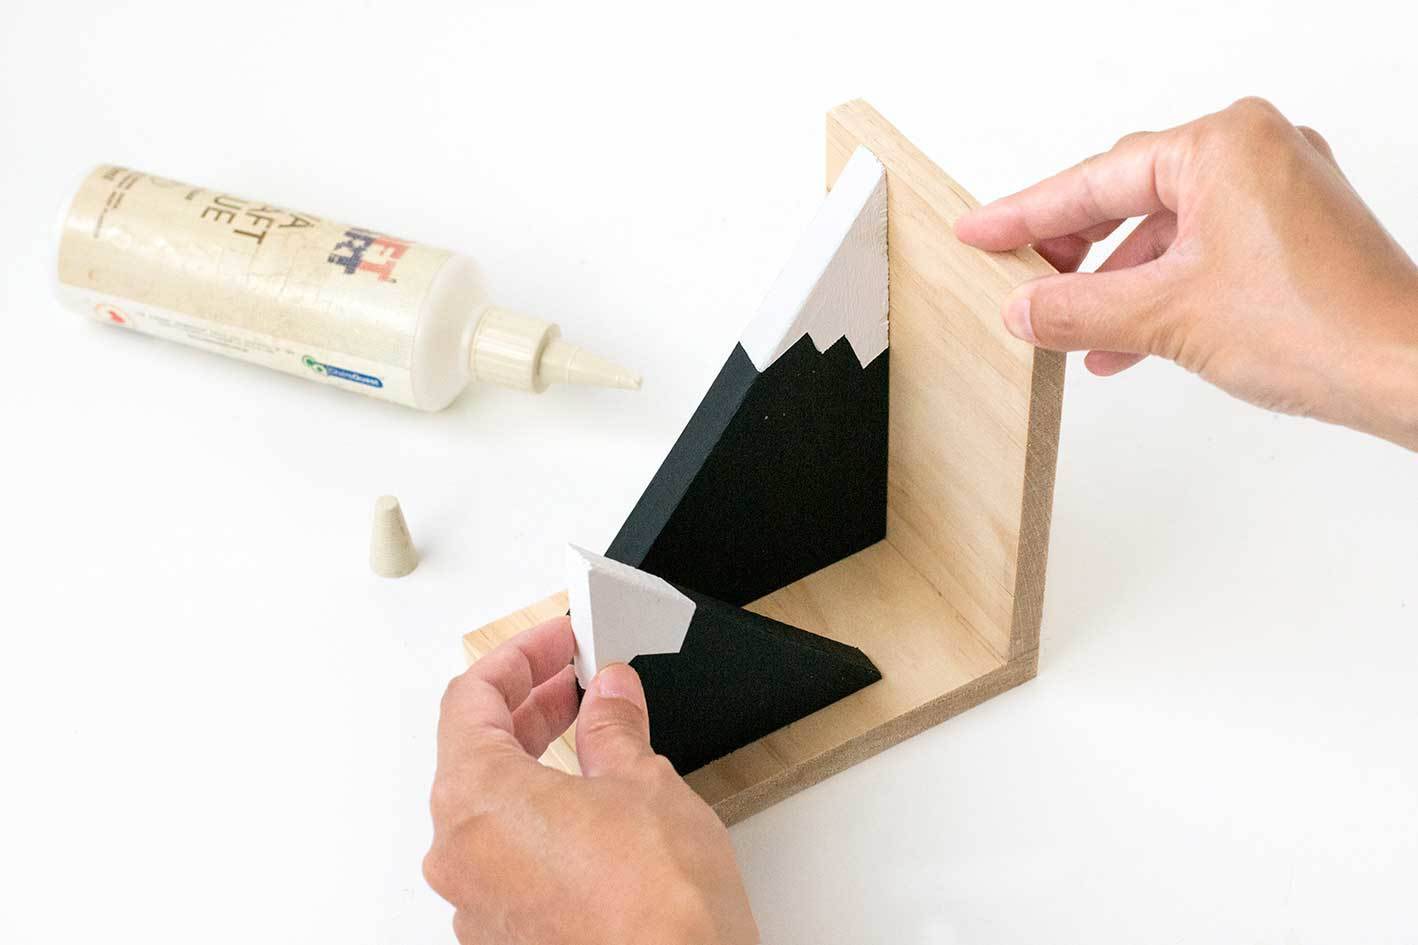
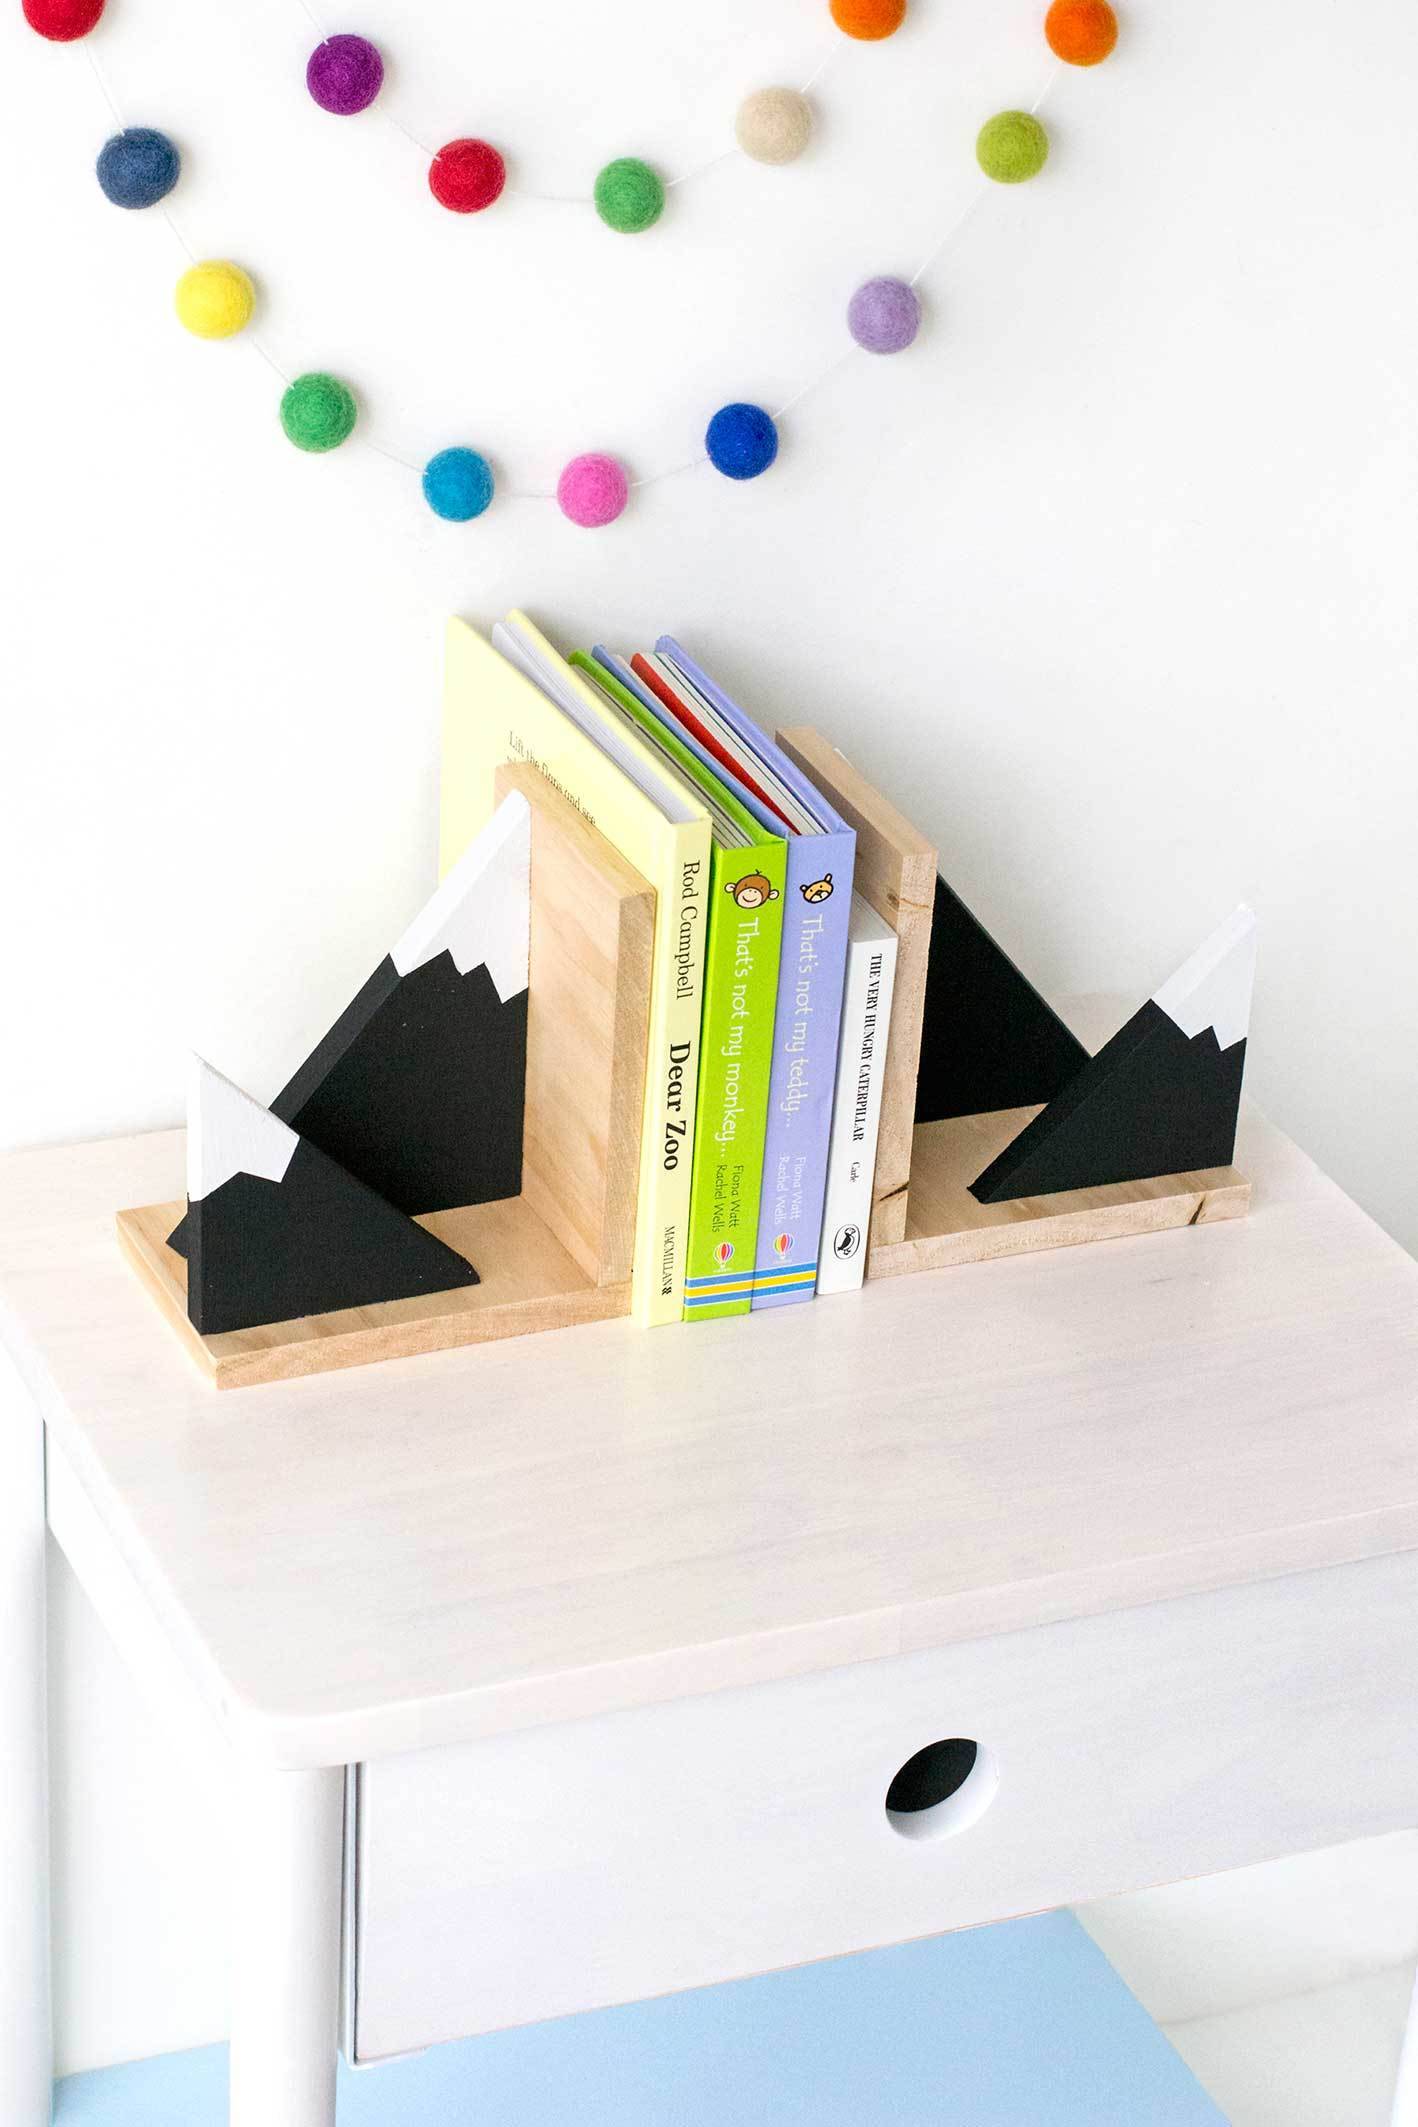
Use wood glue to stick the mountains to your bookend. Attach the large mountain so that it sits against the vertical part of the bookend, and position the smaller mountain so that it faces the opposite direction.
Step

Repeat steps 1 through 7 to create a second of your DIY mountain bookends, and you’re done!
This is one of those projects that you can tailor whichever way you please to suit your child’s nursery. Try making the mountains pastel pink, blue, or patterned depending on your nursery decor. Or incorporate motifs from your child’s favorite books for an even more interesting look!
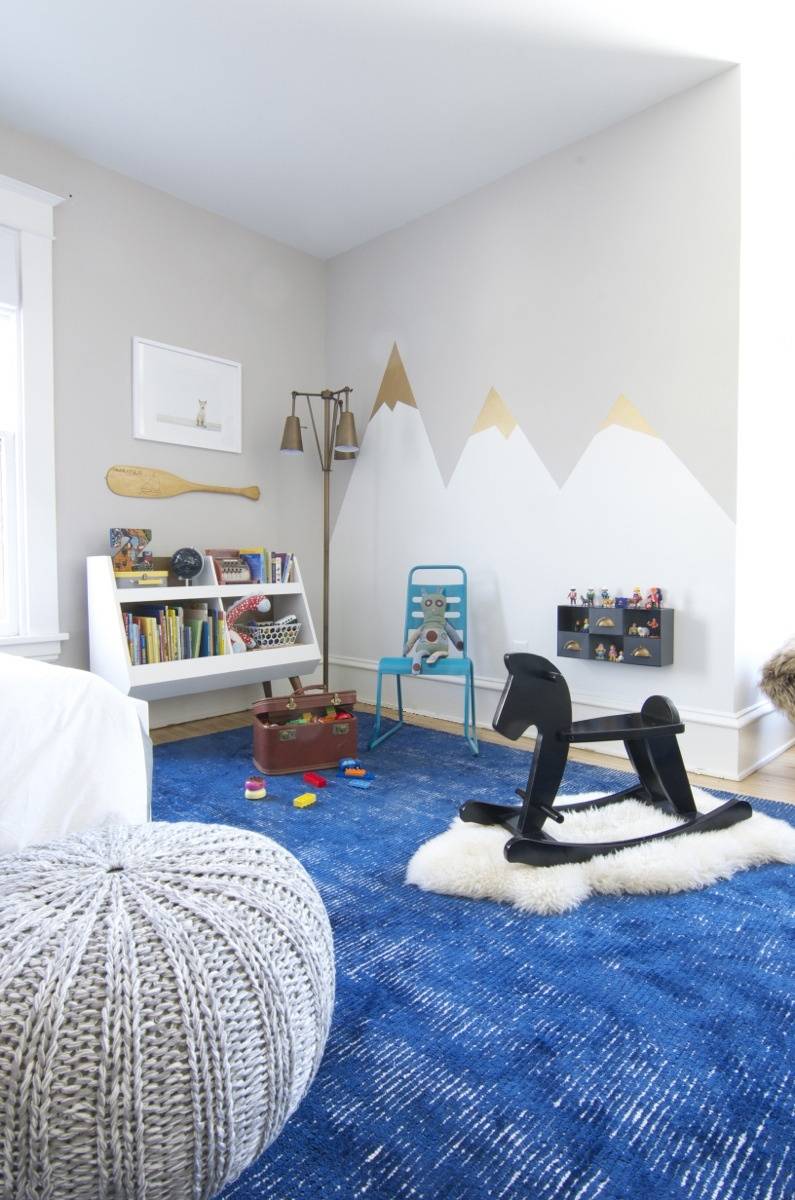
Now that you know how to make DIY mountain bookends, how about a DIY mountain wall, complete with mountain climbers?