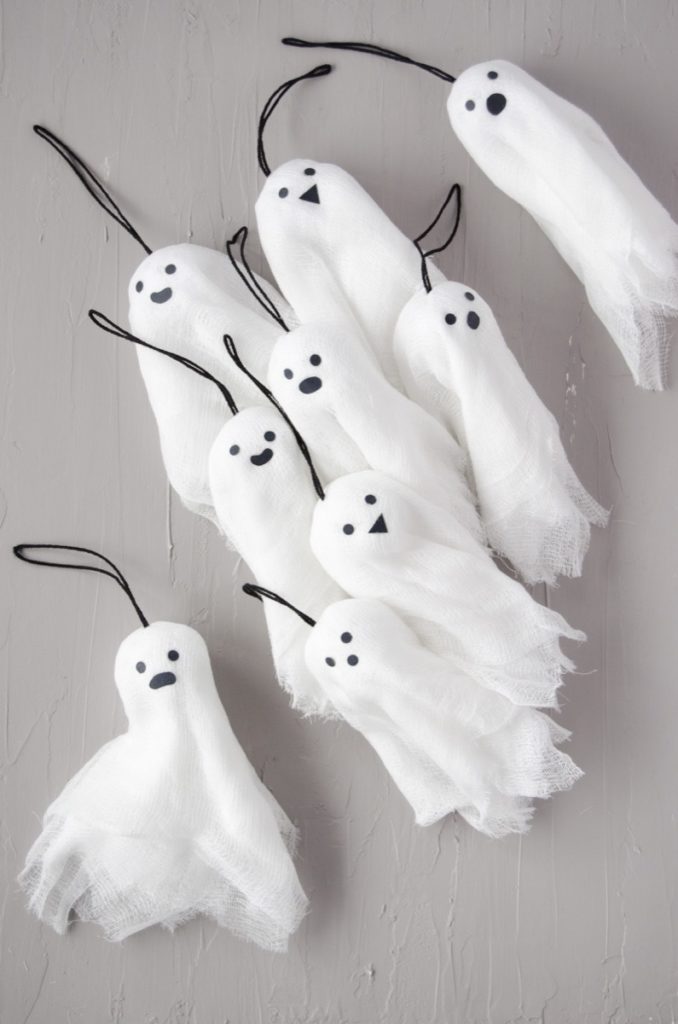
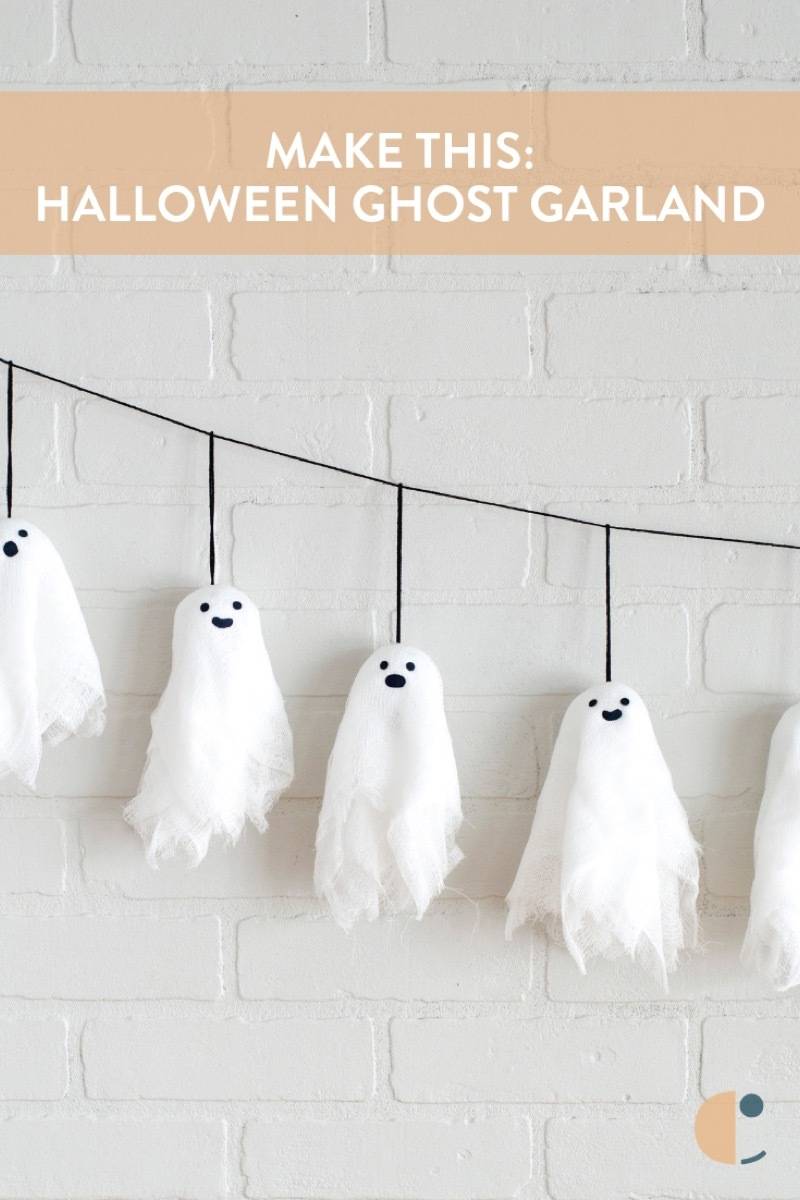
Are you looking for a fun and spooky DIY Halloween decoration? Look no further than this hauntingly beautiful Halloween ghost garland! With just a few simple materials such as cheesecloth and practice golf balls, you can easily create your own DIY ghost garland.

This is an easy craft project that anyone can do, so get ready to give your home a spooky and festive look this Halloween season!
Materials Needed
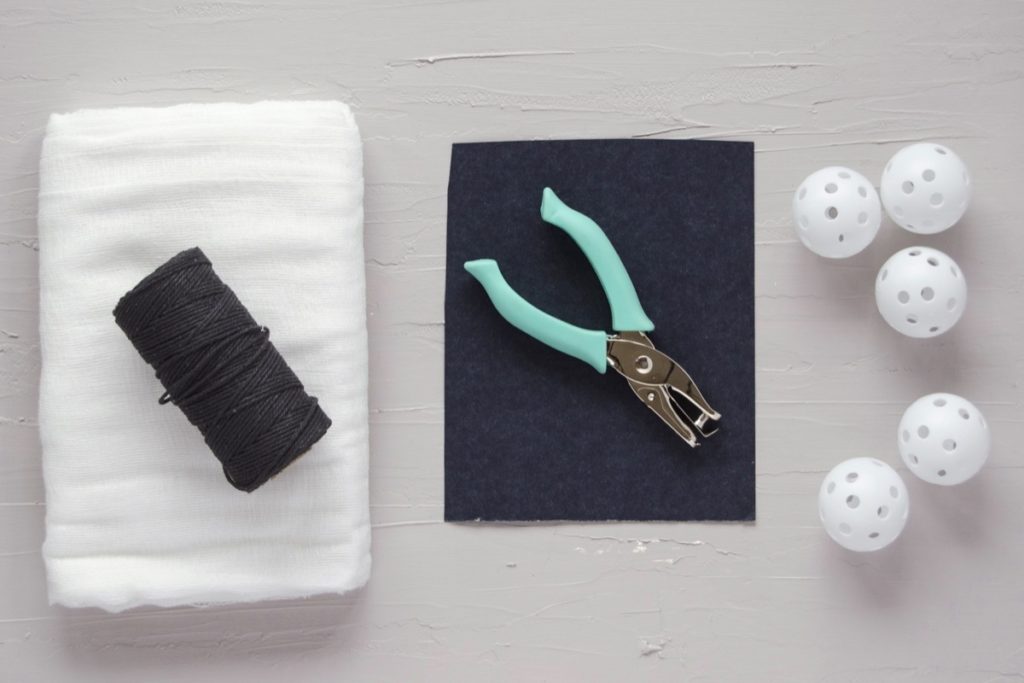
To create your hauntingly beautiful Halloween ghost garland, you will need a few simple materials that are easy to find. Here’s what you’ll need to gather before getting started:
- Cheesecloth: This lightweight and gauzy fabric will be used to create the ghostly bodies for your garland. Make sure to have enough to create as many ghosts as you want in your banner.
- Twine: You will need twine to attach the ghosts to create a garland. Opt for a sturdy twine that can hold the weight of the ghosts.
- Black construction paper: This will be used to create the eyes and mouths for your ghosts. It’s a simple and affordable material that will add the perfect spooky touch to your Halloween decoration.
- Practice plastic golf balls: These will serve as the core of your ghost shapes. You can easily find practice golf balls at sporting goods stores or online. They are lightweight and ideal for creating the floating effect of the ghosts.
- Hot glue: You will need hot glue to secure the cheesecloth to the golf balls. Make sure to have a glue gun and plenty of glue sticks on hand.
- A hole punch: This will come in handy for creating the holes to attach the ghosts to the twine. It’s a small but essential tool for this DIY project.
- Scissors: You will need scissors to cut the cheesecloth into the desired shapes and sizes for your ghosts. Make sure they are sharp and precise for clean cuts.
Now that you have gathered all the necessary materials, you are ready to dive into creating your Halloween ghost garland!
Creating the Ghost Shapes
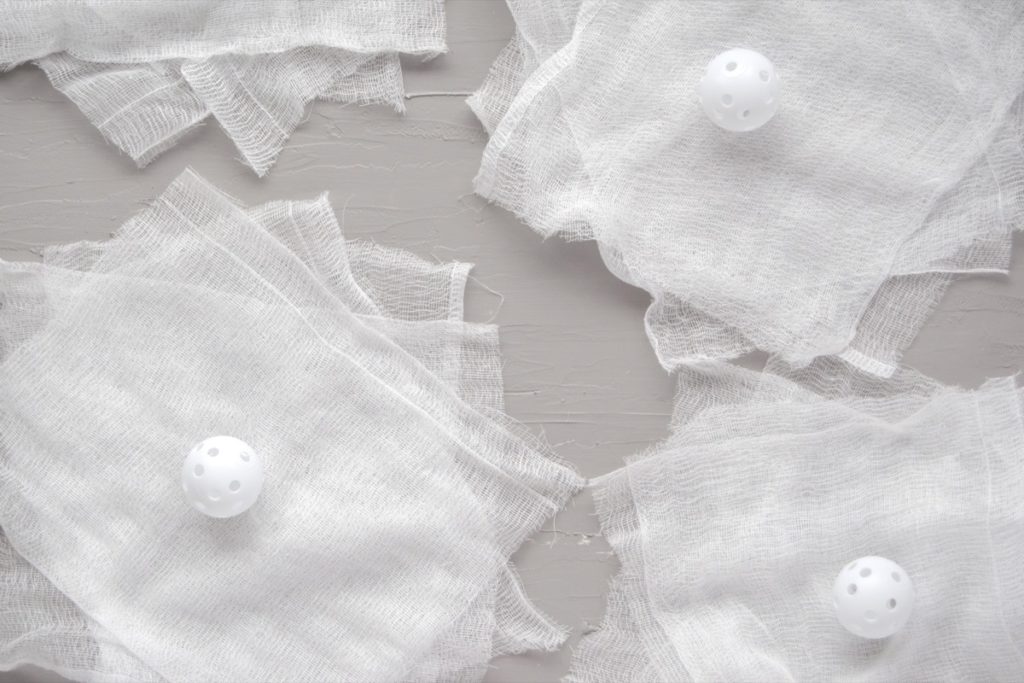
First, cut your cheesecloth into rectangular pieces to start creating the ghost shapes for your hauntingly beautiful Halloween ghost garland.
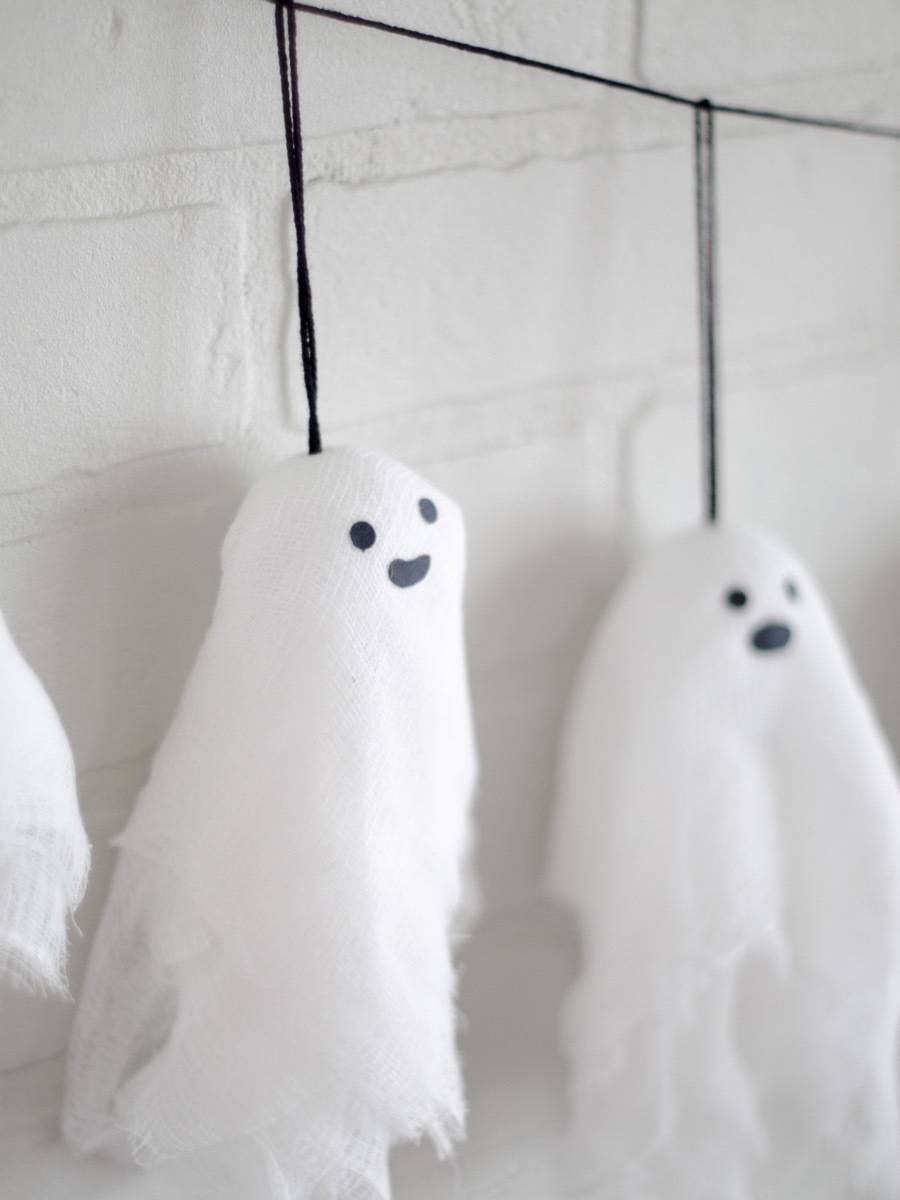
Cut the cheesecloth into squares roughly 10 inches wide. Each ghost is made of four squares of cheesecloth, doubled up. Stagger each square on top of one another so they don’t line up exactly.

To create each ghost head, cut a long piece of twine (you could use yarn as an alternative) and double-knot the end. Thread the loops through the holes in a practice golf ball.
Once you have your rectangles and threaded gold balls, drape the cheesecloth over the practice golf balls, making sure to cover the entire ball. This will create the ghostly body shape.

Find the middle point of the cheesecloth squares and pull the weave apart slightly, just enough to feed the twine on the golf balls through. Add a dab of hot glue to the top of each golf ball to hold the cheesecloth in place.
Play around with the fabric, folding and twisting it to create different ghostly poses. Don’t be afraid to get creative!
Repeat this process for as many ghosts as you want to include in your ghost banner. Creating the ghost shapes is just the first step in bringing this spooky DIY Halloween decoration to life!
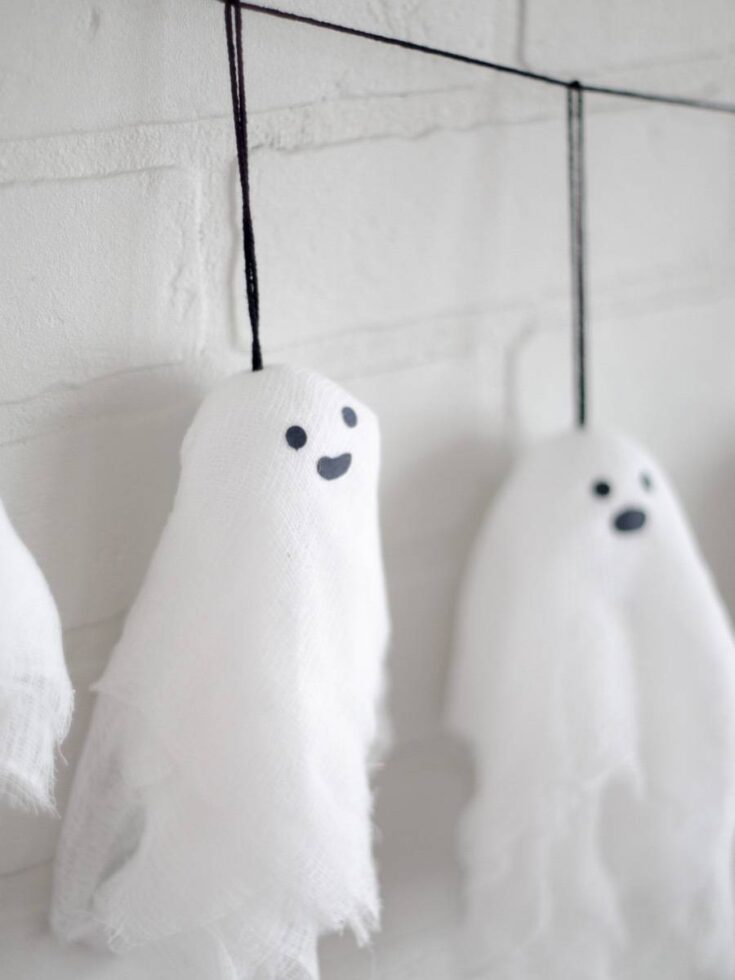
Adding Eyes and Mouths
To bring your DIY Halloween ghost garland to life, it’s time to add eyes and mouths to your hauntingly beautiful ghosts!
This step will give your ghosts personality and make them even spookier. Grab some black construction paper and use a one-hole punch to cut out circles to create the eyes.
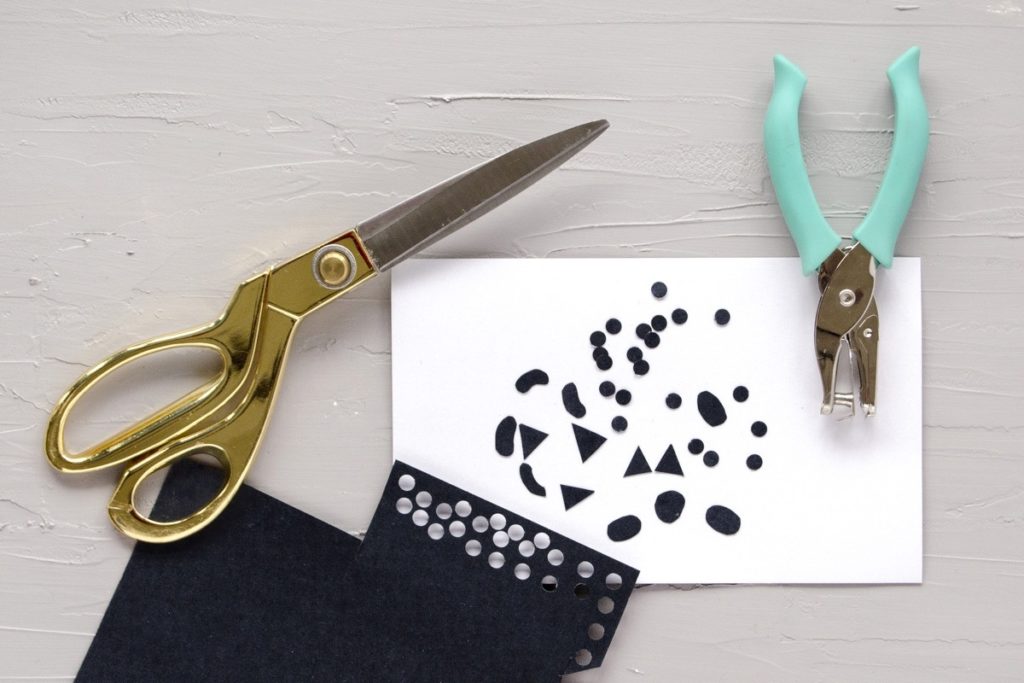
These simple black eyes will give your ghosts a haunting gaze. For the mouths, get creative and cut out triangles, ovals, and smiles from the paper. This will add a touch of whimsy to your garland and make each ghost unique.
Experiment with different shapes and sizes to give each ghost its own personality. Once you have cut out all the eyes and mouths, use hot glue to attach them to the cheesecloth. Play around with different positions and expressions to find the perfect look for each ghost.
Adding eyes and mouths is the final step in creating your spooky DIY Halloween ghost garland, so let your creativity shine and bring your ghosts to life!
Hanging and Displaying the Garland
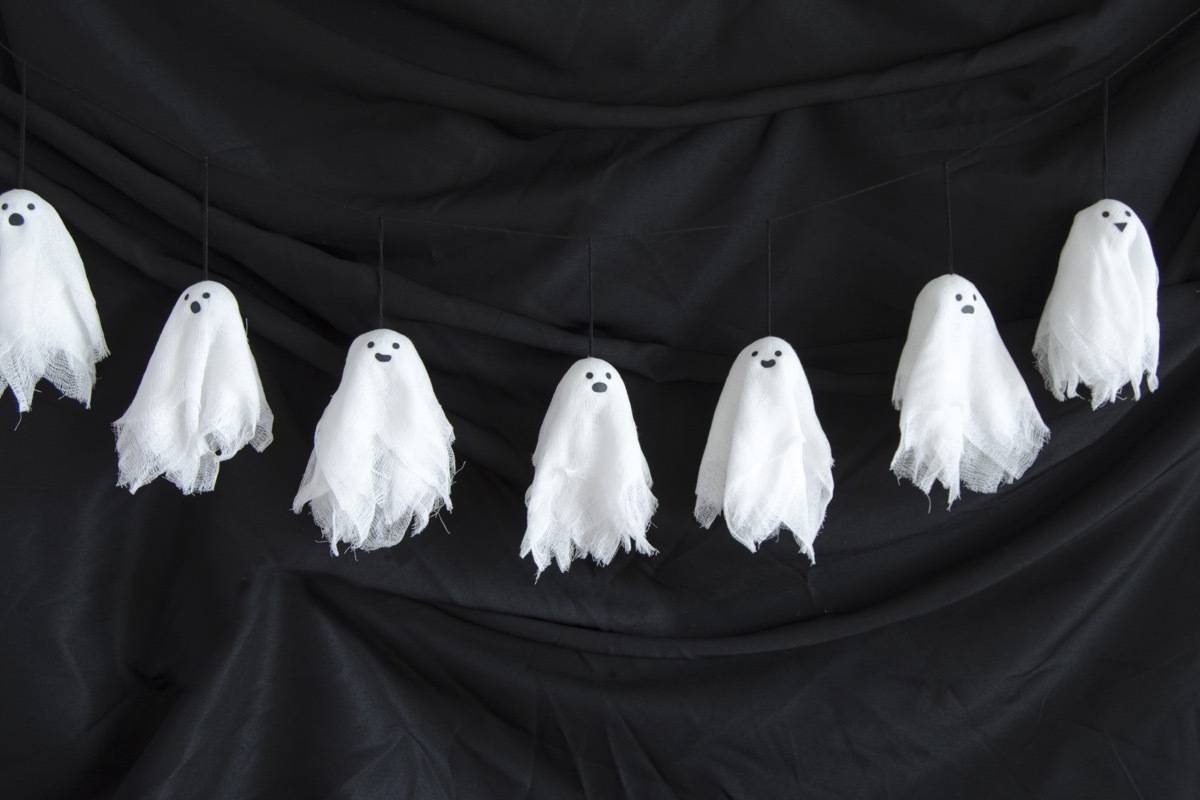
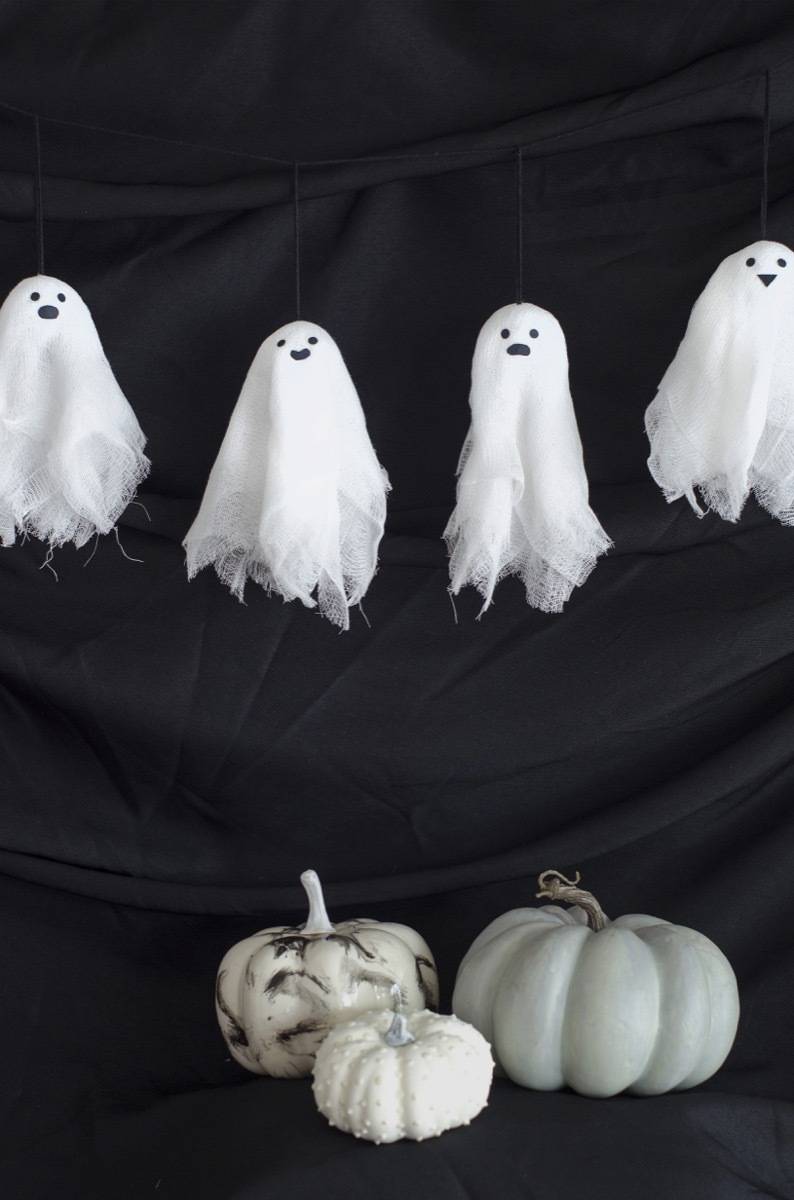
Once you have completed your hauntingly beautiful Halloween ghost garland, it’s time to hang and display it for maximum spookiness! You can showcase your ghost garland in many ways, depending on the desired effect. One option is to hang it across a mantel or fireplace, creating a chilling centerpiece for your Halloween decorations.
You can also drape it along a staircase railing or hang it from the ceiling for a floating, ethereal effect. Another creative idea is to hang it outside on your porch or in a tree to greet trick-or-treaters with a ghostly surprise.
However you choose to hang and display your ghost garland, make sure it’s in a prominent place where it can be appreciated and add a touch of spookiness to your Halloween decor.
FAQ’s
Can the ghost garland be used as an outdoor decoration?
Absolutely! The hauntingly beautiful Halloween ghost garland is versatile and can be used both indoors and outdoors. Whether you want to spook your guests as they approach your front porch or create a ghostly atmosphere inside your home, this ghost banner is the perfect decoration. Just make sure to secure the ghosts well and protect them from harsh weather conditions if you choose to hang them outside.
Can this project be completed by children, or is it suited for adults?
This DIY ghost garland project can be enjoyed by both kids and adults. Children can easily participate in creating their own spooky Halloween decorations with adult supervision. The materials are safe and easy to work with, making it a great activity for the whole family. Plus, it’s a fun way to get into the Halloween spirit and let your creativity shine.
Can this be modified to make individual ghosts instead of garlands?
Absolutely! You can easily modify this project if you prefer to make individual ghosts instead of a garland. Simply skip the step of attaching the ghosts to string or ribbon, and voila! You have individual ghost decorations ready to be displayed.
You can hang them from door frames and light fixtures or even scatter them throughout your home. The possibilities are endless when it comes to creating your own spooky ghost decorations. So go ahead and get creative with this DIY project!
Remember, this hauntingly beautiful Halloween ghost garland is a simple and enjoyable craft project that anyone can do.
It’s a great way to add a touch of spookiness to your Halloween decorations and create a festive atmosphere in your home. So gather your materials, let your creativity run wild, and get ready to impress your friends and family with your DIY ghost garland!
Way To Customize Garland
Once you’ve created your hauntingly beautiful Halloween ghost garland, there are so many ways you can customize it to make it your own. Here are a few ideas to get you started:
- Add some color: While white ghosts are classic and spooky, why not add a pop of color to your garland? Use fabric paint or markers to create ghosts in different colors. You can even use glow-in-the-dark paint to make them extra eerie!
- Personalize the faces: Give each ghost its own unique expression by adding different facial features. Use googly eyes, sequins, or buttons for the eyes, and experiment with different shapes and sizes for the mouths. For a festive touch, you can even glue on small accessories like mini witch hats or tiny pumpkins.
- Incorporate other Halloween elements: To make your ghost garland even more festive, consider adding other Halloween-themed decorations. Hang small bats or spiders from the string or ribbon alongside the ghosts. You could also weave in orange and black ribbons or incorporate small LED lights to give your garland a magical glow.
- Create a theme: If you’re hosting a Halloween party or want to create a specific atmosphere, you can customize your ghost garland to fit a theme. Add small tombstones made of cardstock or clay for a spooky graveyard theme. For a witchy theme, attach small broomsticks or cauldrons to the garland. The possibilities are endless!
Remember, the best part about DIY projects is that you have the freedom to get creative and make them your own. So don’t be afraid to experiment, have fun, and let your imagination run wild when customizing your hauntingly beautiful Halloween ghost garland!
Are you getting excited for Halloween? Even if you don’t like the ghoulish or ghastly, everybody loves candy, right?
How To Make DIY Ghost Garland
Materials
- Cheesecloth
- Twine
- Black construction paper
- Practice golf balls
- Hot glue
- A hole punch and scissors
Instructions
- Cut the cheesecloth into squares, roughly 10 inches wide. Each ghost is made of four squares of cheesecloth, doubled up. Stagger each square on top of one another so they don’t line up exactly.
- To create the head of each ghost, cut a section of twine, and double-knot the end. Thread through the holes in a practice golf ball.
- To create eyes for the ghosts on the DIY Halloween banner, use a one-hole punch to cut out circles from black construction paper. For little mouths, cut triangles, ovals, and smiles from the paper.
- Find the middle point of the cheesecloth squares, and pull the weave apart slightly, just enough to feed the twine on the golf balls through. Add a dab of hot glue to the top of each golf ball to hold the cheesecloth in place.
- Finally, using hot glue, attach eyes and mouths to your tiny little spirits. Thread onto a long piece of twine, and hang.
I am trying to do this with my 5 yo daughter and we can’t do the step 2, any tips???thank you!
Try hot gluing the cheesecloth down to the golf balls so it holds in place!