
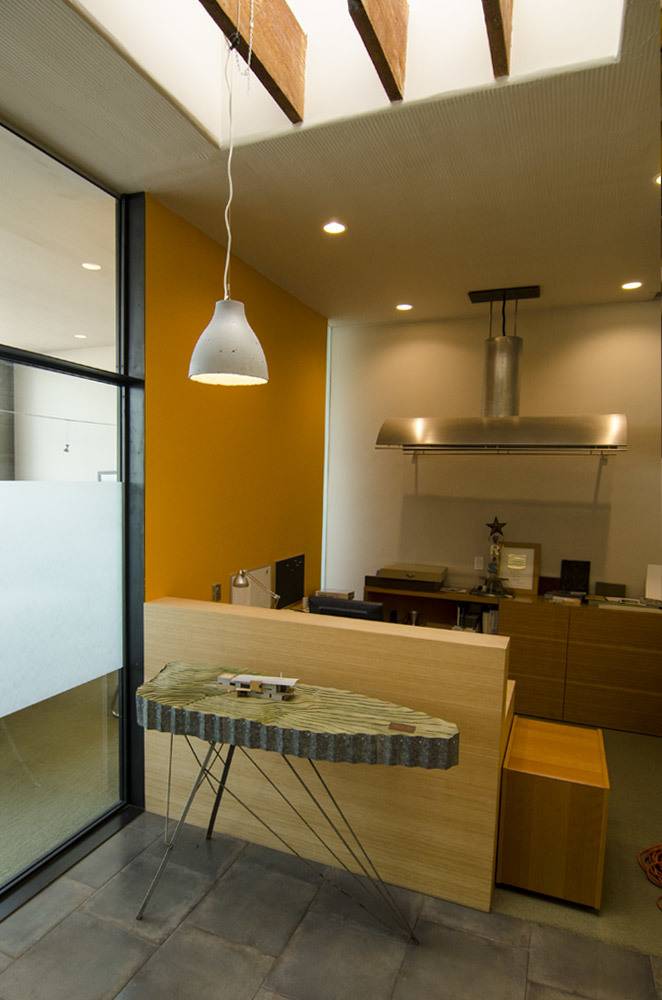
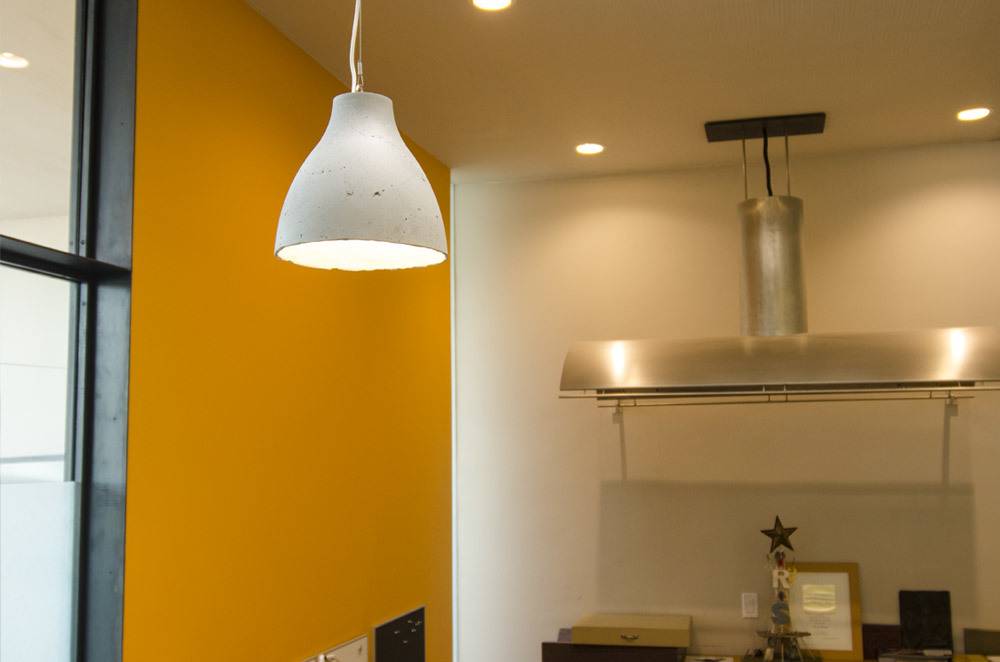
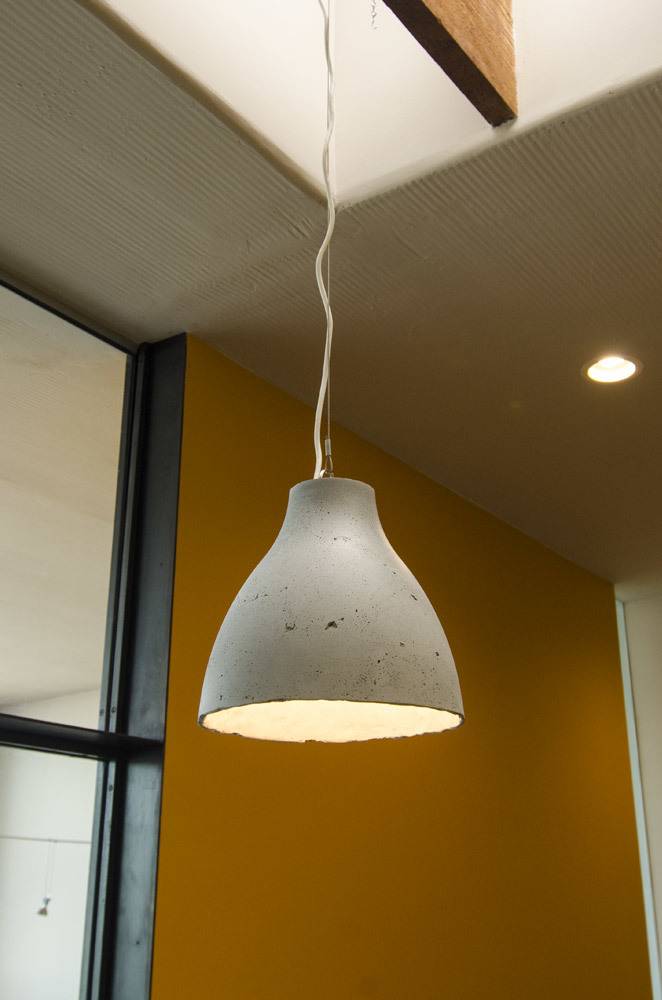
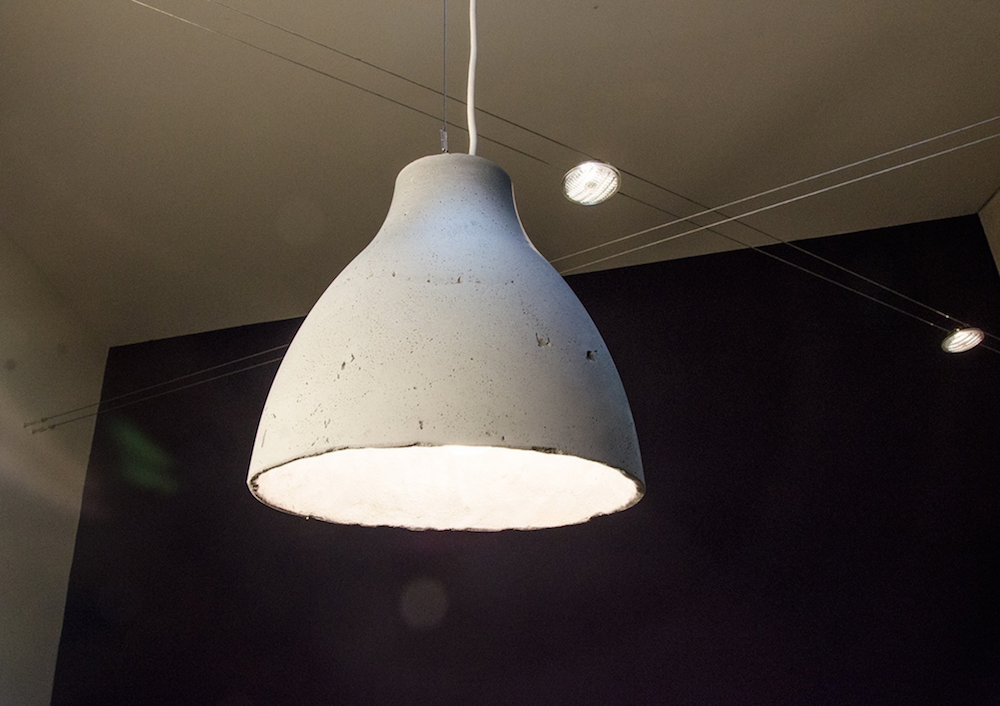
Are you a fan of IKEA hacking? Do you love concrete? Of course you do! This light pendant project employs ShapeCrete, a uniquely shape-able concrete that allows the user to “pack” the mixture into a form, eliminating the need for complicated knockouts and additional forming supplies (read: save money, time and headaches). Unlike traditional concrete, ShapeCrete allows us to take advantage of a huge range of pre-made molds and forms to create concrete objects like this uber-stylish pendant.
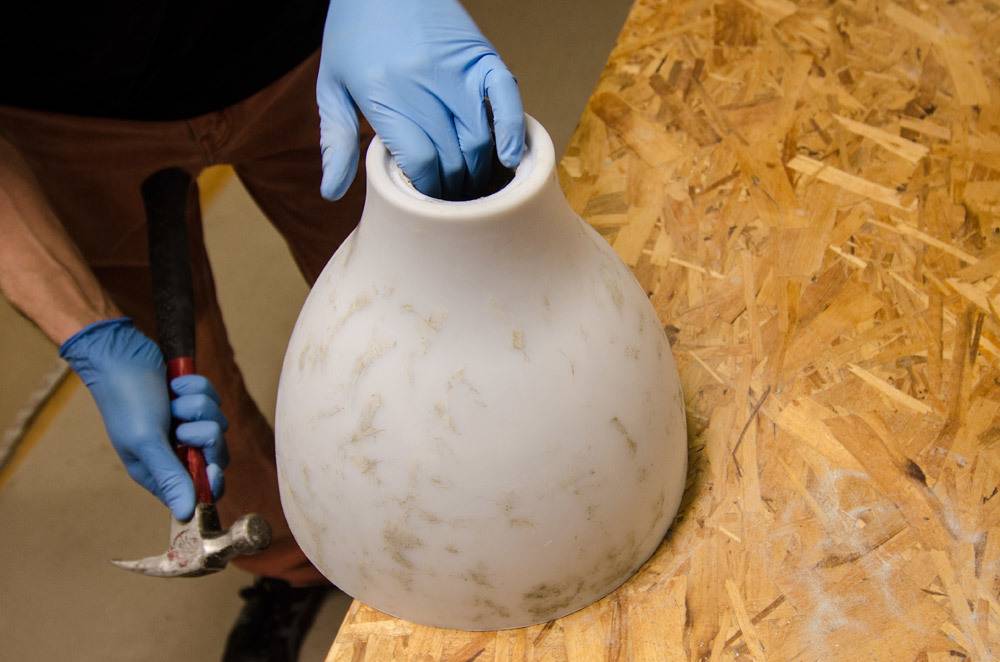
The Melodi Pendant Lamp from IKEA is an ideal form to use because it’s inexpensive, rigid, and durable enough to get multiple concrete pendants from a single mold.
The project can be completed with basic hand tools and you don’t need any experience with concrete to work with ShapeCrete. It’s easy enough for a beginner to make this beautiful concrete hanging lamp.
Materials
- IKEA Melodi Pendant Lamp
- 7 lbs. ShapeCrete Mix
- Rubber Gloves, Dust Mask, Eye Protection
- Cordless Drill
- Drill bits (1/16”, 1/4”, 3/8”)
- Hot Glue Gun
- Metal Funnel
- 3/4” Copper Pipe Cap
- Large Keyring
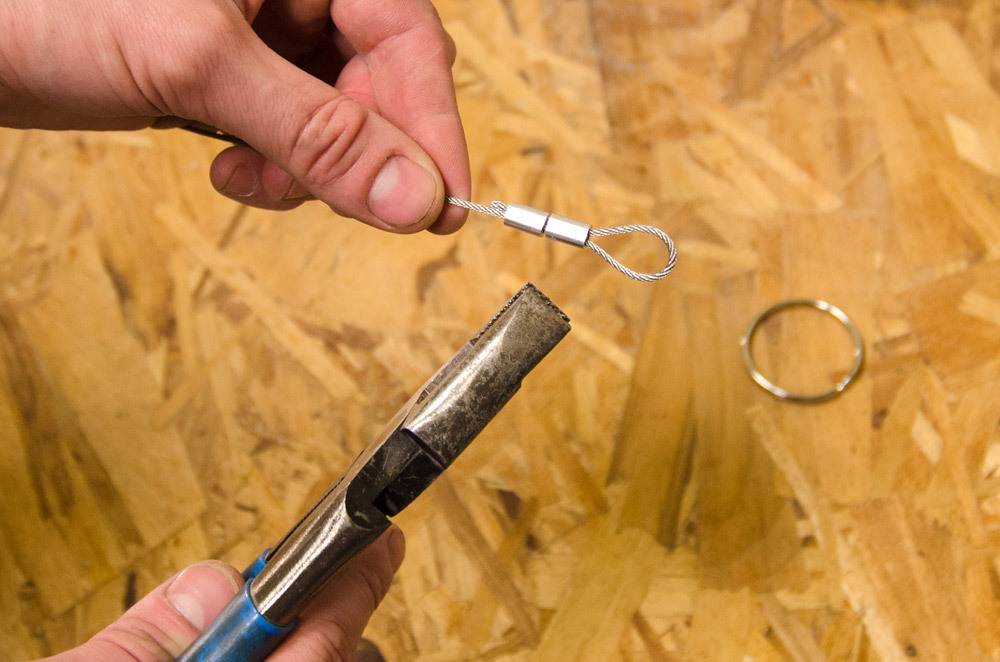
- 1/16” Stainless Steel Cable and Ferrules
Step
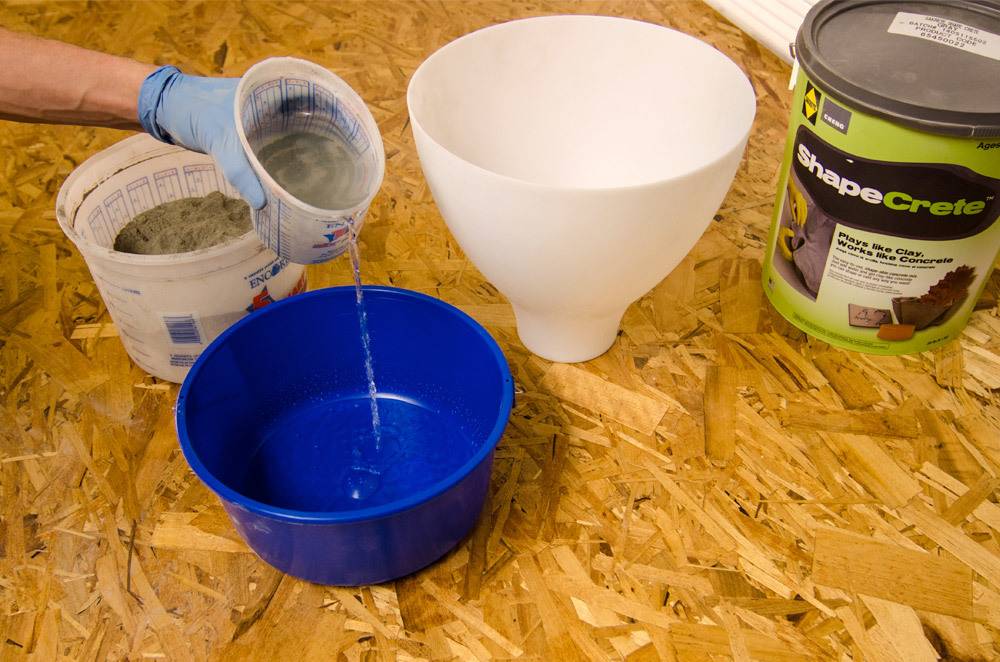
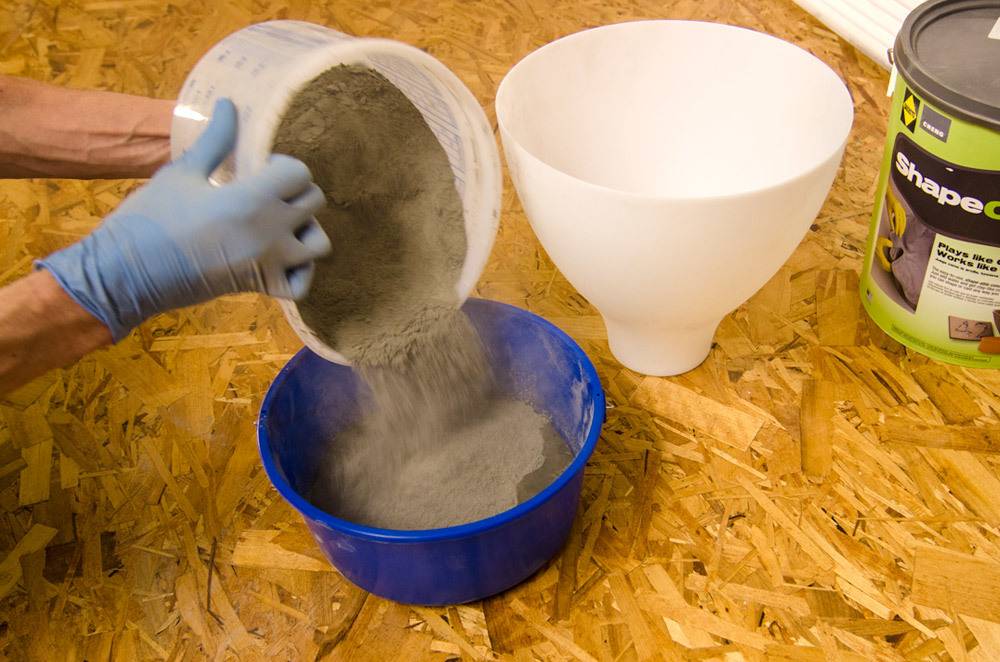
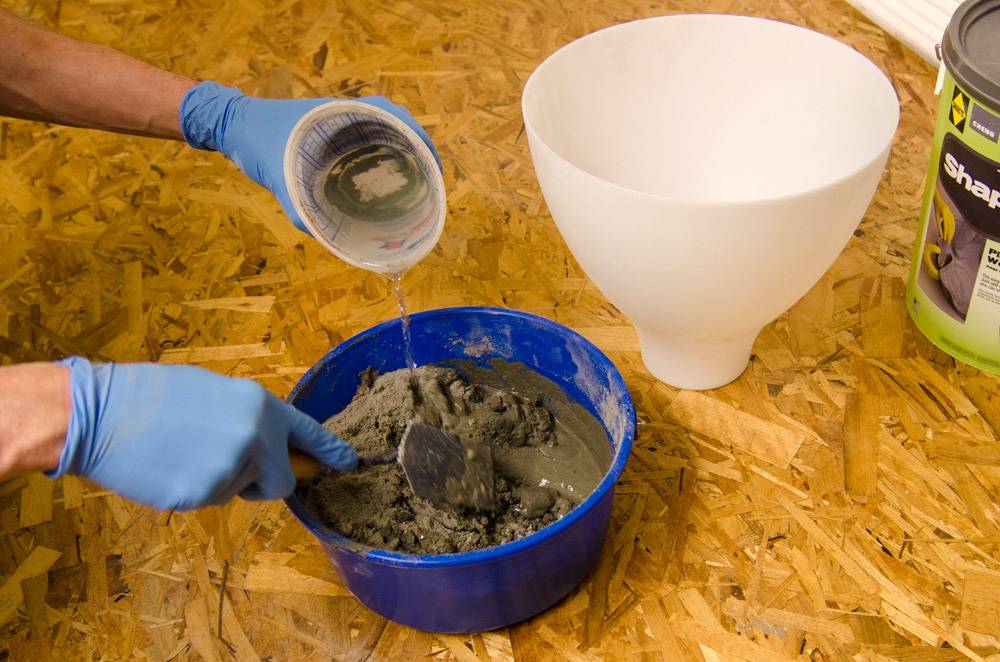
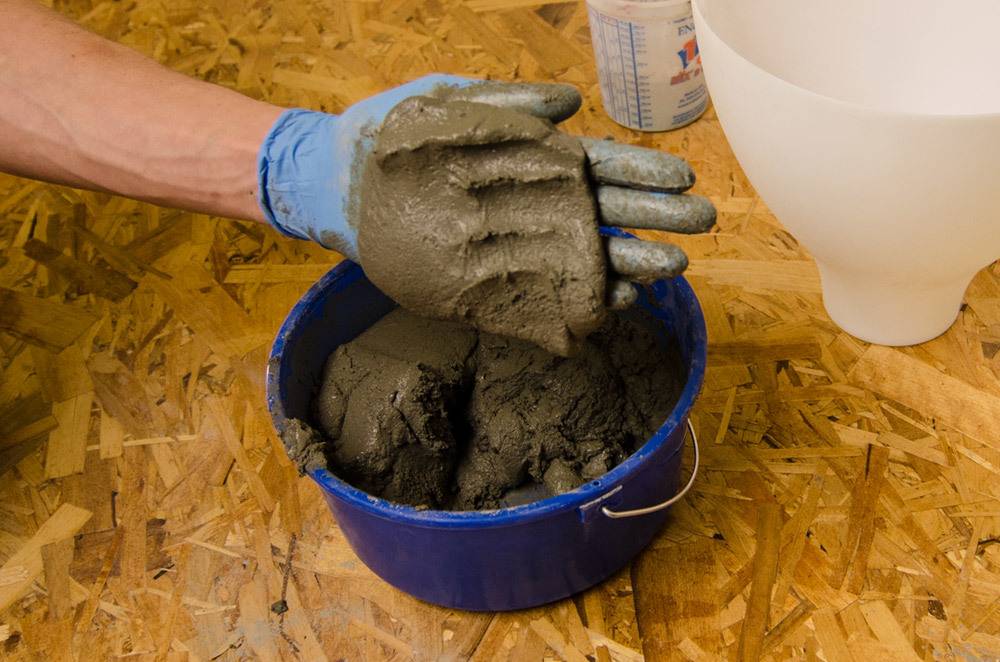
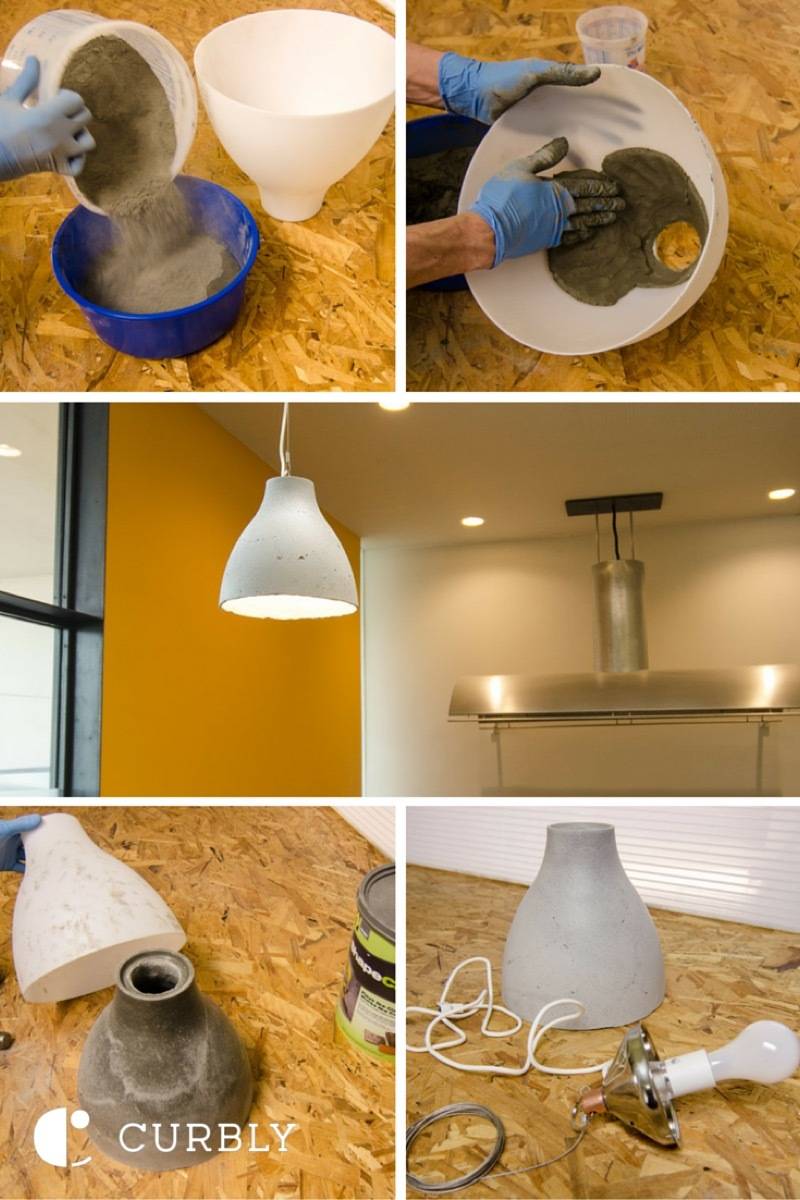
This project uses just under 7 pounds of ShapeCrete. Add some water to a mixing bucket, pour in ShapeCrete, then blend it together. You can use a trowel, mixing stick, or your hands, but we highly recommend you wear gloves. Add more water or powder until you reach a clay-like consistency. Watch the How-To Make a Clay Like Mix Video for more tips.
Step
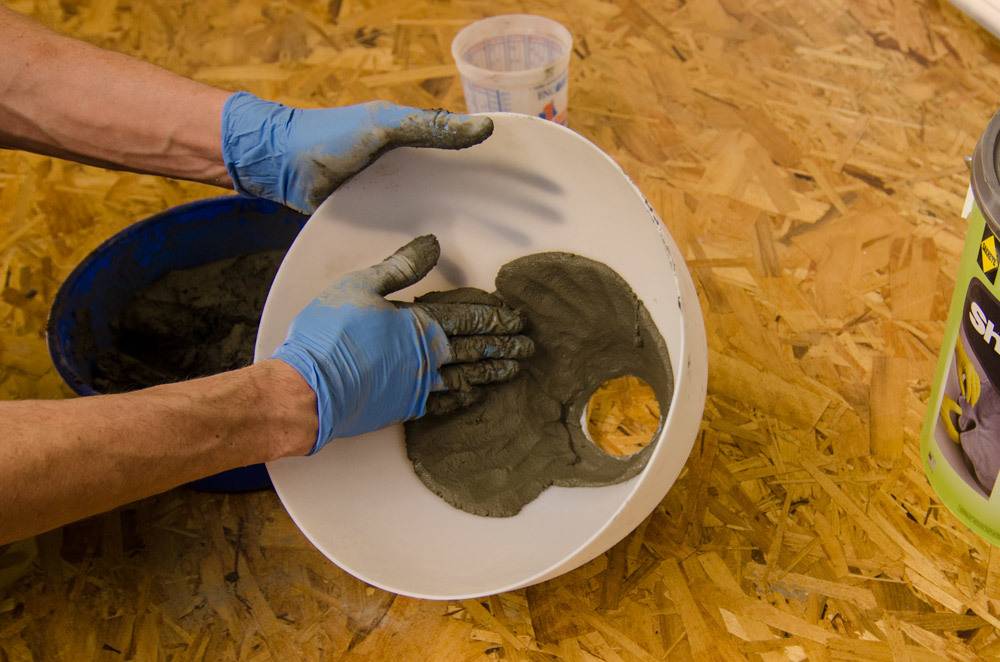
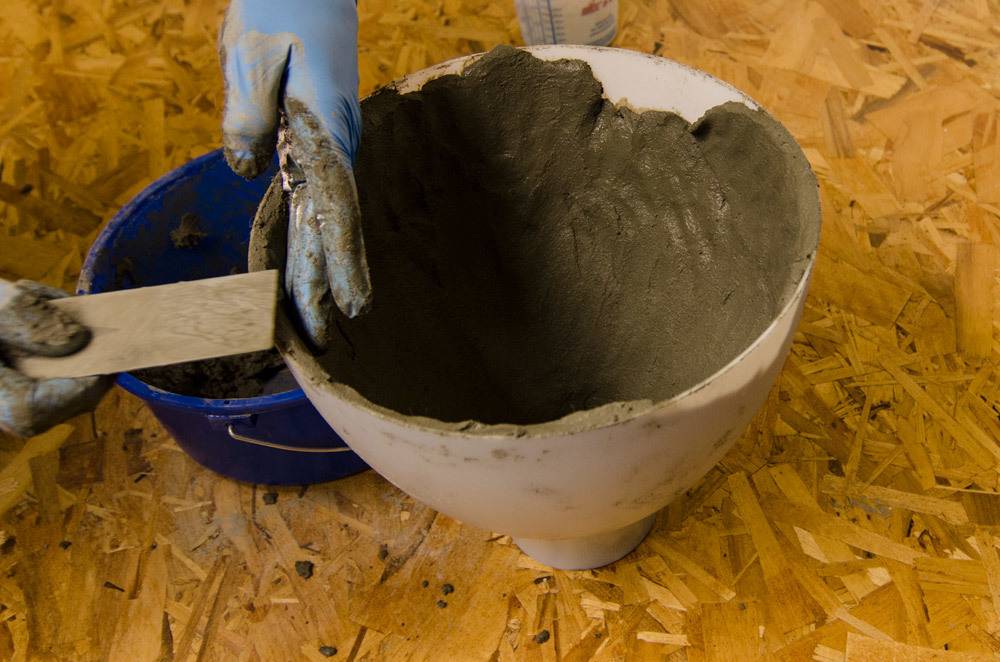
Start by pressing the mix into the bottom of the form. Hold the lamp shade on its side so the mix doesn’t slide down the walls. Try to maintain an even thickness of about 3/8”. Gradually work up until the form is completely packed. Smooth the top rim by hand or with a trowel. Cover the piece with plastic and wait about 48 hours for it to cure.

Step
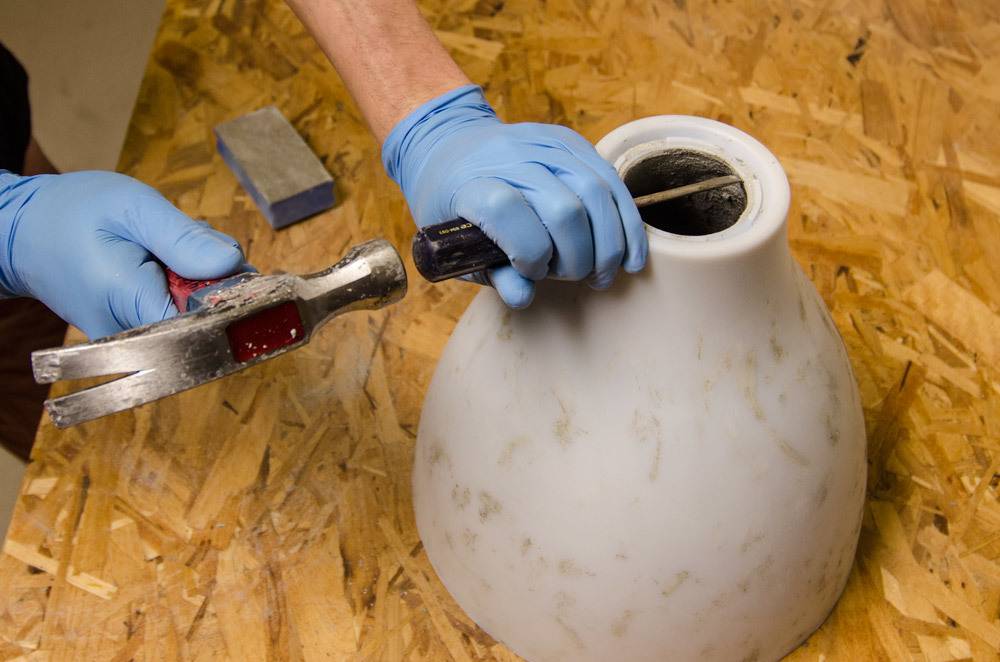
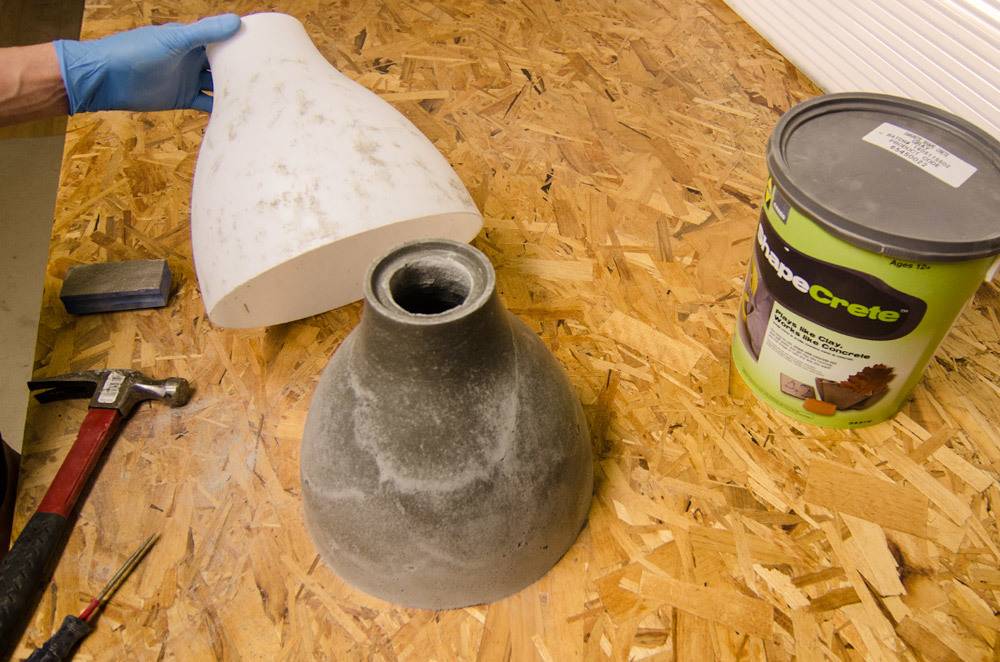
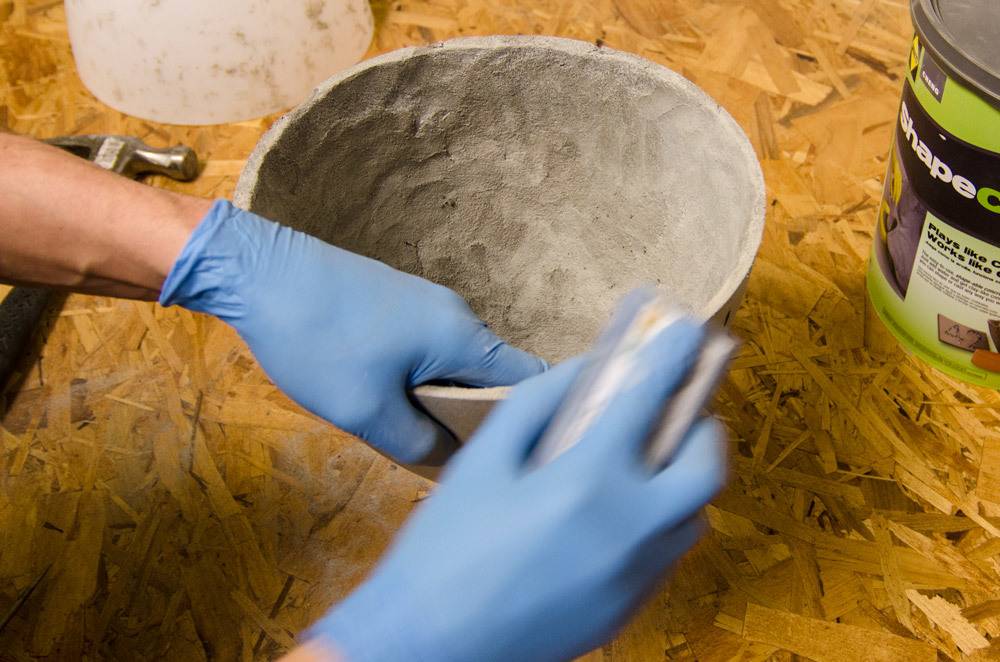
First sand away any ShapeCrete that hangs over the top edge of the plastic form. Gently tap just the edge of the plastic form with a hammer or mallet. Gradually you’ll start to see an air gap between the piece and the plastic form. Keep working around the form like this, gently tapping as you go.
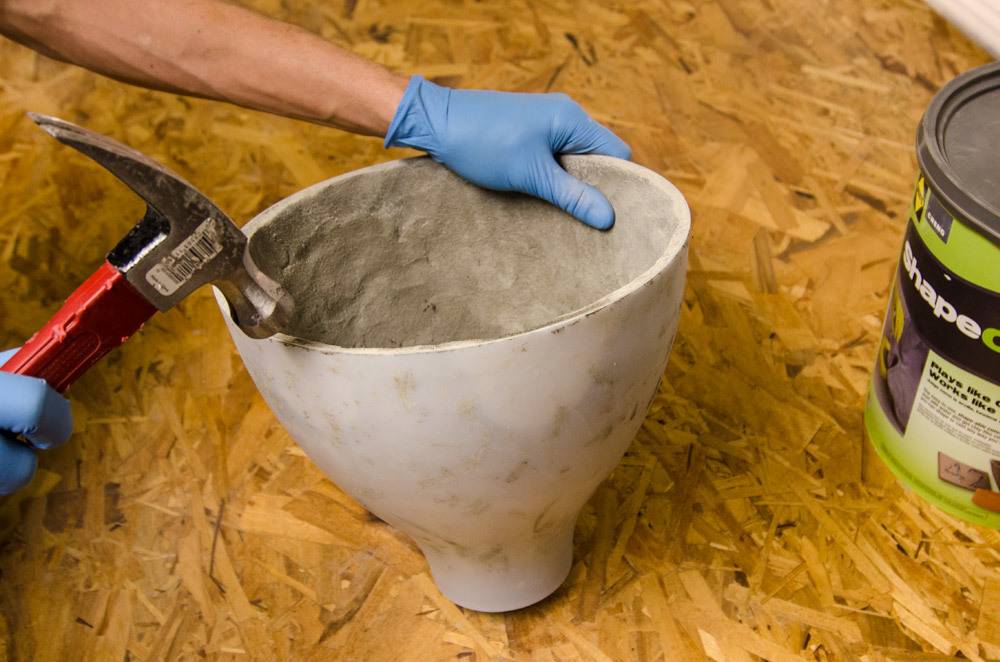
When it looks like the form is loose all the way around, use a small, flat screwdriver and gently pry between the form and the piece on the top edge. Be careful not to pry too hard or the piece could chip.
If the form is stuck, you can always score it with a utility knife and break it away. If you have an air compressor, a good trick is to shoot compressed air between the form and the concrete piece, this will help break the seal and the piece will pop right out.
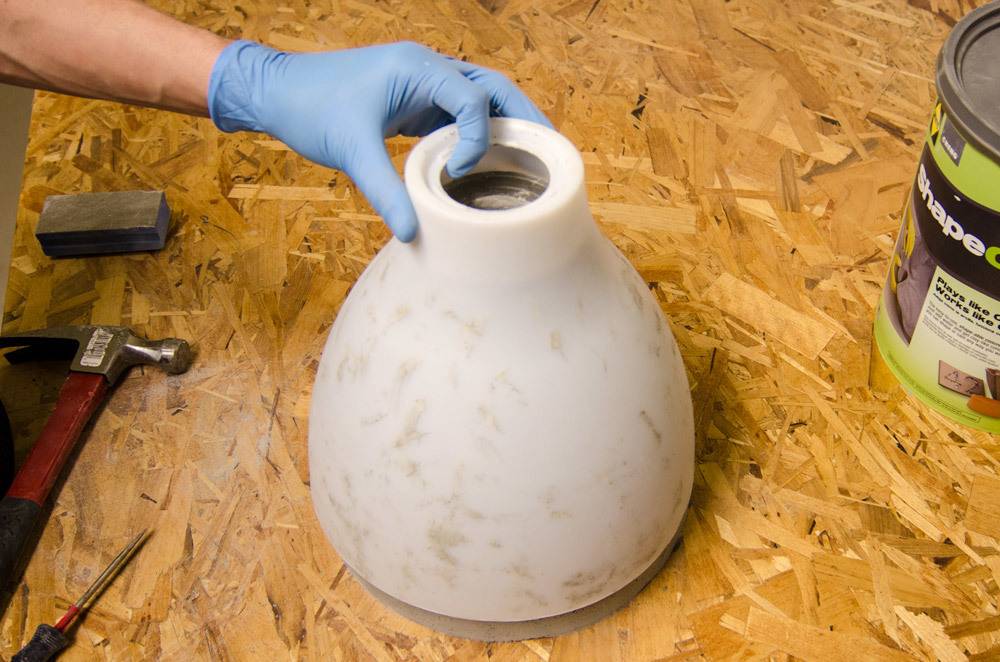
Another trick to aid de-molding is not to pack the mix all the way to the top. By leaving a 1/2” gap, you can flip the form over and tap it down on the table and the weight of the concrete helps the piece release from the form.
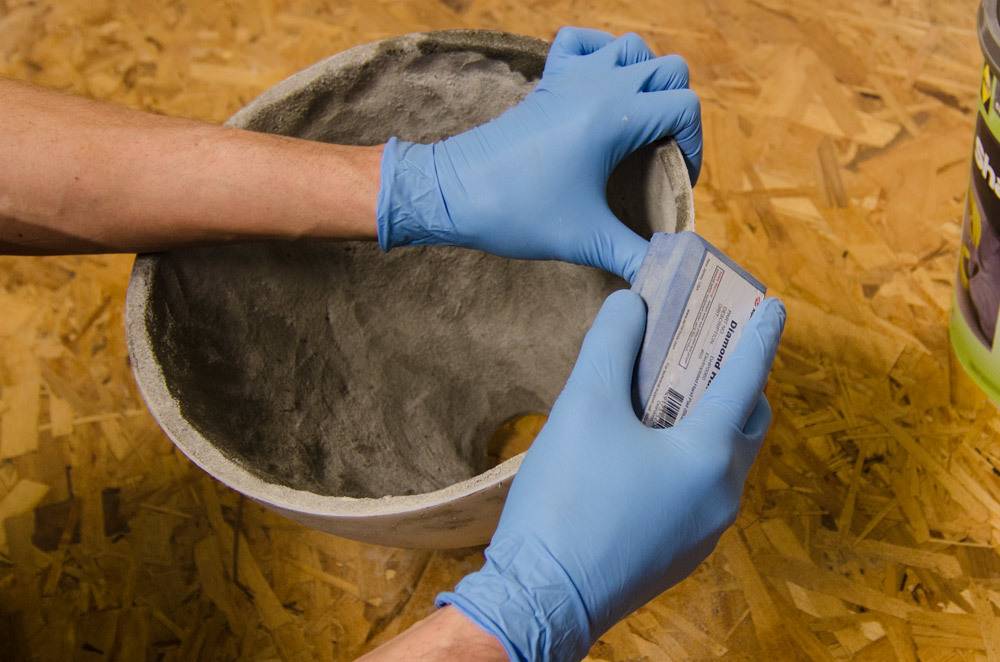
The last step before integrating the lighting is to sand the edges with diamond hand pads, sandpaper, or a file so they don’t chip.
Step
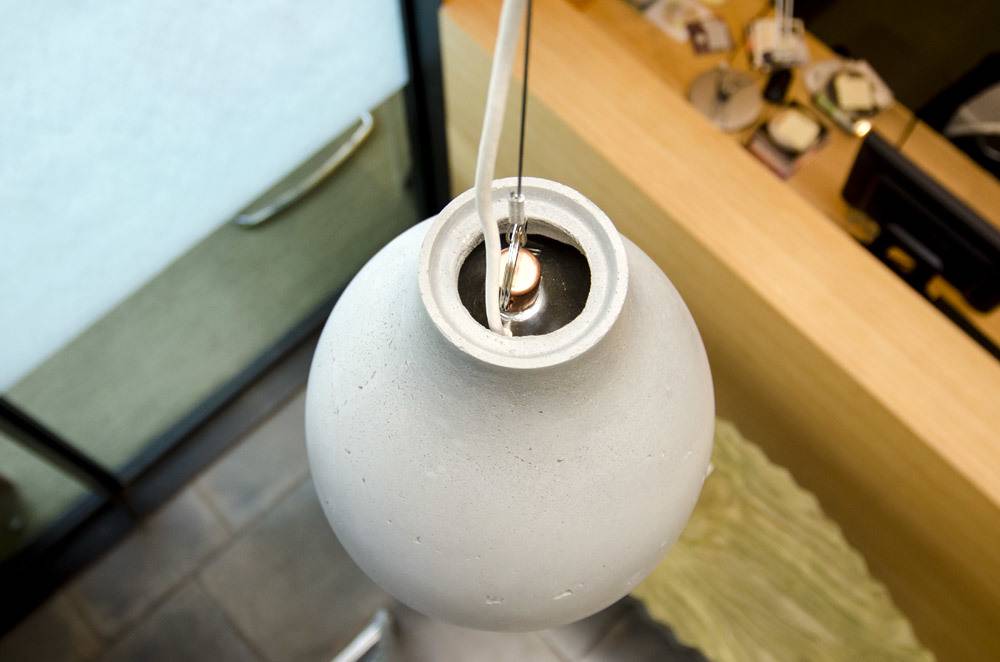
Your new, concrete lampshade will weigh between 6 and 7 pounds, so it’s too heavy to safely hang in the air by just the IKEA cord itself.
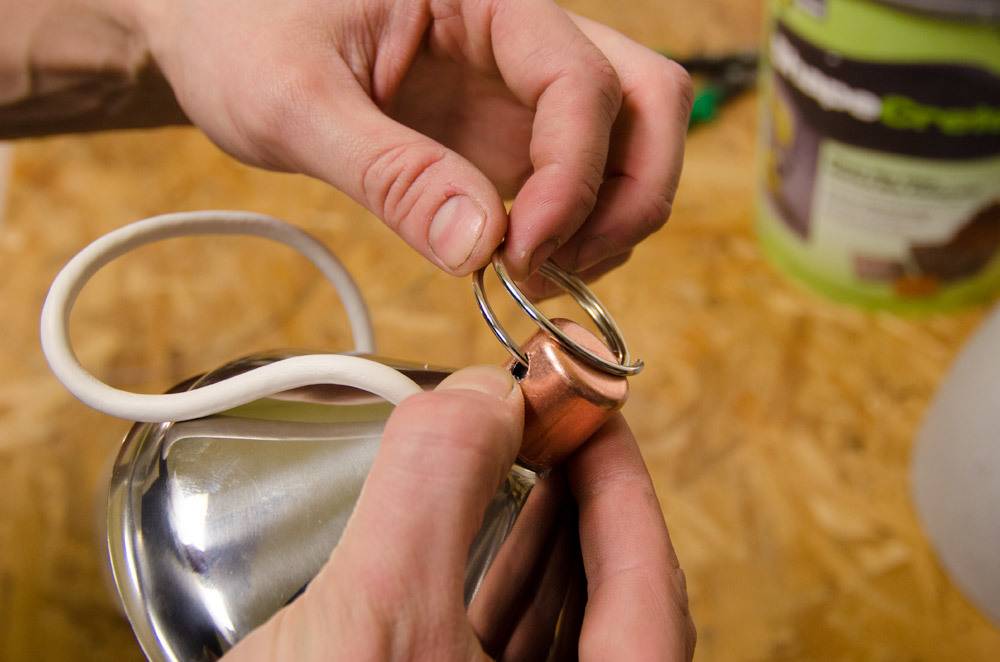
Our solution is to modify a metal funnel by drilling a few holes, routing the cord, gluing the IKEA fixture in place, and suspending everything with a large keyring and 1/16” stainless steel cable.
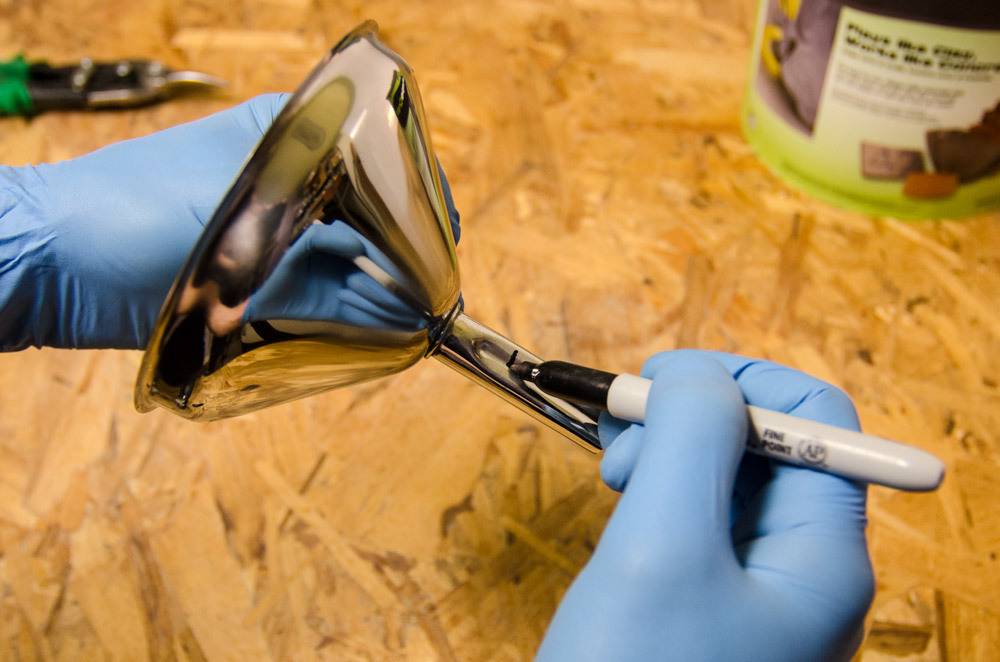
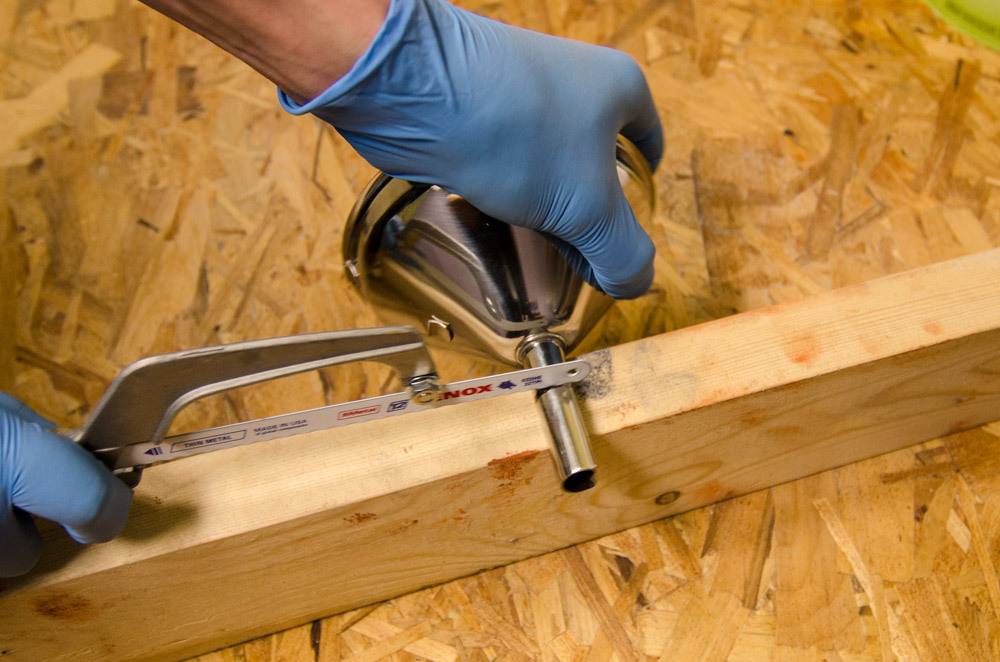
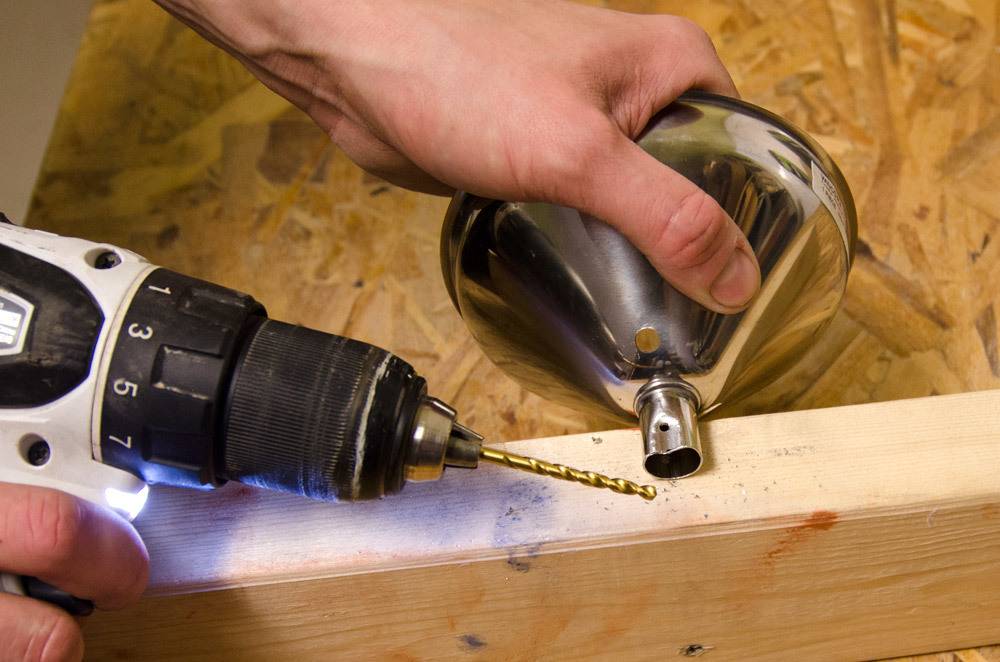
The first step is to remove the handle on the funnel with tin snips. Then mark about 1” up the funnel spout and cut off the excess. You can use a hacksaw or a rotary tool with a cut-off wheel.
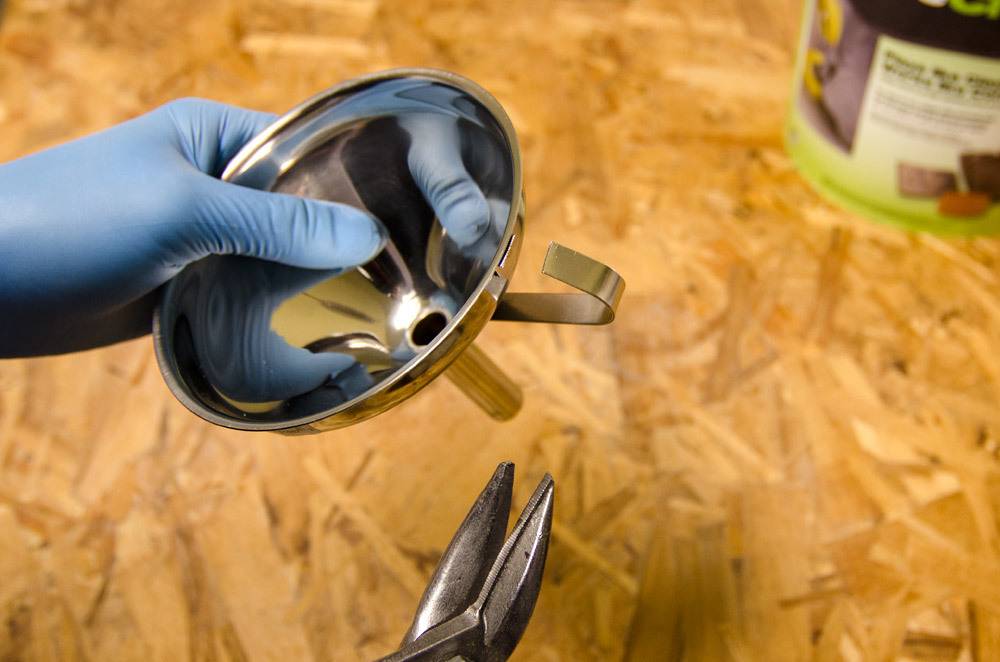
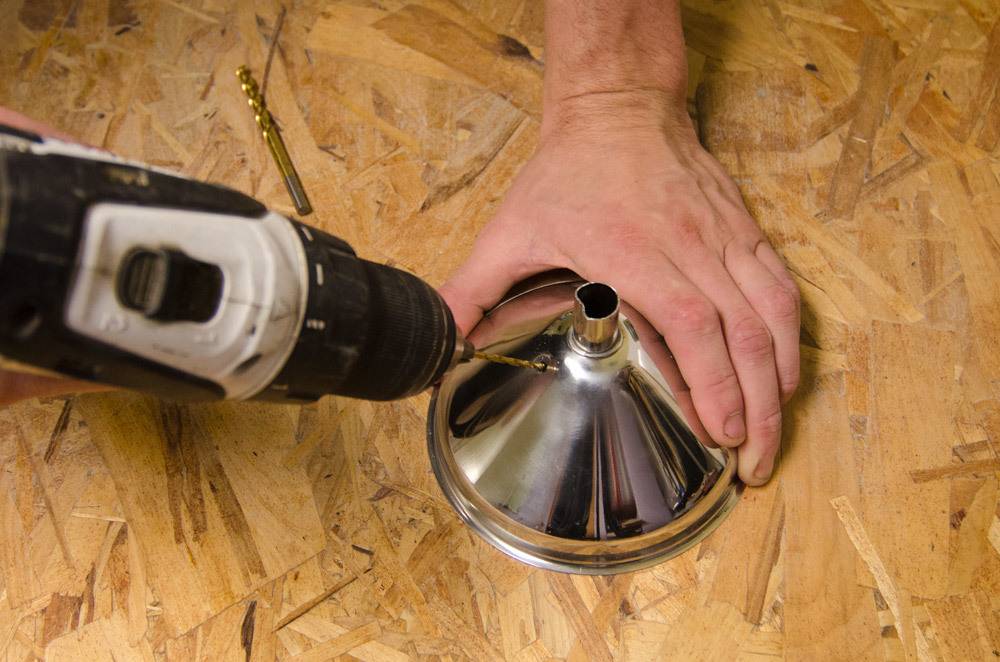
Drill a 1/4” hole near the top of the funnel. First mark the spot with a center punch, then drill a pilot hole, and then drill the 1/4” hole. Drill two 1/8” holes through the spout of the funnel. This is where the keyring will hang.
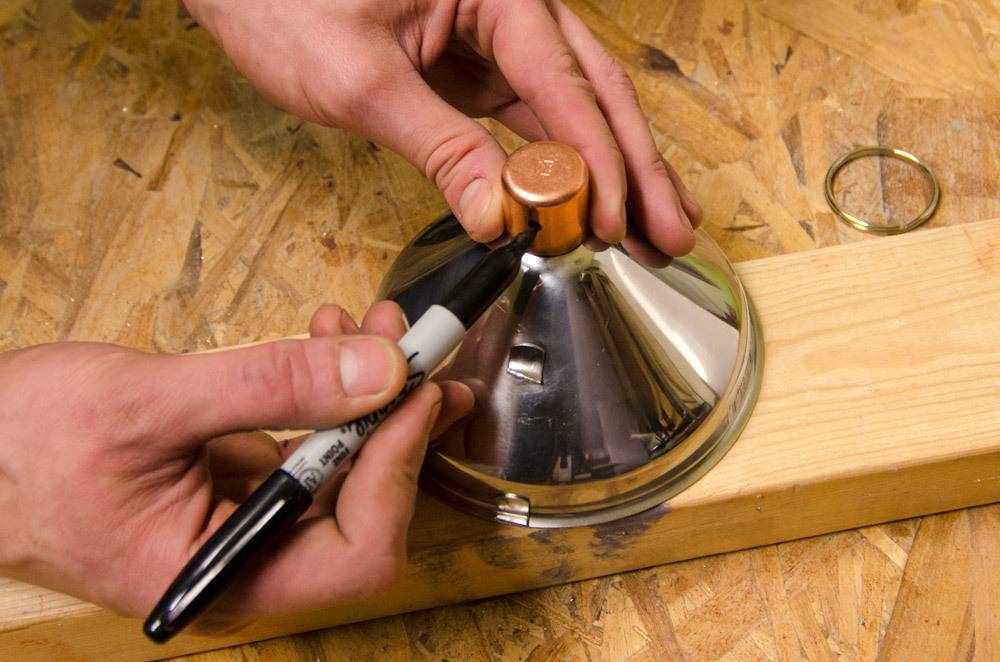
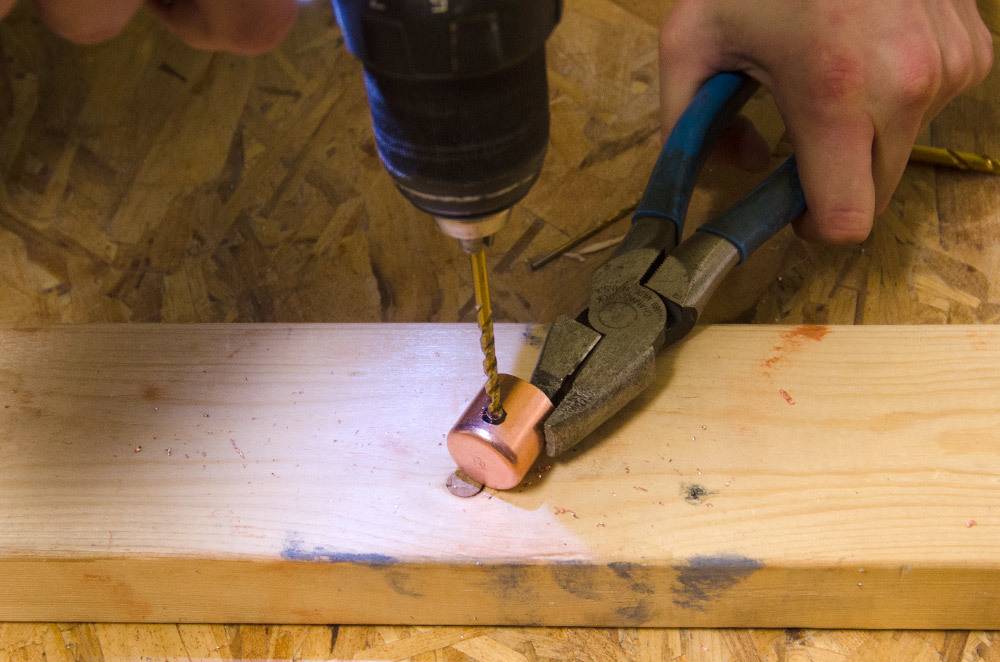
To give the top a finished look, we’re covering the hole with a 3/4” copper end cap. Mark where to drill, center punch the spot, then drill a pilot hole and then the 1/8” holes through the cap. Hold it with pliers or clamp it in a vice while you do this. Run a bead of silicone or glue and stick the copper cap in place.
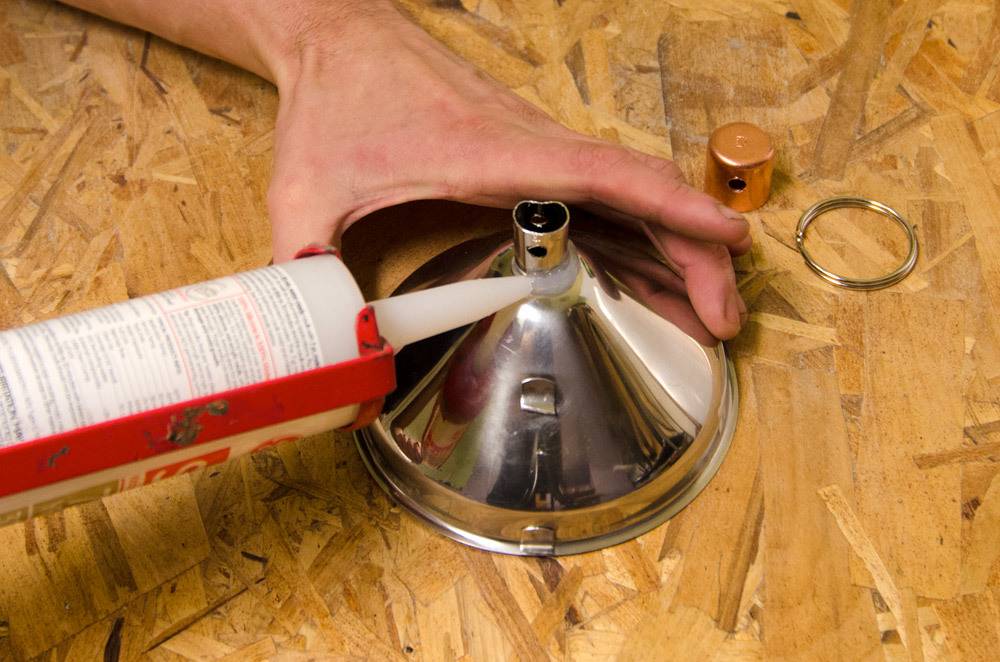
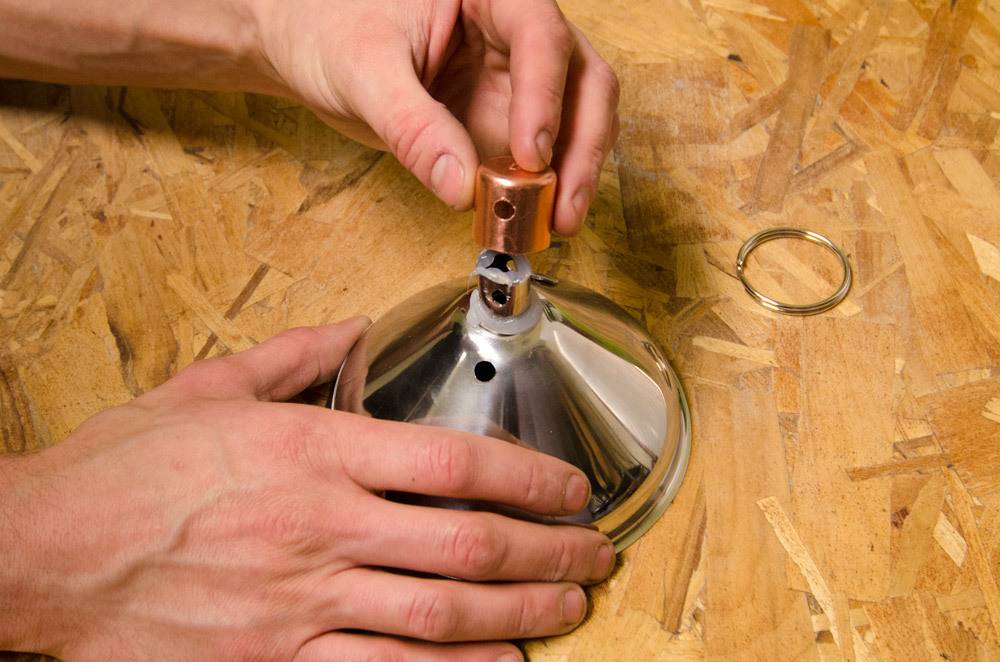
While the glue is drying, hot-glue the light socket to the inside of the funnel. Tack it in place, check that it’s centered, and then glue around the perimeter. Run the keyring through the copper and cap, and through the holes in the funnel. Crimp the ends of the 1/16” wire and get ready for final assembly.


Step
The light can be wired into existing ceiling wiring, or you can install a plug on the end of the cord and plug the lamp into the wall.
Ideally you’ll be able to install a sturdy ceiling hook in a joist, but if not there are a few ways to install the hook in drywall. It’s really important that the ceiling hook is properly installed, so get help if you’re unsure.
That’s it! Enjoy your unique concrete lamp. ShapeCrete can be colored with concrete pigment, stained, or painted so you can add your own creative touch.
Help us share this project on Pinterest!
This is a guest post written by the team at ShapeCrete. We weren’t paid to publish this content; we just like the product and wanted to share the project idea with our readers.
Hi, I really love this DIY project. Can I share this in my blog ?