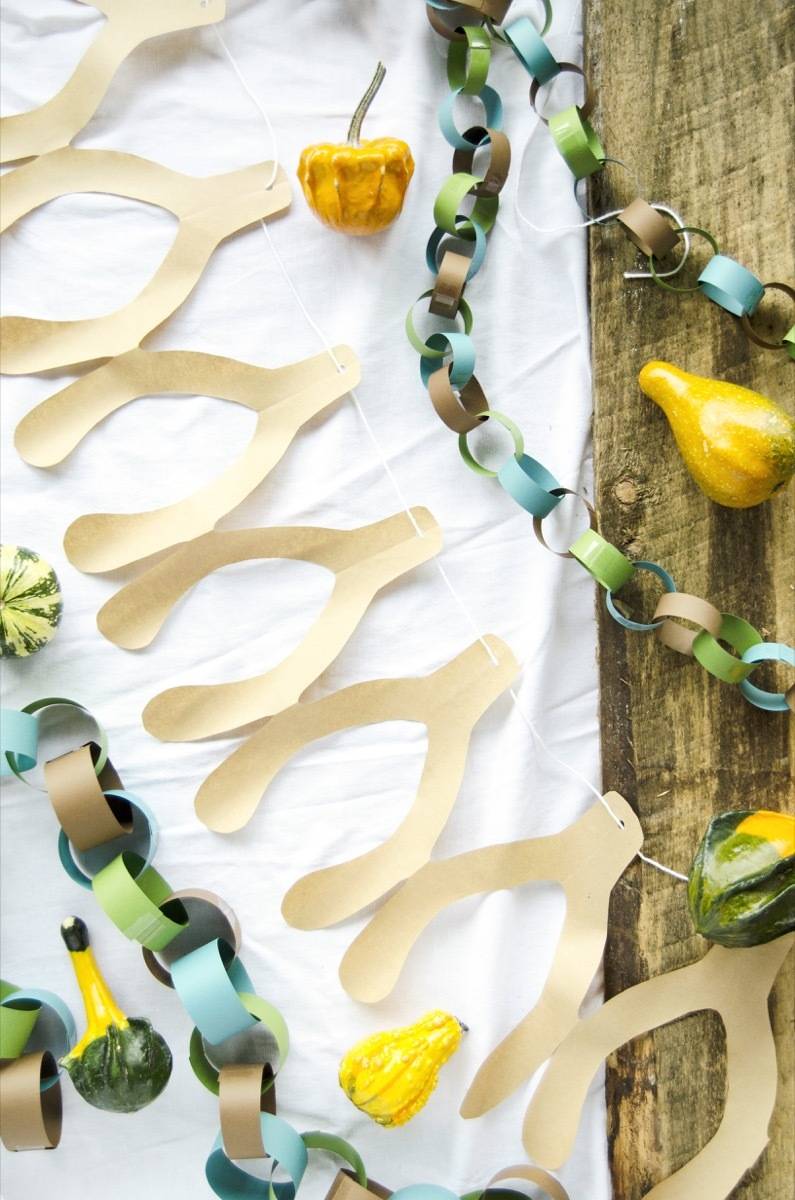
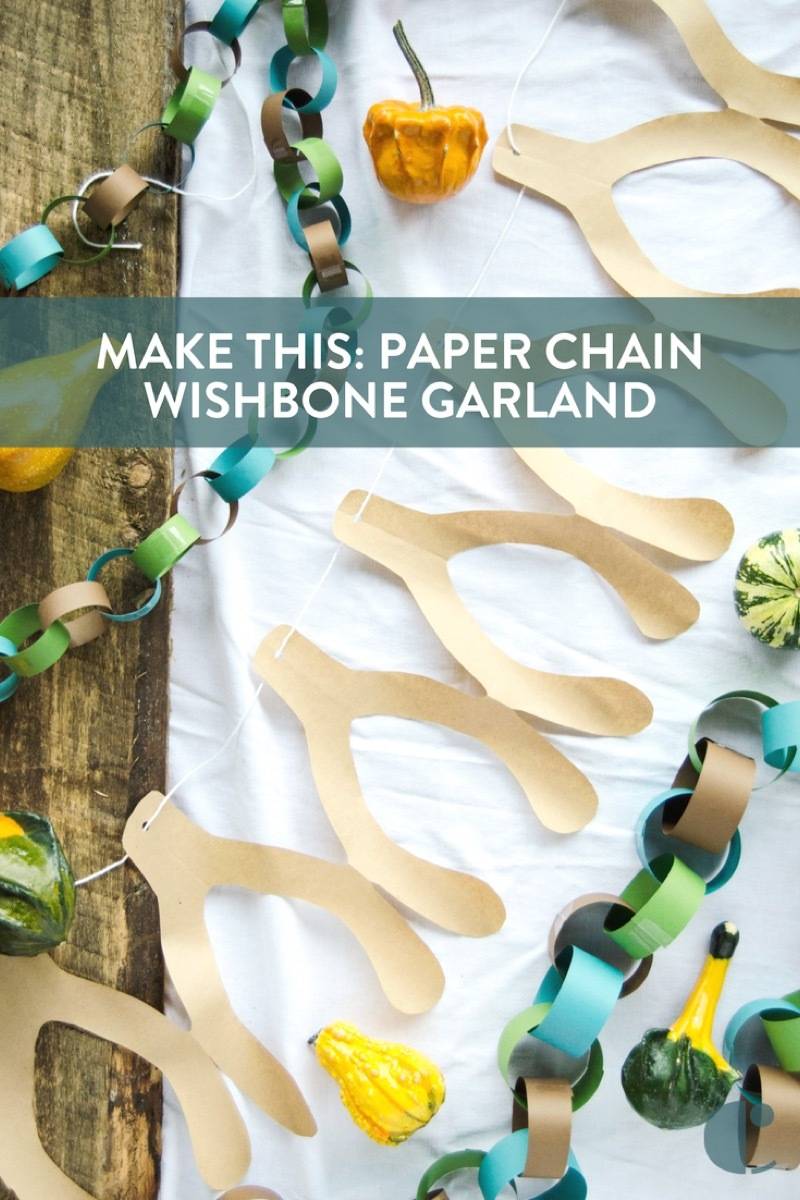
Decorative paper chains bring instant charm to any celebration, and this wishbone garland puts a festive twist on the classic craft.

Using the same accordion-folding technique you might remember from making paper doll chains in elementary school, you can create an eye catching Thanksgiving decoration in under 30 minutes for just pennies.
Whether you’re looking for budget-friendly table decor or a fun activity to do with kids, this decorative paper chain adds personality and warmth to your holiday gathering.
The beauty of paper chain garlands is their versatility. You can customize the colors, adjust the size, and adapt the shape to match your style and space.
This wishbone design is perfect for Thanksgiving, but once you master this simple technique, you’ll find yourself creating decorative paper chains for every season and celebration.
Why Decorative Paper Chains Work for Any Celebration
Before we dive into the how-to, let’s talk about why paper chain decorations deserve a spot in your crafting repertoire:
Budget-Friendly: Unlike expensive store-bought garlands, this decorative paper chain costs almost nothing to create. You likely have everything you need already at home.
Quick and Easy: This is a true 30-minute project that delivers impressive results. No special skills required—if you can fold paper and use scissors, you can make this.
Kid-Friendly Activity: Get the whole family involved! Children love the accordion-folding technique, and it’s a great way to build excitement for the holiday while keeping little hands busy.
Customizable: Choose paper in any color or pattern to match your existing decor. Go rustic with brown kraft paper, elegant with metallic gold, or playful with autumn patterns.
Reusable: Store your paper chain garland carefully, and you can bring it out year after year. It’s a sustainable alternative to disposable decorations.
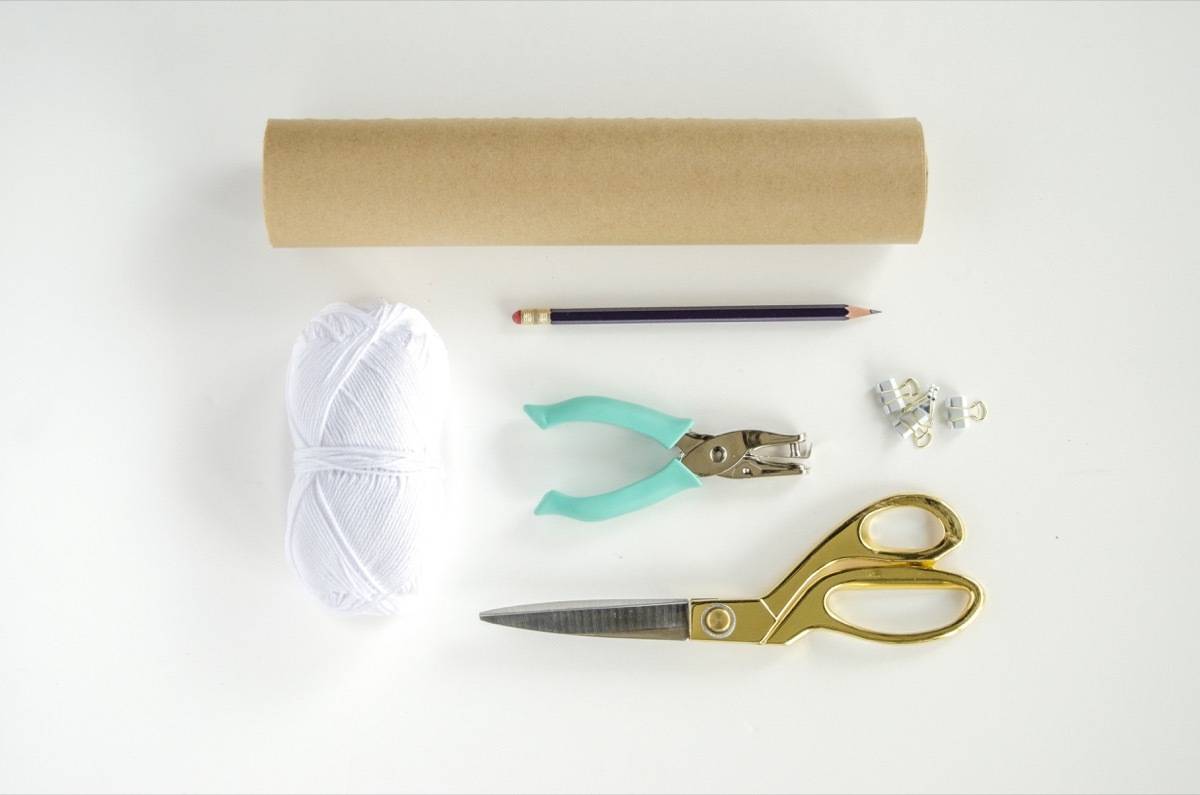
Materials You’ll Need
Gathering your supplies is simple—most of these items are craft box staples:
- Roll of paper or wrapping paper (brown kraft paper creates a rustic look; patterned paper adds visual interest; avoid paper that’s too thin or it will tear)
- Wishbone Paper Chain Template (free download)
- Scissors (sharp scissors make cutting easier and cleaner)
- One-hole punch (for creating hanging holes)
- Pencil (for tracing the template)
- Ribbon, cord, or string (for hanging your decorative paper chain)
- Binder clips (to hold layers together while cutting)
Step-by-Step: Creating Your Decorative Paper Chain
Prepare Your Template and Paper (5 minutes)
Start by printing the Wishbone Paper Chain Template and cutting out the wishbone shape. You’ll notice dotted lines on the template—these indicate areas you should NOT cut, as they’re the connection points that keep your paper chain linked together.
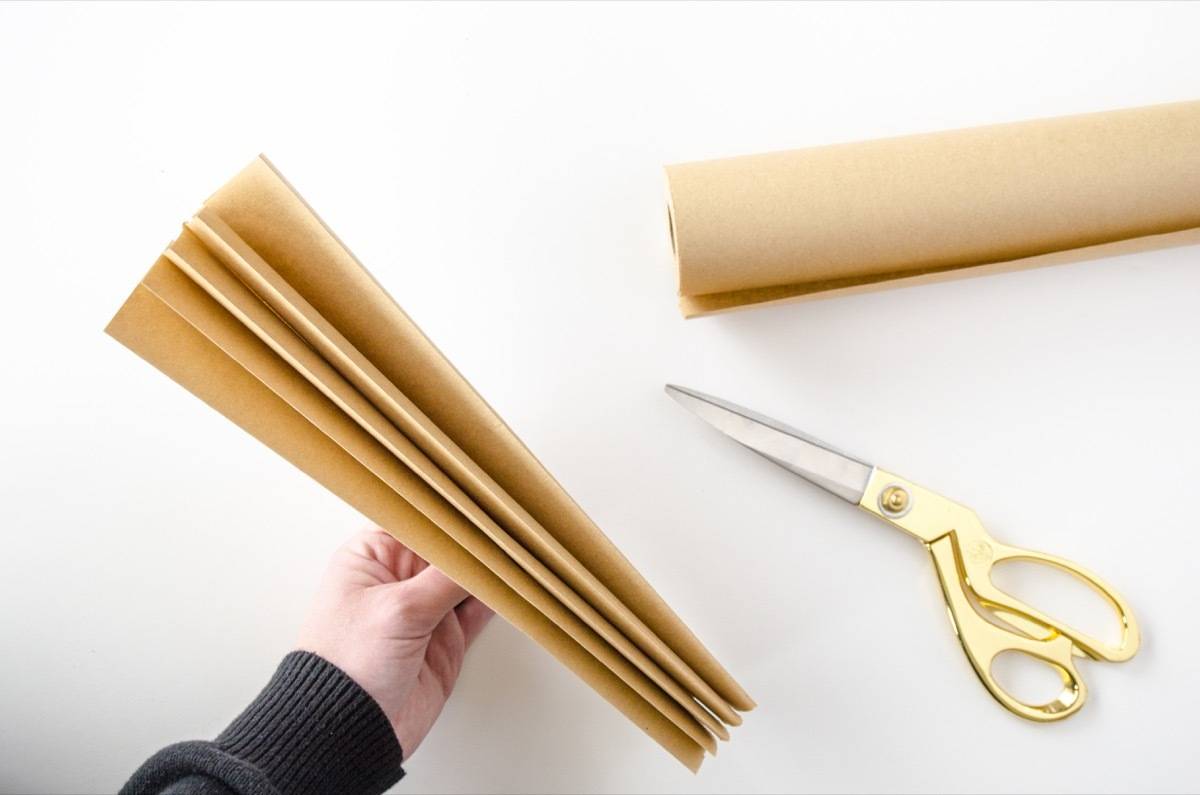
Next, fold your paper accordion-style (fold left, fold right, fold left, and so on). The width of each fold should match the width of your template—approximately 3.5 inches. Don’t worry about being perfectly precise, but try to keep your folds relatively even for the best results.
Pro tip: Crease each fold firmly with your fingernail or the edge of a ruler. Crisp folds make cutting easier and create cleaner lines in your finished decorative paper chain.
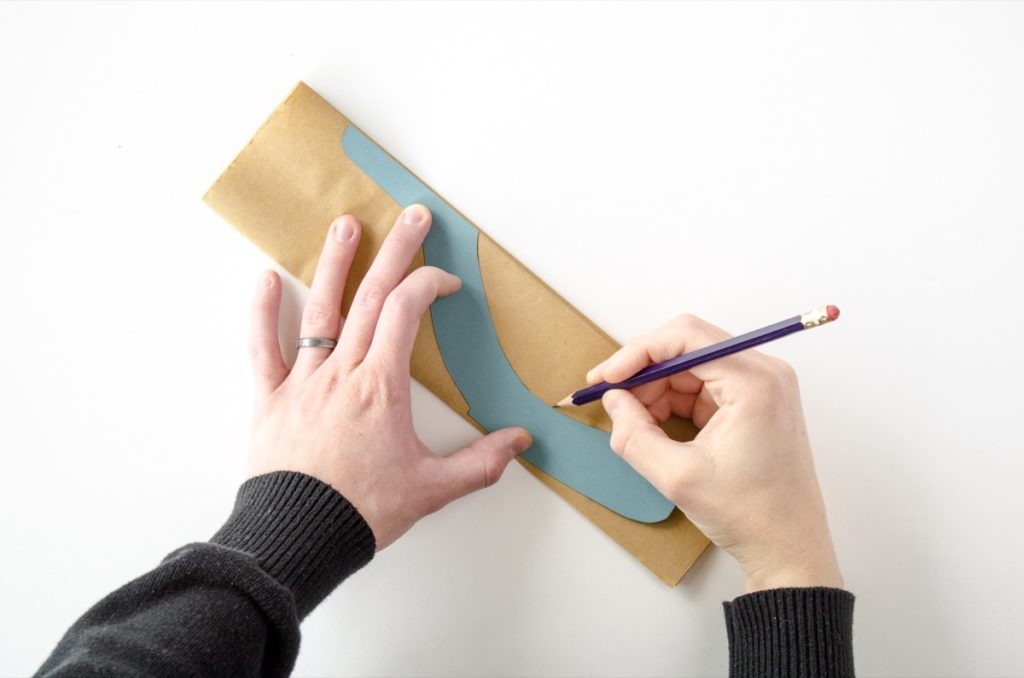
Transfer the Wishbone Design (3 minutes)
Place your cut-out template on the front panel of your accordion-folded paper. Position it so the dotted lines align perfectly with the fold creases—this is crucial for keeping your paper chain connected!
Use your pencil to trace around the template. You only need to trace on the top layer since you’ll be cutting through all the layers at once.
Important: Double-check that the dotted lines match up with your folds before you start cutting. This simple check prevents the disappointment of a chain that falls apart.
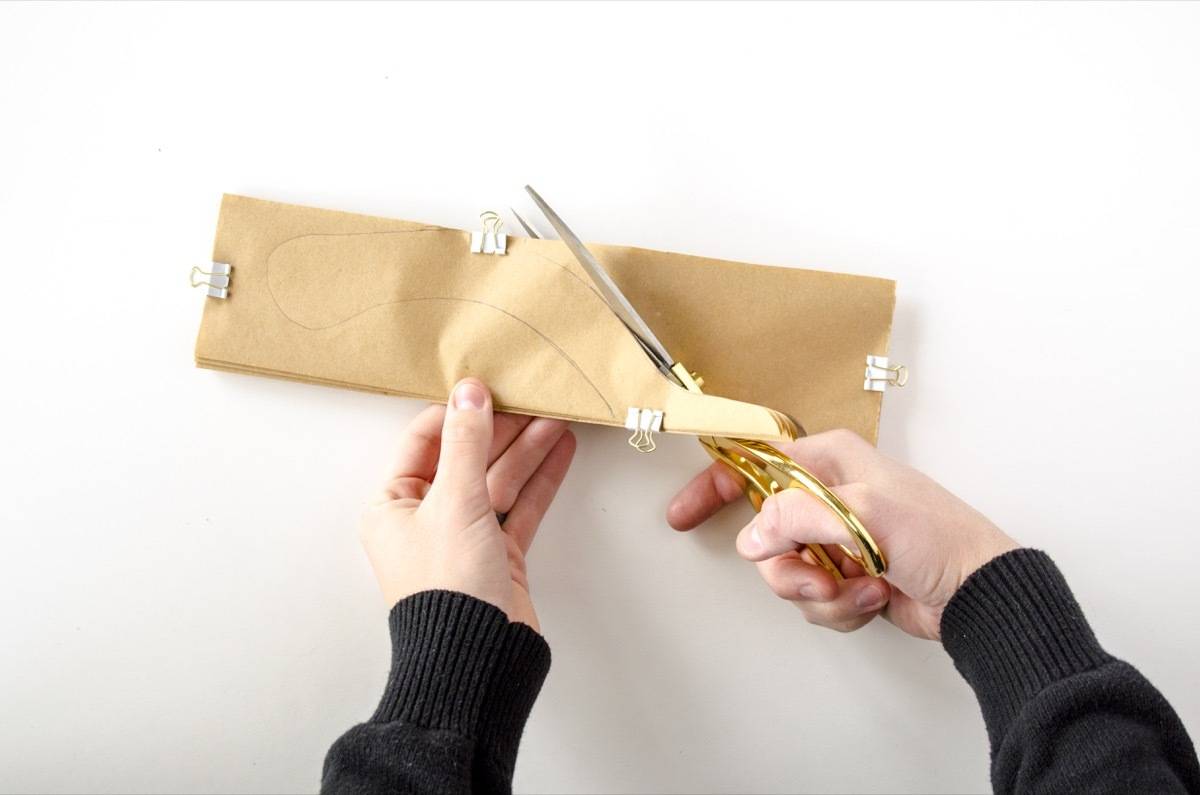
Cut Your Paper Chain Carefully (5-7 minutes)
Here’s where your decorative paper chain really takes shape! Use binder clips to secure your accordion layers together—this prevents them from shifting while you cut and ensures all your wishbones match.
Carefully cut along the traced lines, following the outline of the wishbone. Take your time and use smooth, steady cuts for the cleanest edges.
Critical reminder: Do NOT cut across the areas where the dotted lines appear on your template. These connection points are what keep your paper chain linked. If you accidentally cut through one, don’t worry—you can always tape it back together or simply have two shorter garlands!
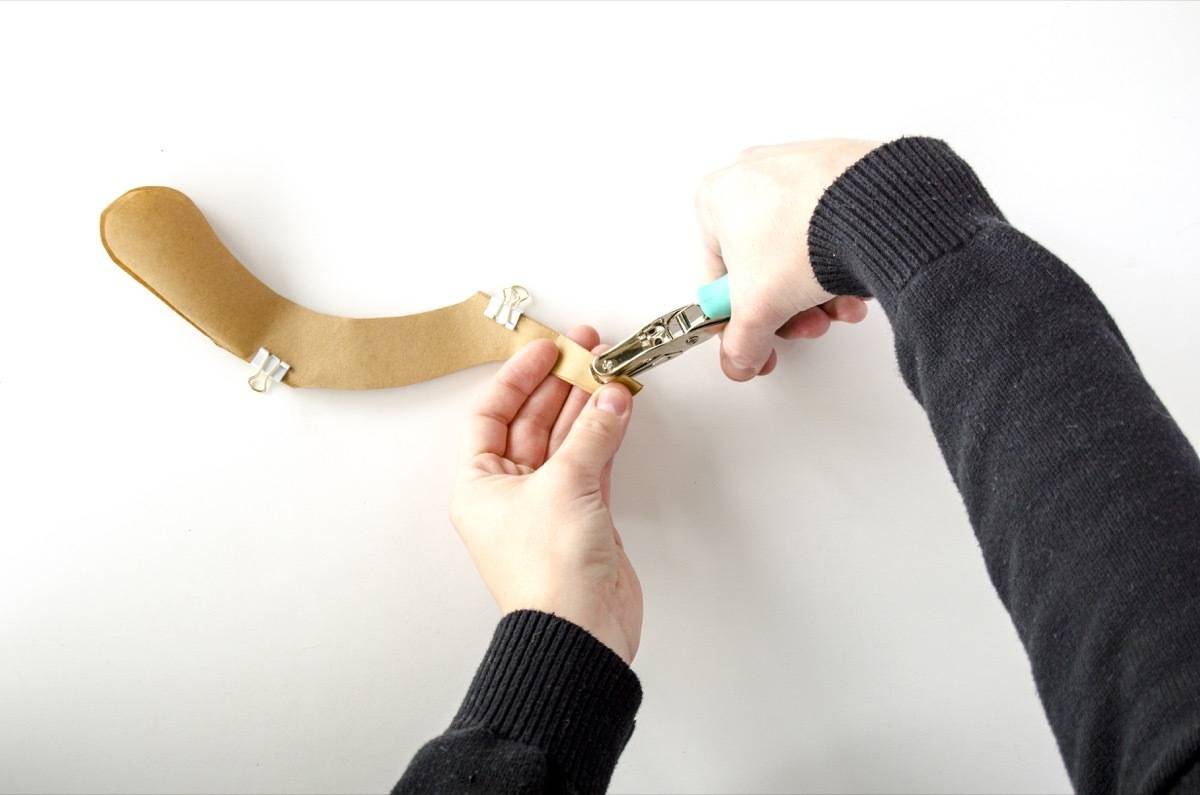
Create Hanging Holes (3 minutes)
Keep your accordion folded and secured with binder clips. Position your one-hole punch at the top of the wishbone shape, centering it but letting the punch hang about halfway off the edge. This creates a half-circle notch on the fold.
When you unfold your decorative paper chain, these half-circles on each side will align to create complete holes through which you can thread your hanging cord. Pretty clever, right?
Variation: If you don’t have a hole punch, you can carefully cut small slits with scissors or simply tape the wishbones directly to ribbon.
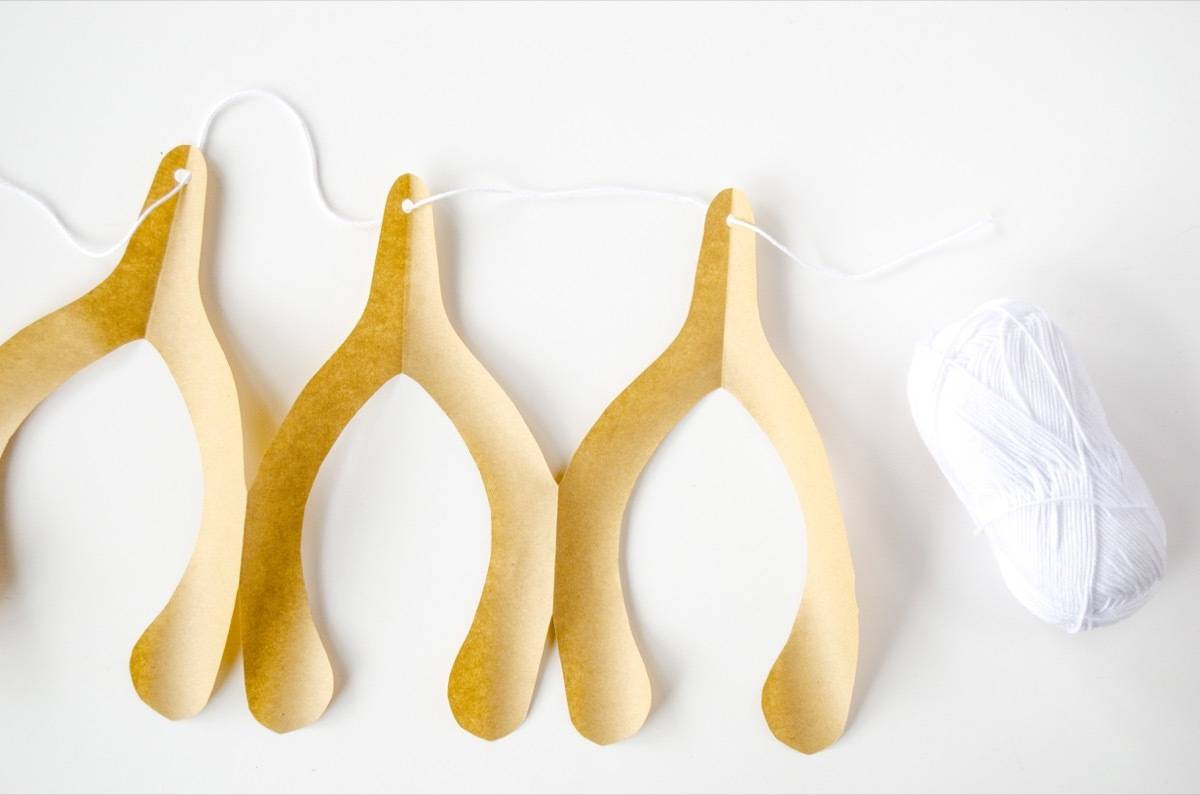
String and Display Your Garland (5 minutes)
Gently unfold your decorative paper chain—this is the most satisfying moment when you see your connected wishbones revealed!
Thread ribbon, cord, or yarn through the holes at the top of each wishbone. Space them evenly along the ribbon, or cluster them closer together for a fuller look.
Optional finishing touch: If the creases in your paper chain bother you, quickly press each wishbone with a dry iron on medium heat. This smooths out the folds and gives your garland a more polished appearance.
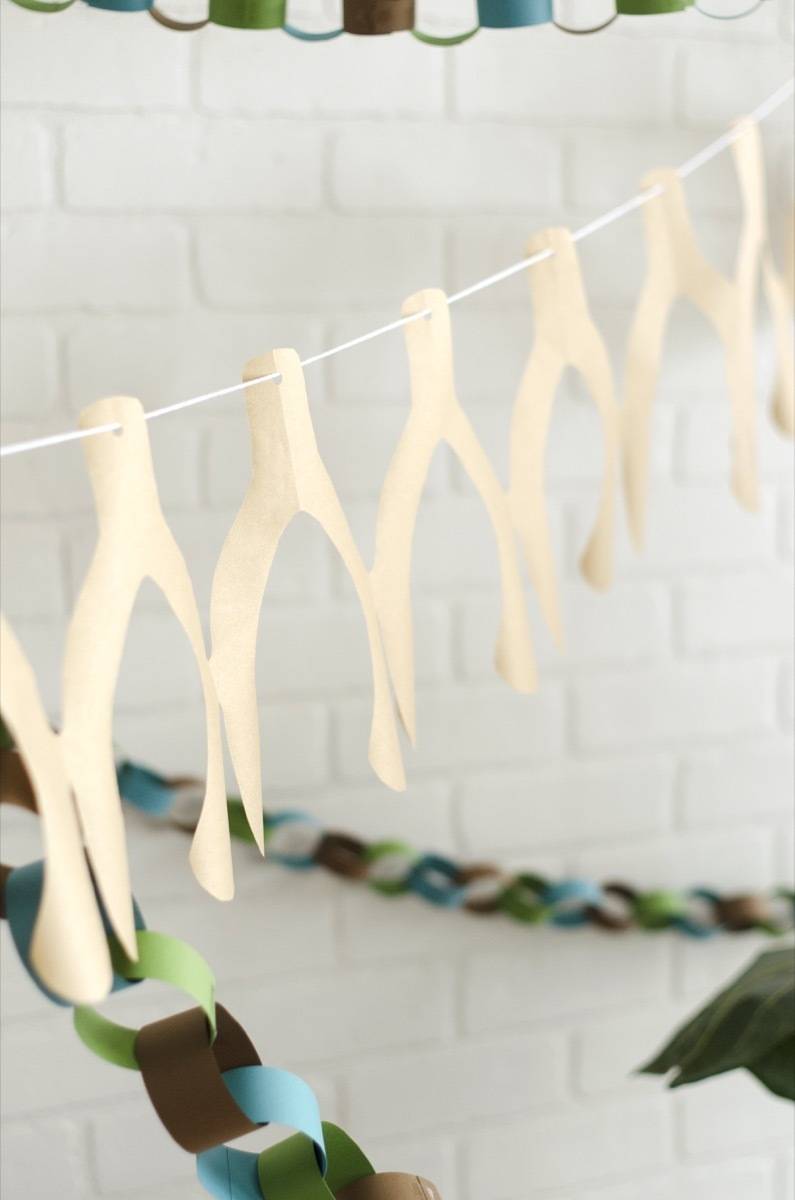
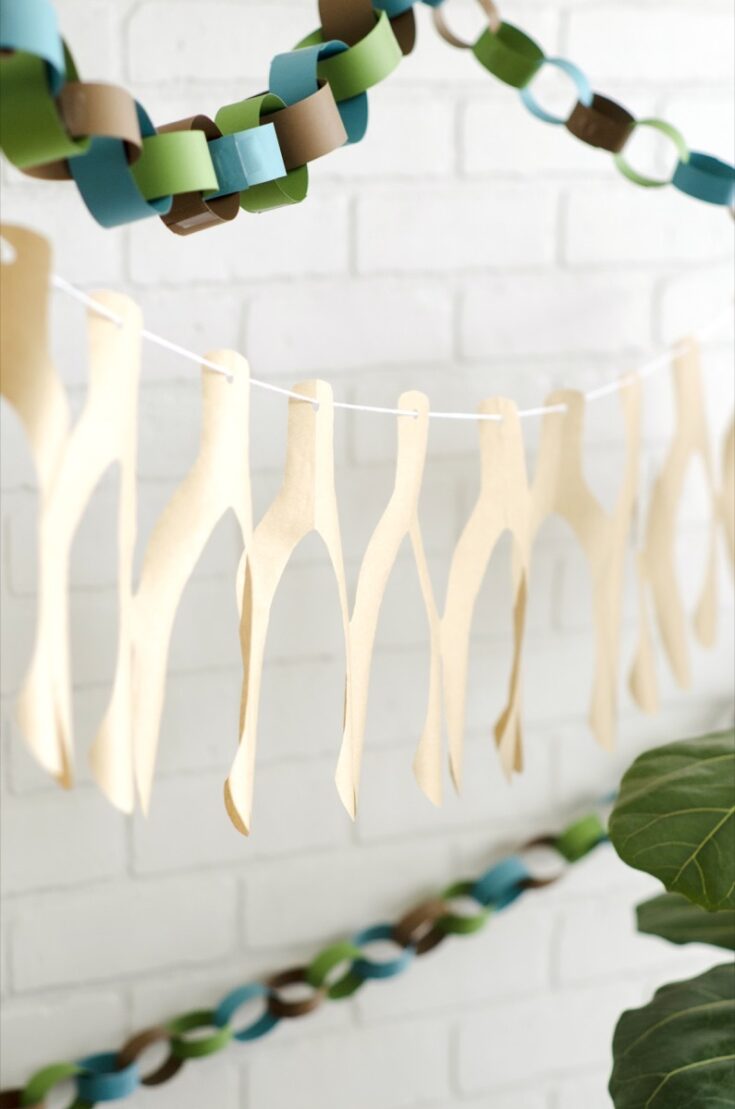
Now hang your decorative paper chain and step back to admire your handiwork!

Styling Your Decorative Paper Chain Garland
This wishbone paper chain looks beautiful in so many settings:
Mantel Display: Drape your garland across your fireplace mantel, letting it swag naturally between command hooks or decorative clips.
Table Runner Alternative: Lay your paper chain down the center of your Thanksgiving table for a unique, conversation-starting centerpiece.
Window Decoration: String your garland across a window frame to catch the light—especially pretty with translucent or patterned paper.
Layered Look: Combine multiple paper chains in different colors or sizes for added dimension and visual interest.
Doorway or Archway: Welcome guests with a festive garland framing your entryway.
Tips for Chain Success
Choose the Right Paper Weight: Medium-weight paper works best. Copy paper can tear easily, while cardstock may be too thick to cut multiple layers. Kraft paper, wrapping paper, and scrapbook paper are ideal.
Keep Folds Consistent: Try to make your accordion folds as even as possible. Uneven folds lead to wonky wishbones, though honestly, the handmade charm means slight imperfections just add character!
Sharp Scissors Are Essential: Dull scissors struggle to cut through multiple paper layers and can leave ragged edges. This is the time to use your sharpest pair.
Don’t Rush the Cutting: Taking your time with the cutting step results in cleaner edges and reduces the chance of accidentally cutting through connection points.
Test First: If you’re using a paper you haven’t tried before, make a small test chain first to ensure it has the right weight and durability.
Common Mistakes to Avoid
Cutting Through Connection Points: This is the number one mistake! Always be aware of where your folds are and avoid cutting across them. When in doubt, leave a little extra paper at the connection rather than cutting too close.
Using Paper That’s Too Thin: Tissue paper and thin gift wrap tear too easily for this project. Stick with papers that have some body to them.
Making Folds Too Narrow: If your accordion folds are narrower than your template, you’ll cut through your connection points. Always match fold width to template width.
Forgetting the Hole Punch Step: It’s easy to get excited and unfold your chain before punching holes. Remember to do this while everything is still accordion-folded!
Uneven Spacing When Hanging: Take a moment to adjust your wishbones evenly along the ribbon for the most polished look.
Storing Your Paper Chain for Next Year
To keep your decorative paper chain in great shape for future celebrations:
- Gently fold or loosely roll the garland
- Wrap it in tissue paper to prevent creasing
- Store flat in a box or large envelope
- Label the container so you remember what’s inside
- Keep in a cool, dry place away from moisture
With proper storage, your paper chain garland can last for many Thanksgivings to come!
Beyond Thanksgiving: Year-Round Paper Chain Ideas
While this wishbone design is perfect for Thanksgiving, don’t pack away your accordion-folding skills when the holiday ends! This decorative paper chain technique adapts beautifully to any celebration:
- Birthday parties with balloon or cake shapes
- Baby showers with onesie or rattle designs
- Graduation parties with cap and diploma chains
- Seasonal decor with flowers, leaves, or seasonal icons
- Room decor for kids’ spaces with their favorite characters or themes
The accordion-fold method is a simple technique that opens up endless creative possibilities. Each time you make a decorative paper chain, you’ll get faster and more confident with the process.
How To Make DIY Paper Wishbone Garland
Learn how to make a decorative paper chain garland with this easy wishbone template. This budget-friendly Thanksgiving decoration takes just 30 minutes and uses simple accordion-fold techniques.
Materials
- Roll of paper (or wrapping paper)
- Wishbone Paper Chain template
- Scissors
- One-hole punch
- Pencil
- Ribbon, cord, or string
- Binder clips
Instructions
- Print off the Wishbone Paper Chain template and cut out the shape.
- Next, fold a piece of paper in an accordion fashion (fold to the left, fold to the right, fold to the left, etc.), with the width of the folds being the same width as the template piece – about 3.5 inches.
- Trace the shape of the template onto the front of your accordion of paper. The dotted lines should line up with the creases in the accordion.
- Use a few binder clips to hold your accordion in place, and cut out the shape.
- Line up the one-hole punch towards the top of the wishbone shape, with the hole punch hanging halfway off (thus punching a half hole).
- String ribbon, cording, or yarn through the holes of the wishbone shapes.
- Hang your new Thanksgiving decoration
Thank you for sharing your creative and fun wishbone garland. I am one of fourteen children and needless to say our family gatherings are quite large and growing every year. It’s great fun!
I love decorating, planning and preparing for it every year. This has inspired me and I plan to use the garlands for table runners and make larger wishbones, that stand up for centerpieces on each table.
It was very kind of you to share.
Suzanne Downey