
My parents are both science teachers: which means they always ruined the secrets to magic tricks, they forced me to identify every tree by leaf and bark type, and we always created our own versions of ‘science-y’ toys. We used to cook our Easy-Bake Oven meals with foil and a light bulb, and created our own slime with cornstarch and food coloring. Which brings me to our homemade shrinky dinks.
And, when we wanted our own shrinkable art, did we get the sweet pre-printed HeMan or Strawberry Shortcake shrinky dink Paper? Nope. We freehanded it on blank sheets of plastic, and copied the designs from coloring books. (Luckily, neither of my parents could draw, or else we might have had hand drawn versions of those, too.)
The process is simple. I don’t know what kind of shrinky dinks are available, if any, but I’ll always be able to make some on my own… I guess my parents actually taught me something. Nuts.
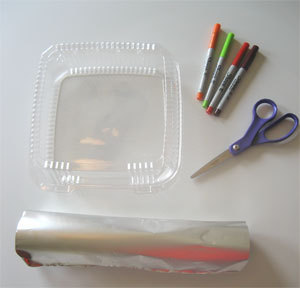
Supplies:
- Clean #6 Plastic
- Permanent Markers
- Scissors
- Aluminum Foil
- Oven and Tongs or Oven Mitt
Steps for making shrinky dinks
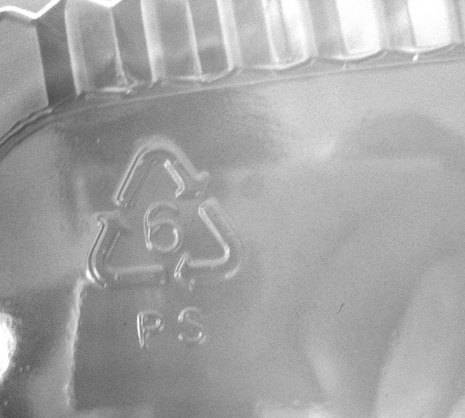
- Obtain a piece of #6 plastic (polystyrene).
Most clear containers at salad bars, delis, and grocery stores will work. Just flip it over and look for a “6” inside the recycling arrows. If you ask nicely, they’ll usually give you a fresh one.
- Cut any excess plastic away to make a flat sheet (use both the top and the bottom), and recycle the excess. Now you’ve got your shrinky dink paper.
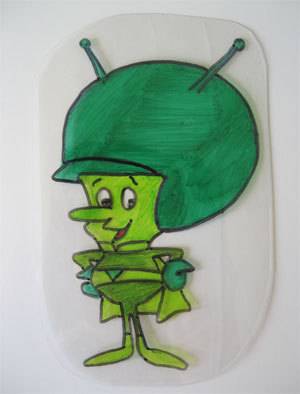
- Draw or write your desired image or text on your shrinky dink paper using permanent markers.
The total image will shrink to about a third of its original size, and five or six times its original thickness. (My parents, of course, would make us measure before and after, and figure how much it had changed.)
- Pre-heat your oven to 350°, and place a rack in the lowest position.
Create a “tray” out of the aluminum foil by bending up the sides. Technically, you could cover a baking sheet with foil, but the thinner surface allows for more direct heat and quicker shrinking.
- Place your art in the tray, then use the tongs or an oven mitt to place the foil on the bottom rack.
- “Cook” for about 3 1/2 minutes
For the first minute your art will curl up all crazy-like, but soon, it will flatten itself out. If you have an oven door through which you can see, then just keep an eye on it. If your door is solid, open it just slightly (as you would do when broiling) after 90 seconds. Total time for a large piece (5-6” starting size) will be about 3 1/2 minutes.

- Using the tongs or oven mitt, remove the tray.
At this point, it’s still plyable, so if you want to flatten it more, or add waves or bend the corners, do so CAREFULLY within the first ten seconds.
Now you’re done!
The shrinky dinks are still cut-able, sand-able, drill-able, glue-able, and plenty more. Attach it to jewelry, make a luggage label, or even a guitar pick!
Please include more application ideas in the comments below. Cheers.
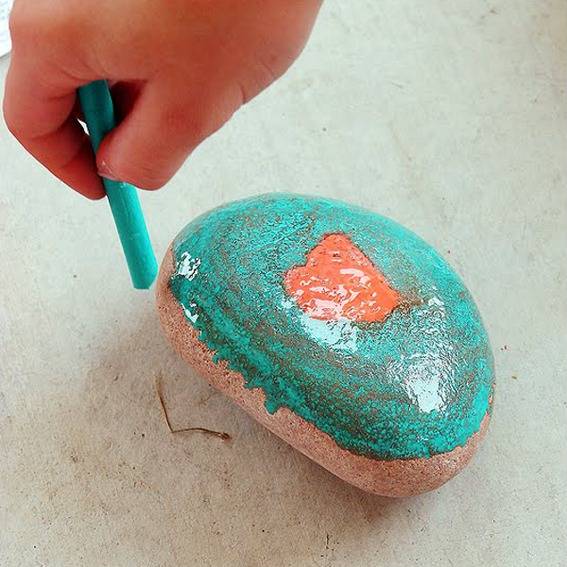
Interested in other creative craft ideas? Try this Hot Rock Crayon Art project:
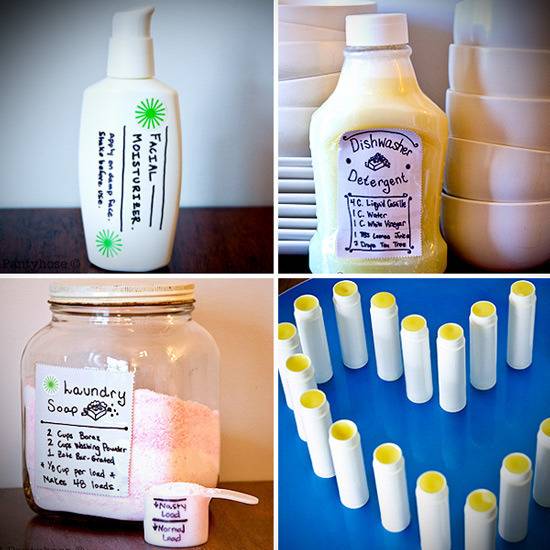
Or maybe you want to do another science project? Check out these homemade replacements for household beauty items:
Can u use #5 plastic for this?
Thank you! I want to make plant labels for my herbs. This will work out perfectly for that!
I’m always looking for crafts I can do with my grandchildren and I remembered doing these with my children when they were small. Thank you so much for providing the information. I’m looking forward to creating more great memories with my grandchildren. I’ll probably need to forward your link to their parents as well.
Hi, what if i do the whole process with pp5 instead of pp6?
thanks in advance!
For the love of science, Seriously and Anonymous #4! 🙂 He tells you in the blog, “The total image will shrink to about a third of its original size, and five or six times its original thickness.” So take the size you desire the end piece to be and multiply it by three to get the size of your original piece of plastic. Or divide the original size of plastic by three to see how much it will shrink down to.
Thank you so much for making this and so much more information available. I was just about to order Shrinky Dinks from Amazon… but why! I remember when my kids were small and how we made so many works of art together.. now I can provide this great activity for my grandchildren and future grandkids! By DIY we can also repurpose that which would be tossed!
May I link to this blog post? I’m a new blogger and don’t know what the heck I am doing! Thanks.
i was seriously born into the wrong family! i only wish my parents were scientists!
Just found this article – it´s seven years old but awesome! I´d like to make a shrinky dink immediately! 🙂 Do you know if it´s possible to use a white no. 6 plastic (yoghurt pot)? Greetings from Germany!
You can use white #6 plastic, but if you are using a cup, or shaped plastic, it can shrink irregularly, because of the processes in which it was formed. (Stretched, heated, etc) It is best to use flat sections of plastic for more uniform shrinking.
Was wondering what you use to do the drawing and coloring? Does it have to be Sharpies?
Can you put the #6 plastic in a shrinky dink machine? Thank you
Do you know where you can purchase #6 plastic? Other than a deli? I called the craft store and they did not have. Also Walmart is no good. Thanks!
Those darn parents-making you LEARN stuff!!
Great blog!! Wish I had seen it before buying the ‘shrinky dink’ plastic. The shrinky dink plastic is already roughed up and you can use anything to color on them; hard to write/trace on though. I like the #6 plastic idea. The smooth surface makes it much easier to trace on (I cannot draw free-hand).
#6 is the plastic that cannot be recycled any longer. I have found it is a food container has a black bottom and the clear top.
Thank you for posting!!
I can’t wait to do this with my nieces and nephews. I’ll use jump RI go and make necklaces or key chains. I made these when I was a kid!!!
What a fab and fun childhood. I do stuff with my kids and they love it and their friends love visiting. Saying there’s always something exciting going on. But I do draw the line at tree bark but so wish I had that knowledge.
Now this is a blog worth following and I’d be real chuffed to have folks that taught me the extras!!
PS Assuming the plastic from toy box covers etc should work nicely?? Can’t wait to do this.
Thnanks! And… Have you ever shrunken a crisp bag?
I just love that you have drawn The Great Gazoo. What a blast from the past 🙂
Can you use #1 or #5 plastic for this?
Can you use #1 or #5 plastic for this?
No, do not try to use any other types of plastic for this. Each different numbered plastic is an entirely different substance. What you need for this is #6 solid polystyrene (not the foamed polystyrene like styrofoam cups), or any other type of “plastic”. Plastics are a wide range of various polymers and they are not all the same or interchangeable, and furthermore heating up some of them could be hazardous to your health, so make sure you ventilate the area well, even for this project.
For the shrinky dink…..if you wanted your creation to have a hole through it, at what point in the process should you do that? Could you use a hole punch, do it before it shrinks and still be left with a small hole?
Taunya,
Punch the hole and make all of your alterations/drawings/coloring, etc before you bake it. If you use a standard hole punch, it will be OK to use thread or string in order to hang your creation/art.
I’m not the owner/admin of this page, but I’m not sure anyone will reply to you, since the post is so old.
Good luck and have fun!!
Isn’t it great how something old becomes something new again??!!
wow that is so cute. i was wondering if it has to be #6. what would happen if you used a #1. i have plenty of those from my fruit.
thank you
I made a name tag for my cat, with our phone number and all. Super cool!
I just made a couple and that was seriously amazing! I remember shrinky dinks from when I was a kid and I know I colored a couple at my grandparents’ house, but I don’t remember ever watching them shrink . . . needless to say this 24-year old was very awed watching the process.
However, my charms ended up a little wavy and I think in my haste I may not have left them in the oven long enough. I was wondering if they would flatten out more if I put them back in the oven? One was almost 4 inches tall and 2 1/2 – 3 inches wide while the other was about 3 inches long and maybe 1 1/2 inches tall. The larger one has more waves, so size seems to have been a factor.
While these are mine and I don’t mind the waves, I was hoping to make some as gifts and would rather them be flat.
Open to suggestions,
Beth
I saw this post the day after I threw away one of those plastic containers, so I went to the trash can, took it out, called my kids and started to do fun things, thank you so so much for sharing this, I love reusing materials that I can’t recycle.
Mine curled up initially then melted INTO the aluminum with no redemption.
Will it make the oven smell or release fumes?
I like what I see & love to reuse stuff if I can