
While there are many pre-made planter boxes available, building your own allows you to customize the size, style, and materials. In this post, we’ll show you how to create a sleek and modern planter box using simple materials and tools. This DIY project is perfect for both beginner and experienced builders and can be completed in just a few hours. Follow along with our step-by-step instructions and bring some natural beauty to your outdoor space with your very own handmade planter box.
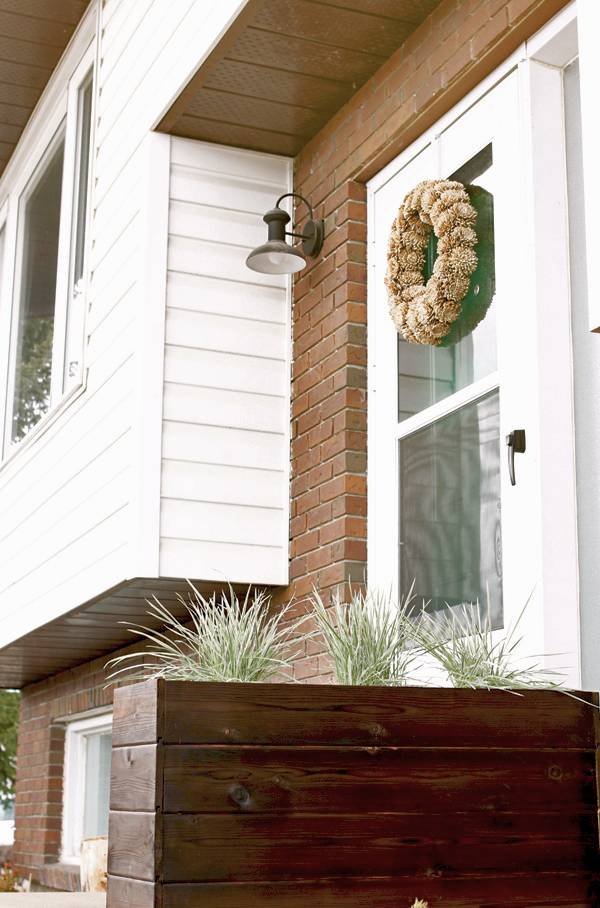
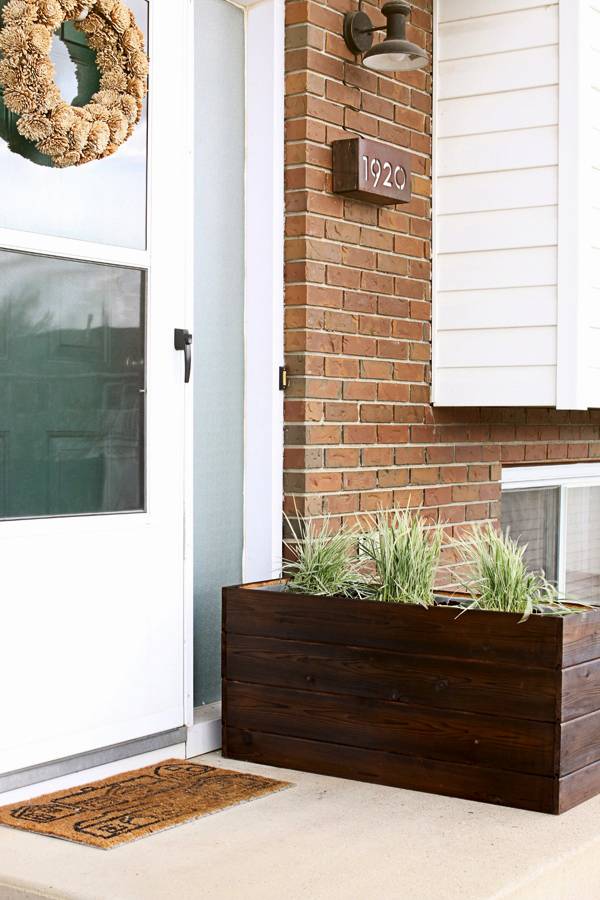
This year, we decided to take our first baby steps towards a more modern and clean outdoor space. We decided to start with the first thing people will see when they arrive. First up, a sleek and modern outdoor planter for our front patio. This planter box is great for planting seasonal greenery and flowers, plus storing it away for the winter months will be easy-peasy.
Materials
- Planter (pick up a basic plastic planter that suits your outdoor space)
- Two eight-foot long 2 x 4s
- 1 x6 Cedar planks (ours had tongue and groove edges, which was awesome)
- Crosscut saw: a hand saw, circular saw, or chop saw will work
- Drill and driver bits
- Hammer and nails or nailer
- Optional: Blow torch and scrub brush
- Optional: Kreg pocket hole jig and 2 1/2″ pocket hole screws
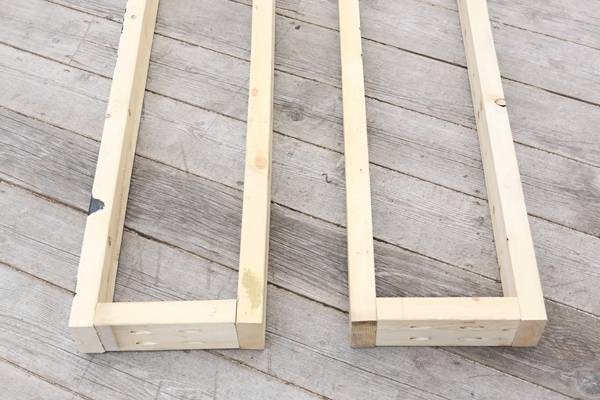
Step 1
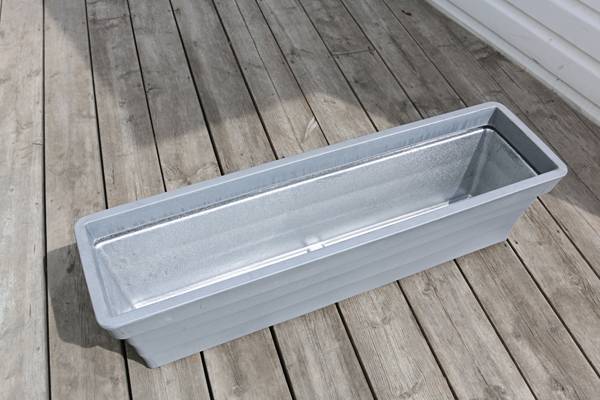
The easiest way to begin is by constructing a frame around a store-bought planter. Start by measuring your planter. Ours measured 36 x 8″.
Step 2
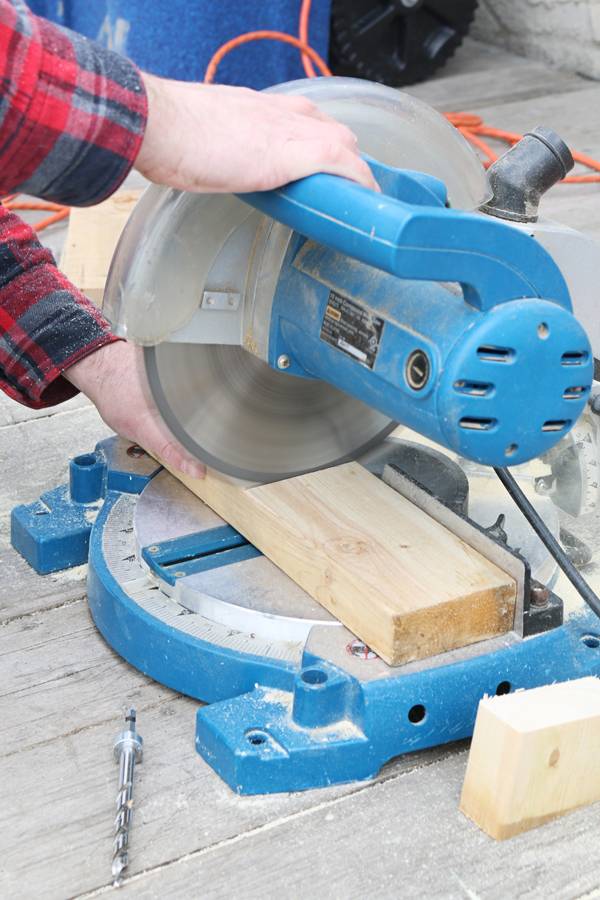
Using your saw, begin cutting your 2x4s according to the proper measurements. The inside measurements of the frame should be the same as the plastic planter, plus whatever height you prefer. The end measurements for the 2×4 frame were then 36″ x 8″ x 18″.
Step 3
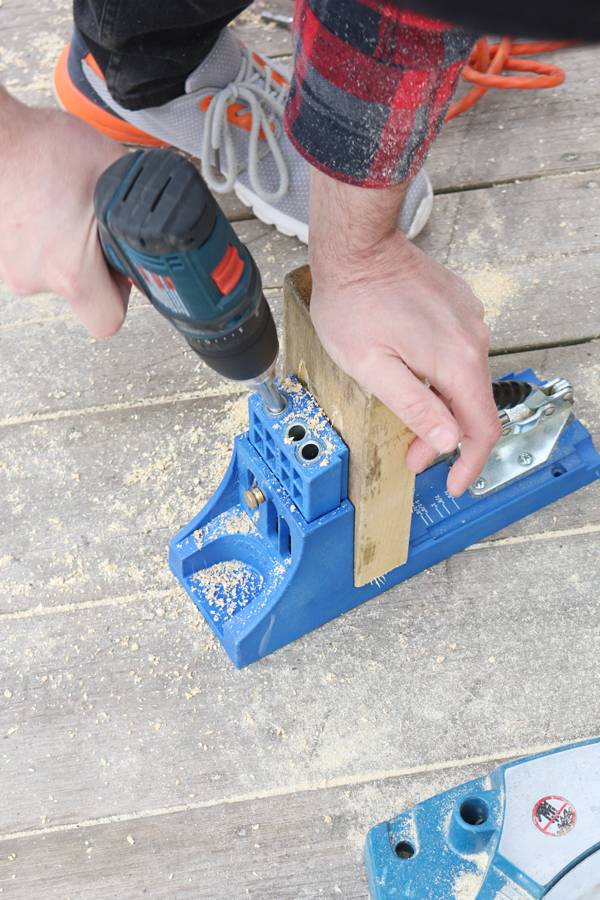
Using a Kreg pocket hole jig, create holes in each of your 2x4s. If you don’t have a jig, consider investing in one for this project. They’re awesome! If not, you can just screw through the side grain with 3 1/2″ long screws. (You can flip the bottom and top pieces to fit).
Step 4
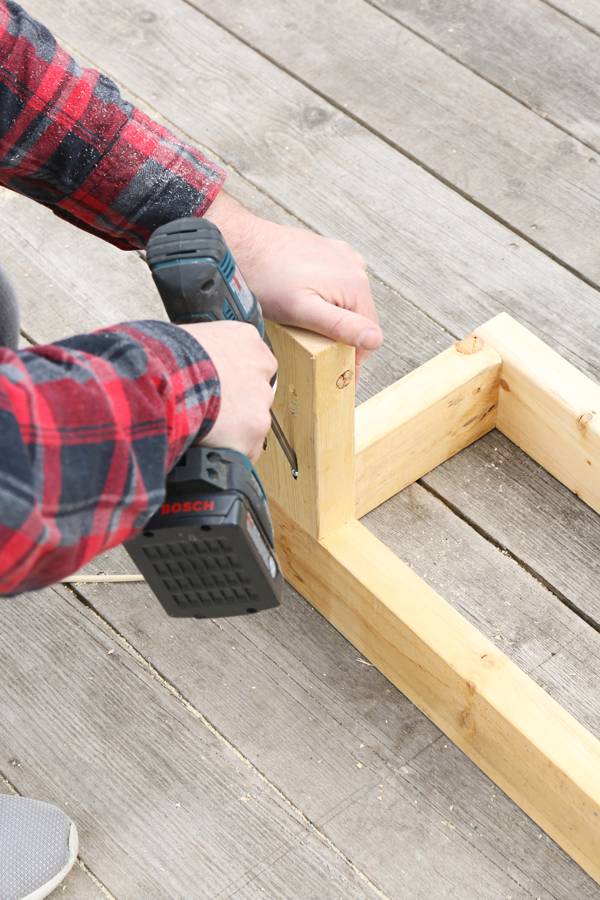
With your 2 1/2″ pocket hole screws, attach your 2×4 frame together accordingly using your drill.
Step 5
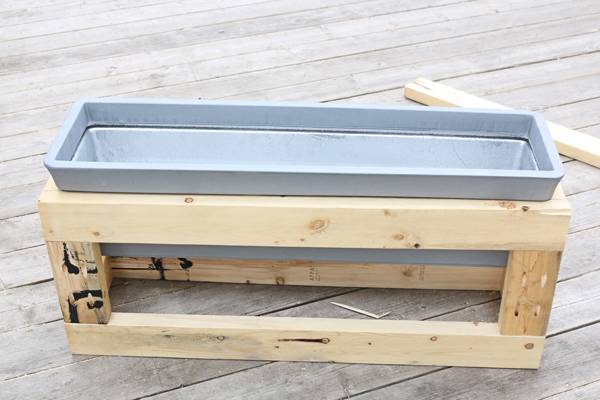
Once your frame is assembled, place your plastic planter into the top. It should fit nice and snug.
Step 6
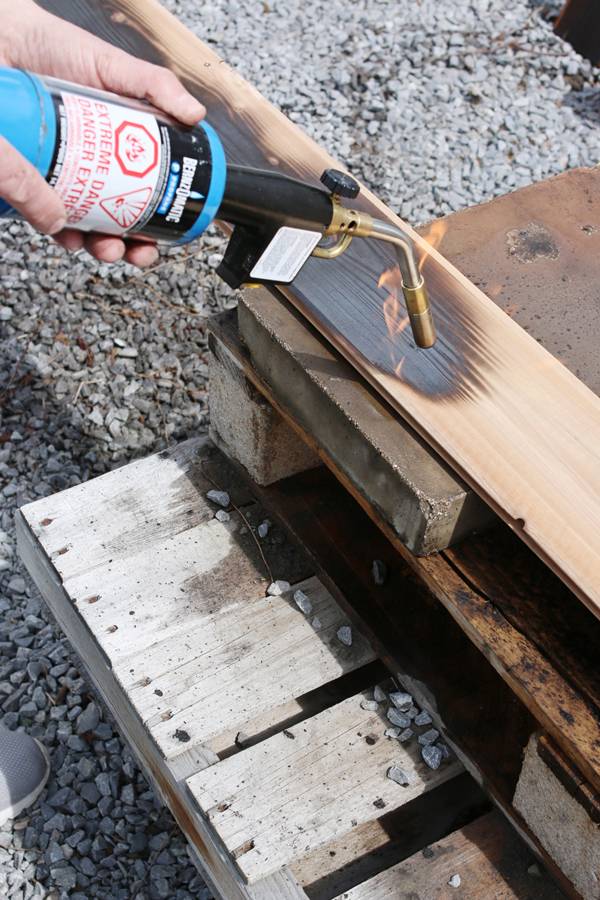
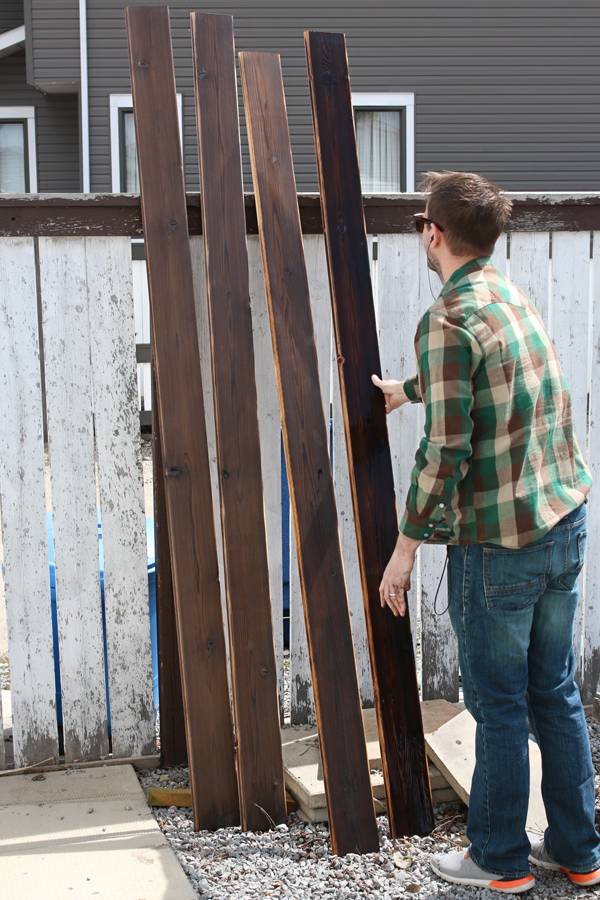
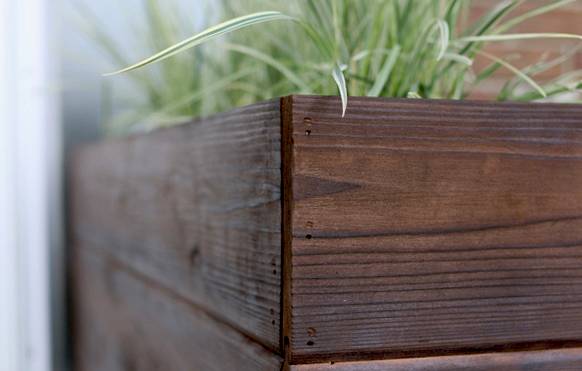
Onto the exterior of your frame! Take your cedar planks into a safe area (you’ll be using a blow torch for a fun Shou Sugi Ban effect!). Using your blow torch, begin by carefully charring each cedar plank. Use broad, even strokes, just like painting.
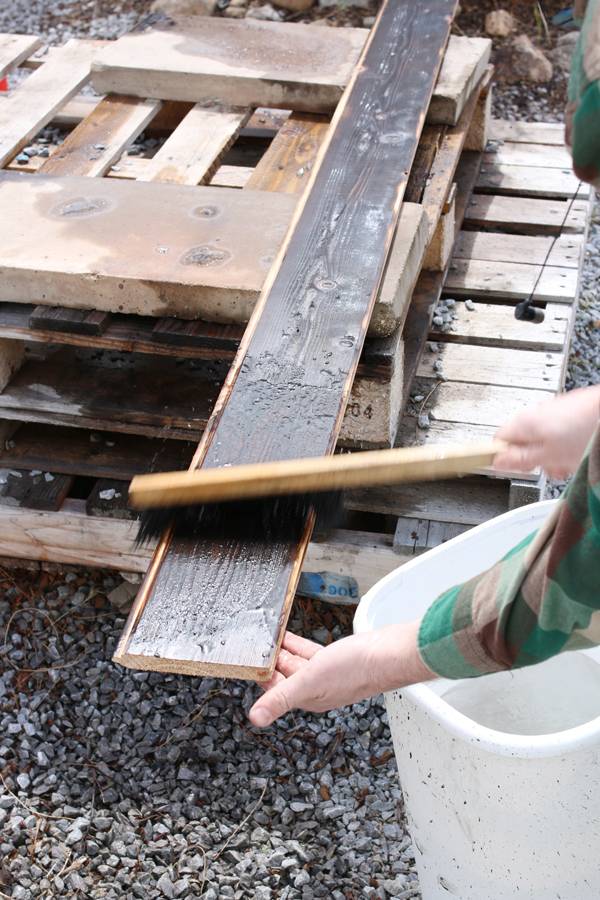
Step 7
Once charred, allow the wood to cool down a bit. Using a bucket of water and a scrub brush, clean the excess char (otherwise everything it has contact with will get black and dirty). All that will be left is the toasted wood.
Step 8
Allow to dry completely.
Step 9
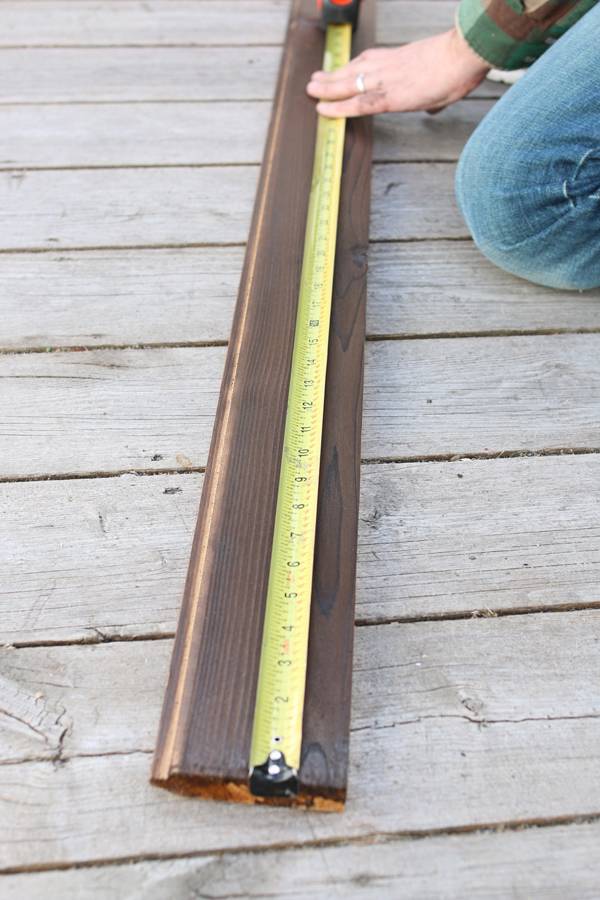
Once dried, cut the planks according to the measurements of your 2×4 frame.
Step 10
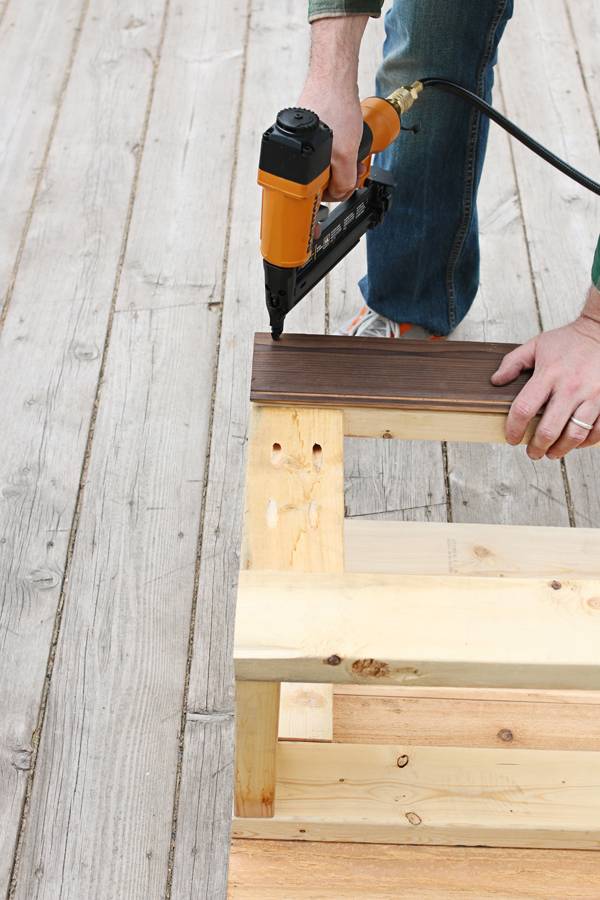
Using a nail gun, attach cedar planks to frame.
Step 11
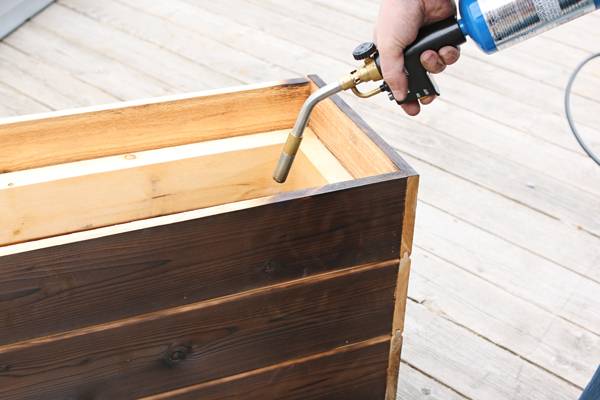
Once the the cedar planks are all properly attached, char any edges that have not yet been treated.
Step 12
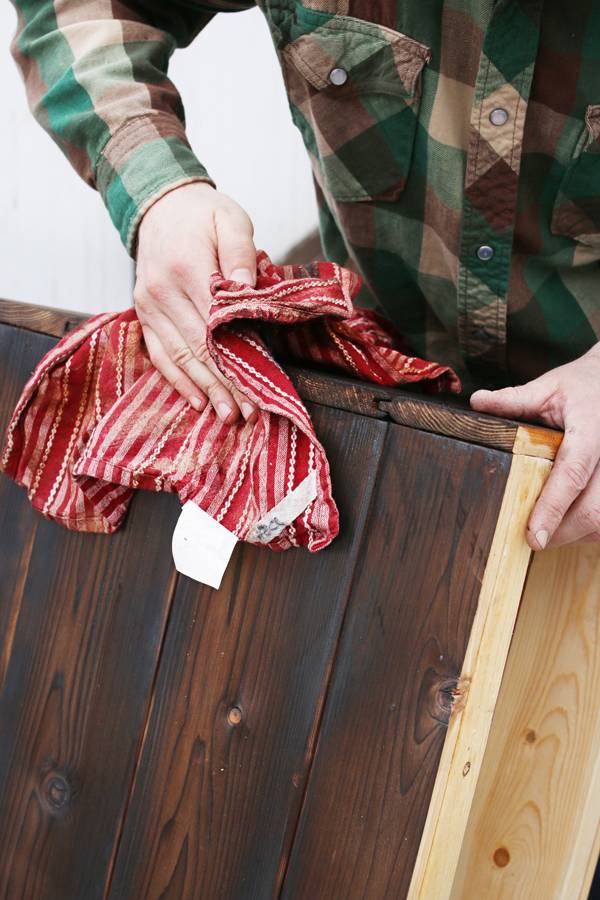
Clean with a wet cloth. Optional: Finish with a natural oil.
Step 13
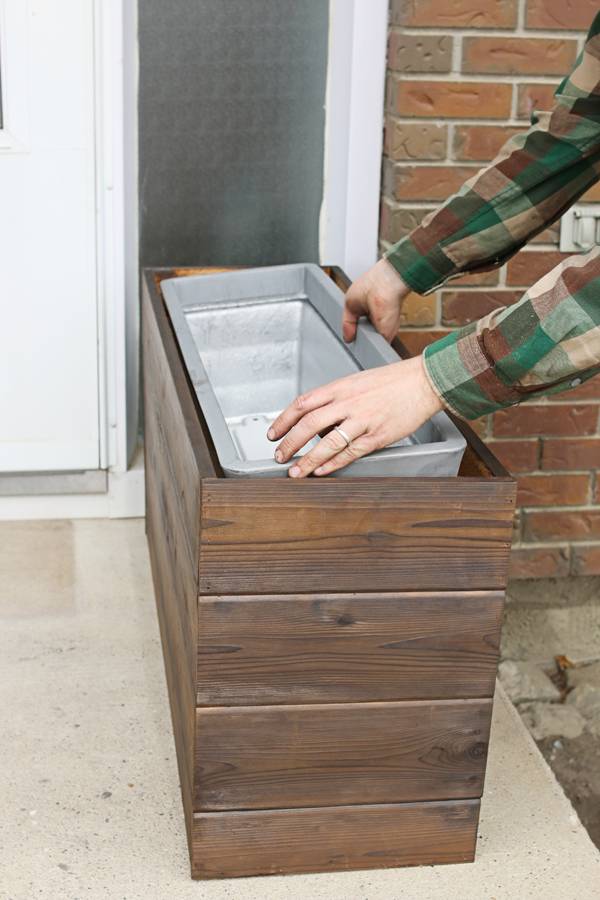
Once complete, simply place plastic planter back inside your new wood planter! (The finished frame should measure 38″ x 11 1/2″ x 18″)
Step 14
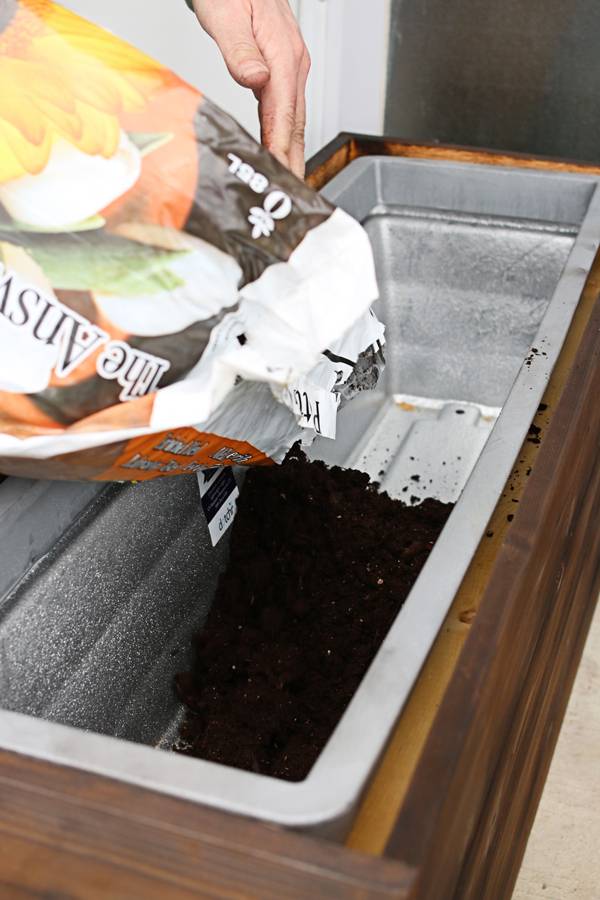
Pour in your soil.
Step 15
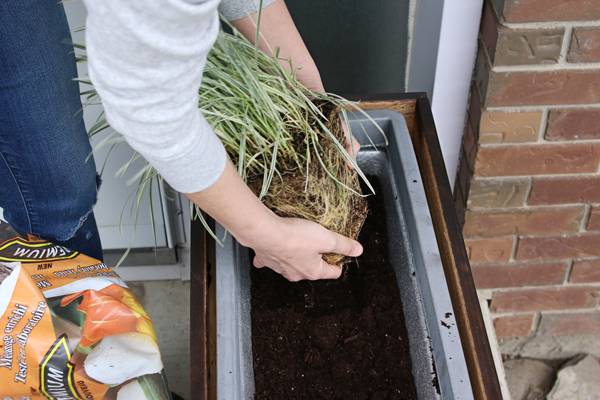
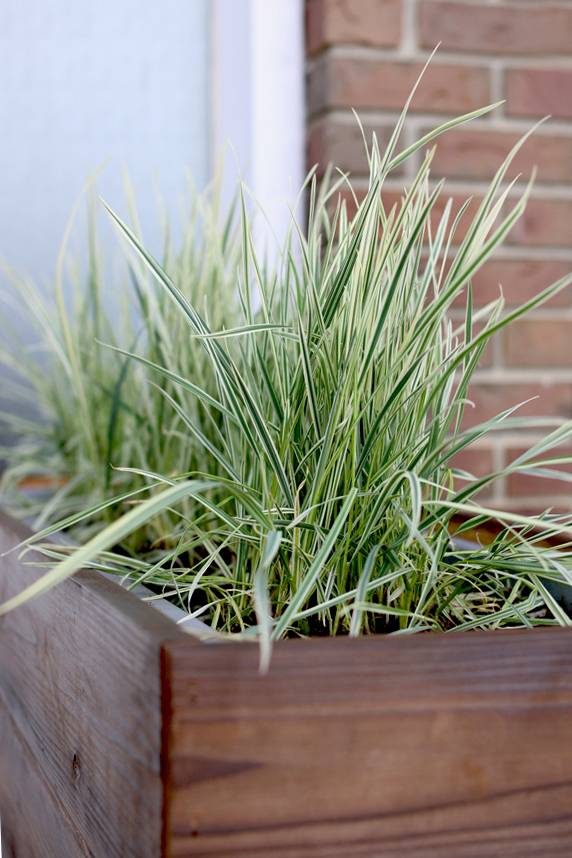
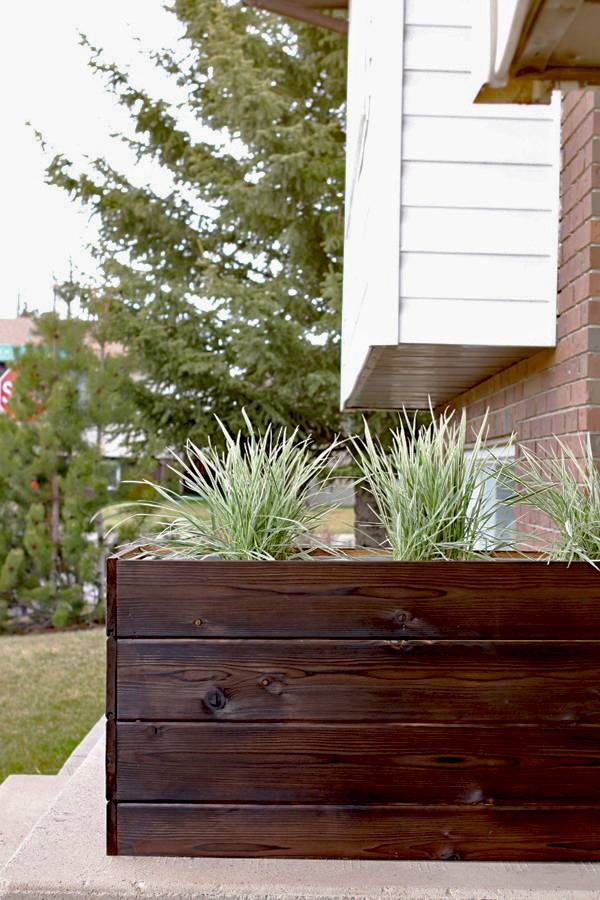
Feel free to plant whatever your heart desires. We wanted a modern look, so we decided to plant Bulbous Oat Grass for a sleek finish.
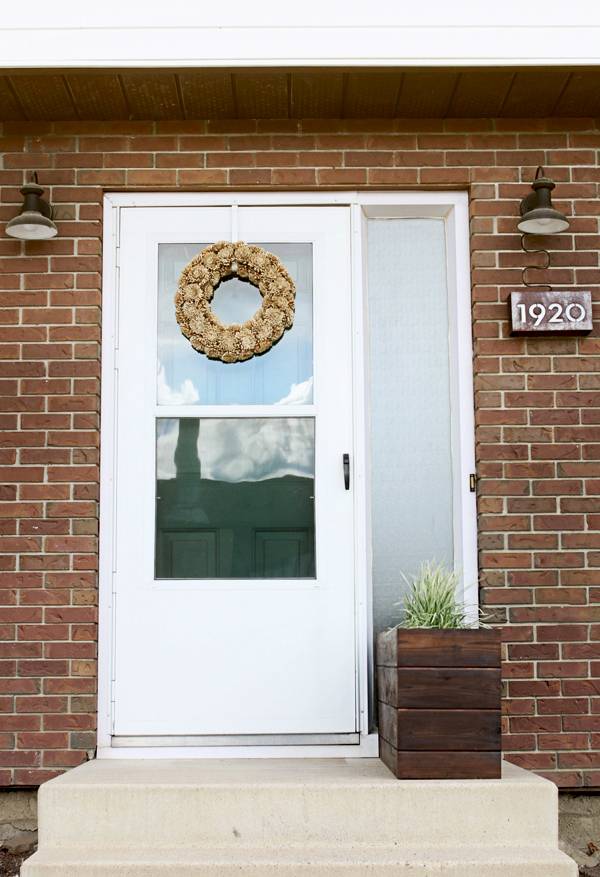
I am in love the simplicity of the overall look and how it instantly modernizes our front entryway. Can’t wait to work on our next outdoor project!
Adding a touch of greenery to your outdoor space can make a big difference in the look and feel of your home. If you’re looking for a simple DIY project to spruce up your porch or patio, a modern flower box may be just what you need. With its clean lines and minimalist design, this DIY modern planter box will add a touch of elegance to any outdoor space. So roll up your sleeves and get ready to create a beautiful home for your favorite plants.