Flower pressing is a beautiful craft that opens up a world of creativity and appreciation for nature. By flattening and drying flowers, you can timelessly capture their beauty. This technique transforms fresh blooms into lasting keepsakes, perfect for various decorative and personal projects.

Table of contents
Introduction to the Art of Flower Pressing
Imagine taking a lovely flower from your garden and preserving its vibrant color and intricate details forever.
Whether you’re drawn to bright violas, delicate single-petal roses, or flowers glistening with morning dew, each choice offers a unique opportunity to craft something special. The process is straightforward, making it accessible even for beginners.
Flower pressing allows you to connect with nature on a deeper level.
It’s a calming activity that invites you to slow down and appreciate the delicate details of each petal and leaf. You’ll find joy in the simplicity of gathering flowers, preparing them, and patiently waiting as they transform into beautifully pressed pieces.
Once you’ve mastered the basics, you’ll discover endless possibilities for using your pressed flowers.
From handmade greeting cards to unique bookmarks and even framed art, your creations will carry the essence of the natural world into your home.
Flower pressing is not just a craft; it’s a way to cherish and share the beauty of nature in a lasting form.
Getting Flowers Ready for Pressing
Selecting and preparing your flowers is crucial to ensure beautiful, lasting results. Begin by choosing fresh, vibrant blooms that are not too thick. Delicate flowers like violas and single-petal roses work wonderfully, and those with morning dew add a special touch. Steer clear of thicker flowers as they may not press well.
Once you’ve selected your blooms, gently remove any unwanted leaves and trim the stems to a manageable length. Then, lay the flowers on a piece of paper or parchment paper to keep them clean and free of pests. This helps preserve their natural color and texture.
Utilizing a Flower Press
Start by arranging your flowers on paper inside the press, ensuring they highlight their best features. Cover them with another piece of paper to protect them during pressing. If you don’t have a flower press, you can use a piece of scrap wood and some heavy books as an alternative.
Tighten the screws on your press evenly to apply consistent pressure across all the flowers. This helps create detailed imprints that capture the natural beauty of each bloom. Place your press in a cool, dry location, and let it sit for a few weeks. It’s important to check on your flowers periodically to ensure they are drying properly and make any necessary adjustments.
Patience is key during this phase. Allowing enough time for the flowers to fully dry will result in vibrant, well-preserved pieces. The pressing process will enhance their unique details and colors, whether you’re using violas, single-petal roses, or any other blooms.
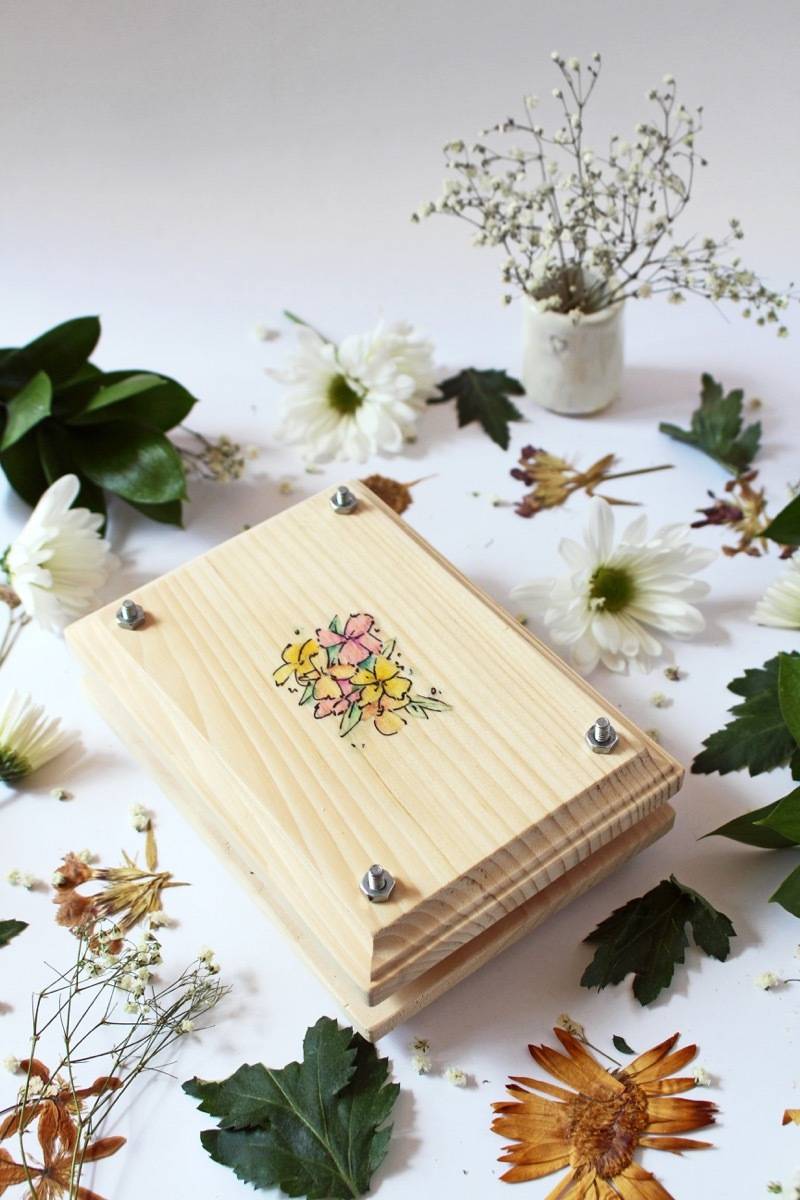
How To Make a Flower Press
How to Make a Flower Press
Pressing flowers at home is a delightful and creative way to preserve the beauty of nature. This timeless craft involves carefully flattening and drying flowers, allowing them to retain their shape, color, and intricate details for long-lasting enjoyment.
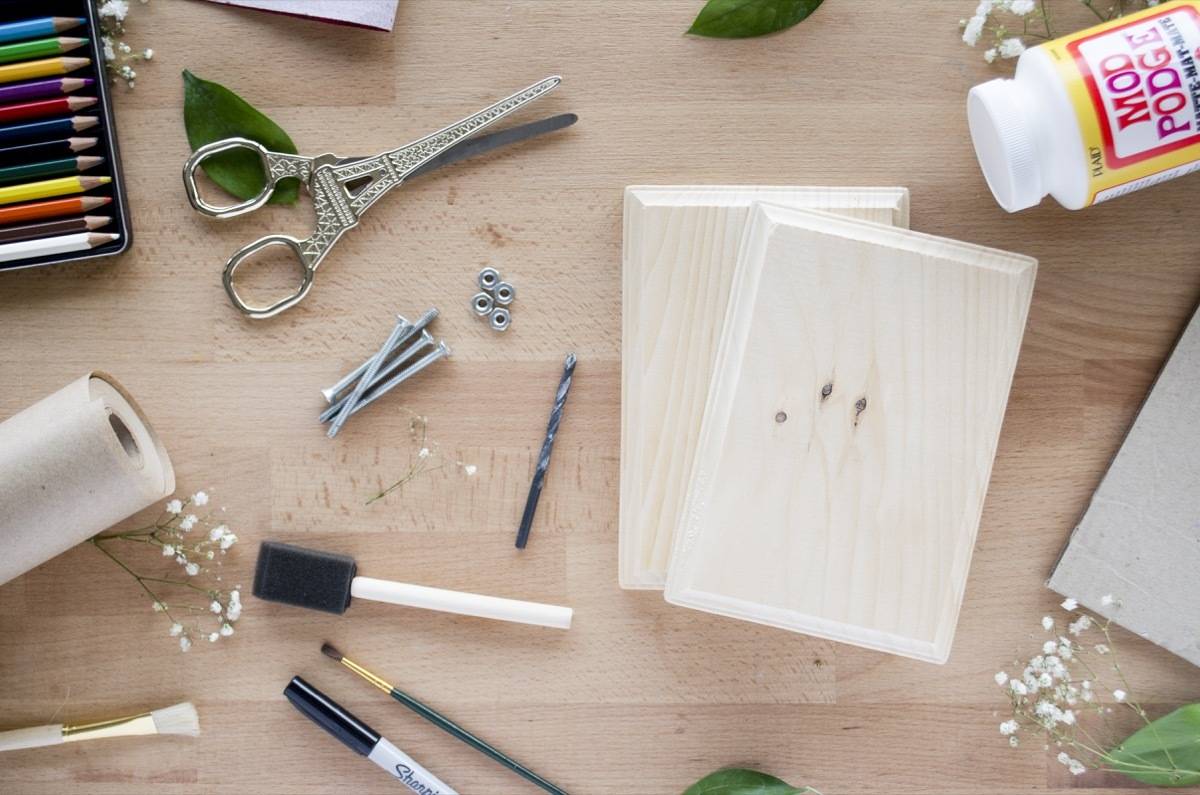
Materials
- 2 small wooden plaques
- 4 machine bolts and 4 matching nuts
- Matte Mod Podge
- Corrugated cardboard
- Sandpaper
- Masking tape
- Pen, pencils, or paint, to add a design
Tools
- Power drill
- Drill bit that is slightly larger than the machine bolts
Instructions
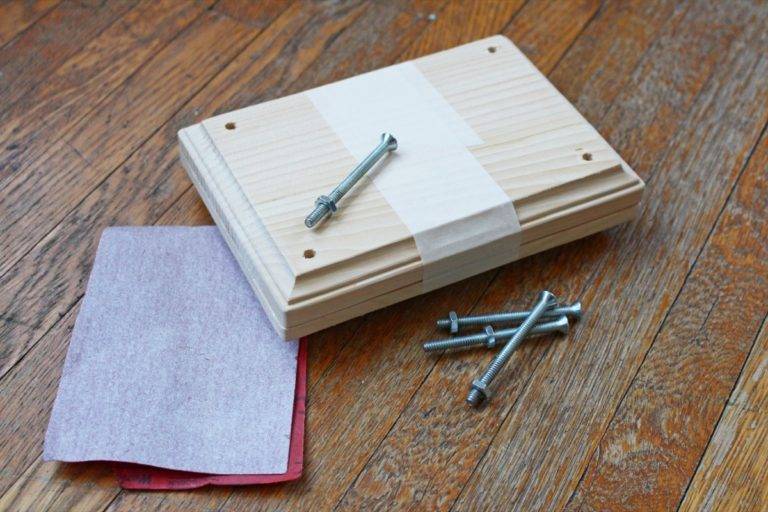
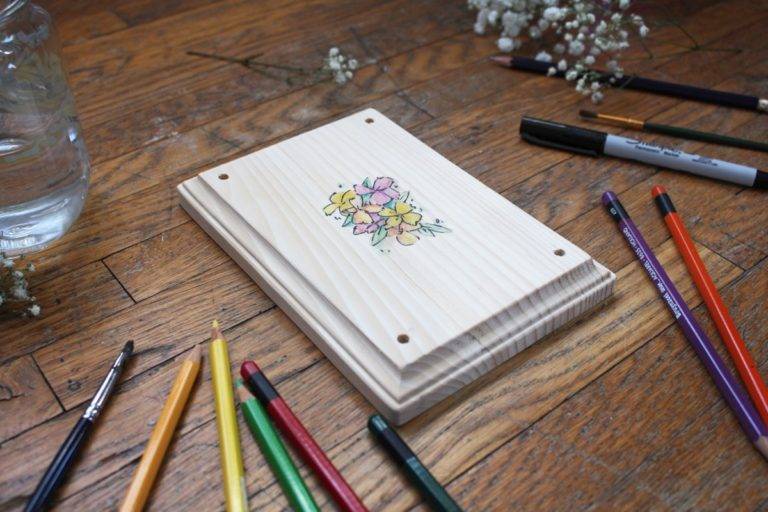
- Start by wrapping tape around both wood boards to secure them in place. At each corner, make a mark. Clamp the boards to a steady surface, and drill into each mark, through both boards. Check that the machine bolts fits easily in the drilled holes. Remove the tape, and sand away any rough edges.
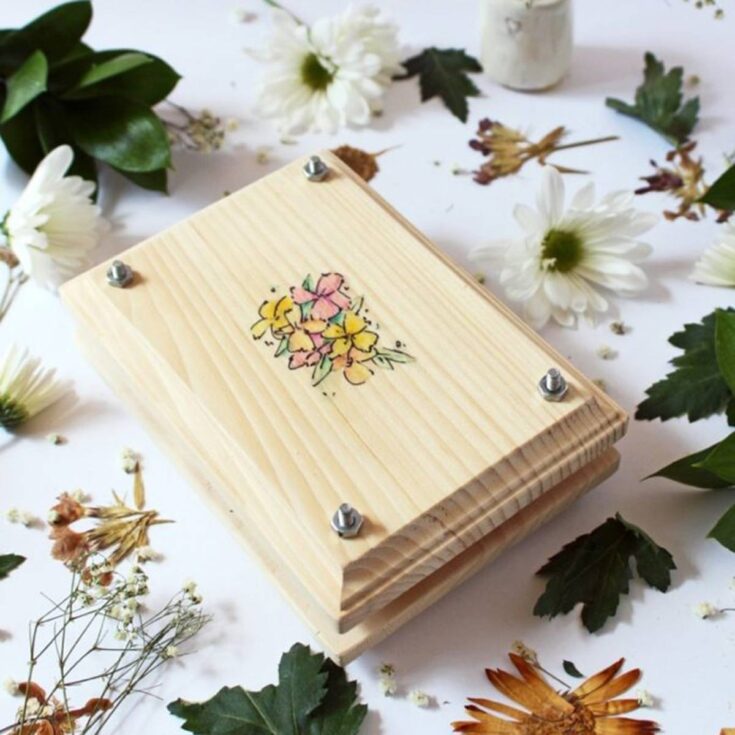
- Now it’s time to add a little flair to the top. I used watercolor pencils and a marker to decorate my DIY flower press. You can use paint, markers, pencils, decoupage, or just leave it blank. If you do add a design, apply a thin layer of matte Mod Podge to the top to protect the design.
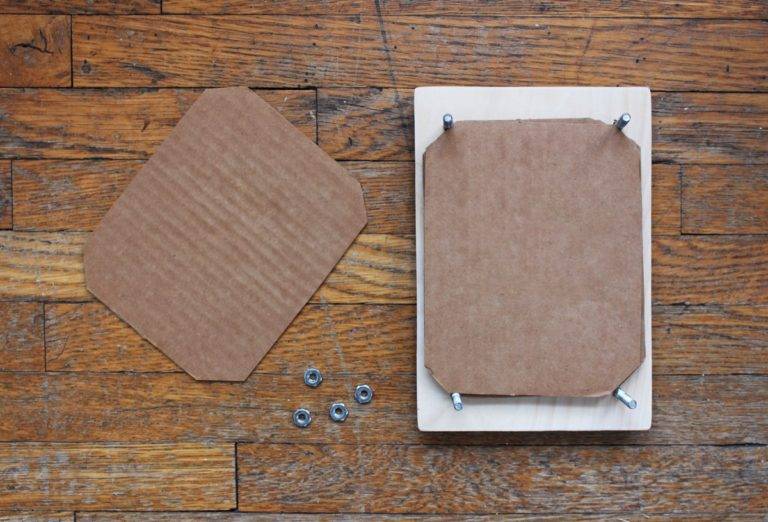
- Insert the machine bolts through the bottom boards. Cut a few sheets of corrugated cardboard into octagonal shapes so they fit just inside the machine bolts. Lay the cardboard in the flower press, add the top, and screw the nuts in place.
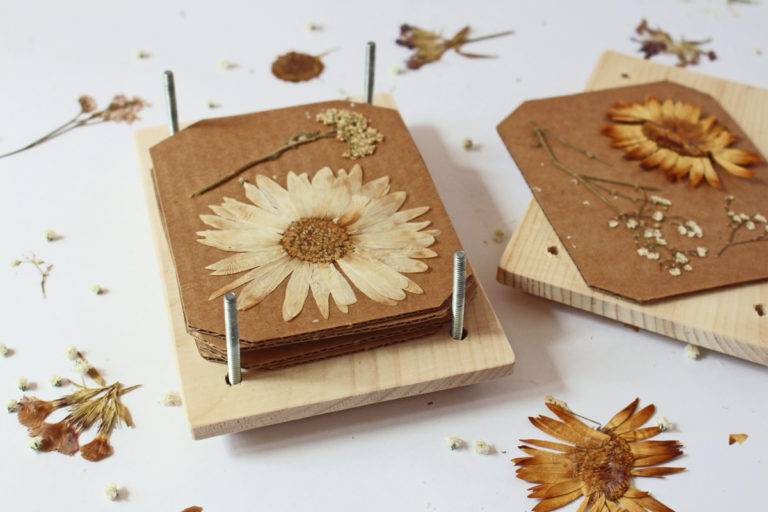
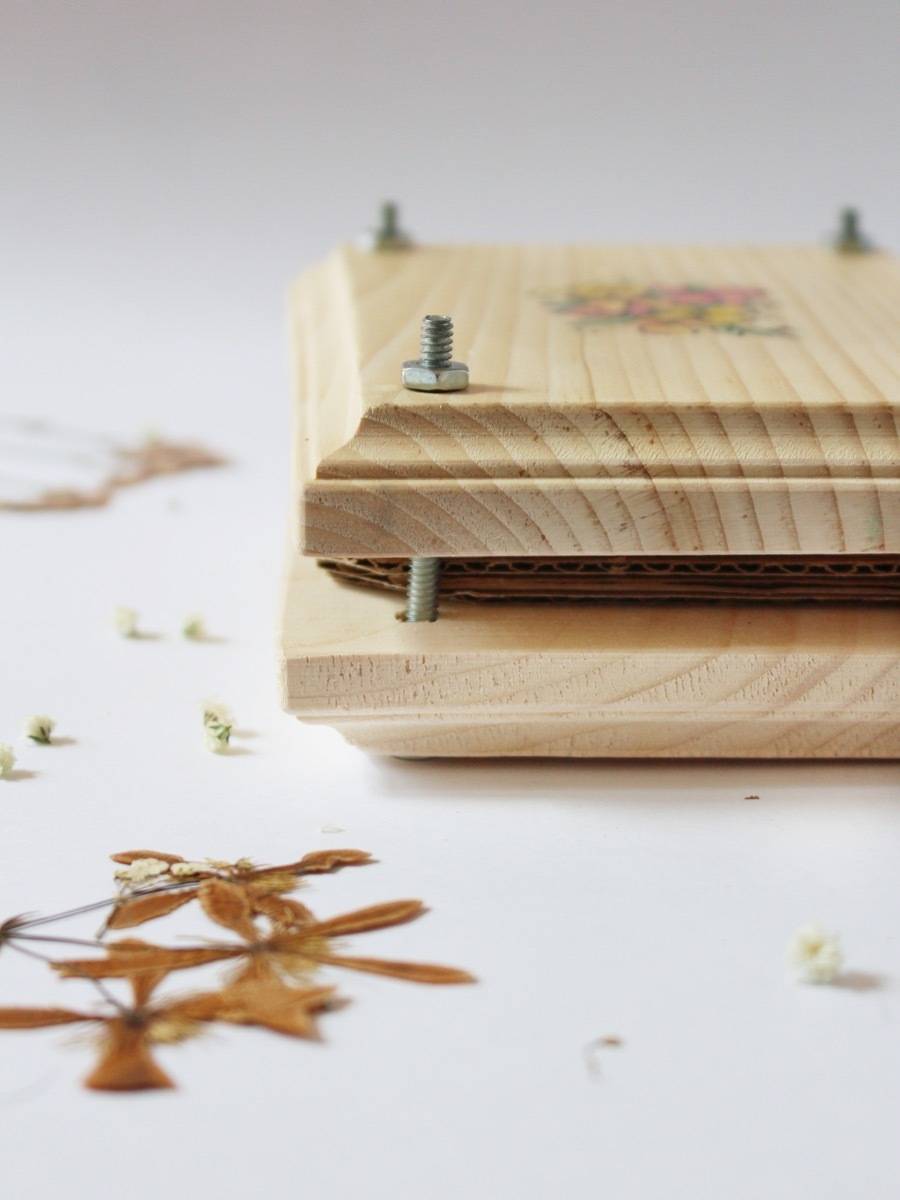
- To use your DIY flower press, lay blooms in between the pieces of cardboard. Make sure the flowers aren’t touching. Close up the flower press, and tighten the bolts. In two weeks, re-tighten the bolts for the final press. Wait another two weeks and your flowers will be ready to go.
Innovative Uses for Pressed Flowers
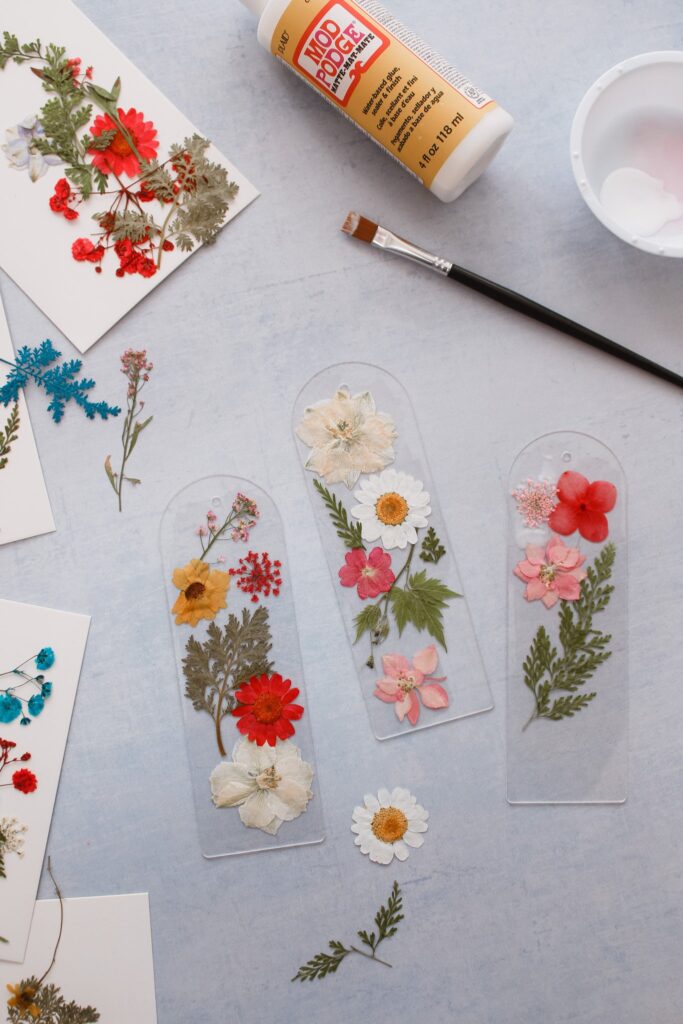
Pressed flowers open up a world of creative possibilities. One popular use is to create unique bookmarks. Simply laminate your pressed flowers between two pieces of clear tape for a charming, personalized marker that adds a touch of nature to your reading experience.
Incorporate pressed flowers into homemade greeting cards for a personal touch in your correspondence. Glue the flowers onto the card, and perhaps add a handwritten note or a small ribbon to complete the look. Each card will be a one-of-a-kind keepsake for the recipient.
You can also create textured artwork by arranging pressed flowers on a canvas or piece of wood. This project is fun for all ages and adds a rustic, natural element to your home decor.
Shadow boxes offer another creative way to display your pressed flowers. Arrange them inside the box to create a three-dimensional effect, highlighting each bloom’s intricate details and colors. These displays make for thoughtful gifts or beautiful decorations that can brighten any space.
Additionally, you can use pressed flowers to enhance your scrapbooking projects. Add them to your photo albums to create elegant, nature-inspired layouts. The flowers can serve as beautiful accents that complement your cherished memories.
Consider using your pressed flowers to decorate candles or picture frames. A simple glued arrangement can turn an ordinary item into a beautiful, custom piece. Whether you’re crafting for yourself or making gifts for others, pressed flowers bring a touch of nature and creativity to every project.

The Best Flowers and Plants for Pressing
When it comes to pressing flowers, certain varieties tend to press well and retain their color and shape. The best flowers for pressing are the ones will shallow heads (i.e. not sunflowers), but other than that the world is yours! Here are ten flowers and plants that are known to be excellent choices for pressing:

- Daisies (Bellis perennis)
- Pansies (Viola tricolor)
- Roses (Rosa spp.)
- Larkspur (Delphinium spp.)
- Forget-Me-Nots (Myosotis spp.)
- Ferns (various species)
- Marigolds (Tagetes spp.)
- Cosmos (Cosmos bipinnatus)
- Verbena (Verbena spp.)
- Delicate herbs like lavender (Lavandula spp.)
These flowers and plants typically have flat, thin petals or leaves, which allow for easier pressing and minimal distortion during the drying process. However, it’s essential to experiment with different flowers and plants to discover your personal favorites and explore the unique qualities each variety offers when pressed.
Remember to select blooms that are in good condition and have not yet started to wither for the best results.
Pressed Flower Inspiration
There are lots of creative ways to use pressed flowers. Use your pressed flowers to decorate paper, set them in resin, frame them, or catalog your findings.
Here are ten of our favorite pressed flower projects:
- Framed Floral Art: Create stunning wall art by arranging pressed flowers in a frame, allowing you to showcase their natural beauty.
- Greeting Cards: Adorn your handmade or store-bought cards with pressed flowers to add a unique and personalized touch.
- Bookmarks: Use pressed flowers to create delicate and charming bookmarks, perfect for gifting or enhancing your reading experience.
- Resin Jewelry: Embed pressed flowers into resin to make beautiful and wearable pieces of jewelry like pendants, earrings, or bracelets.
- Botanical Coasters: Arrange pressed flowers on ceramic or wooden coasters, then seal them with resin or a protective coating for functional and decorative table accessories.
- Pressed Flower Candles: Decorate plain candles by pressing flowers onto their surfaces, adding a touch of elegance and natural appeal.
- Wall Hangings: Arrange pressed flowers in a visually appealing pattern and frame them as a unique and eye-catching wall hanging.
- Flower-Embedded Paper: Create your own handmade paper with embedded pressed flowers, perfect for writing letters, making cards, or scrapbooking.
- Decorative Trays: Transform plain trays by decoupaging pressed flowers onto their surfaces, creating functional and decorative pieces for your home.
- Wedding Invitations: Incorporate pressed flowers into your wedding invitations or stationery for a romantic and personalized touch that captures the essence of your special day.
Pressing flowers at home is a enjoyable and creative way to preserve the beauty of nature. This timeless craft involves carefully flattening and drying flowers, allowing them to retain their shape, color, and intricate details for long-lasting enjoyment.
And instead of full live blooms, you can create beautiful layers of dried blooms.
Preserving Your Pressed Flowers
Properly preserving your pressed flowers is crucial to maintaining their beauty over time. Store them in a dry, cool place away from direct sunlight to prevent fading. Using acid-free paper or parchment paper can also help protect the flowers from potential damage and deterioration.
If you plan to display your pressed flowers, framing them behind glass is an excellent way to shield them from dust and moisture while showcasing their intricate details. This also helps to prevent them from becoming brittle or damaged.
Those who prefer to store their pressed flowers should consider placing them in an airtight container. This will help maintain their vibrant colors and delicate structure.
When handling your pressed flowers, always be gentle to avoid any breakage. With the right care, your pressed flowers will remain a beautiful and lasting reminder of the natural world, ready to enhance your creative projects or brighten your living space for years. Enjoy the process of preserving these delicate treasures and the unique charm they bring to your life.
More Project Ideas from Curbly

I love this idea so much. Lovely photos.
@Chrisjob Thanks Chris! =)