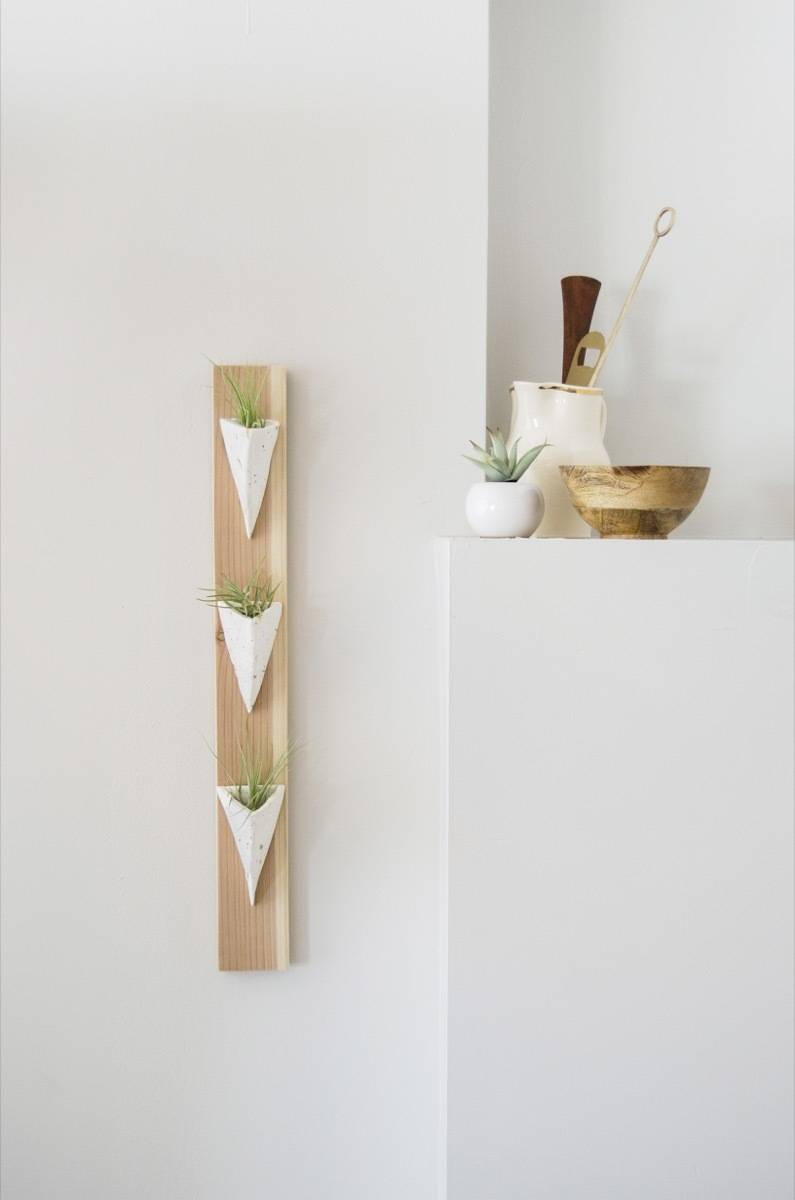
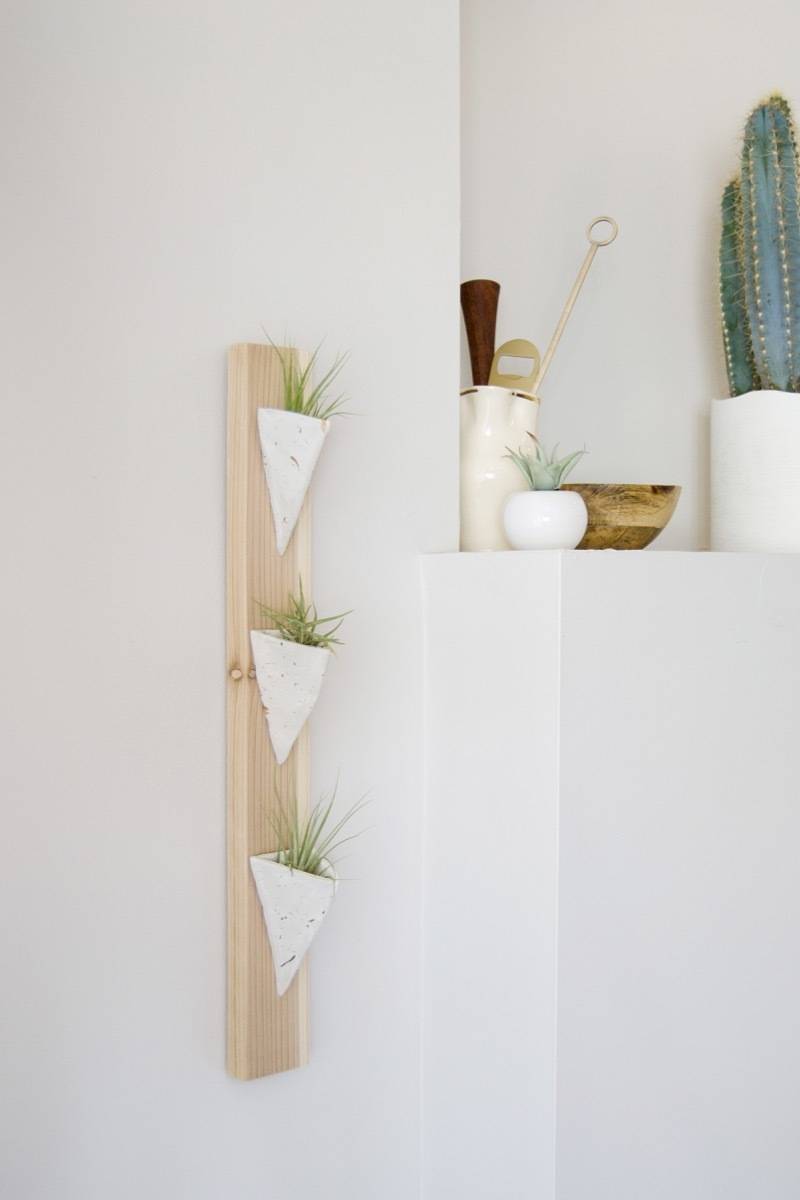
One of the things I love about air plants – also known as tillandsia – is that they can be displayed in virtually unlimited ways. With soil out of the picture, an air plant can live in any container, on any ledge, in any opening, on any surface; they are one of the most versatile plants in terms of home decor. Which, for someone like me who loves crafting things, is the gift that keeps on giving. Looking to fill a bit of wall space, this wall-mounted air plant holder does the trick. Keep reading to see how easy it was to make!
Materials
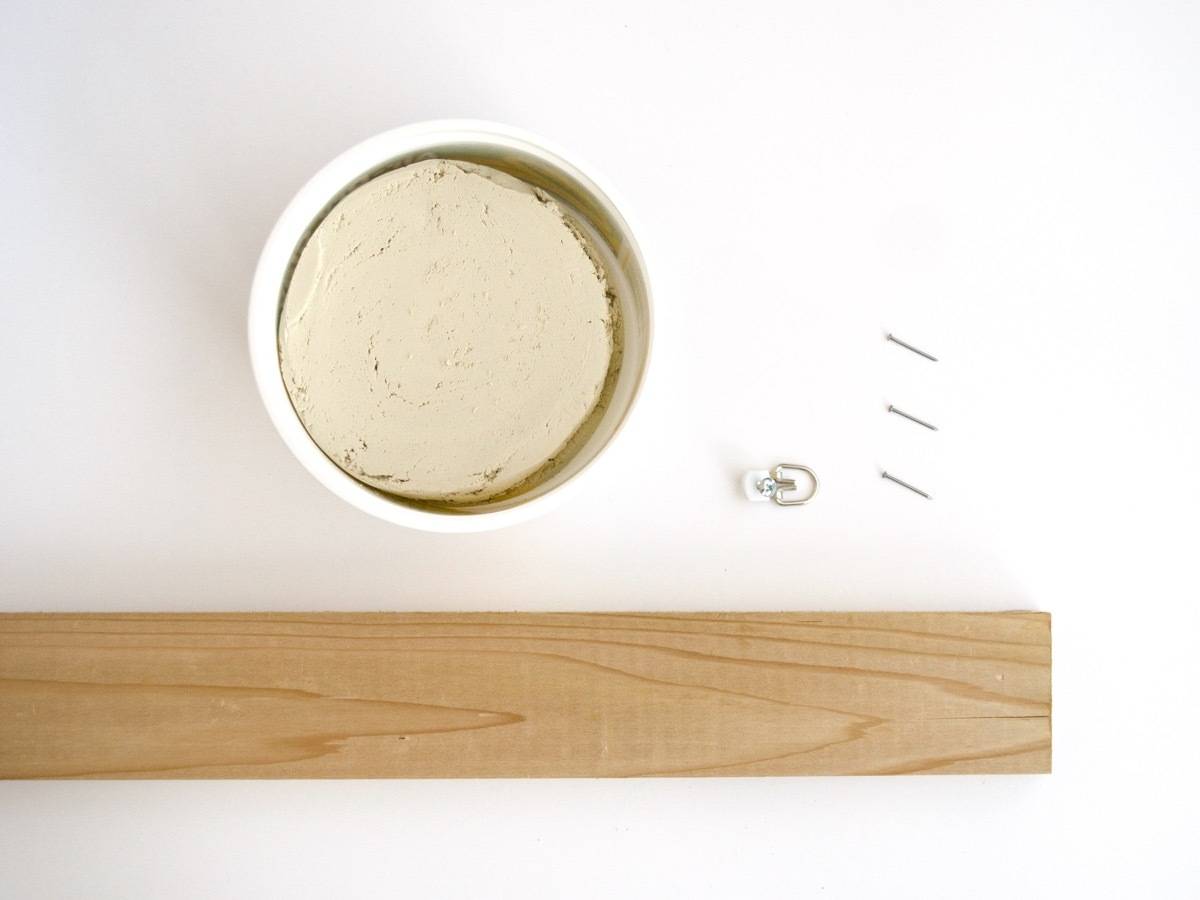
- A wood board – I’m using some 1×3″ cedar leftover from another project
- Air-dry clay
- Hanging hardware
- Three small nails
- Acrylic paint (optional, not pictured)
Step

First, roll out a section of air-dry clay, approximately 1/4 inch thick. Use a rolling pin, or a glass bottle. This brand of air-dry clay is non-toxic, so it’s fine to use kitchen tools for this project.
Step
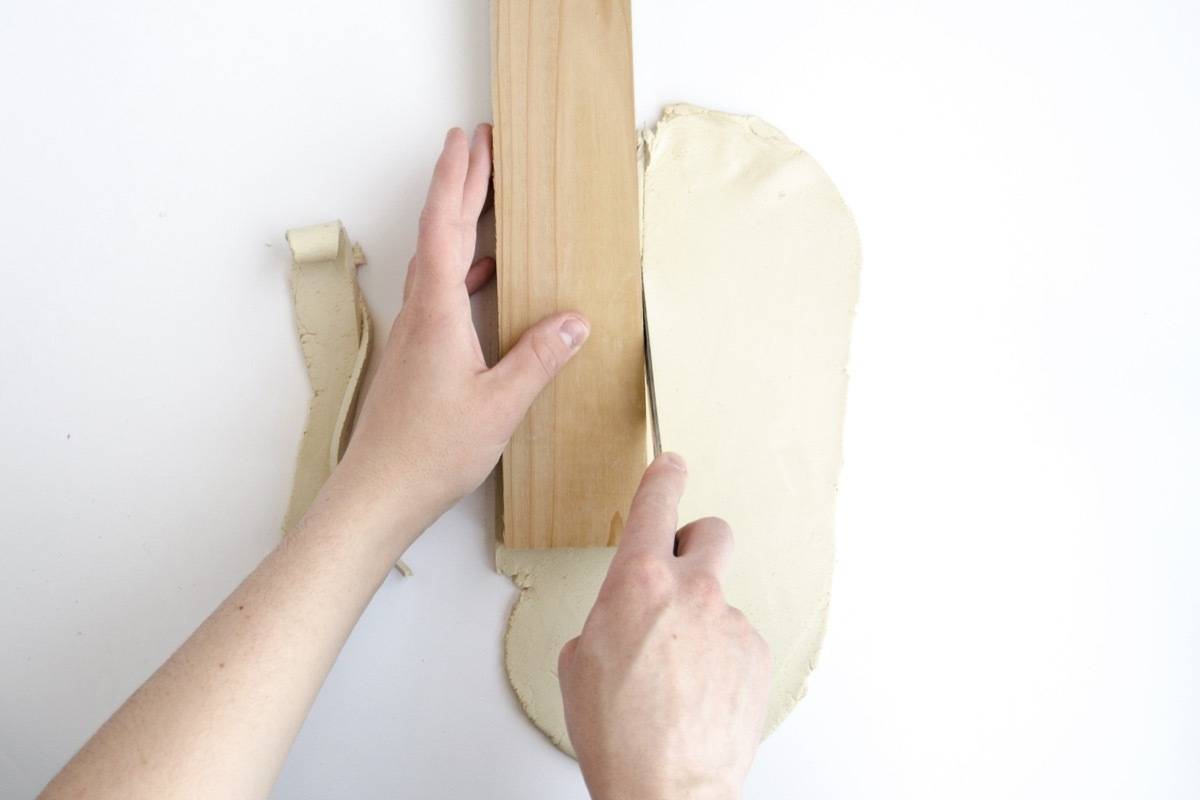
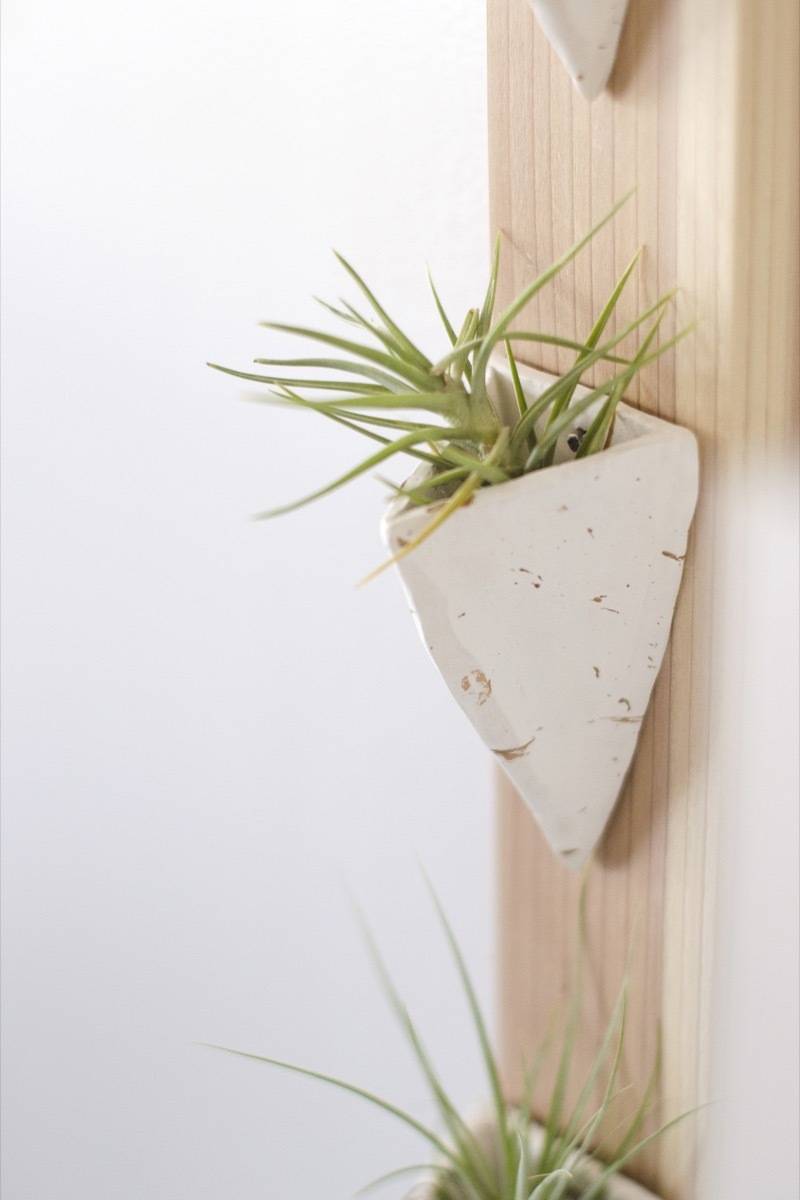
Cut out a few strips of the clay using a knife or clay cutting tool. Make the strips slightly smaller than the width of the wood board. From those strips, cut four triangles of equal size. Use the first triangle you cut as a guide for the last three. Set one triangle aside.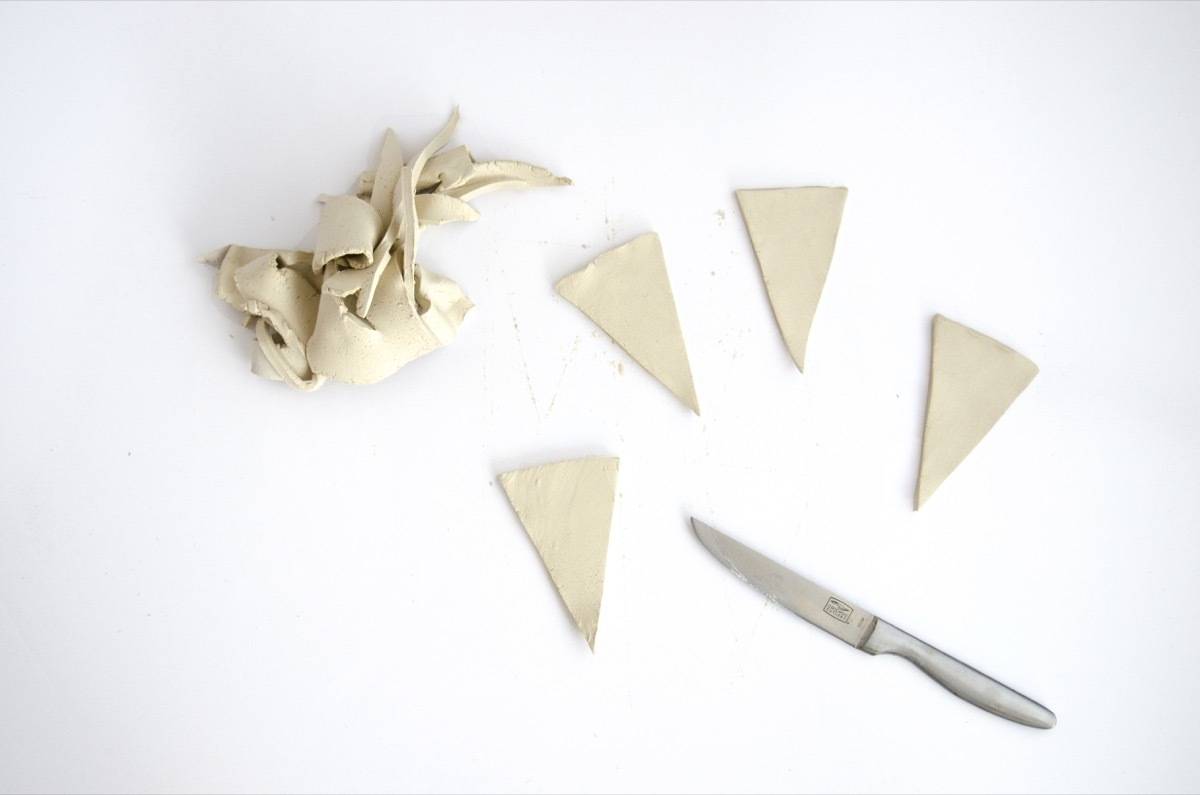
Step
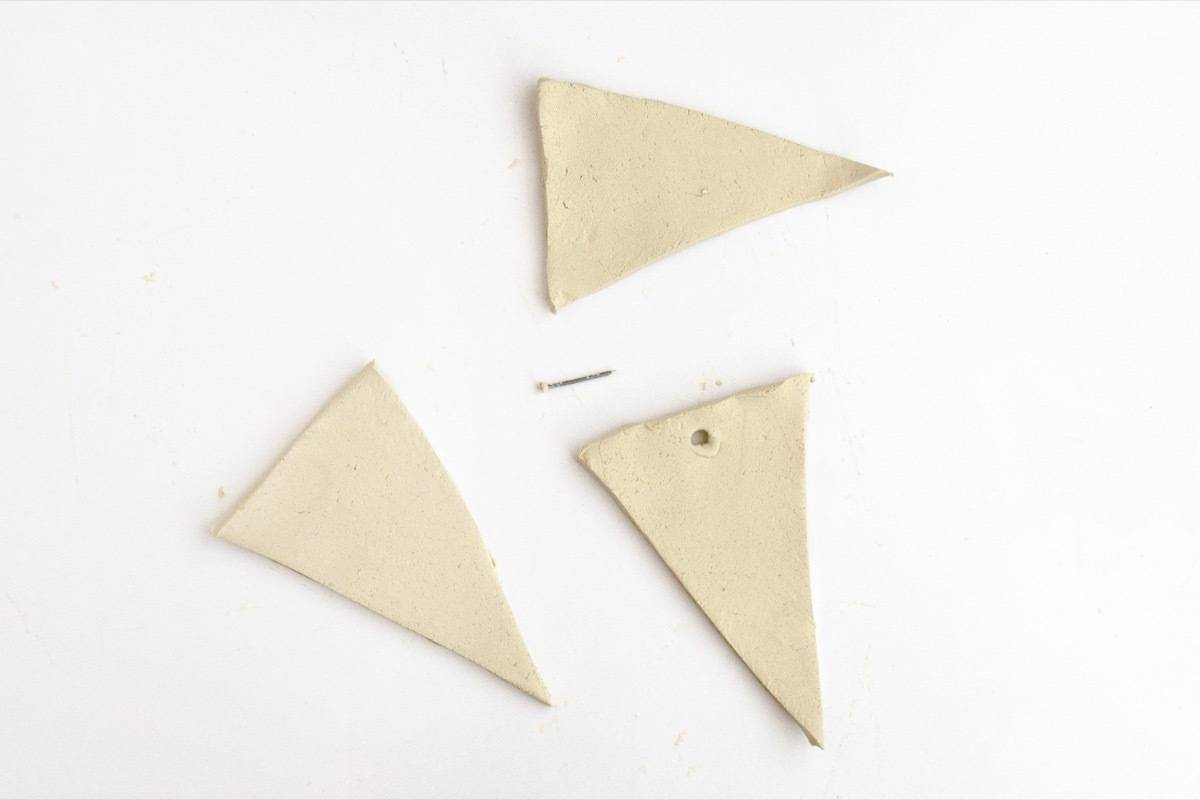
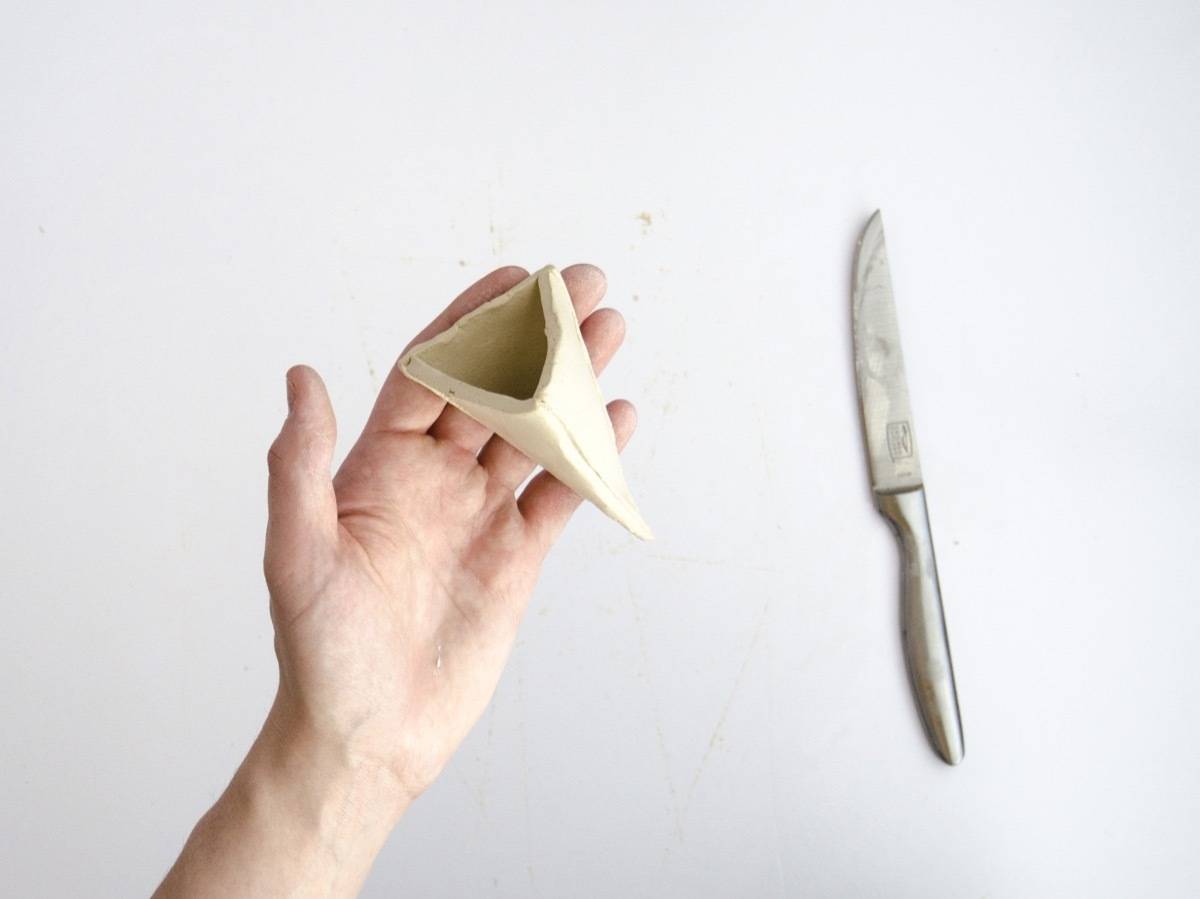
Create a hole in one of the three triangles, along the shorted side. The hole should be slightly larger than the heads of your nails. Next, assemble the triangles together to create a pyramid shape.
Step
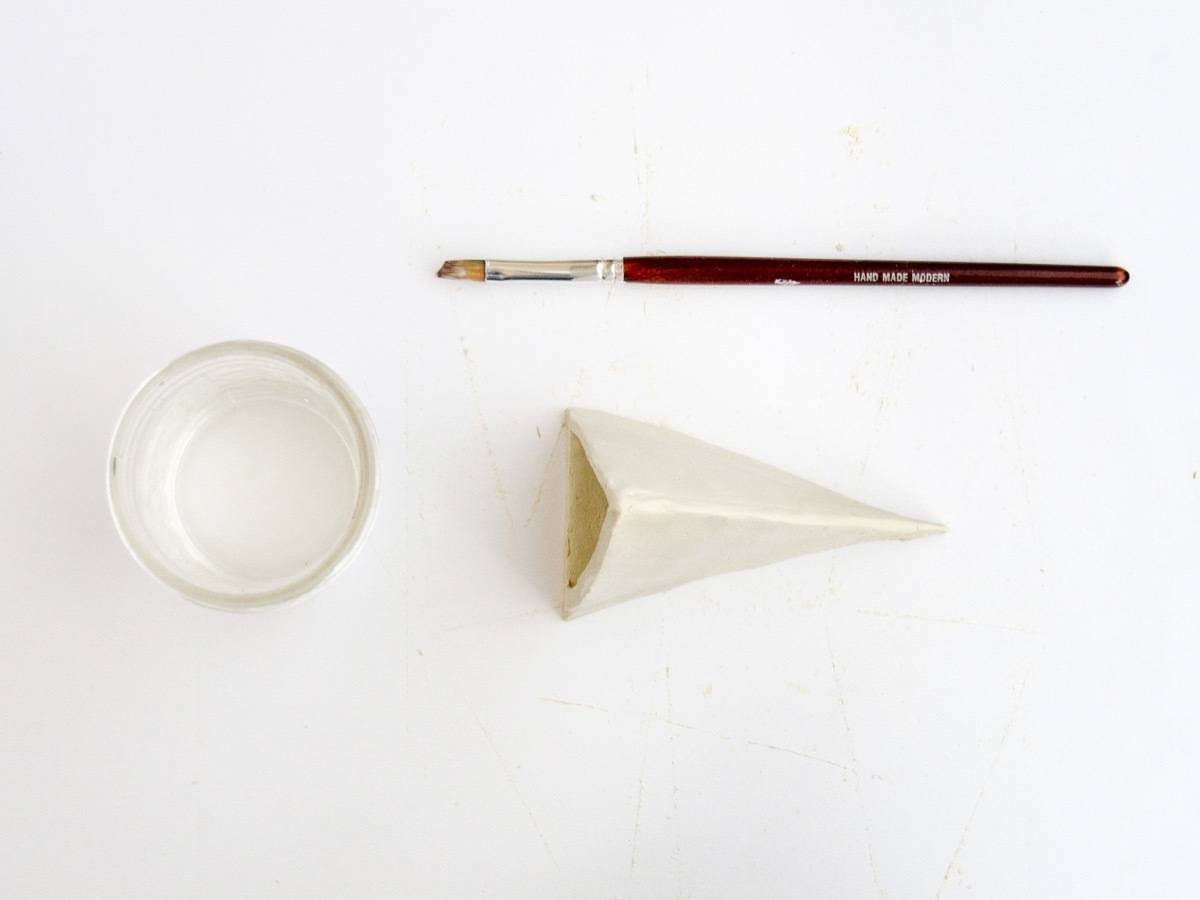
Use a paintbrush to apply water to the seams of the clay air plant holder, and smooth the edges closed with your fingers. You can also smooth off the surface of the clay pyramid by painting it with a bit of water. Keep in mind – the more water you add, the slower your clay air plant holder will dry.
Once you’re happy with your first clay pyramid, use the fourth triangle that you set aside to cut three more triangles, and repeat steps 3-5 twice. In the end, you’ll have three pyramids. Set them to dry on a flat surface. If the walls of your pyramids are too thin and begin to fall in on themselves while drying, stuff each one with a bit of newspaper.
Step
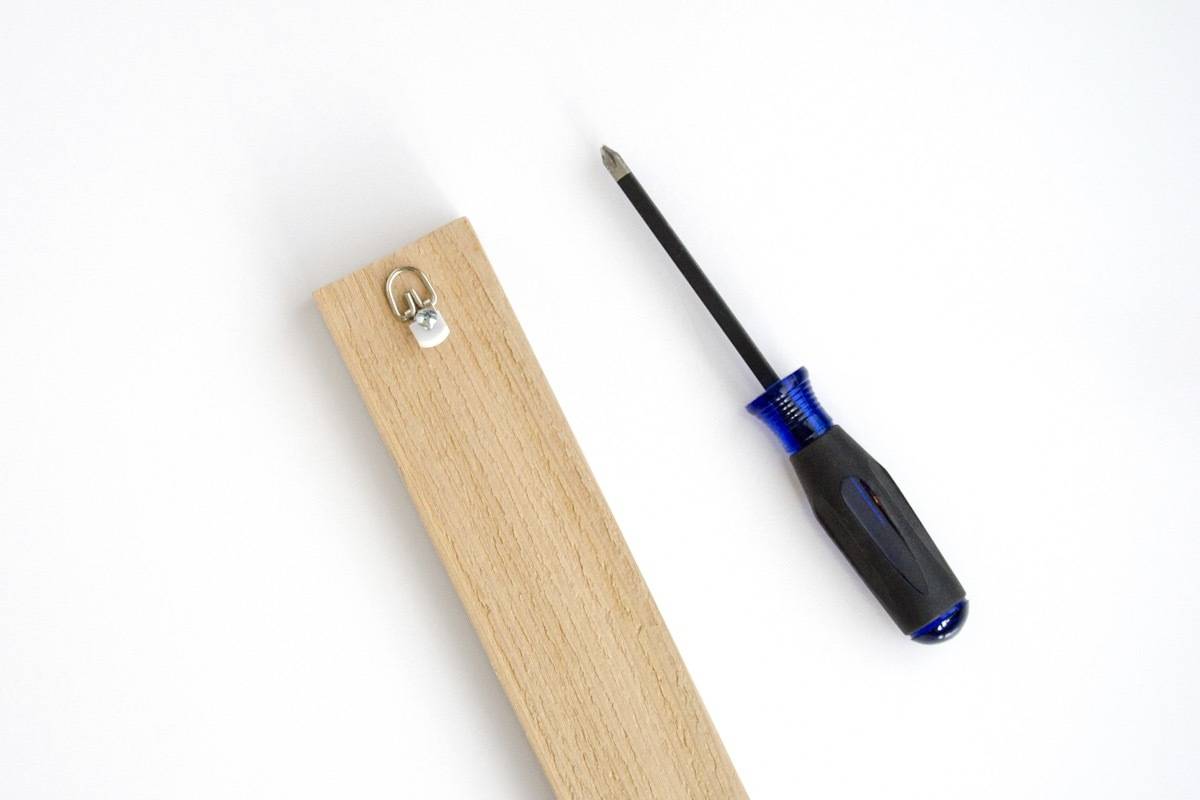
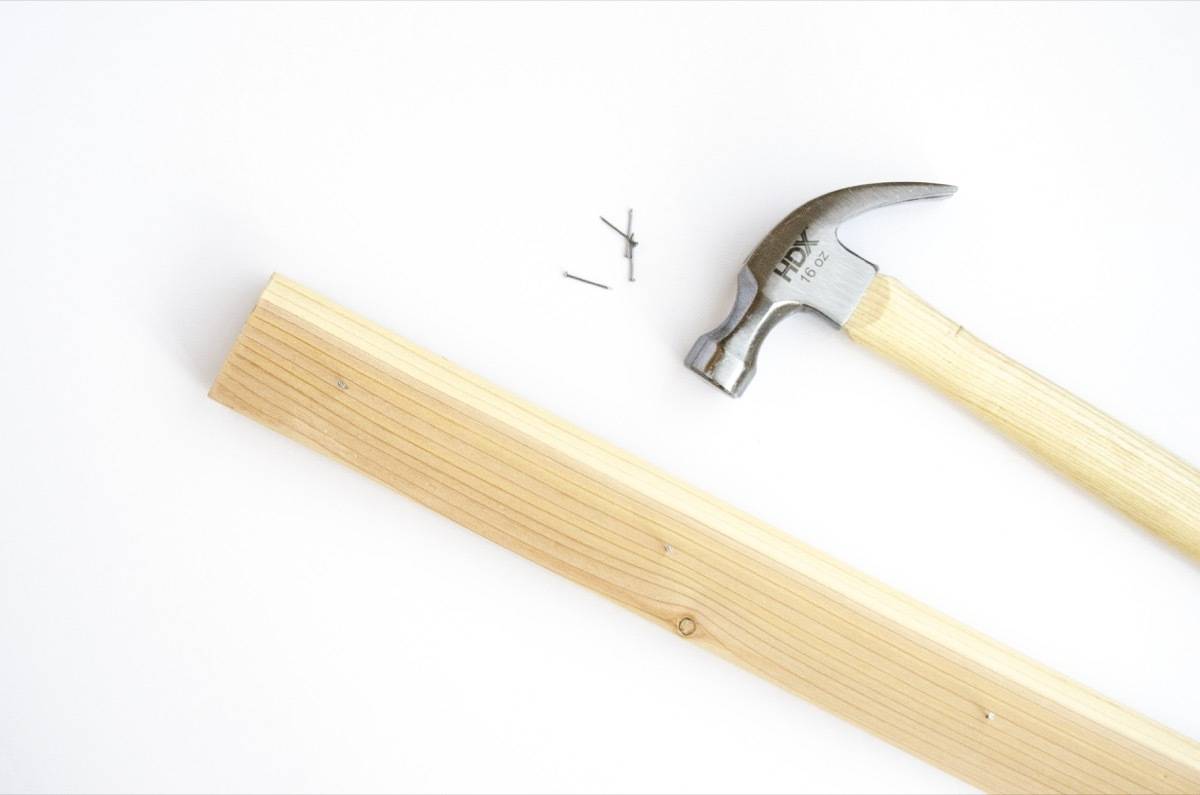
To prepare the wood board, sand the board smooth, and stain or paint if desired. Add hanging hardware to the back of the board. Flip the board over, and hammer in three equally-distanced nails for the clay pyramids to hang from.
Step
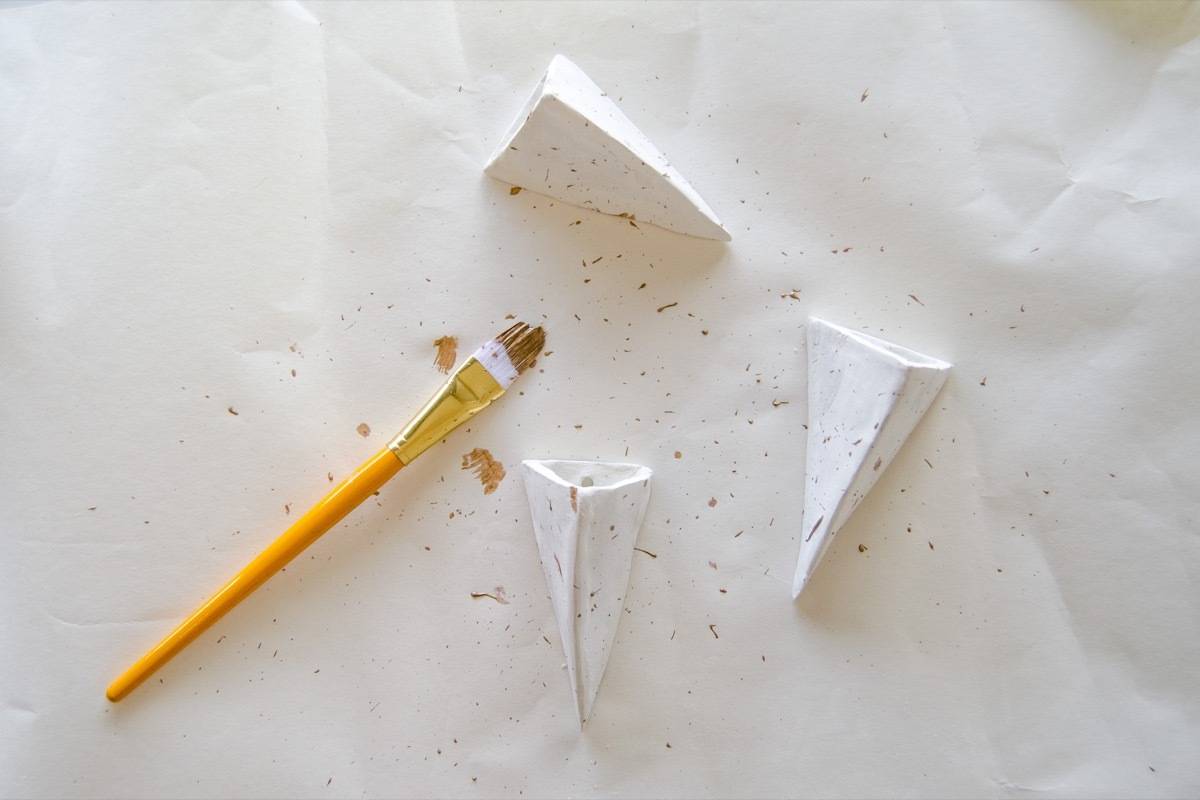
Once the clay air plant holders have completely dried (this could take up to 48 hours!), you can hang them straight away, or decorate them with acrylic paint. If you’re unhappy with any imperfections in the clay after the drying is complete, grab a fine grit piece of sand paper and lightly buff. I chose to do a splatter paint job on my clay pieces, but you could easily paint them solid colors, or tape off patterns and designs. Once dry, hang each clay air plant holder from the nails attached to the board. Hang on the wall, and you’re done!
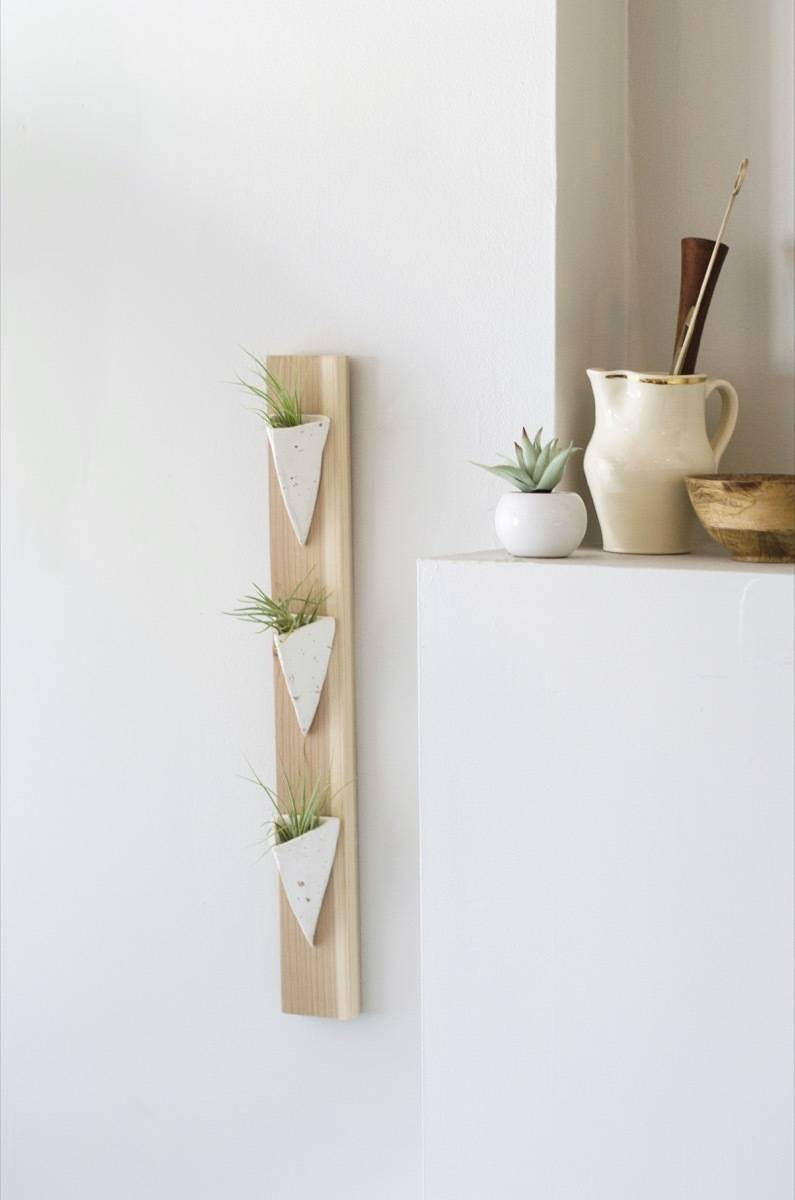

When watering the tillandsia that live in this particular air plant holder, make sure you remove the plants first. Any moisture on the air-dry clay will cause the clay to re-activate, and it could lose its shape. Remove the plants when watering, and return them to their home after they’ve been towel-dried.
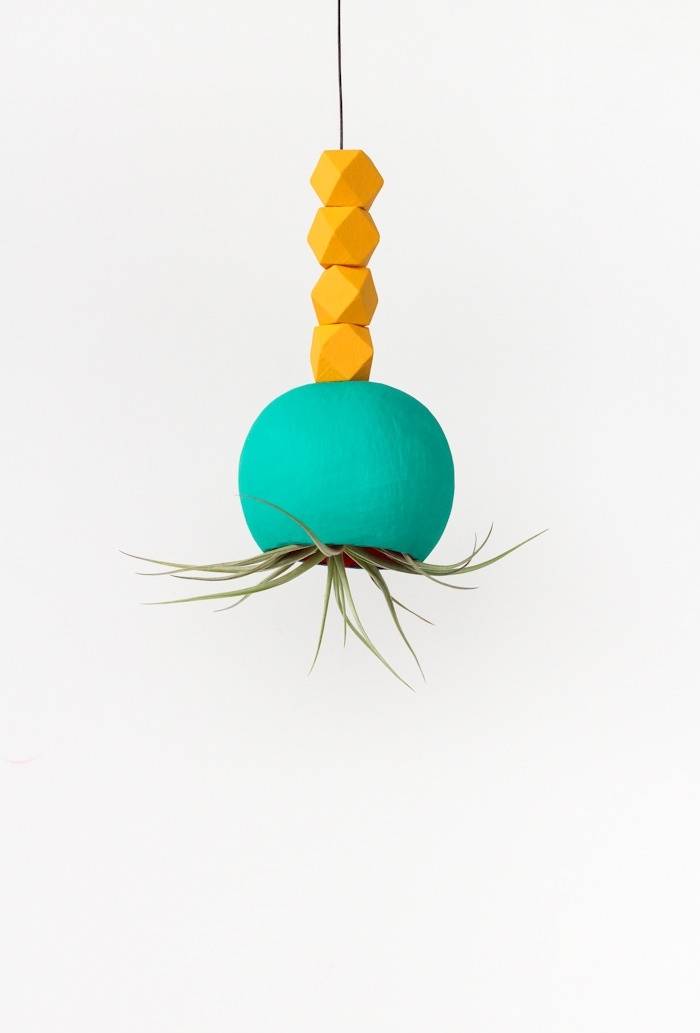
If you love air plant holder DIYs, check out this colorful hanging project!