
You don’t have to ask me twice to talk about DIY headboards! The headboard is that very special piece of furniture that’s up for anything, design-wise (in my opinion, anyway!). Whether understated or ornate, headboards can be painted, upholstered, woven, salvaged, taped on the wall – you name it. You can essentially make a headboard out of anything that fits behind your bed. Ahh, so much freedom, so little time. Let’s take a look at some of my favorites and how you can get started.
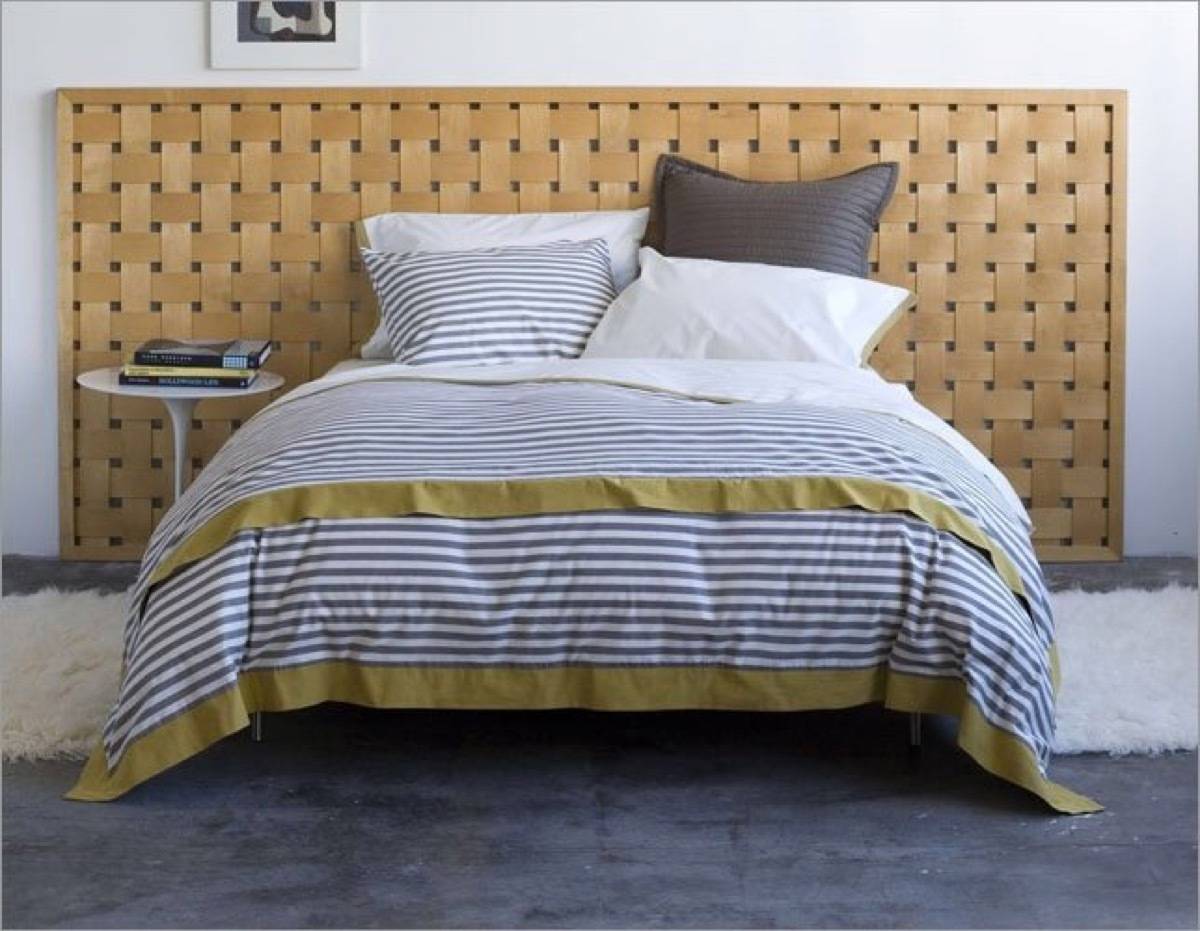
1. Woven Wood Frame: I love woven wood. The best way to create this headboard is to build a simple wooden frame that extends beyond either side of your bed. You can purchase wood veneer by-the-roll online. Using a staple gun, weave and attach the veneer strips to the back of the frame. A dark wood stain would be oh-so-lovely.
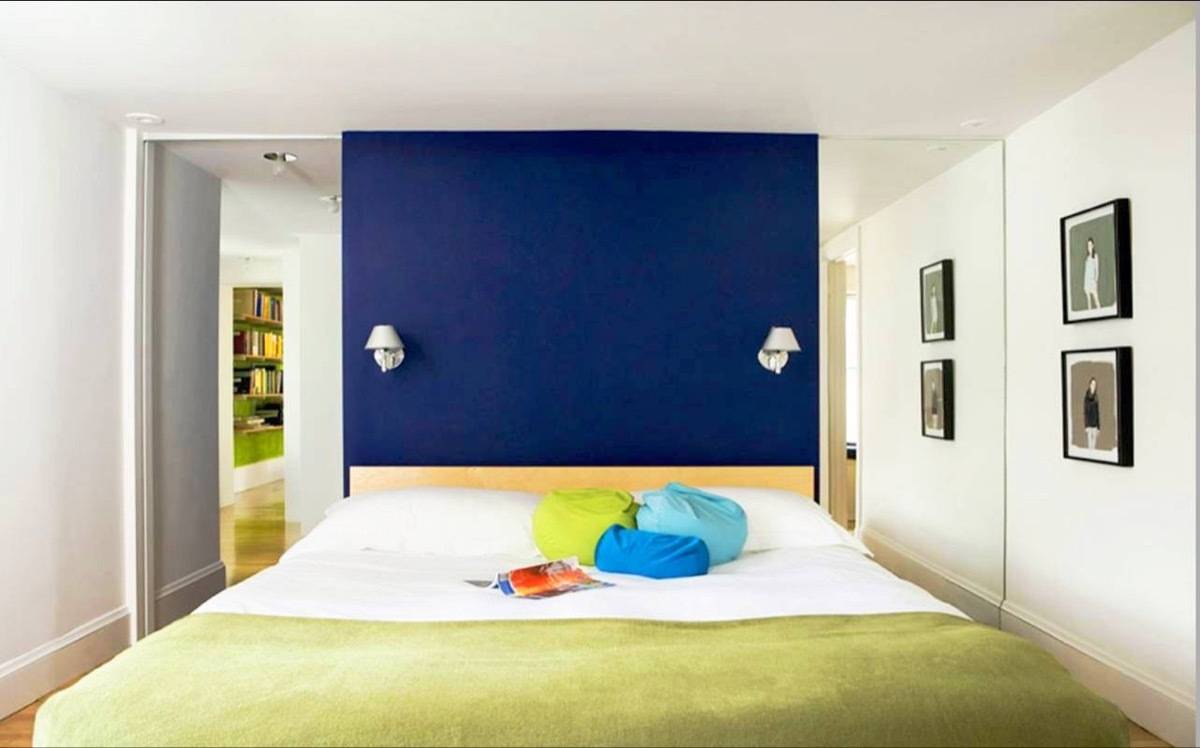
2. Bold Blue Painted Wall: Ahh, the old contrasting wall trick – and a good one too! Little on effort and low on cost, all you need to do is choose a bold, contrasting color to paint the wall section right behind your bed. I just had another idea… What if you added full length mirrors next to either side of the painted section of the wall? I think it would look stunning and polished!
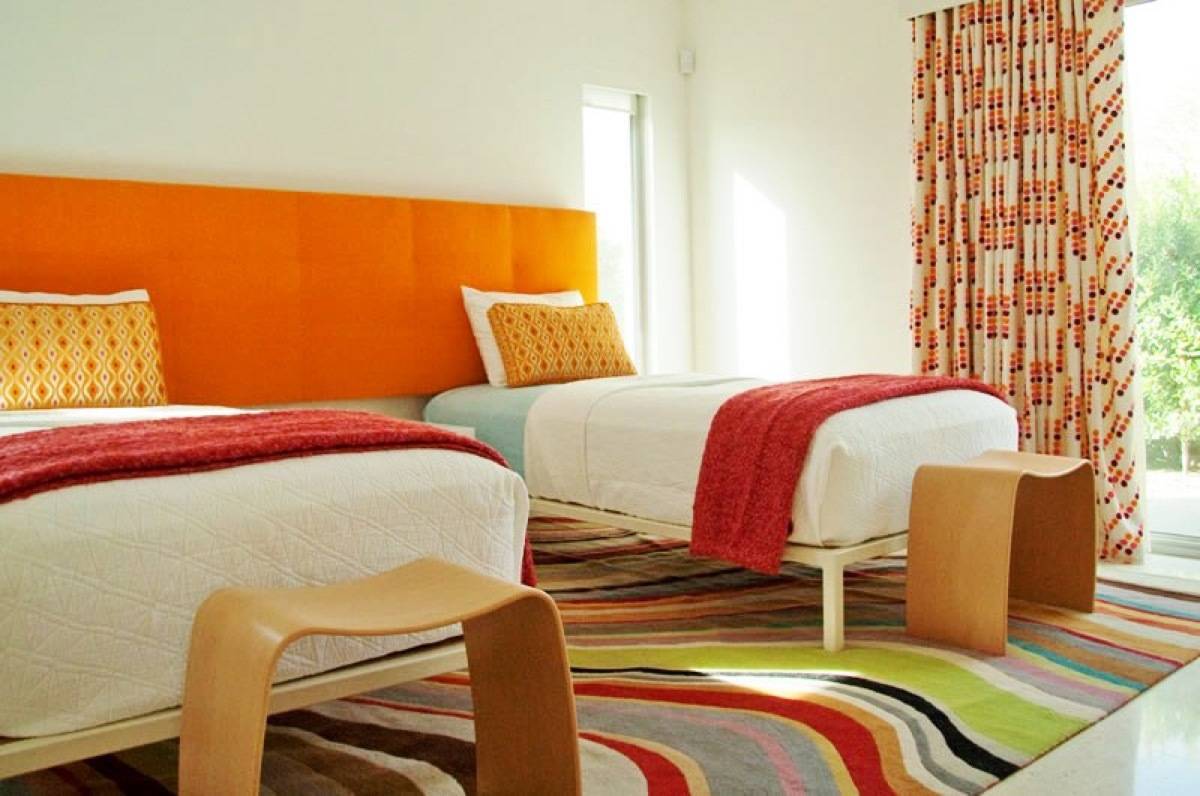
3. The Orange Twin Beds Upholstered Panel: What do I need to say? All you have to do is get two pieces of 3/4″ plywood about 3′ high by 8′ long (if you need it longer, add another section by attaching metal brackets on the back). Go to the fabric store, purchase enough 2 1/2″ or 3″ foam to cover the wood. Before attaching the foam to the wood, mark and drill the holes where you’ll attach your covered buttons. Spray adhesive on the wood, center the foam, then add a big piece of Dacron batting to soften up the edges. Upholster the panel, make covered buttons, add twine and pull the buttons through to the back. Make sure the ‘tufting’ or tension is equal for each button and then staple the twine down to the wood. Using a hanging device, hang the panel behind the two beds.
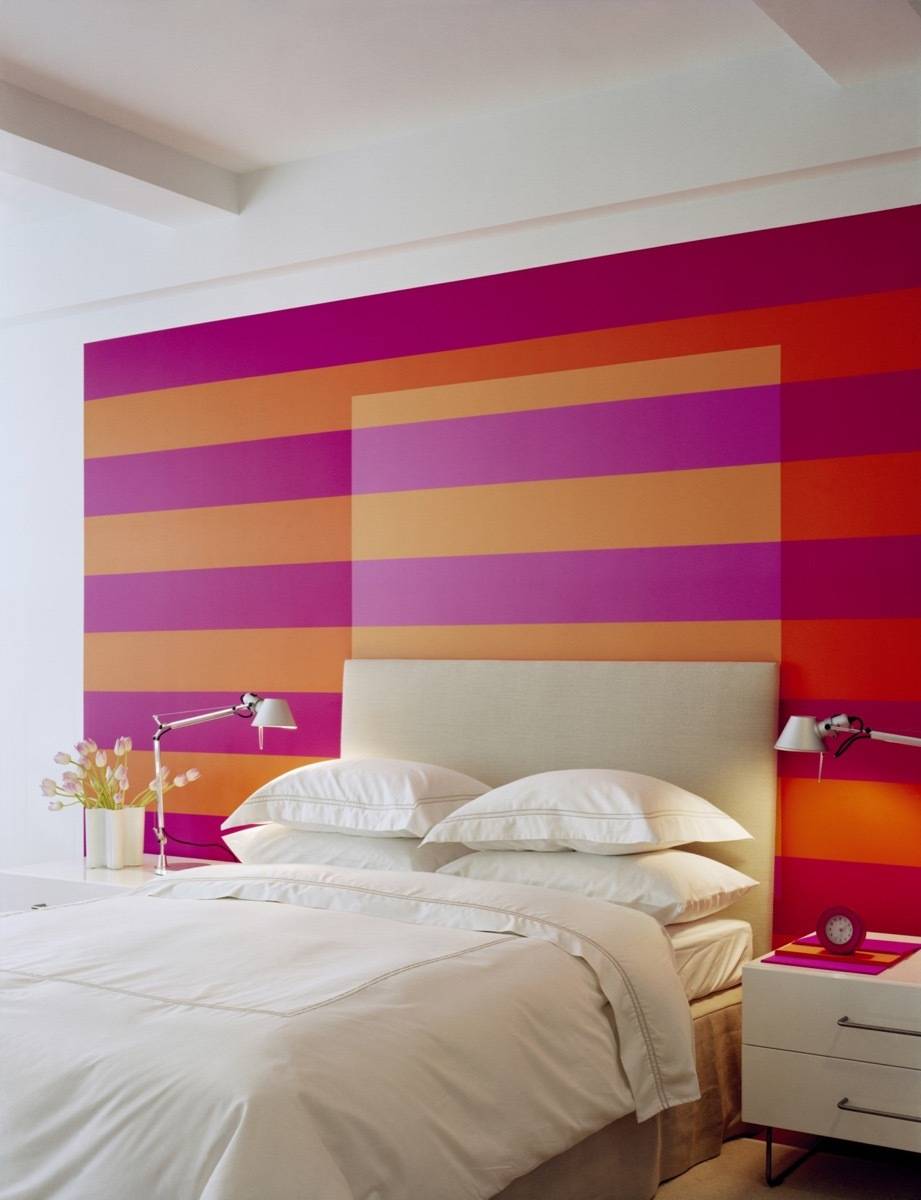
4. Pop-Out Painted Stripe Headboard: This is just clever. A brightly striped wall with the pop out section for the headboard painted in lighter shades of the stripes. It’s a pretty bold wall, but think of how happy those colors would make you feel every day! Plus, if you ever changed your mind, it would only cost you a can of primer and a new coat of paint.
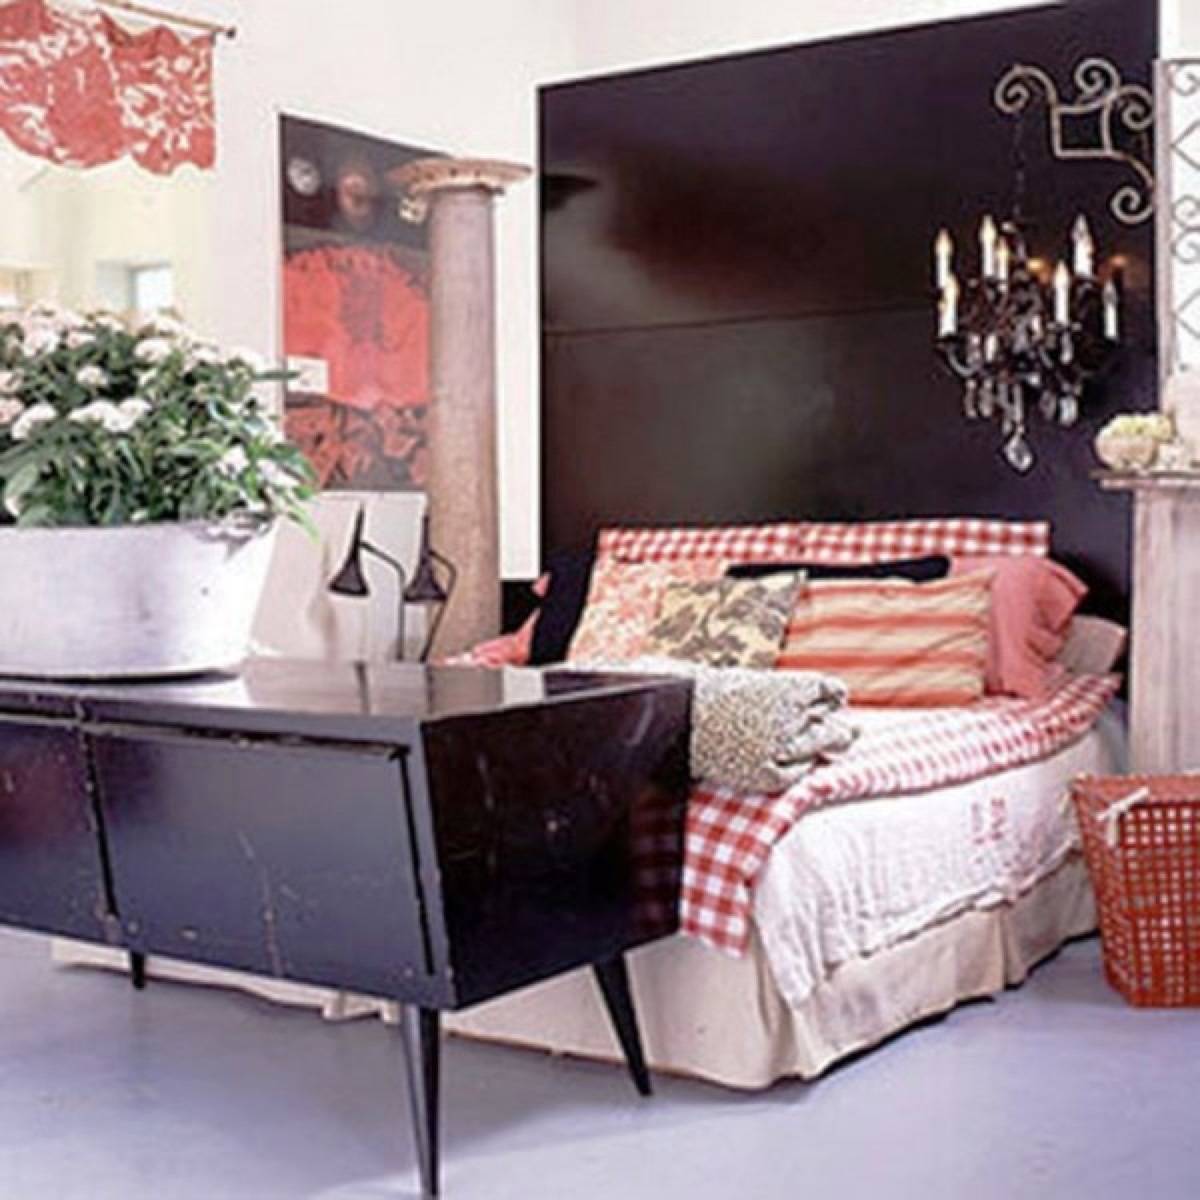
5. Three Horizontally Stacked Black Doors: I’ve seen headboards made from paneled doors, shutters, old windows, mantels, etc. But I really love the simplicity of this one made from three hollow-core doors stacked up the wall. The matte black paint behind the red and white checked bedding is divine. This is an easy DIY idea that almost looks like it’s a custom built paneled wall behind the bed. And again, with simplicity like this, you won’t tire of it very quickly. If you do, you have options! Paint it another color, alternate colors, or give them the Moroccan stencil treatment.
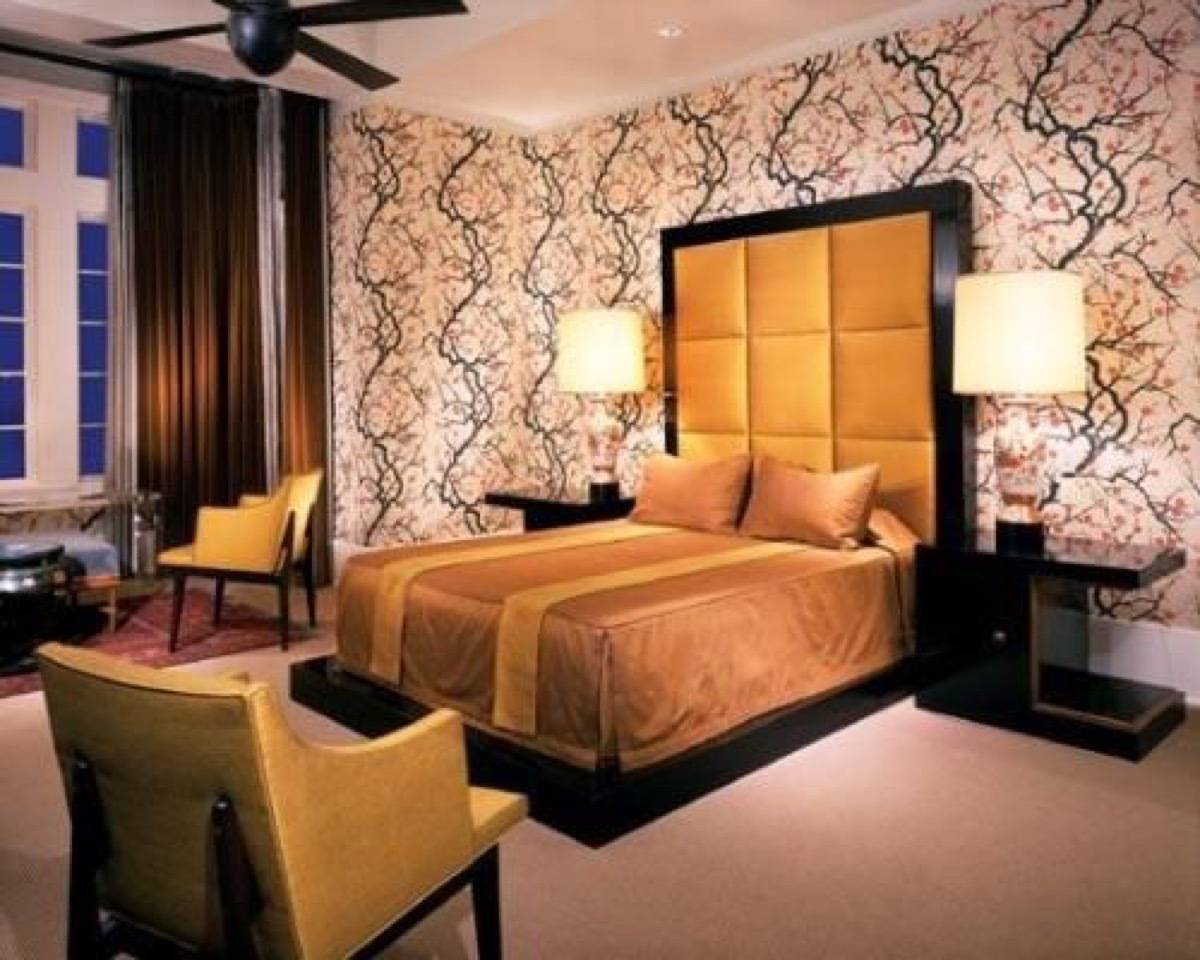
6. Chunky Wood Framed Upholstered Panels: There’s so much you can do with upholstered panels. Here’s a headboard made of what looks like gold silk all framed up with a chunky wood frame. This DIY project might take a little more time, but it looks so custom (yeah, custom made by you, for you). For this project, I would upholster small pieces of plywood, arrange and attach them on a larger piece of wood, maybe two). Then, I would come back and attach the frame to the wall to give it that built in look.
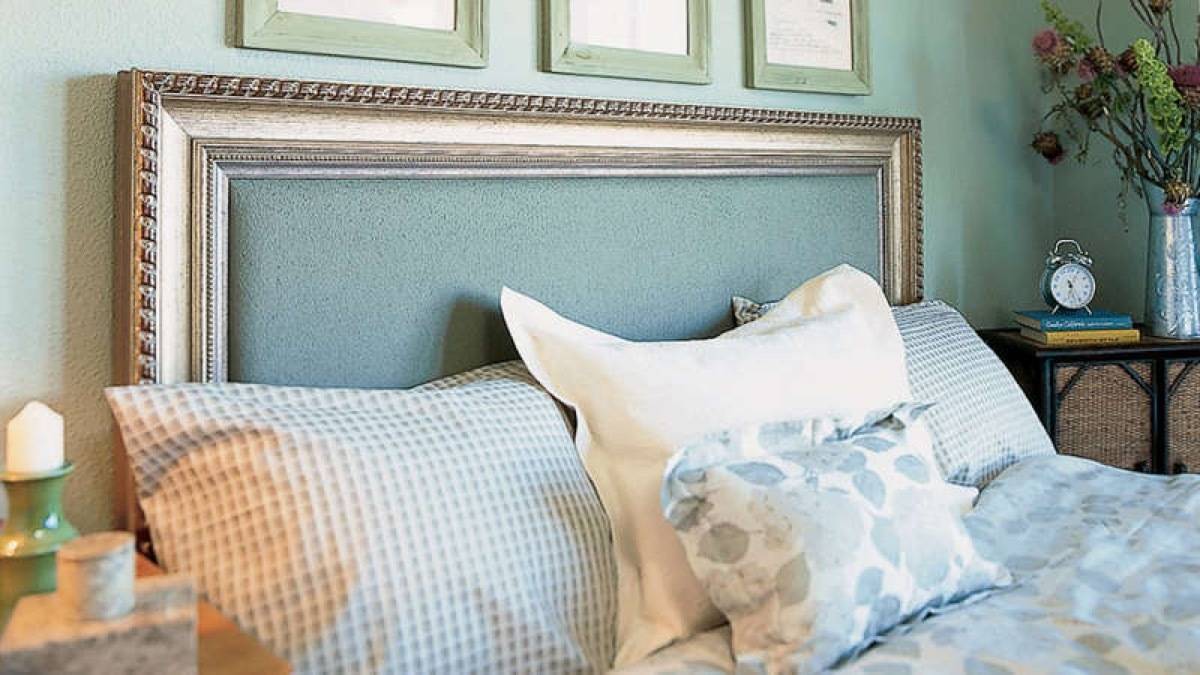
7. On The Wall Upholstered Headboard: This one is simple, yes, but I love the plain fabric paired with the shiny silver frame. This may take you 2-3 hours if you have the wood ready. All you need to do is to measure and outline the area to be covered in fabric. Spray adhesive on the wall, or just staple some Dacron batting on the wall. Cut your fabric to shape so it’s ready to be attached. Begin attaching a few staples at the top, center, and bottom. Now repeat the stapling on both sides, working out towards the corners, pulling firmly as you go. Once the fabric is nice and tight, you’re ready to add your frame. You could buy what they call “sticks” from a picture framing company and use a miter saw to cut the corners (a little tricky). Attach the frame to the wall, covering the staples and you’re good to go. You have lots of options with this design.
8. The Three Panel Hanging Headboard: Here’s a headboard I designed myself. It can be easily stacked, packed, and moved with minimal effort, plus takes up very little space. It works like a charm and is super easy to make. If you have a queen sized bed, it will measure right around 60″ wide. Each of these three panels is just under 20″ wide. Again, Lowes or Home Depot will cut the wood to your specs. There’s a nifty hanging apparatus on the back called the Hangman Picture Hanging System, also available at Lowes.
For more headboard inspiration, check out 4 Bold and Bright Headboard Ideas to Spark Up Your Bedroom, Woven Leather Headboard and DIY Headboard Ideas.