
As my new office space started coming together, I realized I had a very large blank wall that needed some major artwork. On the opposing wall, I have a small trio of frames, so I didn’t want to do the same on the big wall. But I didn’t want just one big image either. So I did what we all do, I searched the internets for some inspiration. One product popped up from Umbra (pictured above) that caught my attention immediately. The 30″ x 26 1/2″ configuration would be perfect photographs that hold a special place in my heart but have yet found a special place enlarged on my walls.
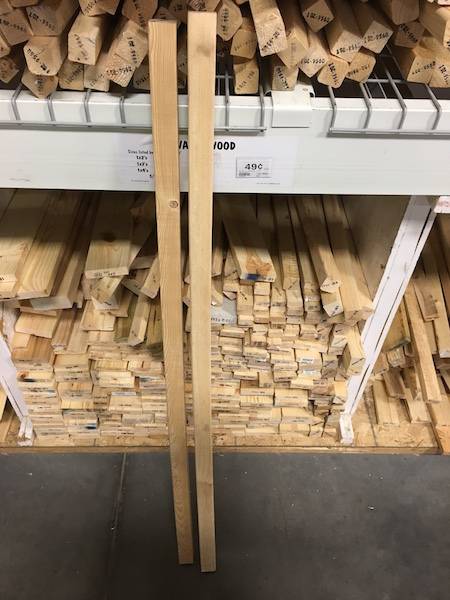
The store-bought version costs a very reasonable $20, but I knew I could make one for next to nothing. Which I did. Actually, I made two of them for $5.00.
Materials
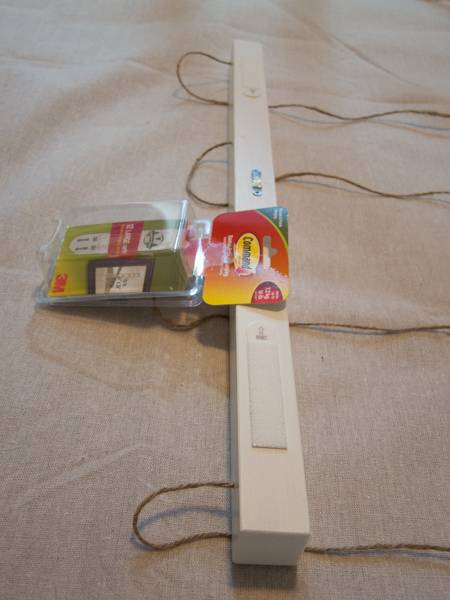
- 4 feet of 2″ x 2″ pine board per display (I found two 4′ long off cuts at my local big box store for 49 cents a piece)
- Measuring tape
- Saw
- Pencil
- 2 ply natural jute cord or alternative cord of the approximate ply/width
- Drill
- Drill bits, one the width of the twine and one slightly larger or roughly the size of the cord when it’s knotted a couple times
- 100 grit sandpaper
- Primer & paint OR stain & varnish, if desired, although I think these could look great with some simple Danish oil
- Scissors
- One sawtooth picture hanger per clothesline
- Three 3M Command Large Picture Hanging Strips
- 1 7/8″ clothespins (I found a pack of 24, like these)
- One sawtooth picture hanger for each display you make
- A hammer
- Three sets of 3M Command Large Picture Hanging Strips
- A small bubble level
Step
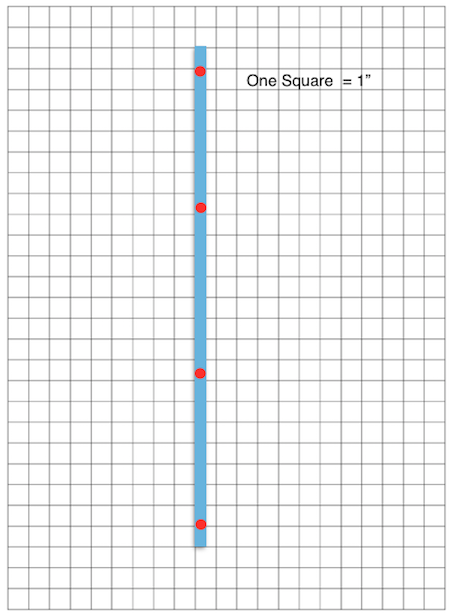
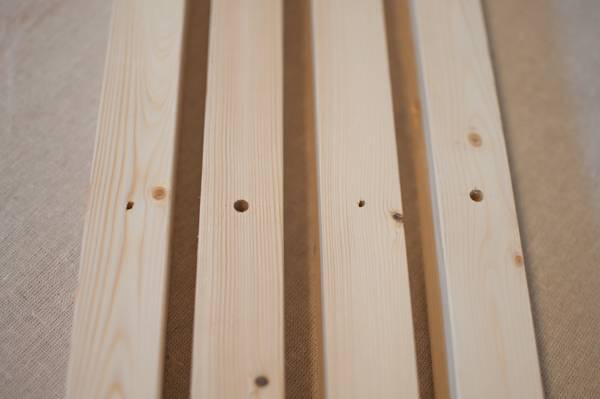
First, cut the 2″ x 2″ board into two 2-foot lengths; starting at the ends of the boards, mark with a pencil approximately 1 1/2 to 2″ from each end. Then mark 2 or 3 points along the board equidistant from the two marked points at the ends of the boards. (I chose to mark only 2 points, which would give me a total of 4 clotheslines per display.) The image above crudely illustrates these instructions.
Step
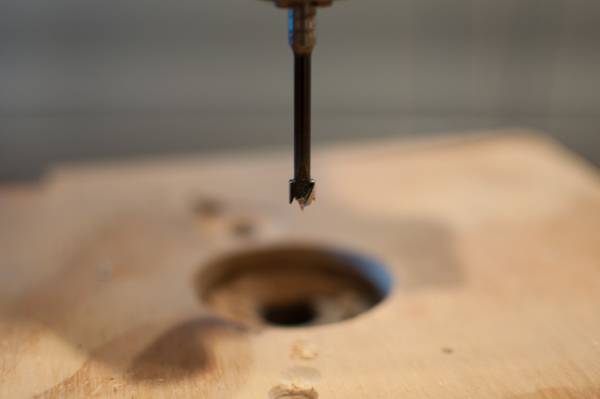
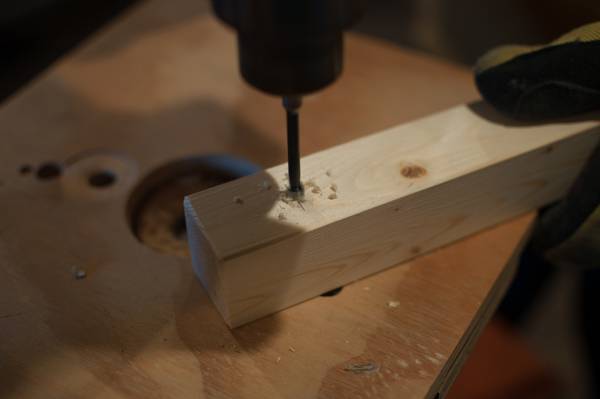
Next, using the larger of the two drill bits, drill holes at each of points marked, but ONLY drill about 1/4 way into the wood. Forstner bits work GREAT for this step in that they create a point which will guide the smaller bit precisely in the center of the hole. (Yes, we have a drill press, and, yes, if you have one, this is the time to use it. But if you don’t have one, don’t worry. A hand drill will work just fine too.)
Step
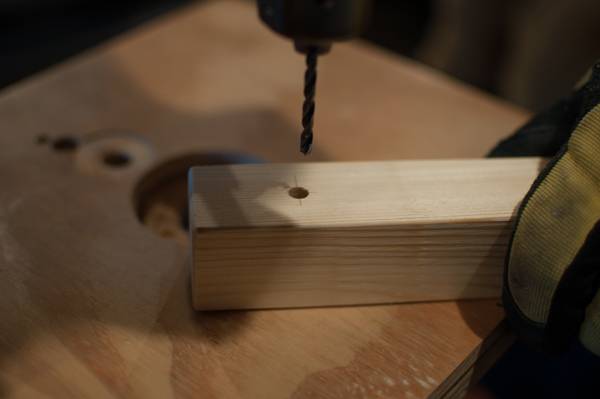
Then, using the smaller bit, drill through the hole you just made and through the board entirely. Why are we doing this? To countersink the knots we’ll be making later. If you don’t care if the knots show, you’d only have to drill the smaller holes.
Step
Now it’s time to sand and prime and paint, OR stain and varnish, OR apply Dutch oil.
Step
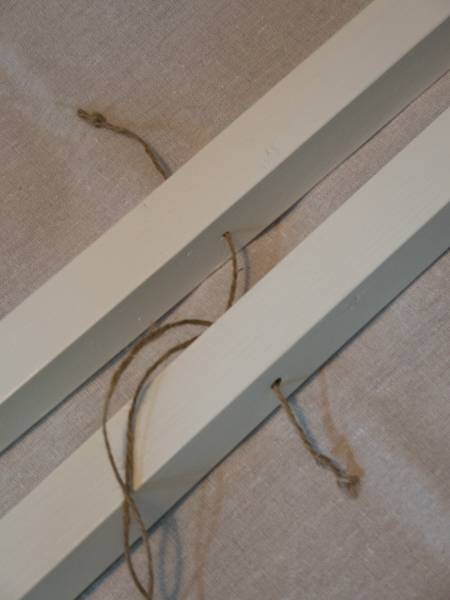
Time to string the line. I cut four 36″ lengths of jute for my clothesline, but you could make them as long or as short as you want. Whatever length you chose, thread each end of the cord into its corresponding holes in the boards–GOING THROUGH THE SMALL HOLES FIRST and OUT THE LARGER HOLES. (If you have difficulting threading the jute into the hole, melted candle wax is a lifesaver. Just dip the very end of the jute into the wax and roll it between your fingers–but mind your fingers. Candle can easily burn your fingers!)
Step
Then, knot the ends of the jute–but only on one side. (Knot enough times so the cord doesn’t pull through the smaller holes!) Pull the lines taught and knot the other end of the jute, making sure they are all knotted at the same point. (Or very nearly at the same point. Otherwise, your hanger will have saggy lines. This is particularly important if you install your hanger with the lines running vertically. If you hang the structure horizontally, sagginess would probably be more forgiving.)
Step
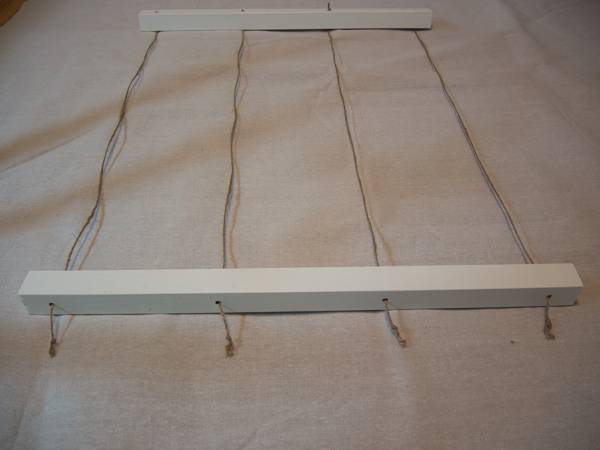
Attach a sawtooth picture hanger at the center of one of the 2″ x 2″s. I would also STRONGLY recommend attaching two sets fo 3m Command Large Picture Hanging Strips on each end of the top piece of wood and one at the center of the lower piece of wood. This will keep your clotheslines secure, as you don’t want them swinging back and forth when attaching photos.
Step
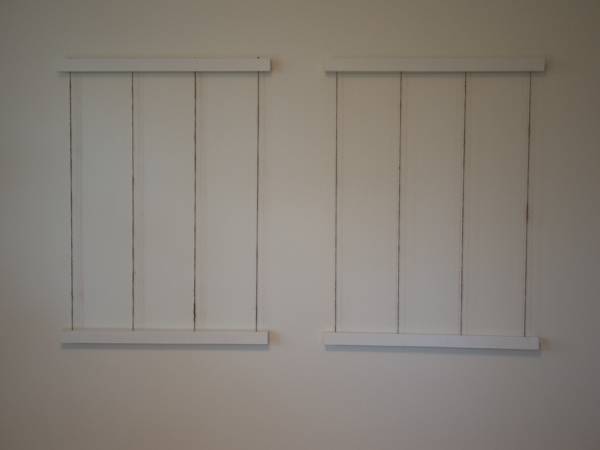
When hanging the clothesline, use a small bubble level on the top board to level it up first. After it is hung via the sawtooth hanger and stabilized by the 3M strips, level up the bottom board and press the exposed Command adhesive strip to the wall. (What’s great about the strips is you can easily adjust the level if needed.)
Step
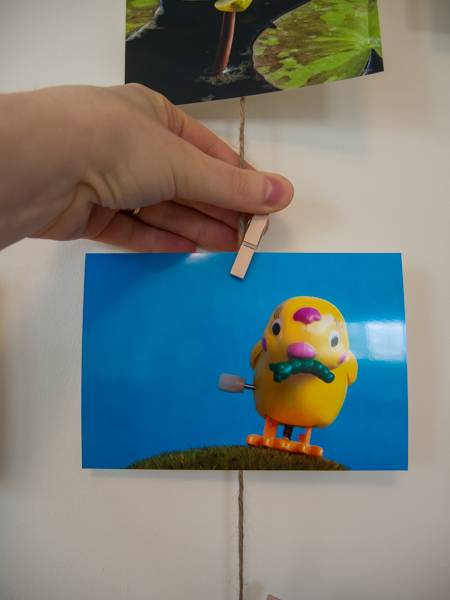
It’s finally time to attach your favorite snaps with the small clothespins.
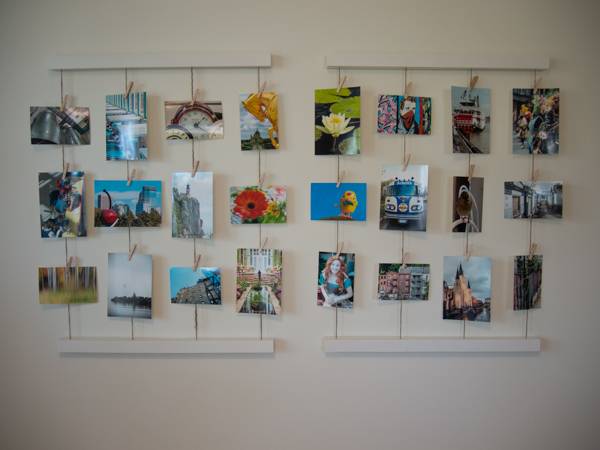
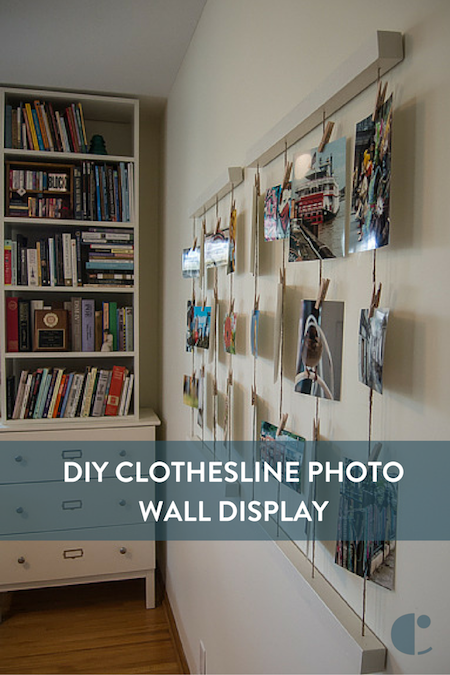
And….. DONE!

There’s still room for more prints on my clotheslines:
And look, take a peek at the new bookcase arrangement. To see the rest of the office (aka: the reveal), come back next Tuesday. And to see the other posts in this series, check out part 1, part 2, and part 3 too.
I have something similar but a LOT simpler that I use to display photos most of the year, Christmas cards during the holidays–it’s just a grid of clothespins stuck to the wall with 3M stickies.