
There are just a few incidentals left to complete, and then my home office will be finished. (I get a little giddy just thinking about it.) The hard stuff-building, painting, staining, and sanding is done. Now it’s just a matter of making things look pretty.
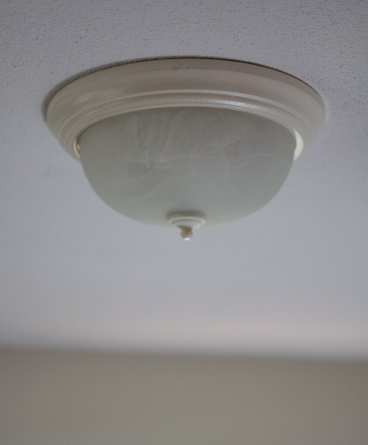
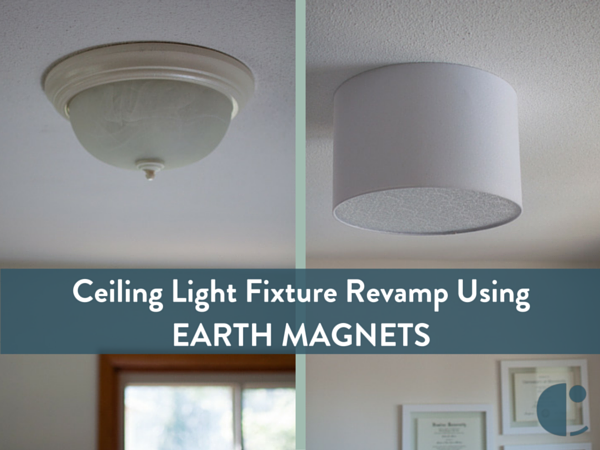
One of those things is the room’s ceiling fixture. I haven’t seen any (excuse the expression, but it fits) boob light revamps on the interweb that hides their appearance.
Although I did see one project that suggested making a pretty bra (made of beads) for the thing. Yeah, that wasn’t going to happen. It still looked like a boob light–just ready for some action. Okay, I’m getting off track.
So! I had also seen a bunch of projects where the makers removed the glass part of the fixture and wired up a barrel shade to the original flange of the old fixture through which they drilled holes.
The outcome looked okay, but, because they had to leave room for their fingers to do the wire-twisting, the shades couldn’t be flush to the ceiling–something I wanted. However, if the makers didn’t use some sort of baffle in the bottom of the shade, they could then reach inside the shade from below and do the twisting. That wasn’t going to work either because it was imperative that my shade have a baffle. And a REAL baffle, by the way; no poster board.
And then something occurred to me: earth magnets. Those things can hold anything. So that’s what I used to make this DIY ceiling light fixture revamp. If after reading about this project you decide you’d like to give it a try, PLEASE make sure that the flange of the ceiling light you want to hide plays well with magnets! They gotta attract for this project to work. Now let’s get started.
MATERIALS
- One barrel shade with a spider fitting; the shade should have a circumference slightly larger than the ceiling flange of the old light fixture (I found mine at Home Goods for about $20)
- Two pliers or vice grips or a combination of the two
- A sheet of poster paper
- A pencil
- A scissors
- Painter’s or masking tape
- A Sharpie
- Tin snips
- An acrylic light panel (I used this one for about $9)
- Small Rare Earth Magnets — NOT regular refrigerator-magnet-type magnets. You’ll need one for each branch of the shade’s spider wire. Usually three. (I used 1/4″ earth magnets with a 1 pound pull–together that means they can hold 3 pounds, which is plenty to hold up a shade of this size–about 20″)
- CFL or LED light bulbs for the fixture if you don’t already have them in the fixture. This is because CFLs and LEDs burn cool, and this particular fixture rests closely to the ceiling which means there’s little room for heat to escape. So, for safety reasons–PLEASE DO NOT use incandescent or halogen bulbs with this setup. CFL or LED’s ONLY.

Step

Start by taking off the glass shade of the light fixture and measure its diameter. Then, use the tin snips to cut out the spider wire from the inside of the lampshade, making sure that enough of the spider wire is left to adequately reach the flange of your ceiling fixture and curve/conform to the angle of the ceiling flange. So, for example, the flange of my fixture is 13″ in diameter with about a 2″ drop and my shade is 15″ in diameter. I left about 4″ of the spider wire intact. (If this sounds confusing, check out the pic in step two and keep reading. It’ll all make sense.)
Step
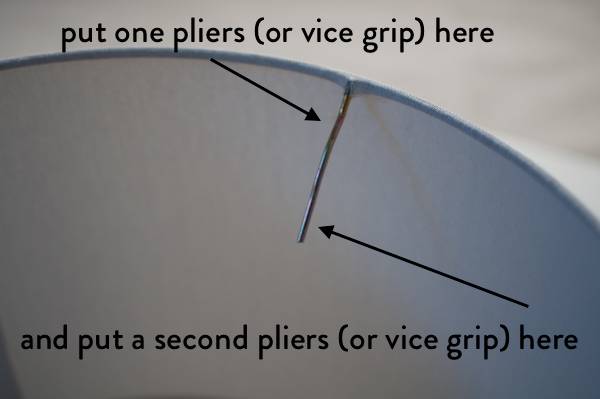
Using the two pliers or vice grips or their combination, apply one to the base of the wire that remains and one to the end of the wire. Keep a tight hold on the wire nearest the shade so it doesn’t move. IF IT DOES MOVE, IT COULD BREAK AND THAT WOULD BE BAD. Applying force to the end of the wire, bend the wire to correspond to the slope of the light fixture’s flange. Repeat for each of the remaining wires. (Spider shades usually have 3 branches, so you’ll probably have two more to bend.)
Step
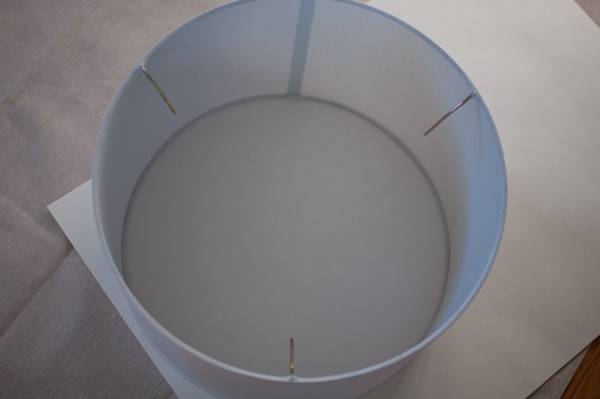
Next, with the pencil the inside circumference of the lampshade onto the posterboard. Cut the circular shape, making sure to cut on the OUTSIDE of your pencil line.
Step
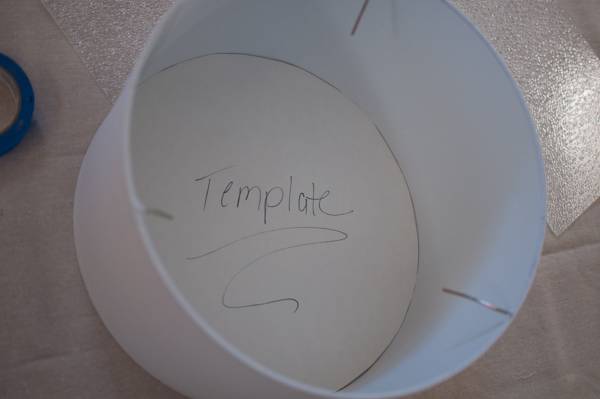
Fit the poster paper template inside the lampshade to make sure it fits.
Step
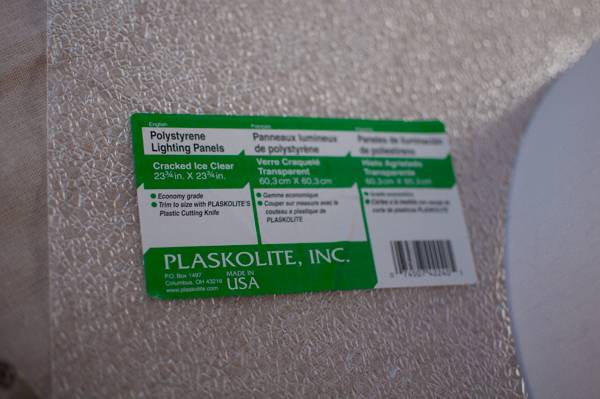
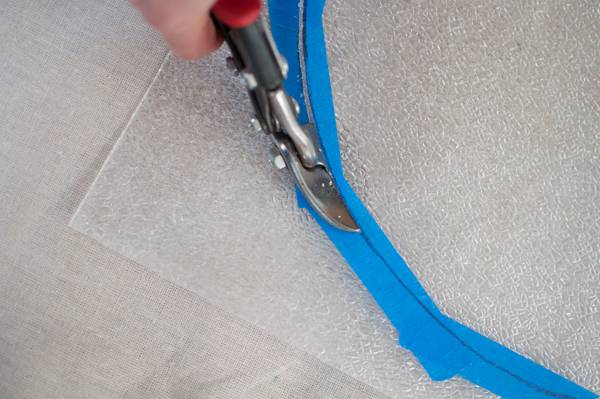
Take your acrylic sheet (close up of maker’s sticker above), and, using the paper template as a guide, position tape in a circle the same circumference as your paper sheet. When you’re done taping, position the template BACK OVER the tape and transfer a cut line to the tape with a Sharpie. DO NOT IN ANY WAY USE THE SHARPIE TO MARK DIRECTLY ON THE ACRYLIC!!! It doesn’t come off.
Then, using the tin snips, simply cut along the Sharpie line.
Step

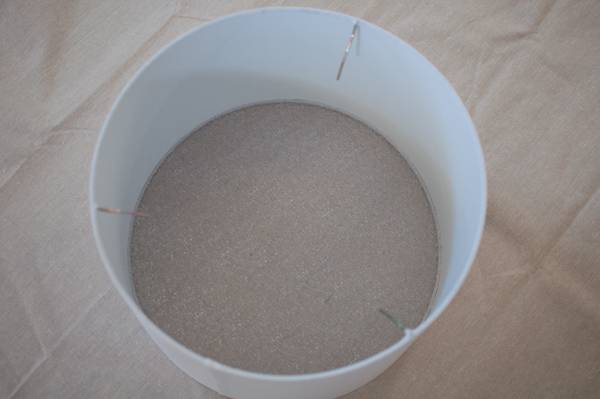
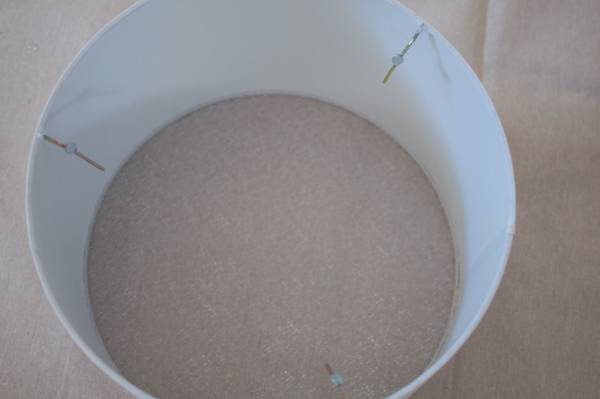
When you’re done cutting the acrylic, remove the tape, and fit the acrylic inside the lampshade.
Step
I gingerly tucked the acrylic up from the bottom of my shade and then gently pushed it down to the bottom of the shade from inside and above.
Step
To finish up, simply put one of the earth magnets on each of the spider wires, making sure the magnet is in a spot that will ‘hit’ the light fixture flange.
Step
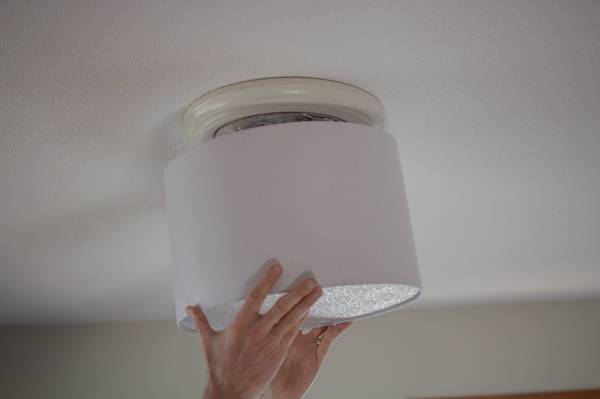
Now it’s just a matter of positioning the shade & magnets onto the flange. This might take a try or two, but, trust me, it’s easy. Plus, the magnets are very forgiving in finding the sweet spot.
I HAD considered hot gluing the magnets to the wire, but they’re so strong, it wasn’t needed. That being said, the shade is completely removable from below with a gentle tug if you should need to service the bulb or fixture. I’ve made two of these fixtures. One has been up for 2 months or more. It hasn’t budged. That being said, if you have a rambunctious child in the house that likes to throw balls and such and aims for the light fixtures, a shade like this will probably go wonky with a direct hit. For such installs, you might want to consider stronger magnets … or tell the kid to stop throwing balls in the house.
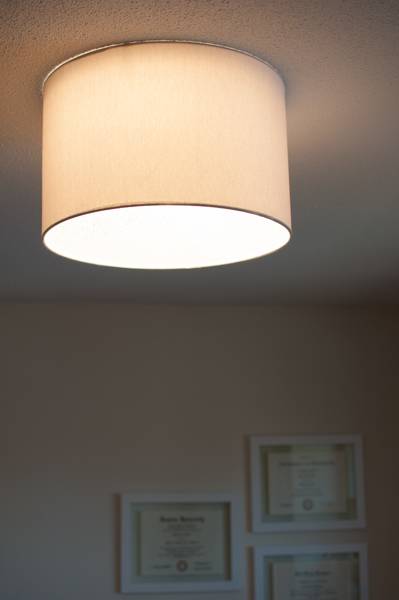
And here it is illuminated. Nice and tight to the ceiling with a perfectly diffused light.
Come back next week for an all-new “Embracing Simplicity: A Home Office Makeover” how-to, and don’t forget to check out the first post in this series and last week’s how-to, a no-sew mail organizer.
i can’t believe you posted a solution to this problem. i took down this ugly chinese restaurant fixture in my hall the moment i bought my home 16 years ago. after several attempts to find something decent, i still (shamefully) have no fixture. this post has given me a great idea. many thanks.
You’re welcome, Isabel! It’s actually a very quick project once you gather your supplies. Takes maybe 15 to 20 minutes start to finish!
Great idea! How does the acrylic diffuser stay in place?
I want to thank you for the bottom of my heart. I have been searching the internet for this solution and finally found a tutorial for exactly what I wanted to do. The magnets are genius! I could not figure out how to attach the barrel to the ceiling in a way that makes me not have to fuss with the fixture (which if full of gross dead bugs.) Also, the diffuser at the bottom, also brilliant!
Out of ALL the posts about replacing boob lights with drum shades, yours was hysterical, simple to read and understand & had great tips (masking tape over acrylic before cutting!); thank you!
Thanks, Peg! Glad you enjoyed it. 😉