
This year, a group of Curbly contributors and editors got together to create a series of DIY decor and entertaining projects using that iconic symbol of the season: the pumpkin. We’ll be sharing our creations for the Curbly Pumpkin Challenge each day this week. Happy Fall.
Um, yeah. I think I got a different memo than everybody else for this whole Curbly Pumpkin Challenge, because I went, like, off the rails. But it’s not my fault. Really. I was just having too much fun
with the challenge. In the end, this project might be a little over the DIY top, but, honestly, anyone can do it.
Now, why did I choose to make an enchanted pumpkin forest? Because I’m a little obsessed with miniature things like fairy gardens, and since I don’t have one, I thought I’d take advantage of the situation.
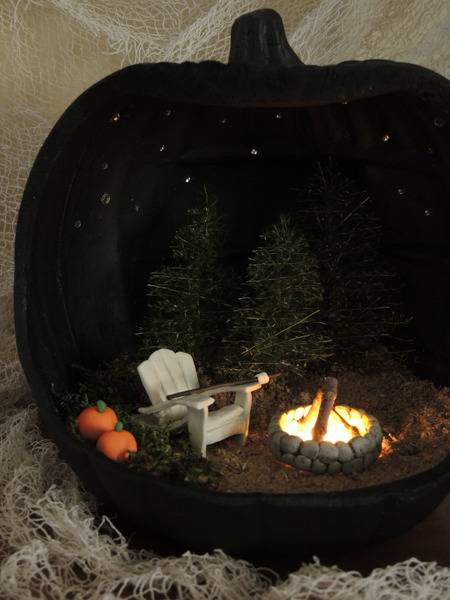
Okay, so, here goes. I wanted to use a real pumpkin for this project, but it just wasn’t practical for all the work involved. So even though I don’t particularly like faux pumpkins, that’s what I used. A 9″ one to be exact that I picked up on sale at Michaels for $4. I bought a white one because I wasn’t sure what color I’d eventually want, and white seemed like a good blank canvas.
A word about cutting faux pumpkins: if you have a roto-tool, use it. I used a fine drill bit and pulled the bit toward me as I cut. ALWAYS PULL TOWARD YOU. If you push the bit away from you, you’ll end up going off kilter and cut where you don’t want to.
A word about the insides of faux pumpkins: they look goofy. (You can see the ribs of the mould.) I only found this out after I cut a big hole out of the side of the pumpkin. To mitigate the goofiness, I painted the inside and out with black craft paint. A couple coats evened everything out.

If you look closely at the picture on the above left, I drilled a small hole in the back of the pumpkin, as well, to string a very small string of LED lights through.
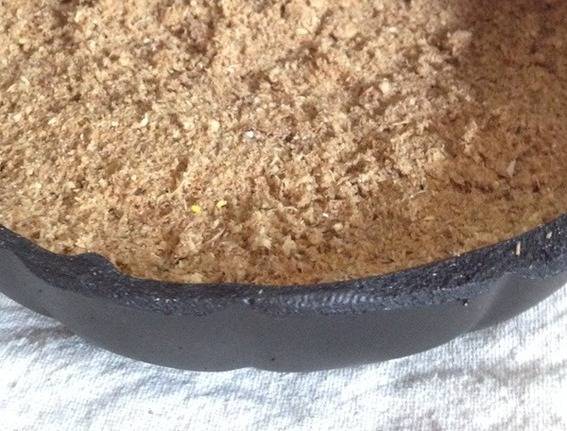
Next, my enchanted forest needed ‘earth.’ For that I scooped up a few handfuls of sawdust from under the table saw, which I mixed with 50/50 water and white glue. I’ve made faux dirt like this before using pencil shavings and it worked very well. The 50/50 mix doesn’t make the sawdust ‘firm’ but more like a pre-baked graham cracker crust, so it stays in place and doesn’t blow around, but it still lets you dig around in it.
Sawdust (cedar, by the smell of it!) packed inside the bottom of the pumpkin:
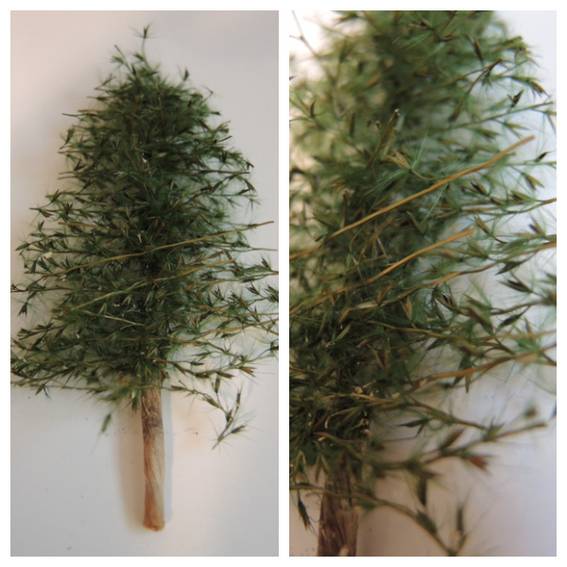
Now it was time for trees. Those I made using random, dried vase filler I found at the Goodwill ($2) which I cut and glued to raffia-wrapped wire. When the glue was dry, I cut the sections into an evergreen shape.
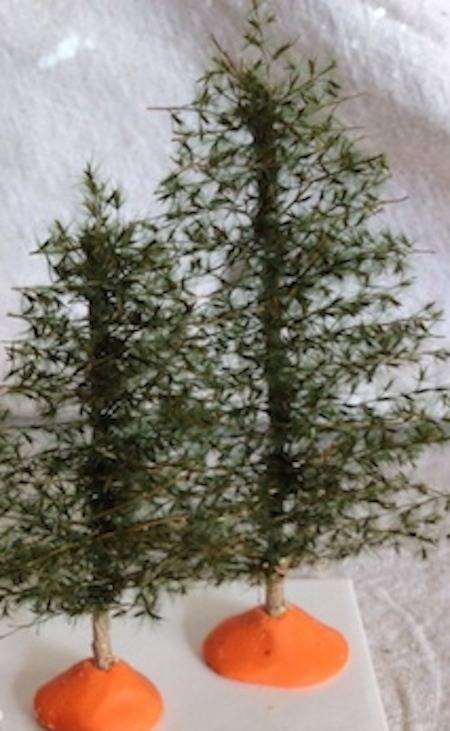
To keep them upright, I formed some Fimo around their trunks. Then I gently pulled the trees out and popped the forms into the oven to harden. When done, I reinserted the tree trunks and planted them into the faux dirt.
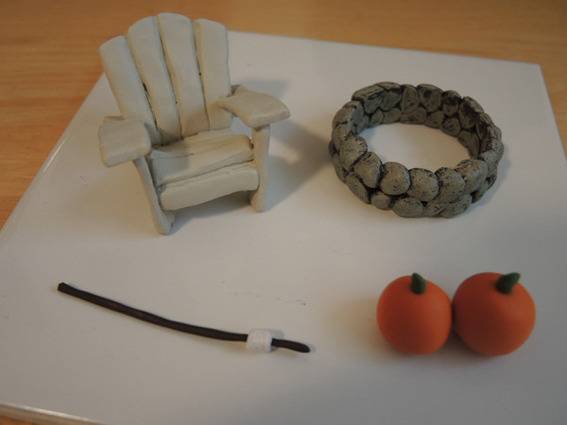
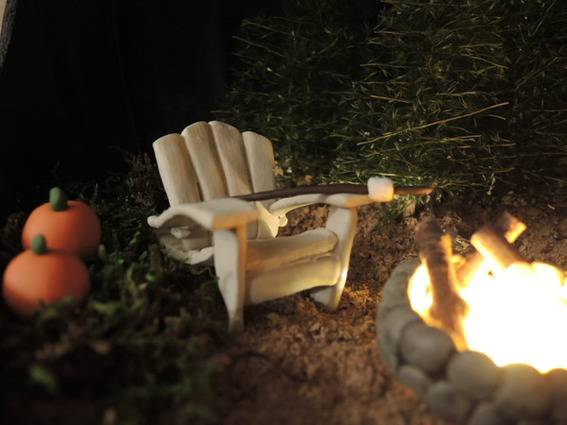
My vignette needed some decor, so I kept the Fimo out and fashioned a couple of pumpkins, an Adirondack chair, a fire ring, and a stick with a marshmallow on it. I used whatever colors I had on hand (the Adirondack chair was made with pink), and I painted them to suit my fancy after they were baked and cooled.
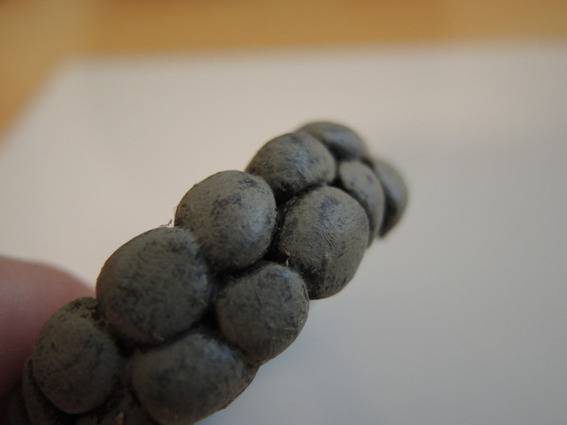
To make the fire ring, I molded little balls of the Fimo around one of those metal cups from a tea light. I also did a little sponge painting to make the clay more like stone.
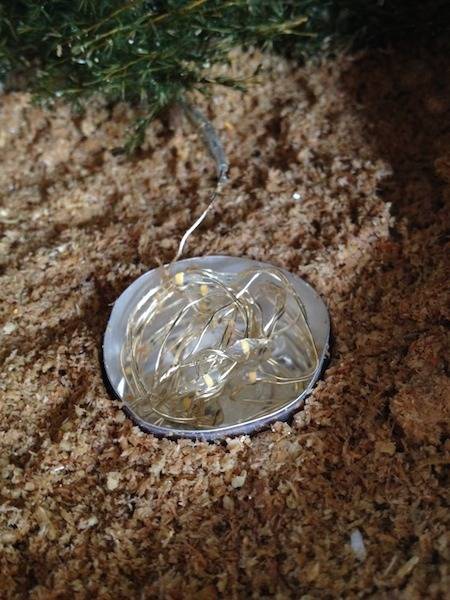
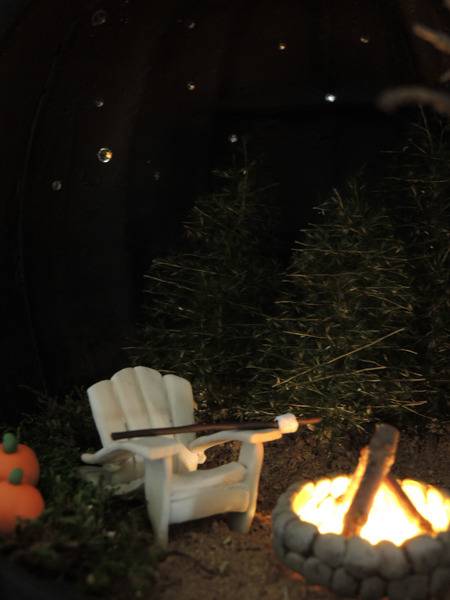
I nestled the metal tea cup in the sawdust earth to serve as a ‘fire pit’. Then I strung my LED lights through the hole in the back of the pumpkin and bunched up the lights inside the metal cup.
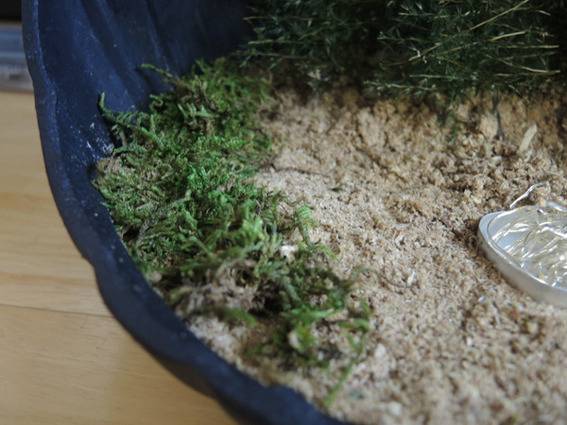
After that, it was just a matter of setting the scene. I grabbed some dried green moss I had on hand to add more color and dimension.
I added a bit of yellow tissue paper (white, dyed yellow with food coloring) to the top of the lights to make them look more flame-like and topped them off with some twig ‘logs.’
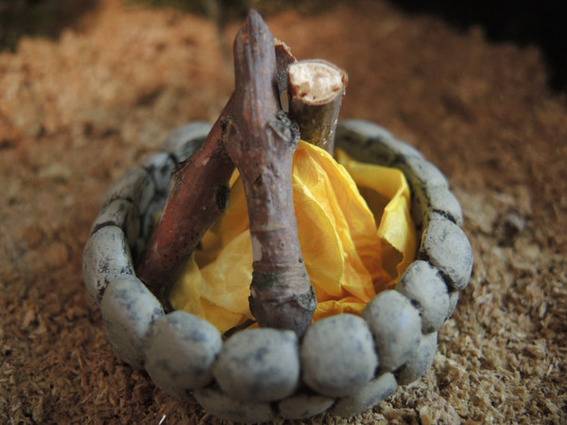 These tiny LEDs remain cool (they’re even submersible in water), so I’m not worried about the tissue paper getting too hot. Although, I probably wouldn’t burn the lights unattended either.
Next the pumpkins, chair, and marshmallow stick.


I absolutely, 100%, LOVE this!!! Amazing job, it looks fantastic!
Precious! I love it. Proud of your creativity.
Thanks, JC! It was a ton of fun to do. 🙂
I love everything about this, and especially the stars and the marshmallow stick. Awesome job.
Thanks, Chris! (Every campfire needs a marshmallow stick nearby.)
Way cool. I am inspired.
I love this!