
We love the festive season! It’s the perfect time to get creative. If you’ve already got your tree trimmed and you’re ready for a new and exciting holiday project — or even if you’re keeping your Christmas décor minimal this year — this DIY wooden tabletop Christmas tree will bring a little extra festive cheer to your home.
These trees are super easy to make and to personalize. What’s more, they’re so durable. Bring them out year after year as a contemporary and stylish fixture of your home’s Christmas get-up.
Ready to get crafty? Here’s our easy step by step guide to creating your own wooden tabletop Christmas trees…
How to make your DIY wooden tabletop Christmas tree
What you’ll need:
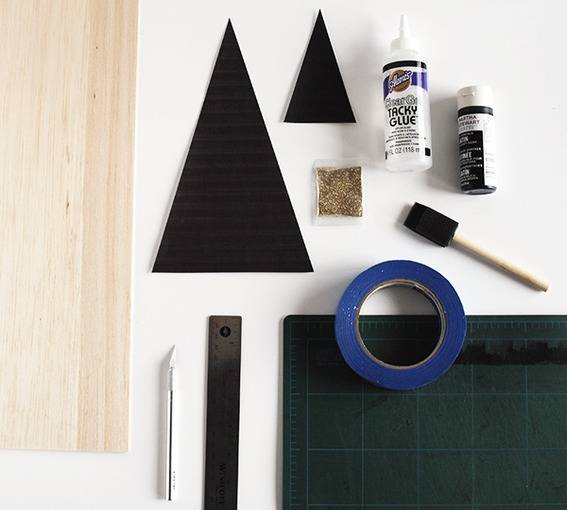
To make your wonderfully festive, wooden tabletop Christmas tree, you’ll need to gather the following materials:
-
A 6 x 36″ sheet of balsa wood
-
Tree templates (you can make these by creating and printing out triangle shapes on a computer)
-
Acrylic craft paint OR craft glue and glitter
-
A foam paintbrush
-
Painter’s tape
-
A self-healing cutting mat
-
A ruler
-
A craft knife
Making and assembling your wooden tabletop Christmas tree:
Once you have everything you need, just follow these easy steps to make your one-of-a-kind Christmas tree:
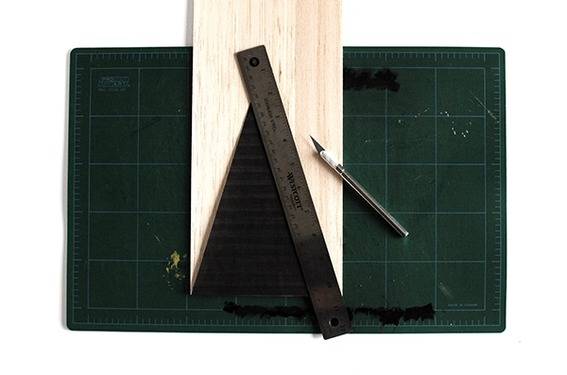
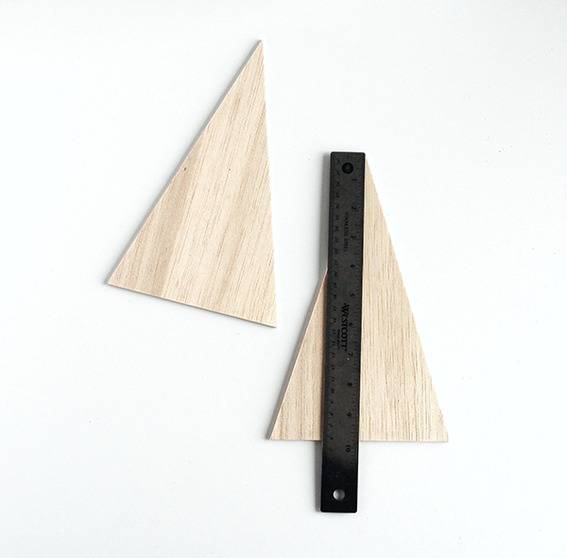
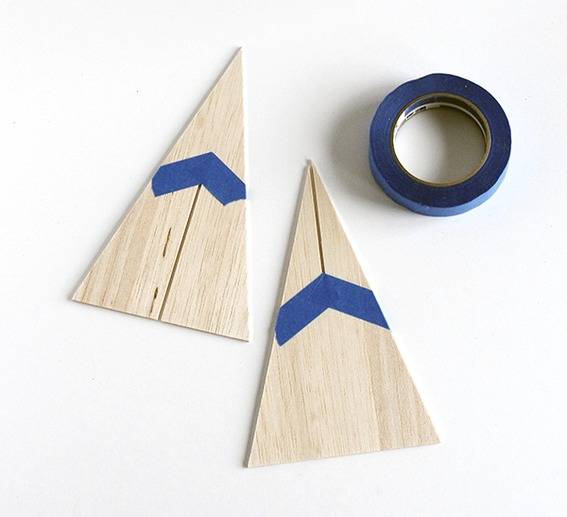
1. Take your tree template and line it up with the bottom edge of your balsa wood sheet. With a ruler and a craft knife (and following your template) cut a triangle out of the balsa wood. Repeat this process to create a second wooden triangle.
2. Now you have your triangles, you need to fit them together. Measure and mark the center point of the triangles. I marked mine by just poking it with the craft knife so I wouldn’t leave any visible pencil or pen marks.
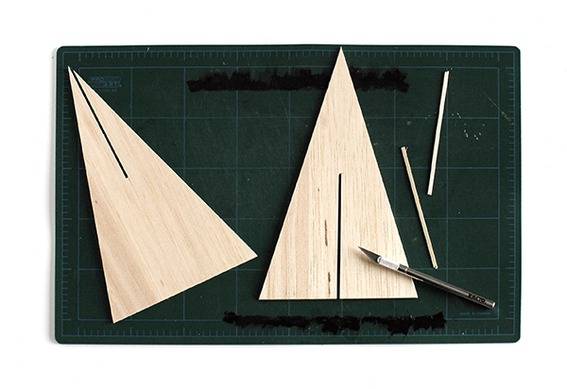
3. Take one triangle. Cut out and remove a section from the center point to the bottom of the triangle. Then, take your other triangle. Cut and remove a section from the center point to the top of the triangle.
The piece you remove should be as wide as the sheet of balsa wood is thick. For example, my sheet of balsa wood is 1/8” thick so that’s how wide I cut my slice.
(Save the wood scraps — you can use them later!)
4. If you’re leaving your tree au naturel, you can stop right here! Simply slide the two triangles together to assemble. But if you want to add a little more style and/or sparkle to your wooden tabletop Christmas trees, read on…
Decorating your wooden tabletop Christmas tree
If plain balsa wood just isn’t rocking your design world, it’s time to add some impressive (but very easy) Christmas tree decoration:
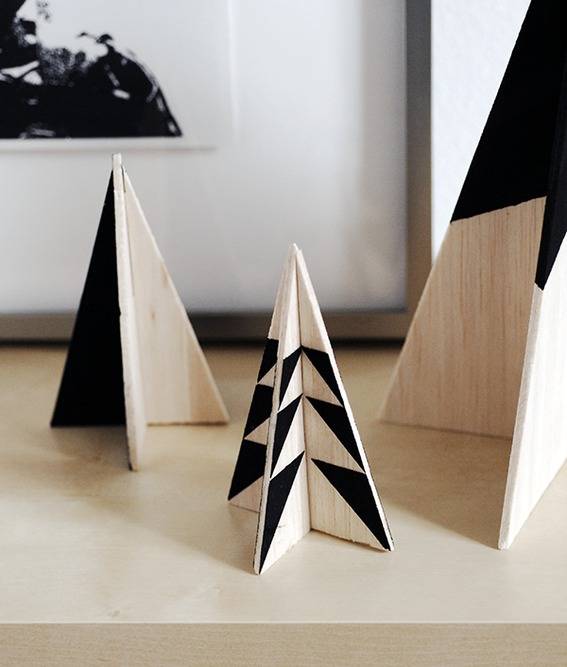
1. Tape off your design of choice. Keep it minimal with a geometric pattern. Or — because it’s Christmas after all — go all out with glittery bling!
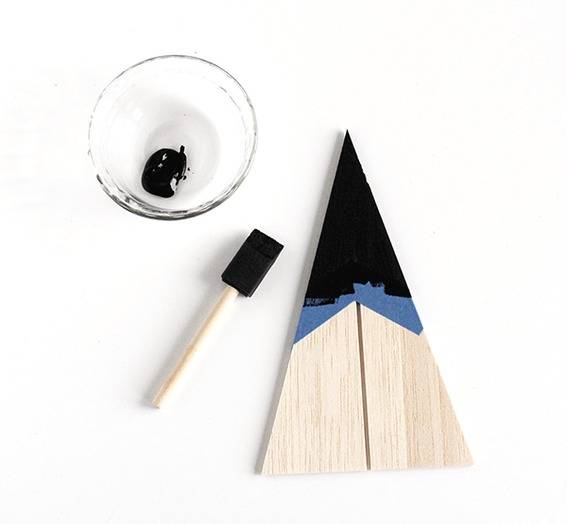
2. Brush on your paint. Or — if you’ve opted for sparkle — clear craft glue and glitter.
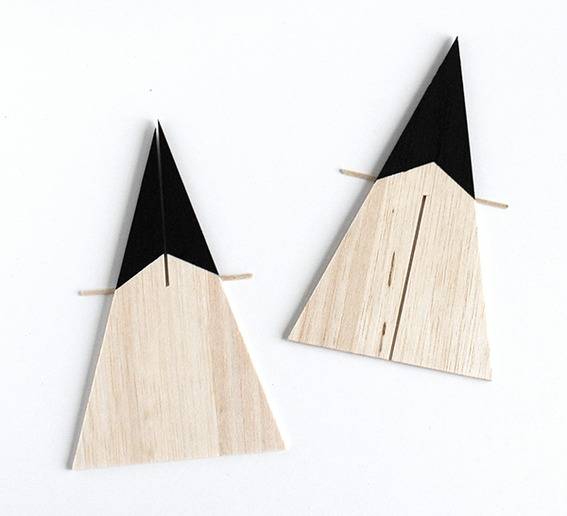
3. Repeat stages 1 and 2 for the other side of your tree. Then remove the tape and rest your freshly glued or painted trees on those handy little balsa wood scraps.
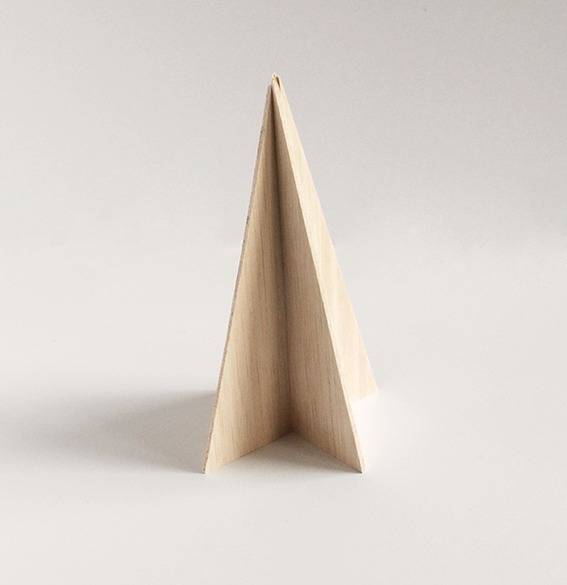
4. Once your paint or glue is dry, you can assemble your wooden tabletop Christmas trees by sliding the grooves together.
And that’s it! You’re done! A beautiful, personalized Christmas decoration for your home.
You can stick with just one tree. But I love to create a couple of trees in different sizes for an instant festive scene.
You can arrange them on the mantelpiece, on top of dressers and even make them an integral part of your Christmas table centerpiece. Happy holidays!
Here’s a glitter one just for kicks. Ooooh, it’s just so sparkly!
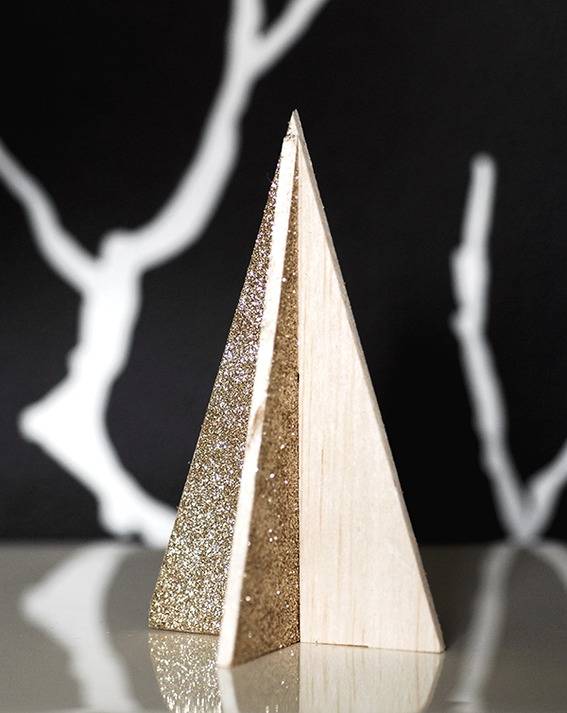
Here’s a glitter one just for kicks. OooOOoh, SPARKLY!!
[Artwork by Kate Banazi]


This is really nice! I always like this style but what do you call it? Can anyone help me?
What thickness of balsa wood did you use?
1/8 in thick. It was listed in the directions when she mentioned cutting the slots to slide the pieces together.