
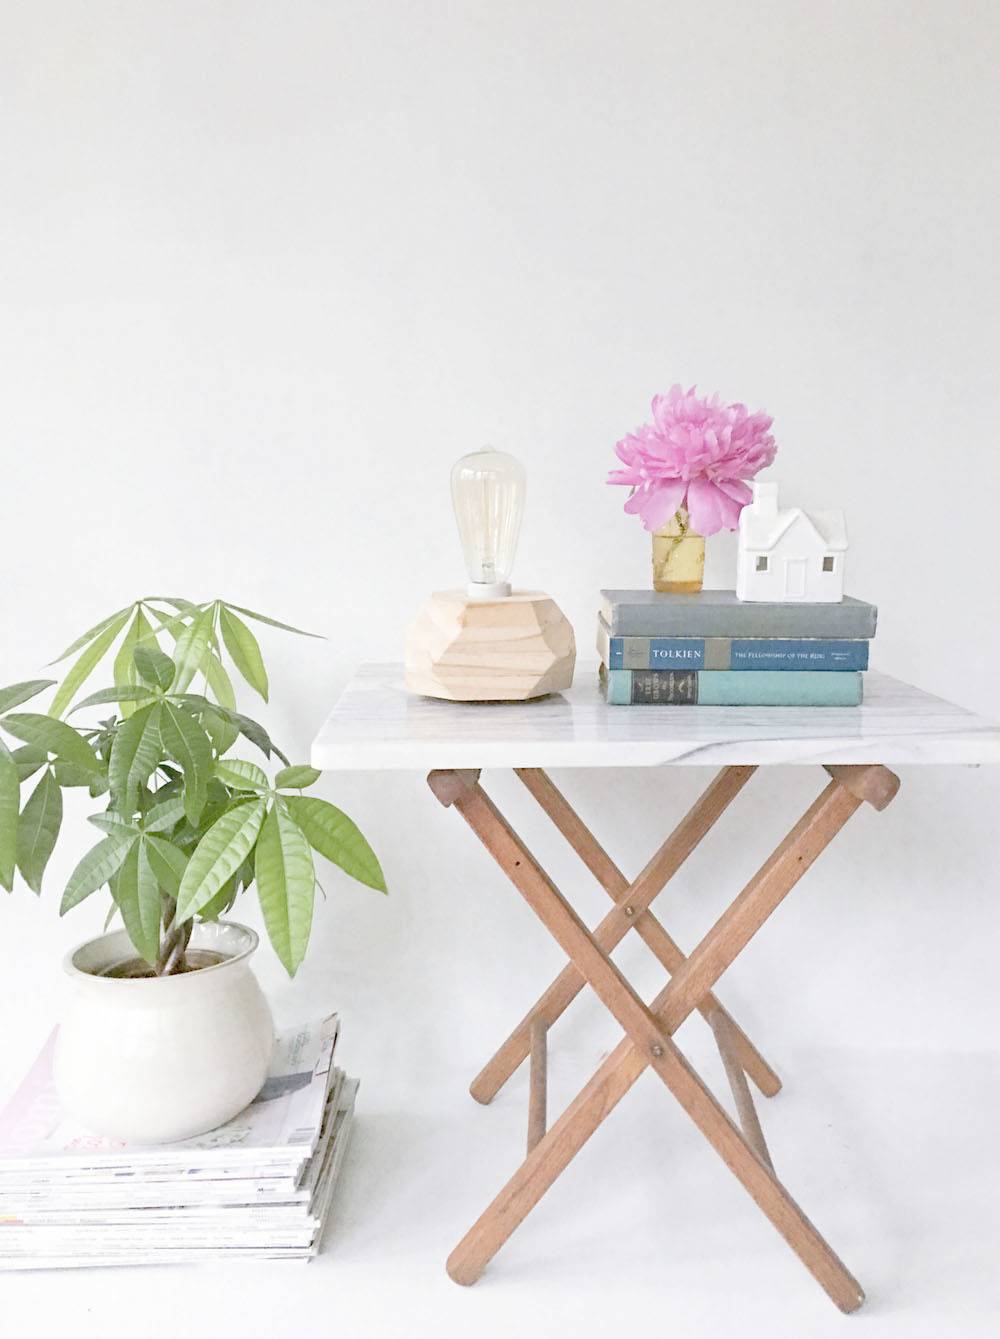
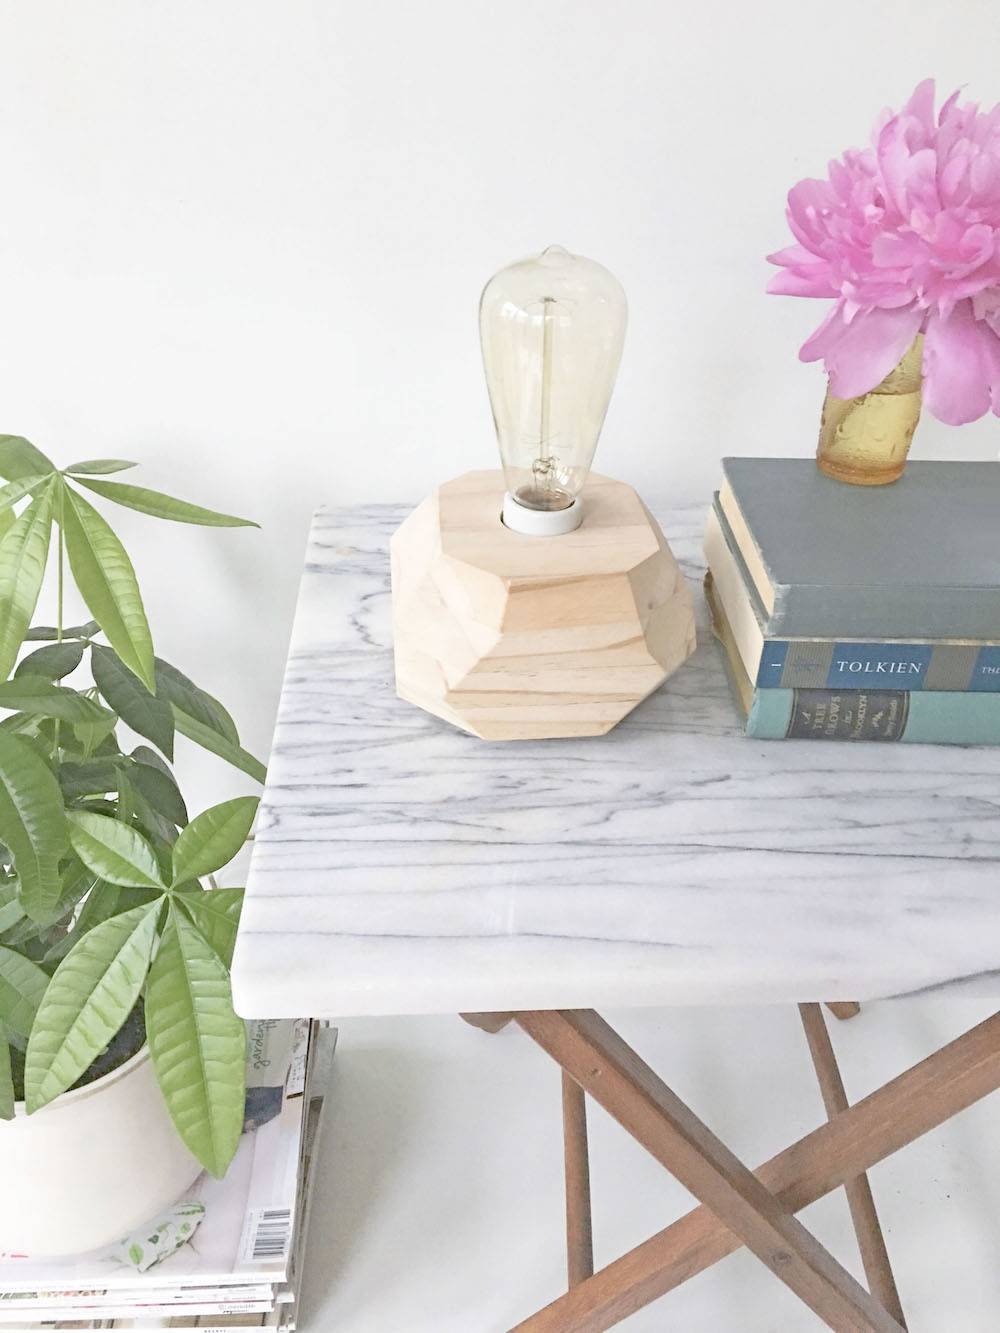
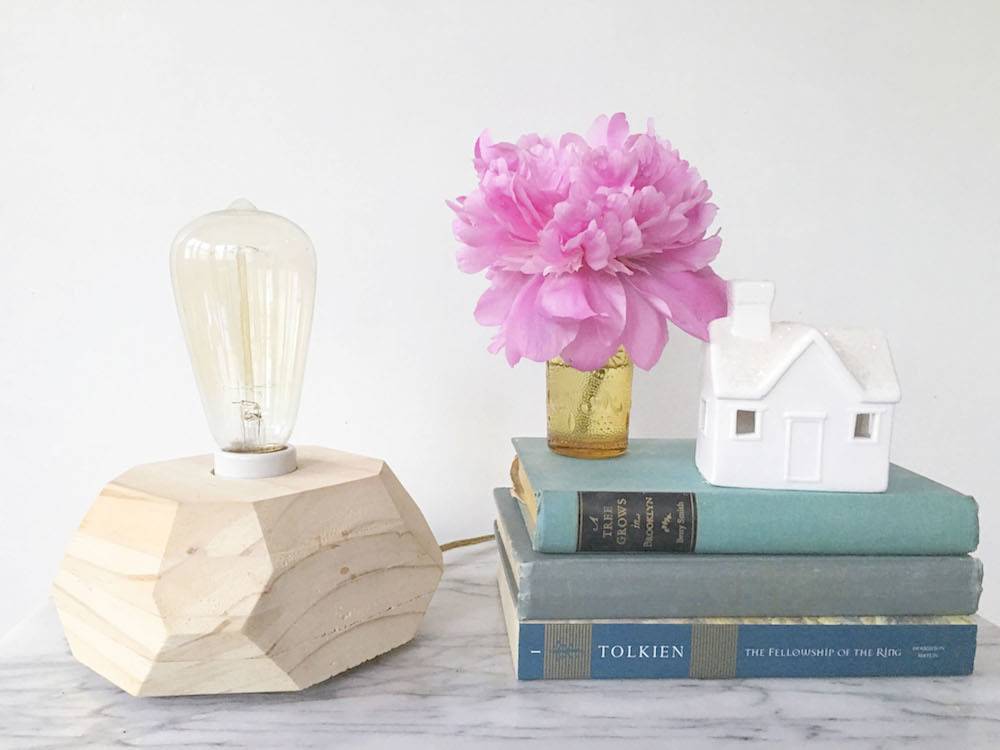
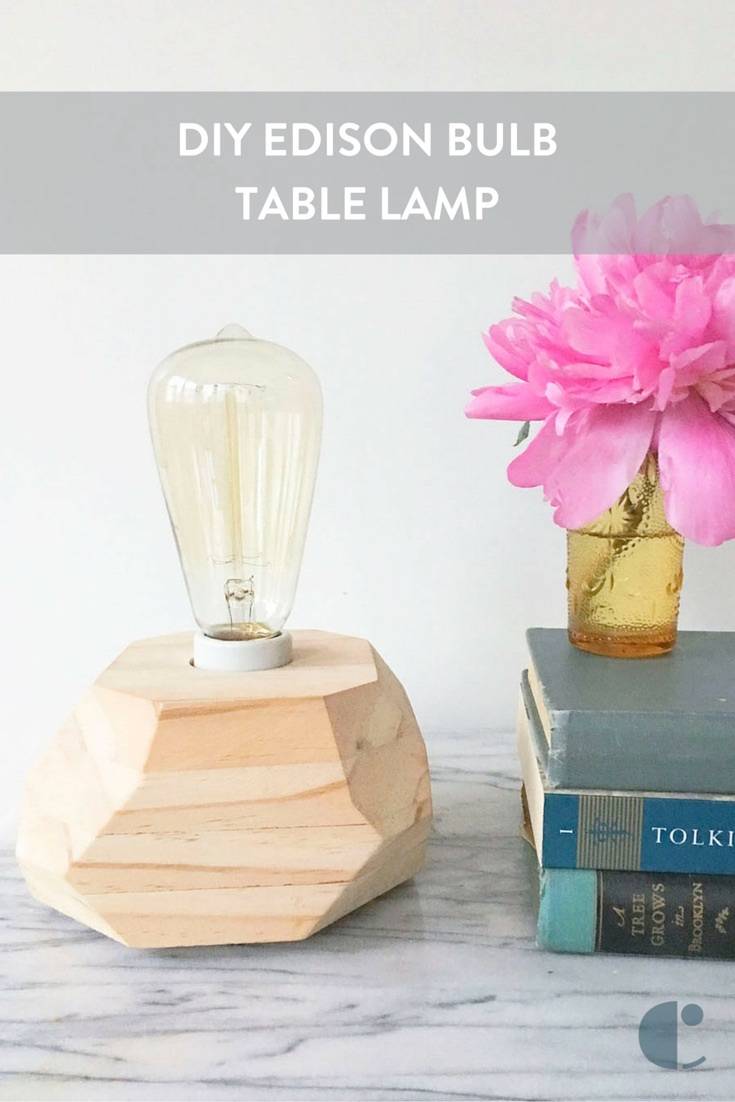
Edison bulb table lamps are minimal and unique. They can be the perfect light for a side table, bedside table, or book shelf. Using basic woodworking skills and electrical installation, this wood-block version of the edison bulb table lamp is simple to make. Here is what you need…
Materials
- 2 ft 1X6 board
- drill
- 1 1/2 spade bit (pictured)
- 5/8 spade bit (not pictured)
- Drill Bit (big enough to drill hole for lamp pipe)
- Loctite Adhesive (you could use wood glue)
- Porcelain Lamp Socket (I got mine here)
- lamp cord ( I took mine from an old lamp but you could get yours at Amazon)
- Threaded lamp pipe (two pictured but I only needed one) I purchased multiple sizes at Lowes. The length depends on size of block.
- Rubber feet (small rubber furniture pads) (3-4)
- Screw Driver (small phillips for installing light fixture)
- Miter Saw
- Sander or Sand paper
- Wood Clamps
- Hot glue or Super Glue (unless your furniture pads have adhesive)
- Stain or paint (optional) I didn’t use this

Step
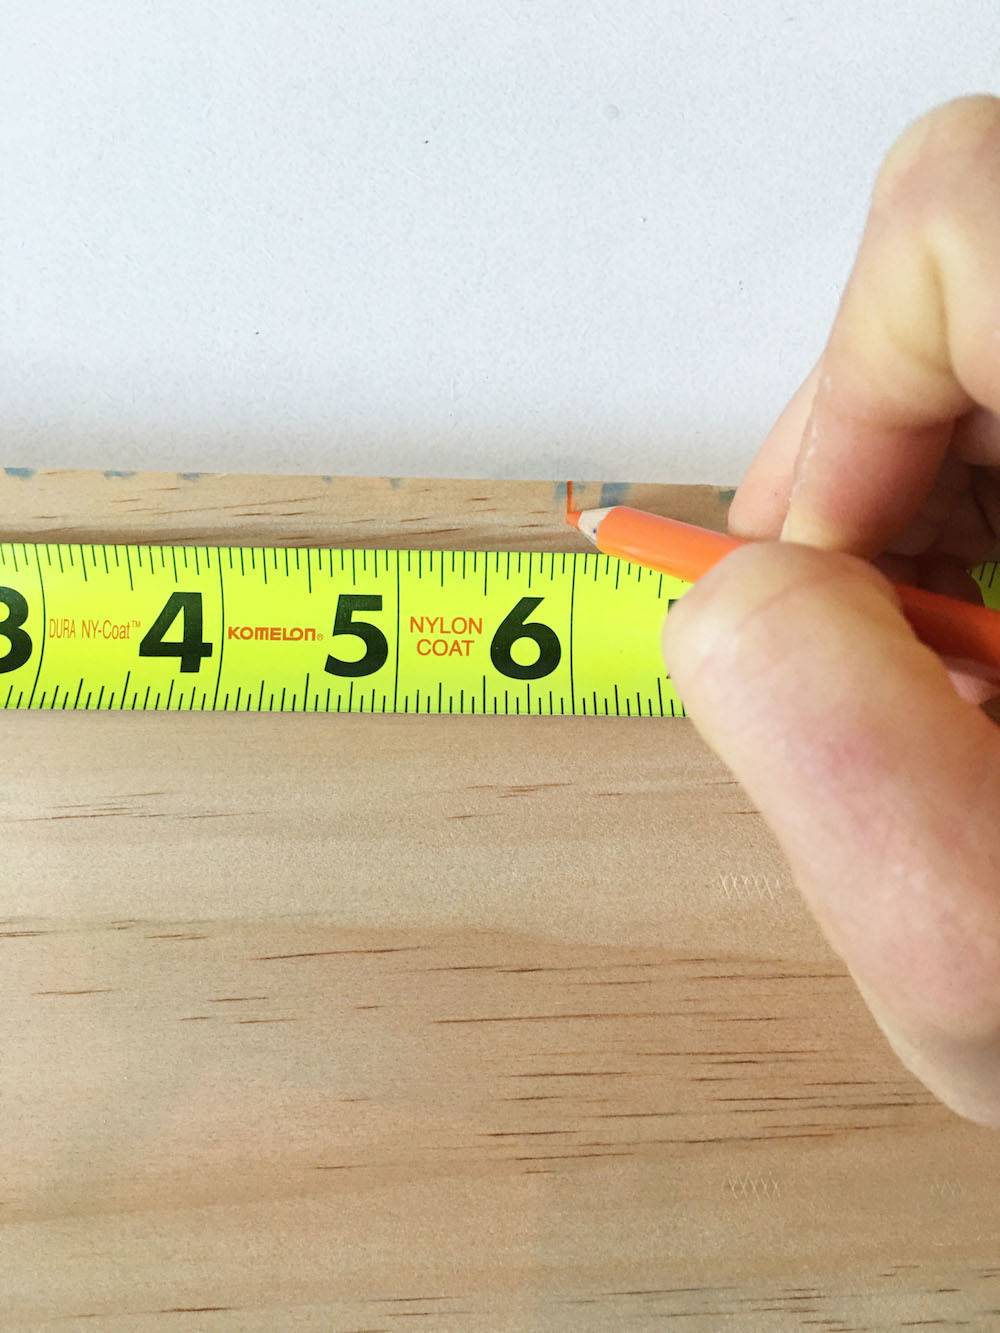
To make four square boards from your 1X6 board, measure and mark your board every 6 inches.
Step
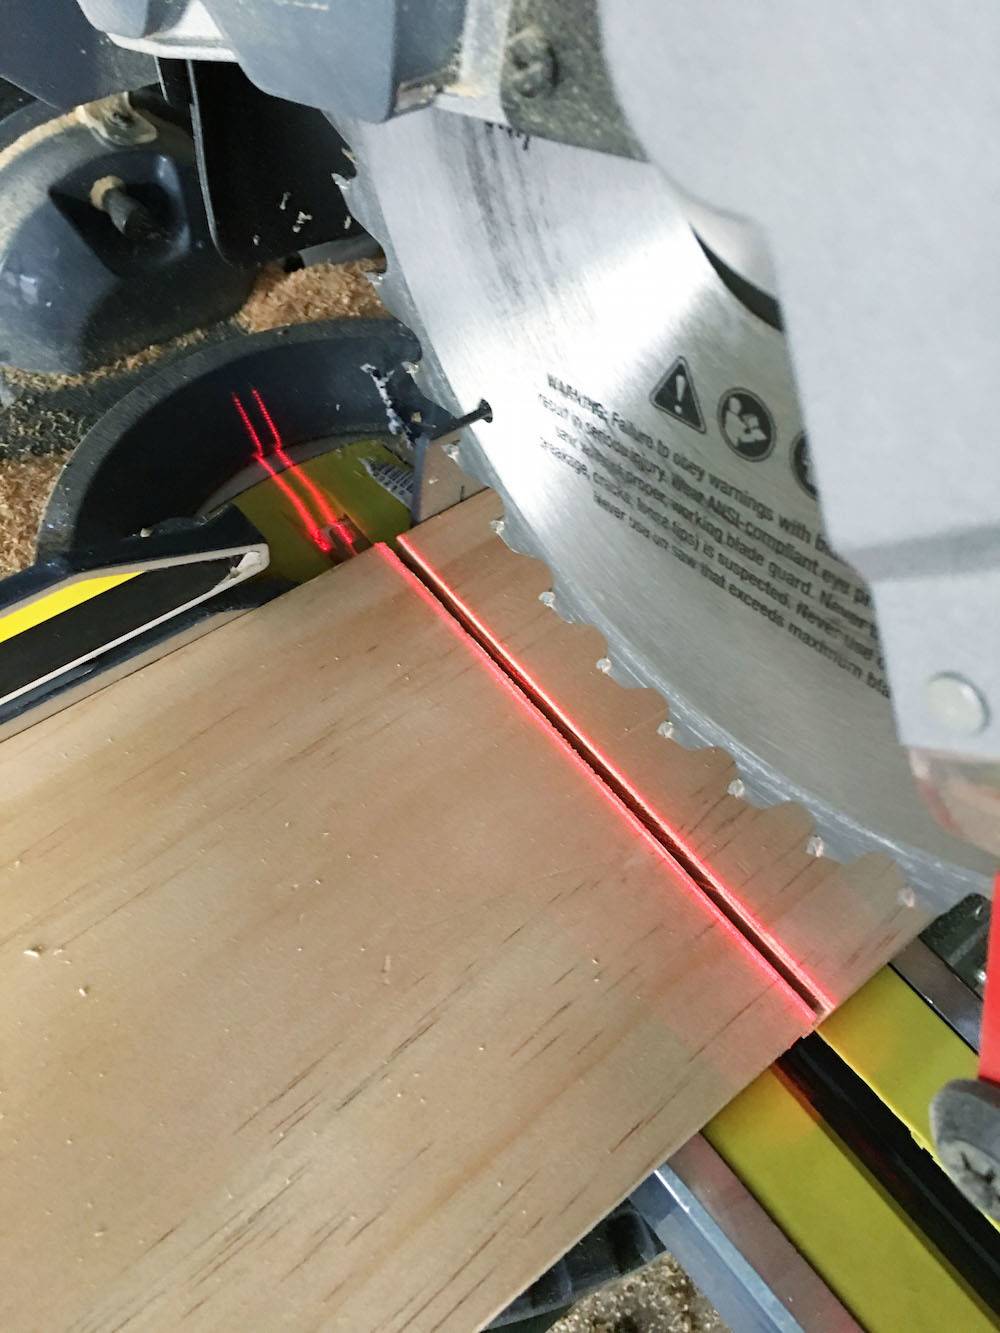
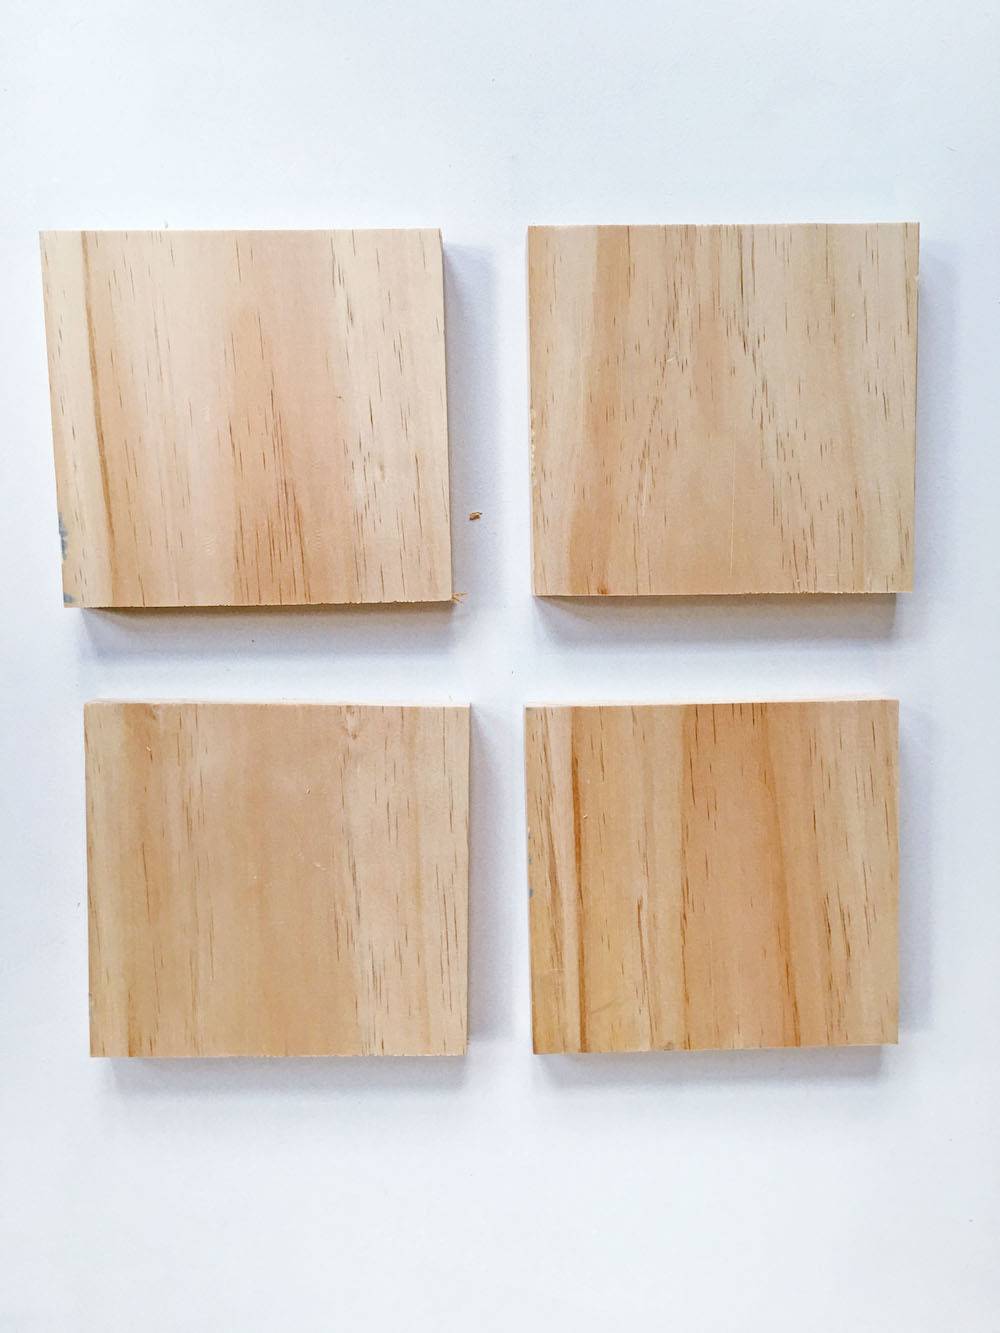
Cut your board into four 6 inch squares.
Step
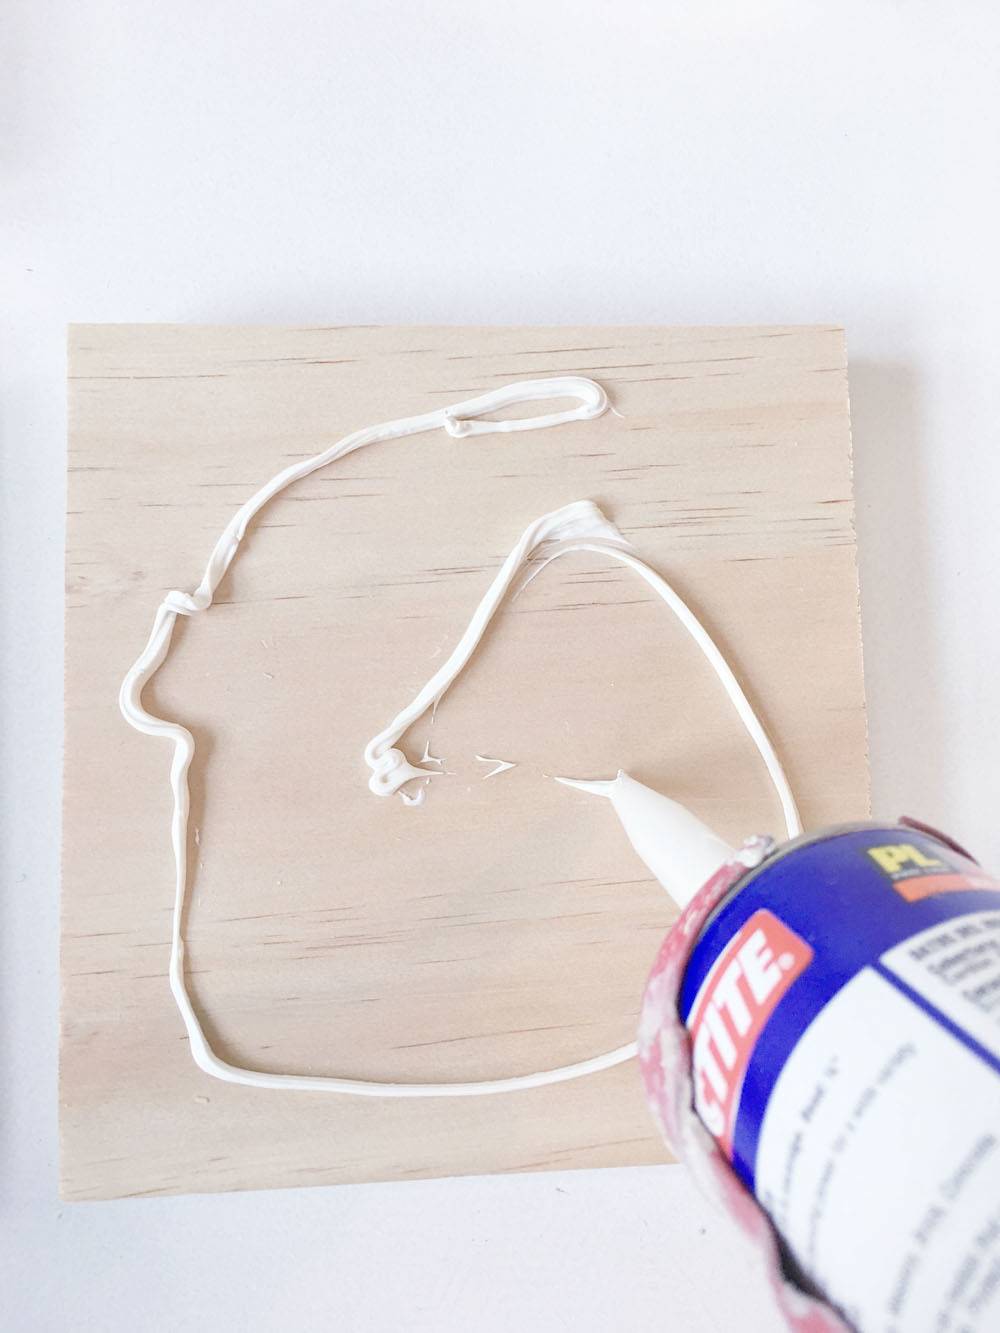
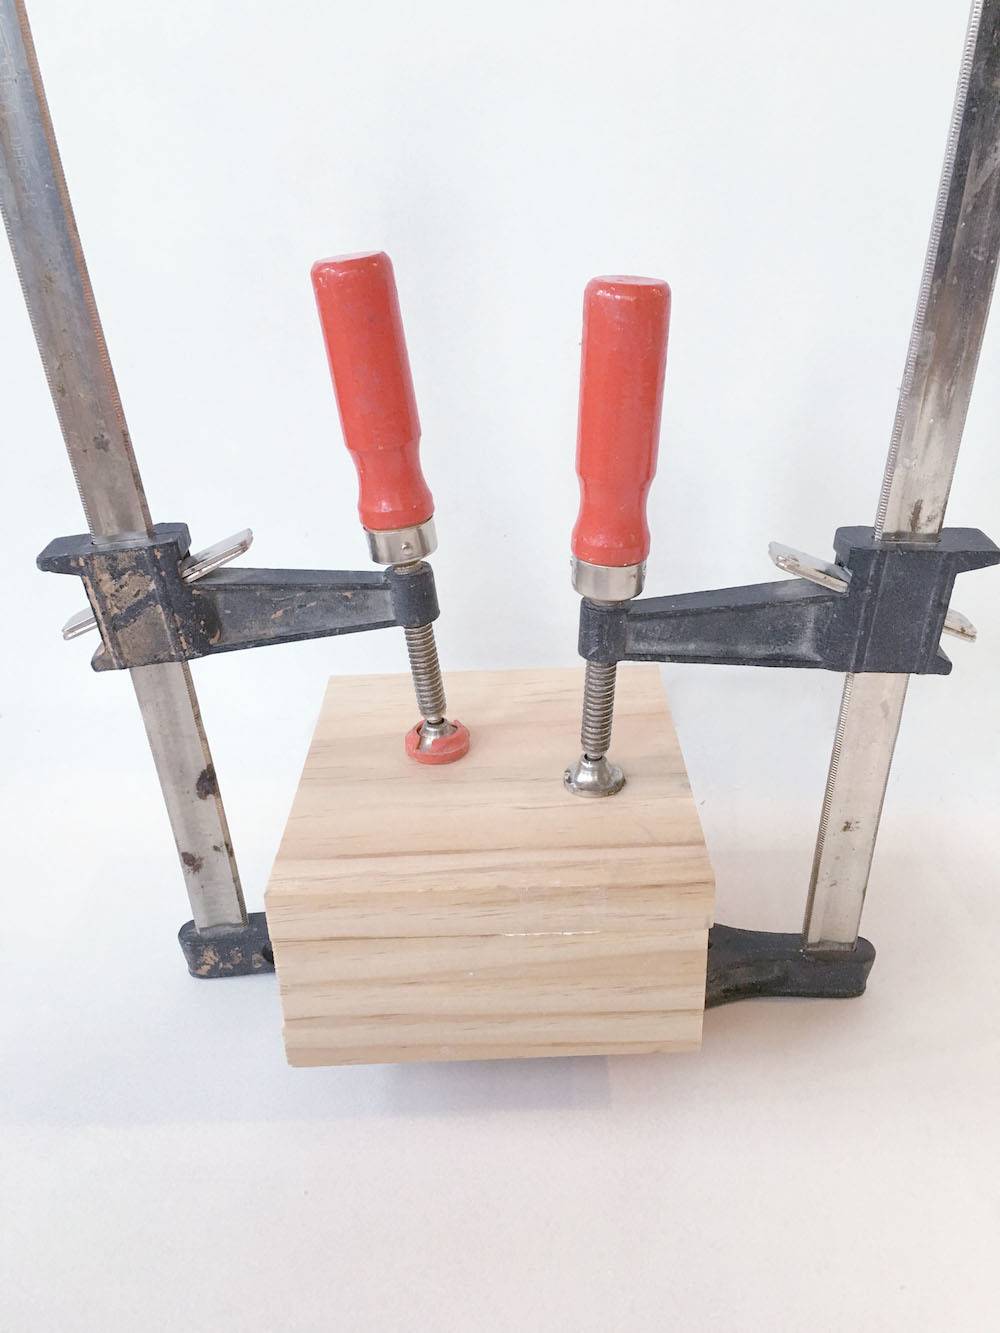
Glue the four pieces together and clamp. Let your wood block dry. If your wood pieces don’t line up on one side this is okay. You can easily fix this with your miter saw.
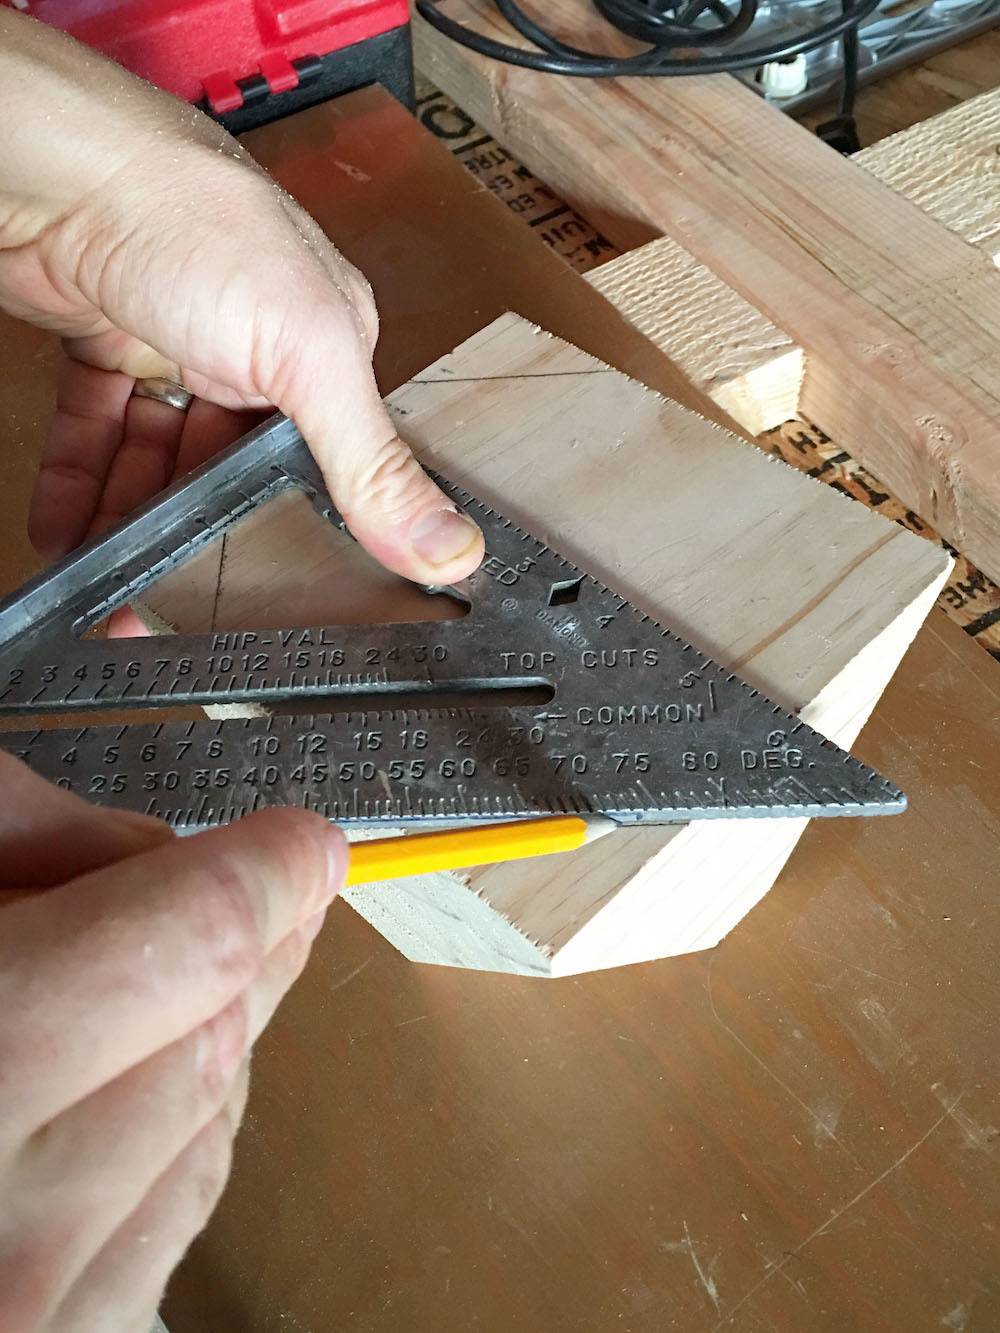
Step
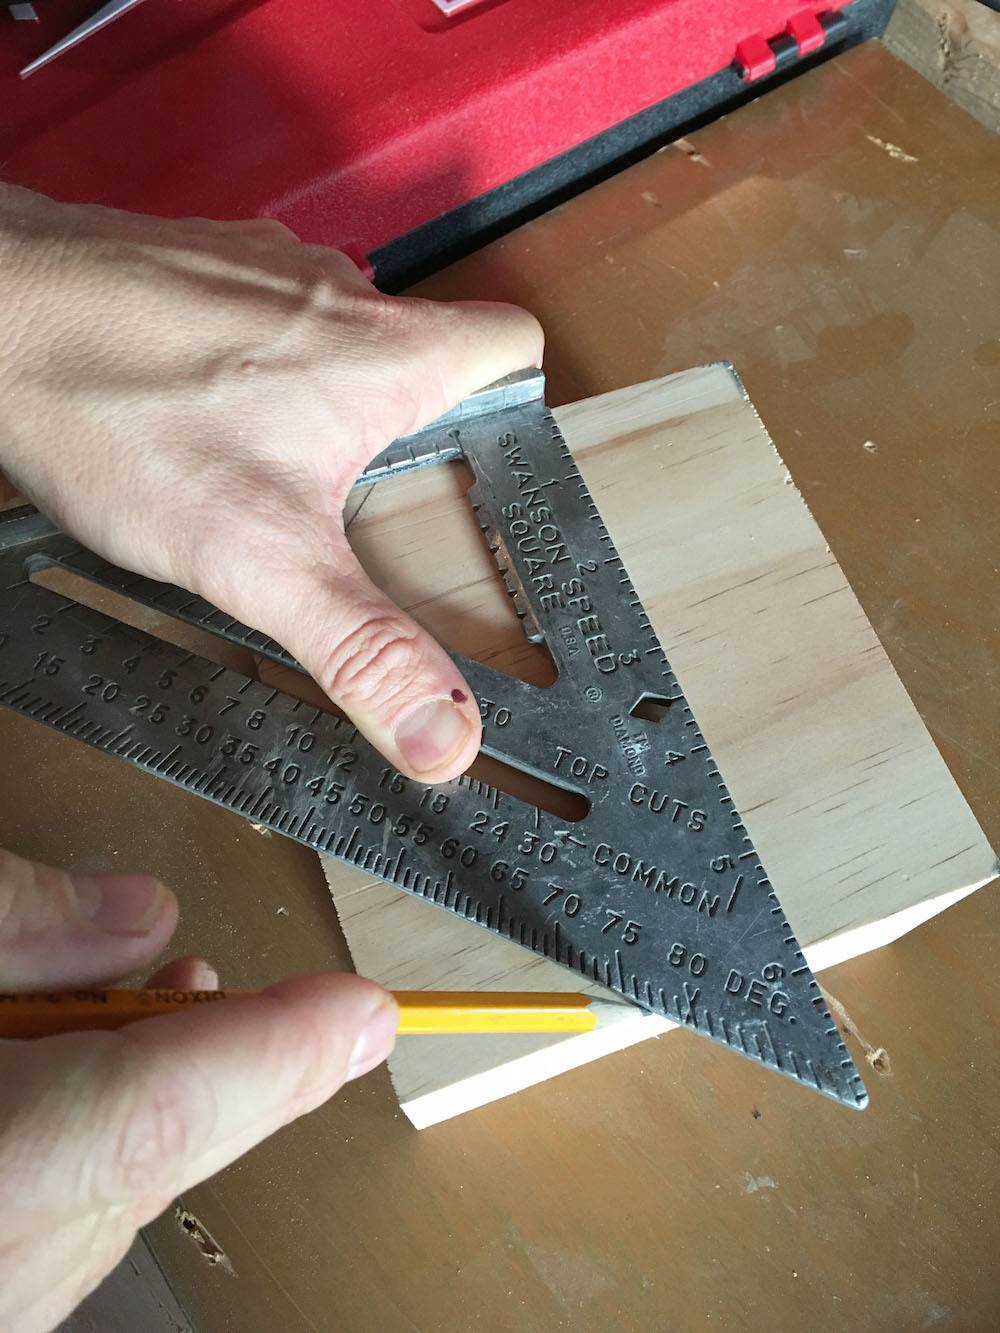
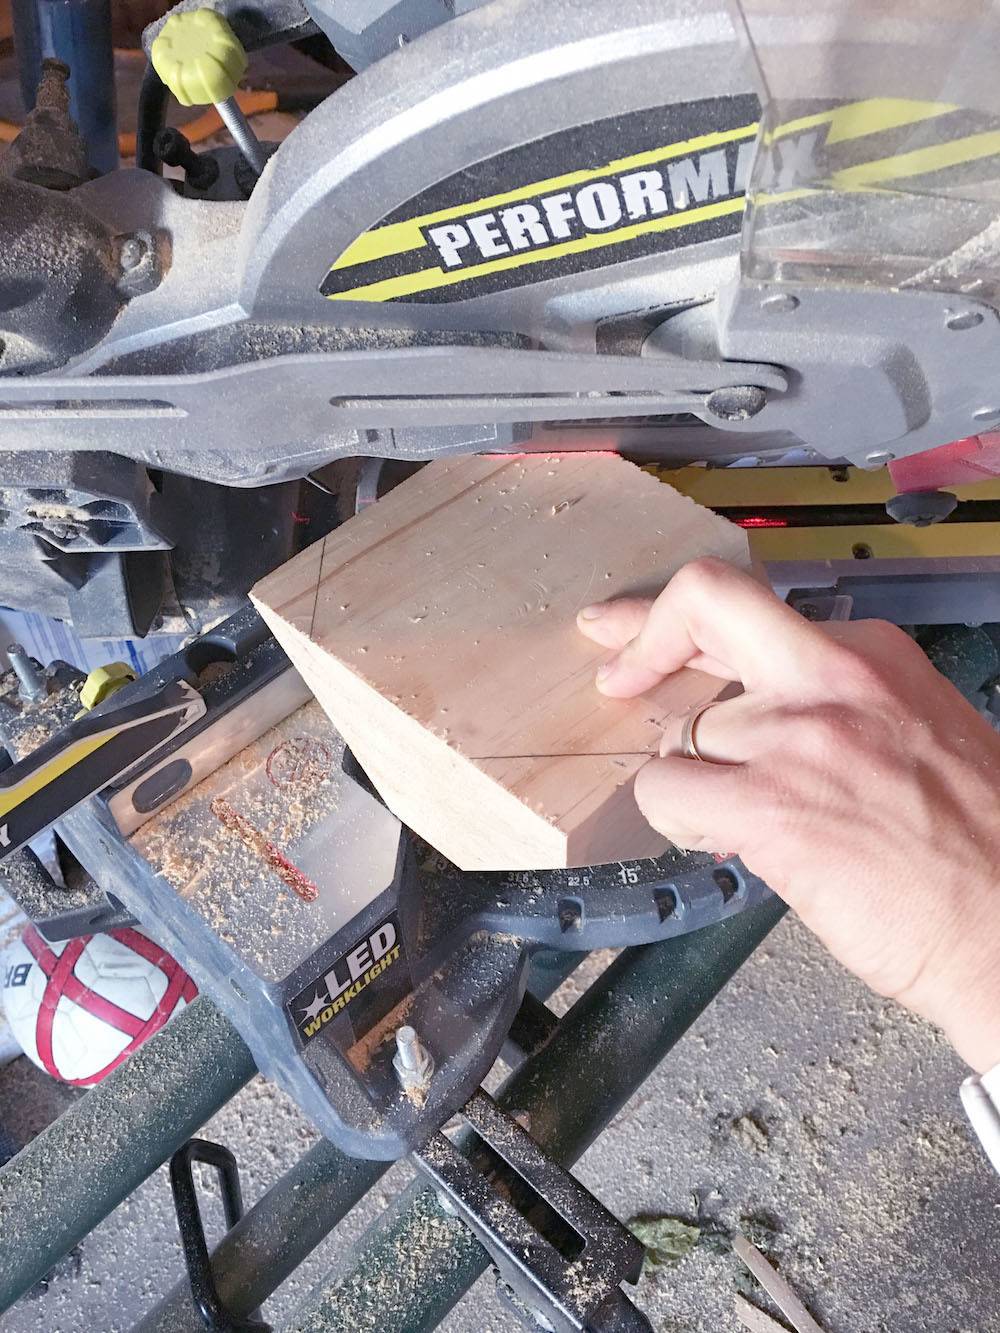
After using the miter saw to clean up uneven sides (if needed), use a ruler to make marks on the corner. This does not need to be symmetrical or perfect. I just drew the lines at random.
Step
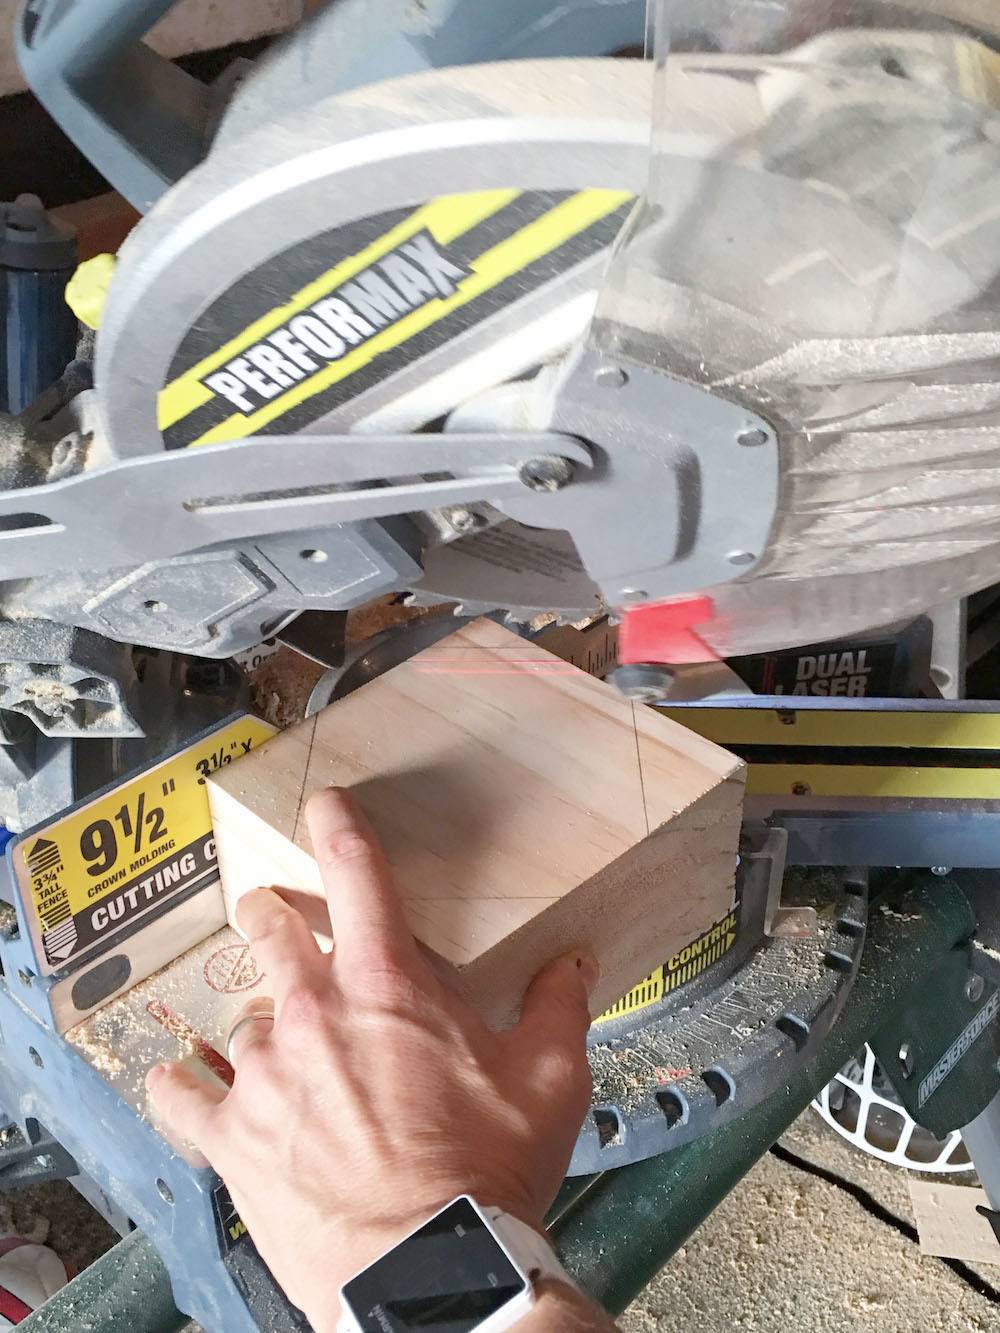

Set your miter saw at an angle, put your safety goggles on and cut your block. Any angle will do. I started with a 15 degree angle but I used different angles for each cut.
Step
Flip your block over and repeat step four and five. Again, I used different degrees of angles.
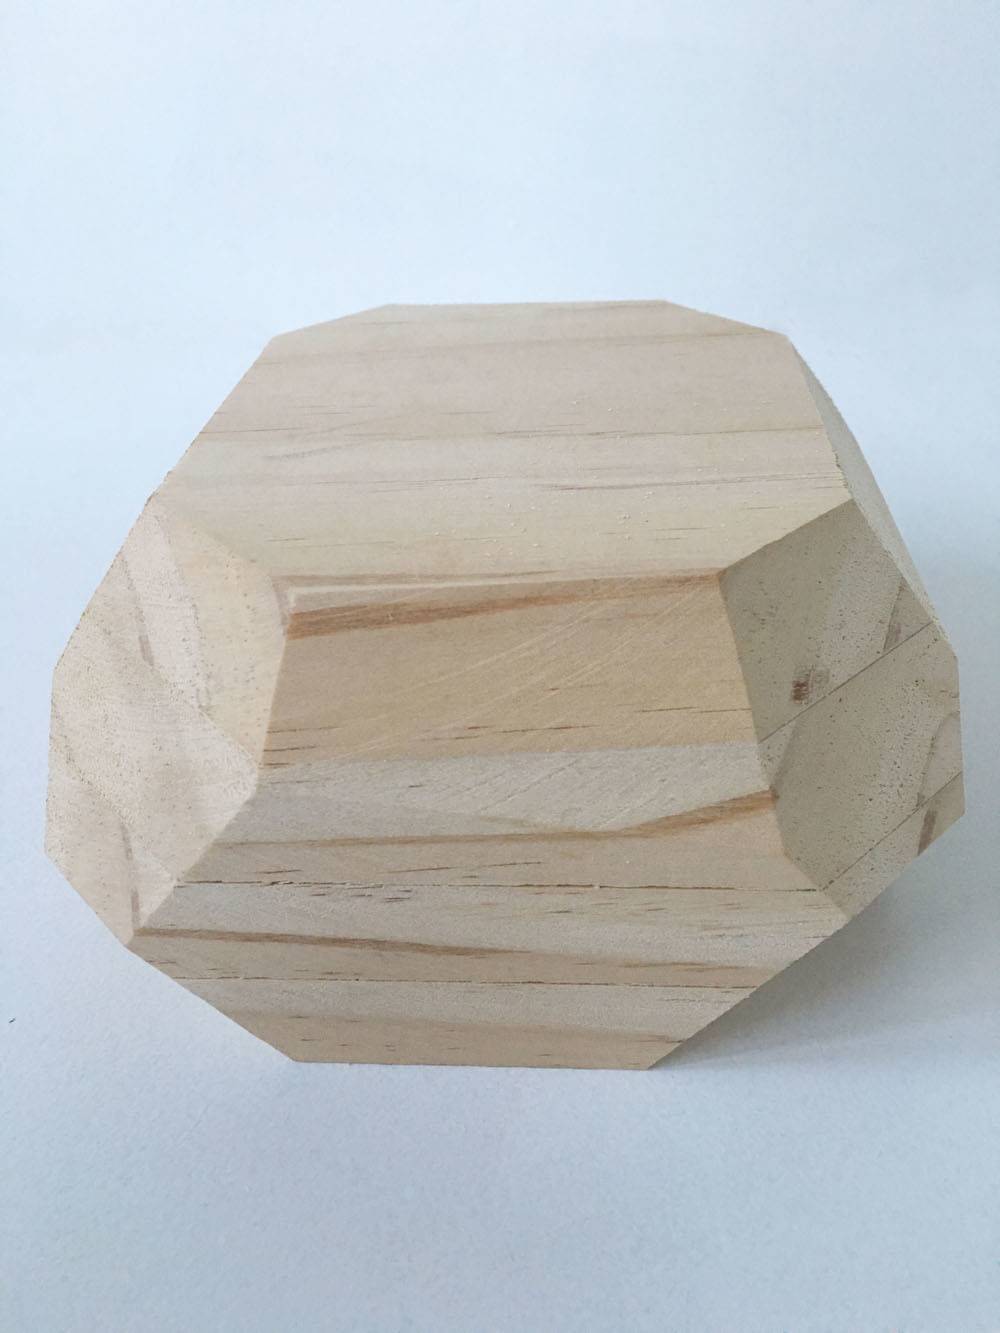
Step
The left photo is what my block looked like after cutting. The next step is to sand your block nice and smooth. ( I sanded after I drilled the hole but I wish I would have done it before because it made my drilled holes a little off center.)
Step

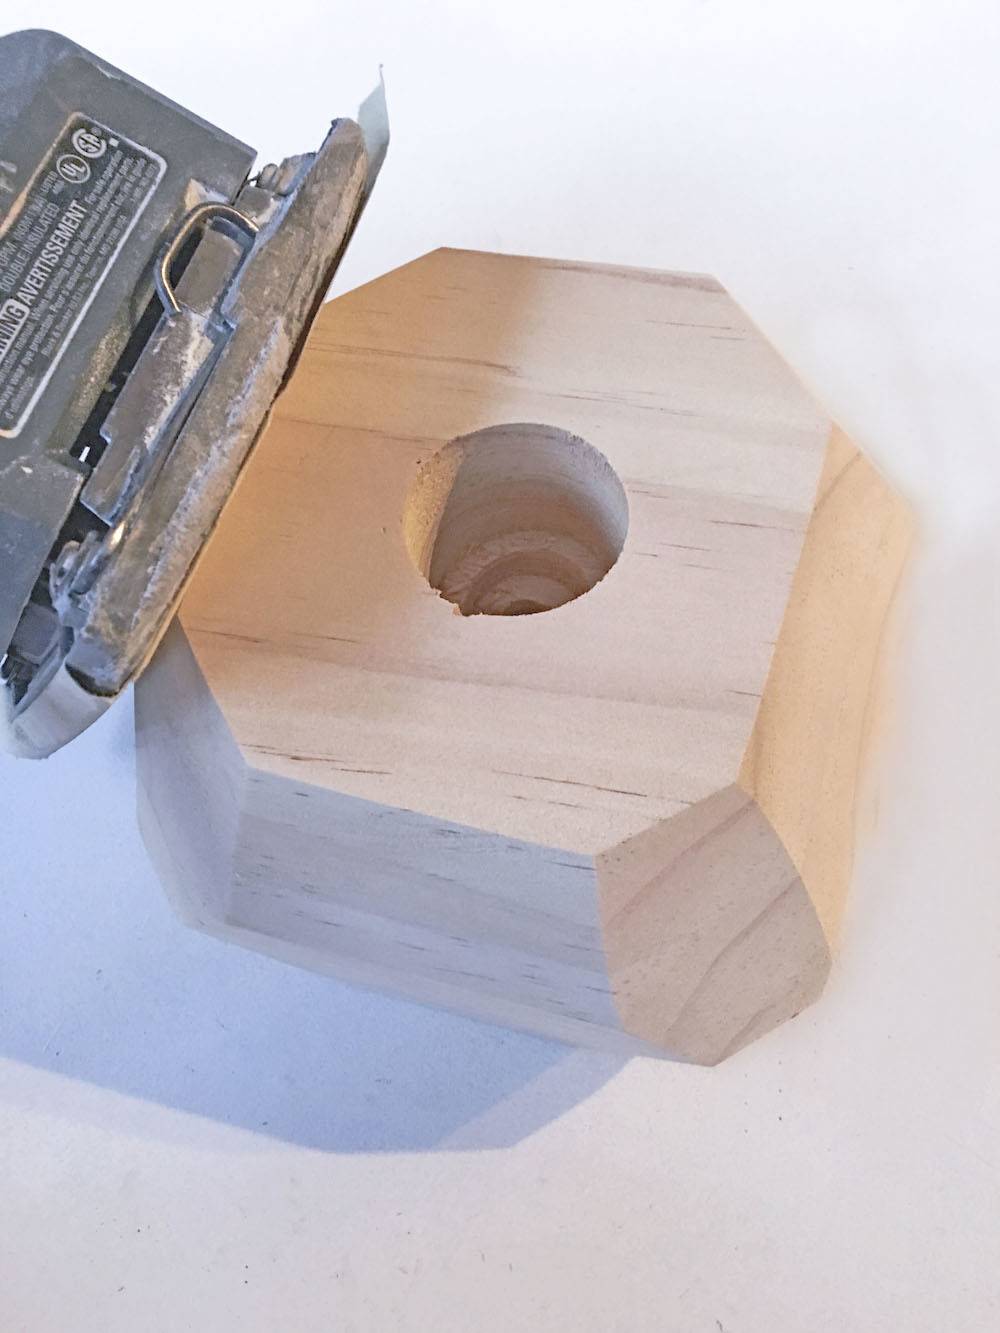
Next, drill a hole to sink the porcelain lamp socket into the block. I used a 1 1/2 inch bit. I wanted the white socket to stick out of the top of the block a little. I measured, drilled and placed the socket in place. If I didn’t like it I would drill a little more.
Step

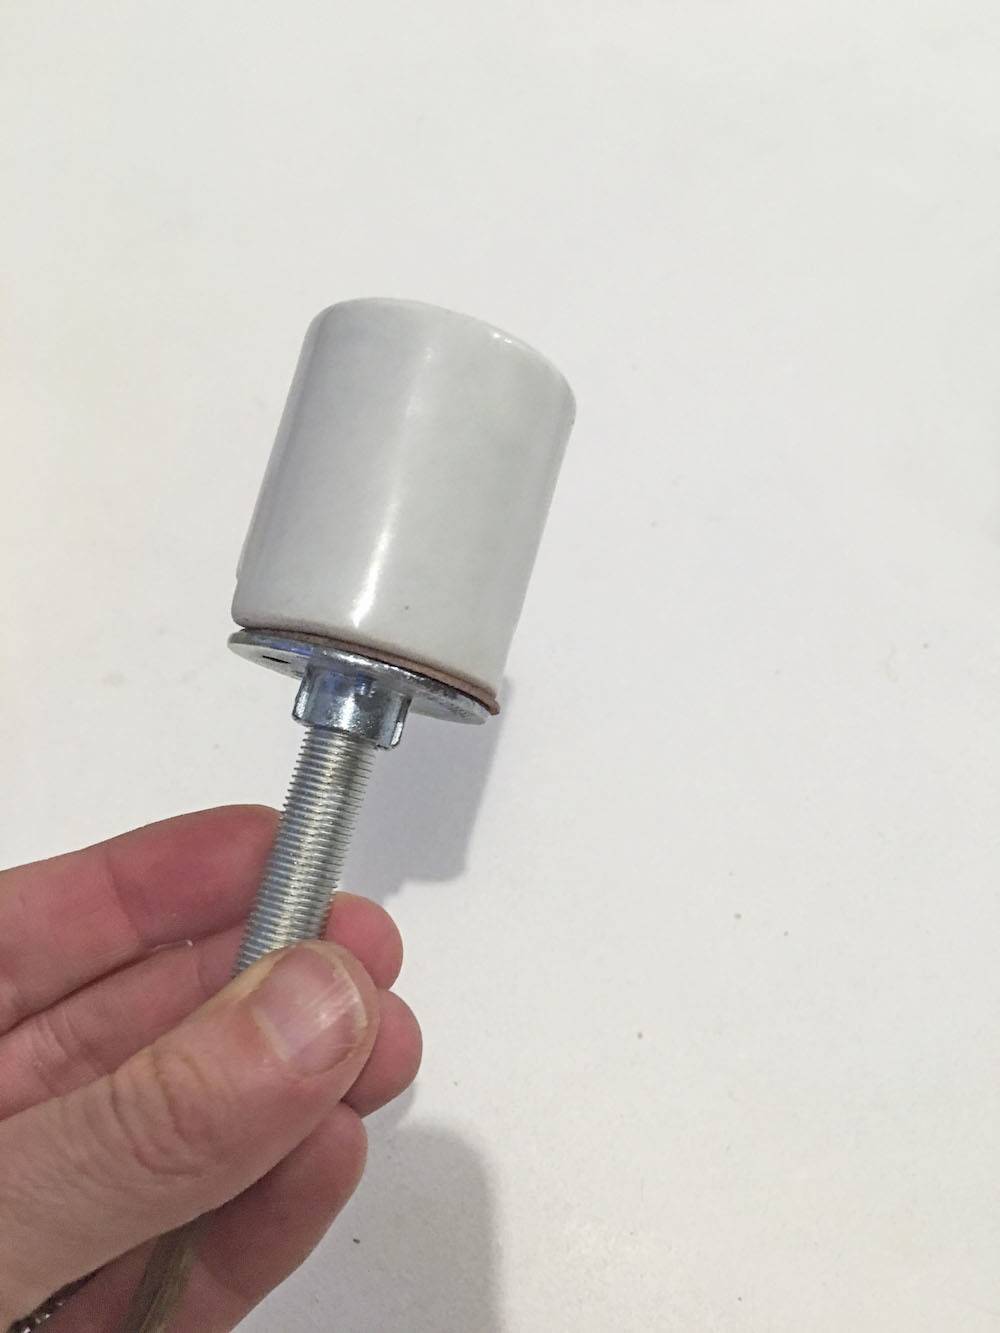
I realized the bottom of the porcelain light socket had a screw to hold the threaded cord secure. I also realized the part you screw the lamp socket into was a little bigger than the lamp pipe. (see this picture for reference).
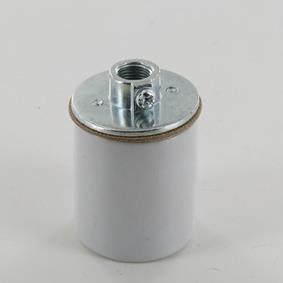
I realized all this mid process. Because of this, I needed to drill a 5/8 inch hole so the bottom part of the porcelain lamp socket could sit flush. I drilled and checked until I had drilled enough that the socket sat secure.
Step
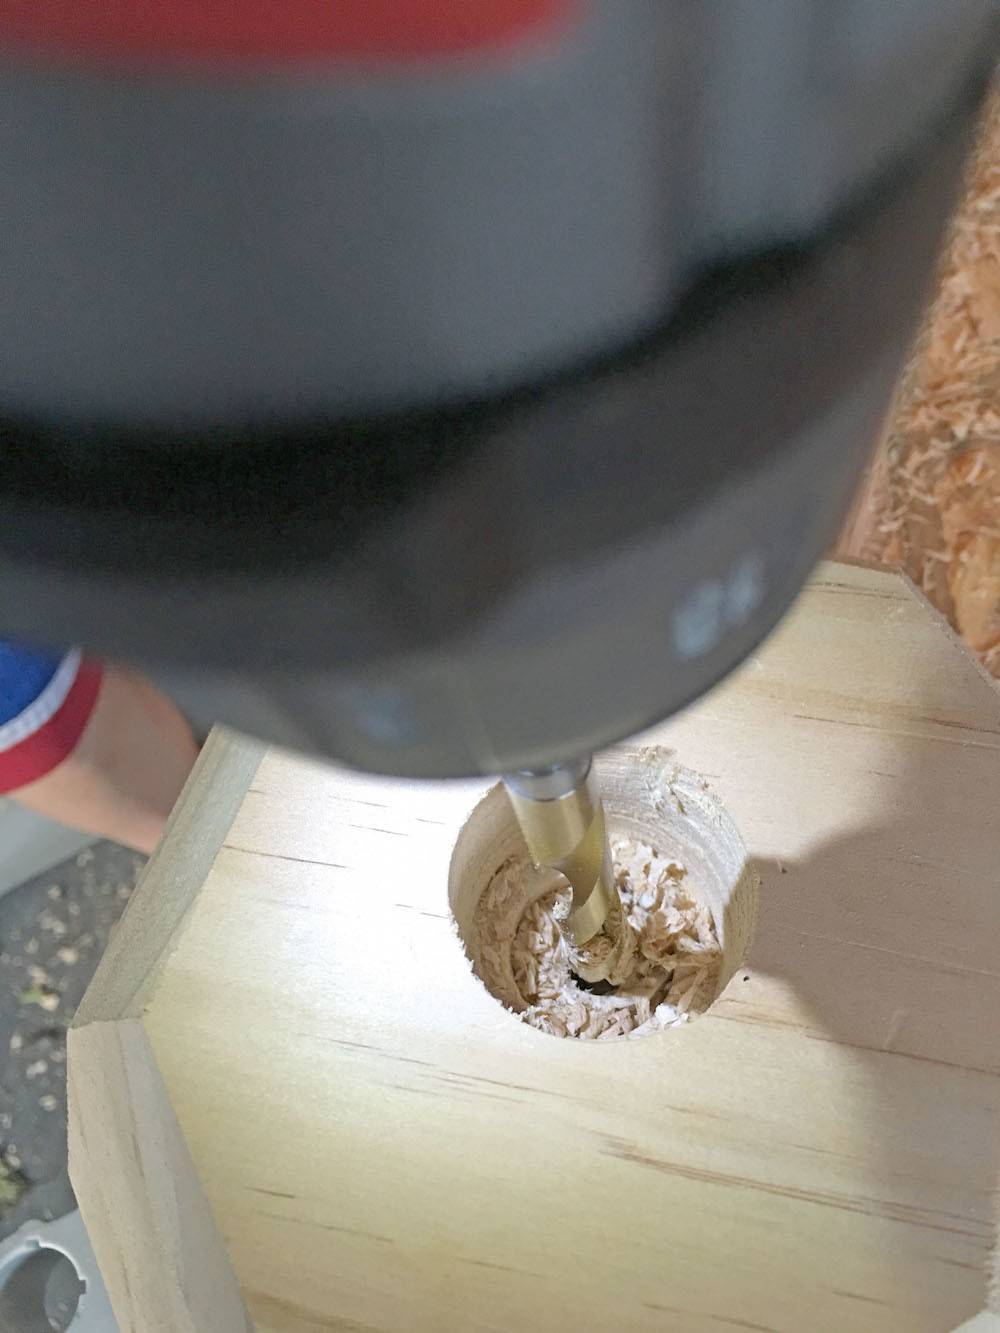
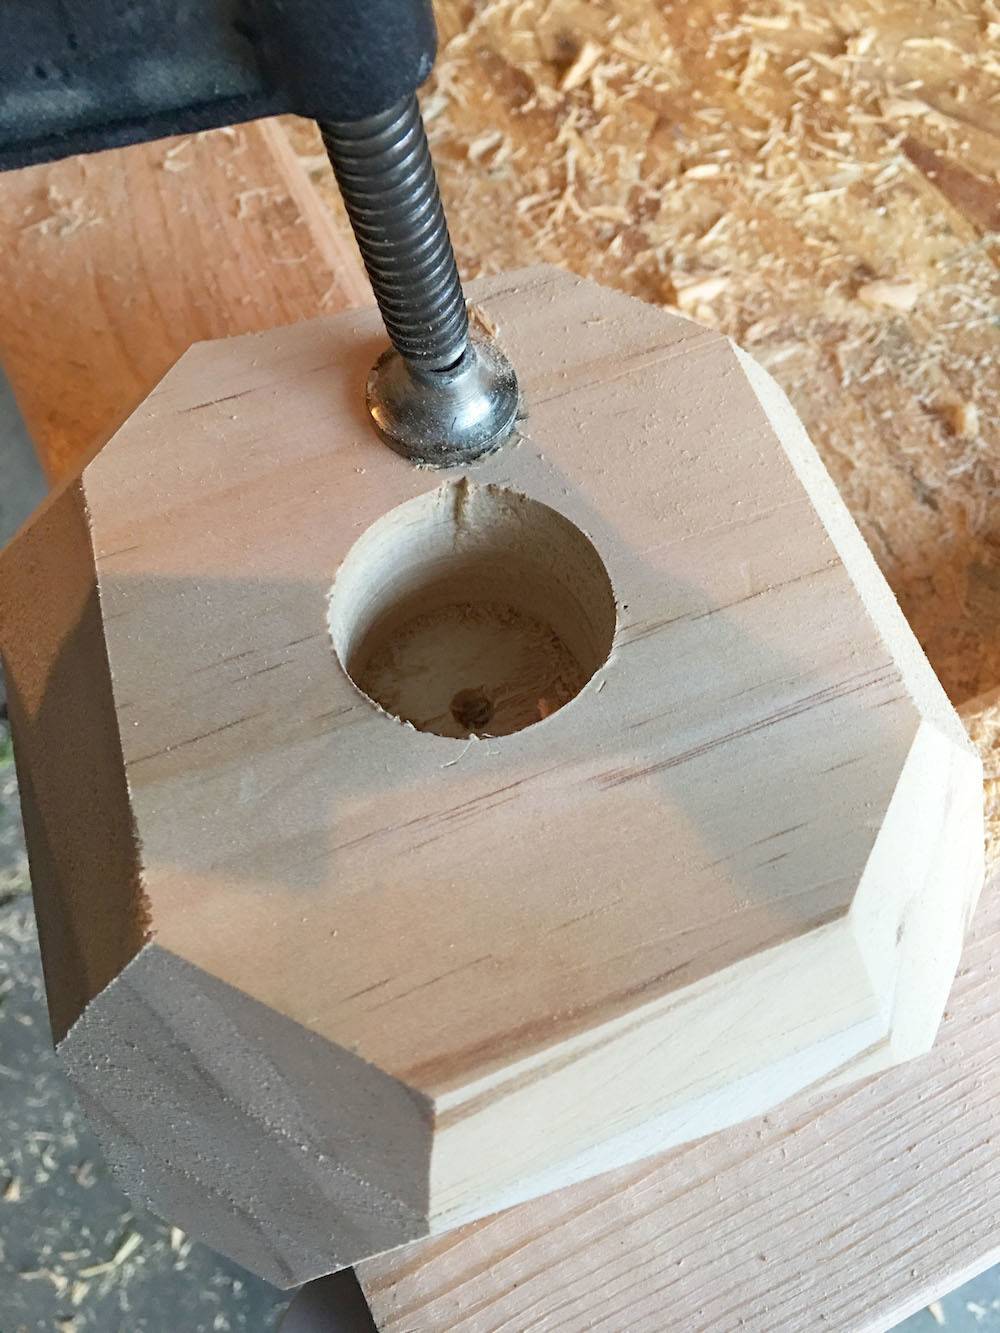
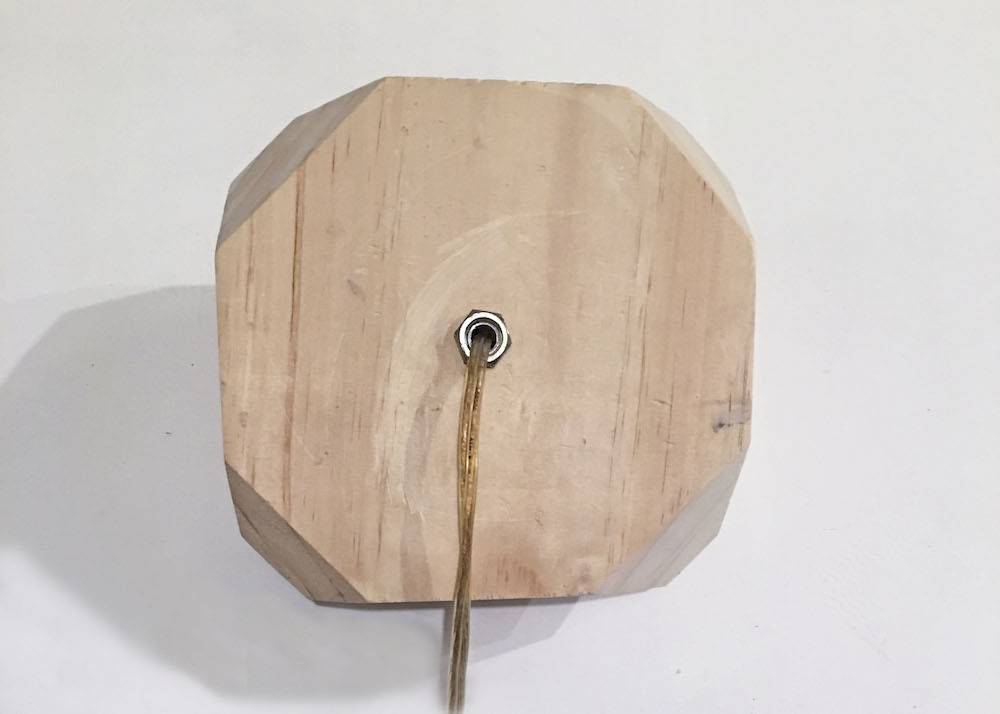
The next step is to drill a hole for the threaded lamp pipe to fit all the way through the block.

Here is the block after drilling the three holes.
Step
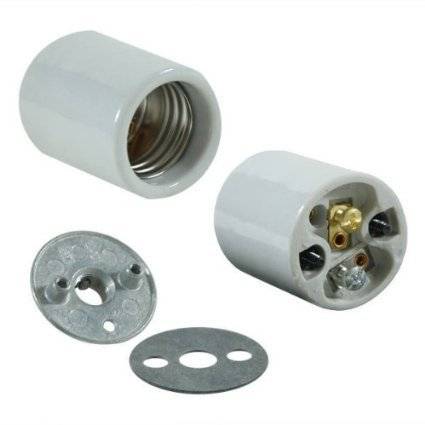
Take apart your porcelain socket. (The above picture shows the back side and front side of socket)
Step
Before you install your lamp cord to your socket you need to first slide your the following things, in order, over your cord.(Sorry, this is not pictured)
- locking nut
- woodblock (from the bottom to the top and locking nut is underneath)
- threaded lamp pipe
- metal bottom part of the porcelain socket
- Insulation piece of porcelain socket (goes between installed socket and bottom part)
If your plug is installed at the end of your lamp cord, you have to screw everything on before you attach the lamp cord to the socket. You are basically putting on everything backwards. If this does not make sense read thru the next steps to see how it all fits together and them come back and do step 12.
Step
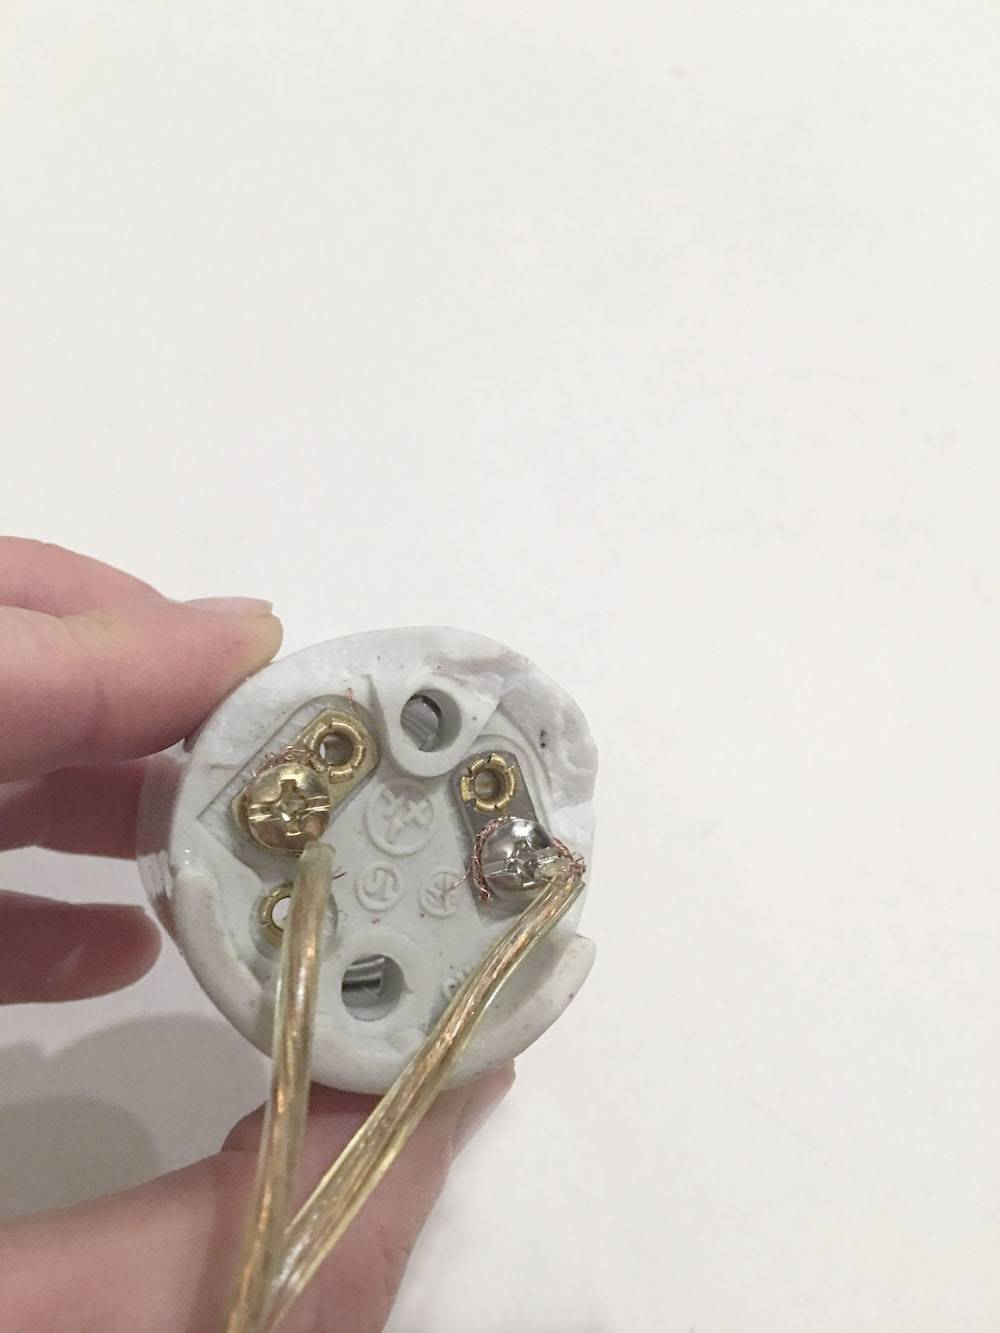
Install the lamp cord to the bottom of the lamp socket. Read the instructions that come with your kit. [Right Photo]
Slide the isulation layer and the bottom part of your socket up your lamp cord and re-attach. (Mine re-attached with screws from the inside)
Screw in the lamp pipe to the bottom of your lamp socket and tighthen the screw to lock it. (Note: because of step 12 the cord is already threaded through as you attach it all together)
Step

Pull the cord from the bottom and pull the lamp pipe and cord all the way through.
Step
Screw the locking nut on the bottom of the threaded lamp pipe to secure the cord.
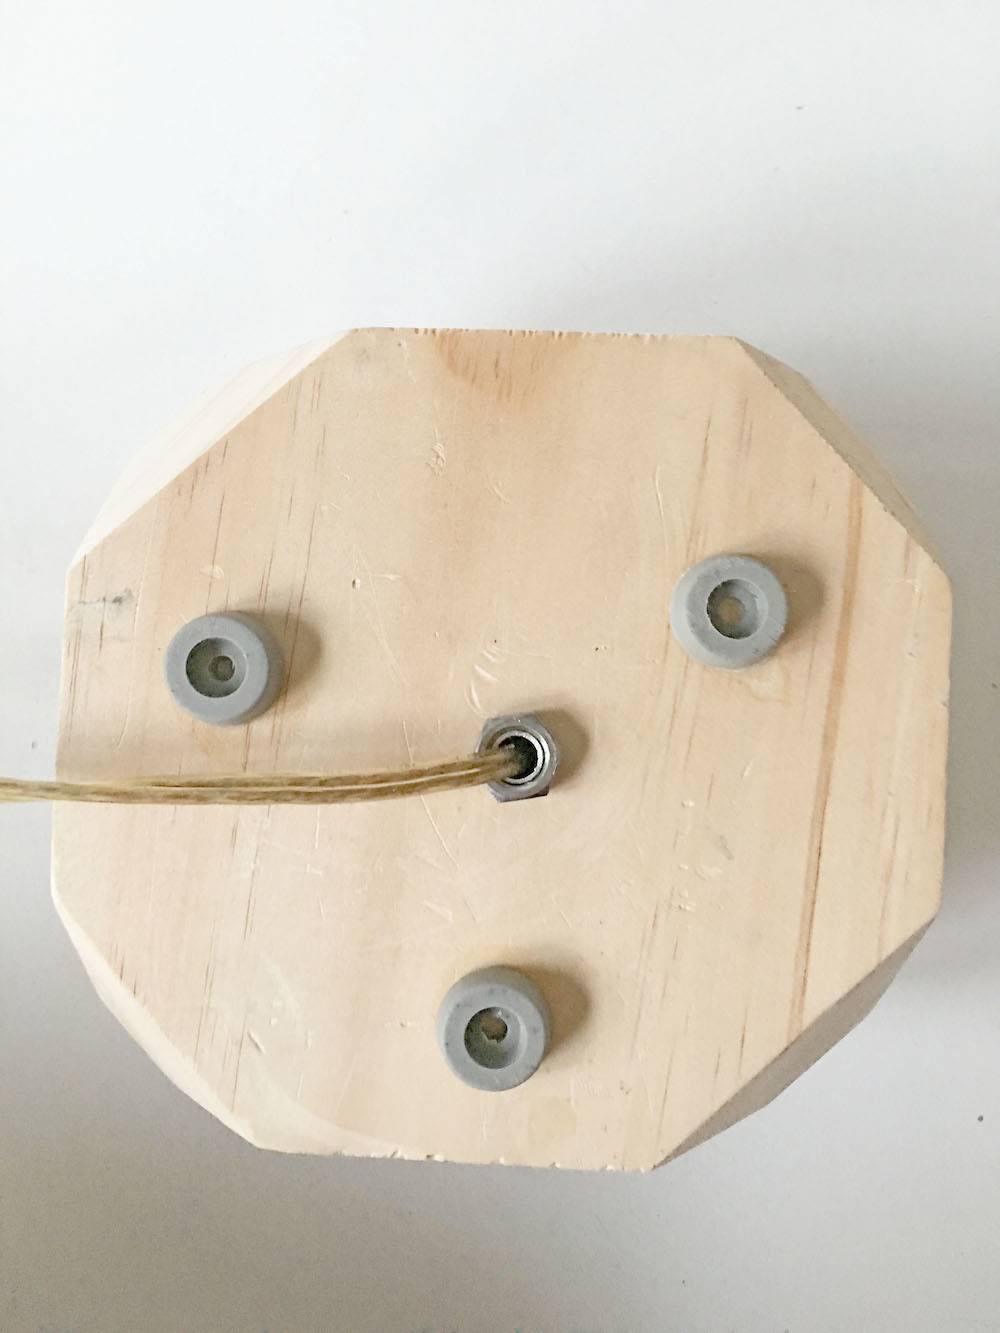
Step
Use the hot glue to attach rubber feet to the bottom of your block. This is so the cord can fit neatly underneath the block while it sits flush.
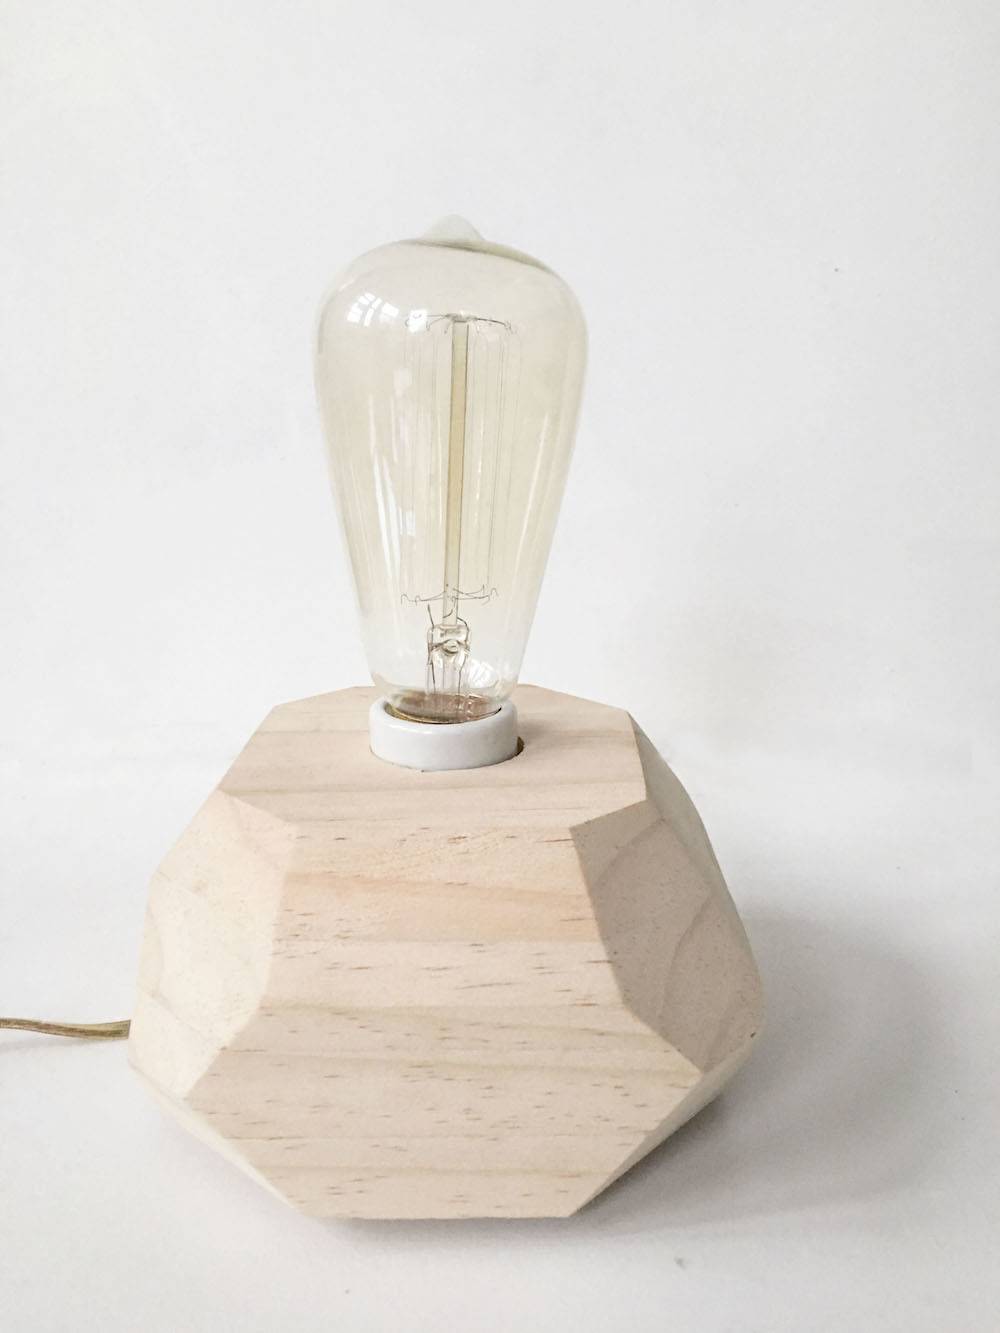
Screw in a light bulb and you are done!
Interested in learning more about lighting DIY projects? Check out some more project ideas here and here
How do you turn the lamp on. I didn’t see a switch.
@sadie
If you look closely in the materials picture you will see my lamp cord has a switch already installed on the cords. You can’t really see the switch in the styled photos but its there.
You can buy lamp cords with this or you can buy them separately and install it yourself. I used one from an old lamp.
Thanks for reading
I see it now! How could I have missed it.
Thanks for the quick reply. Love the lamp. I’m going to try and make it.