
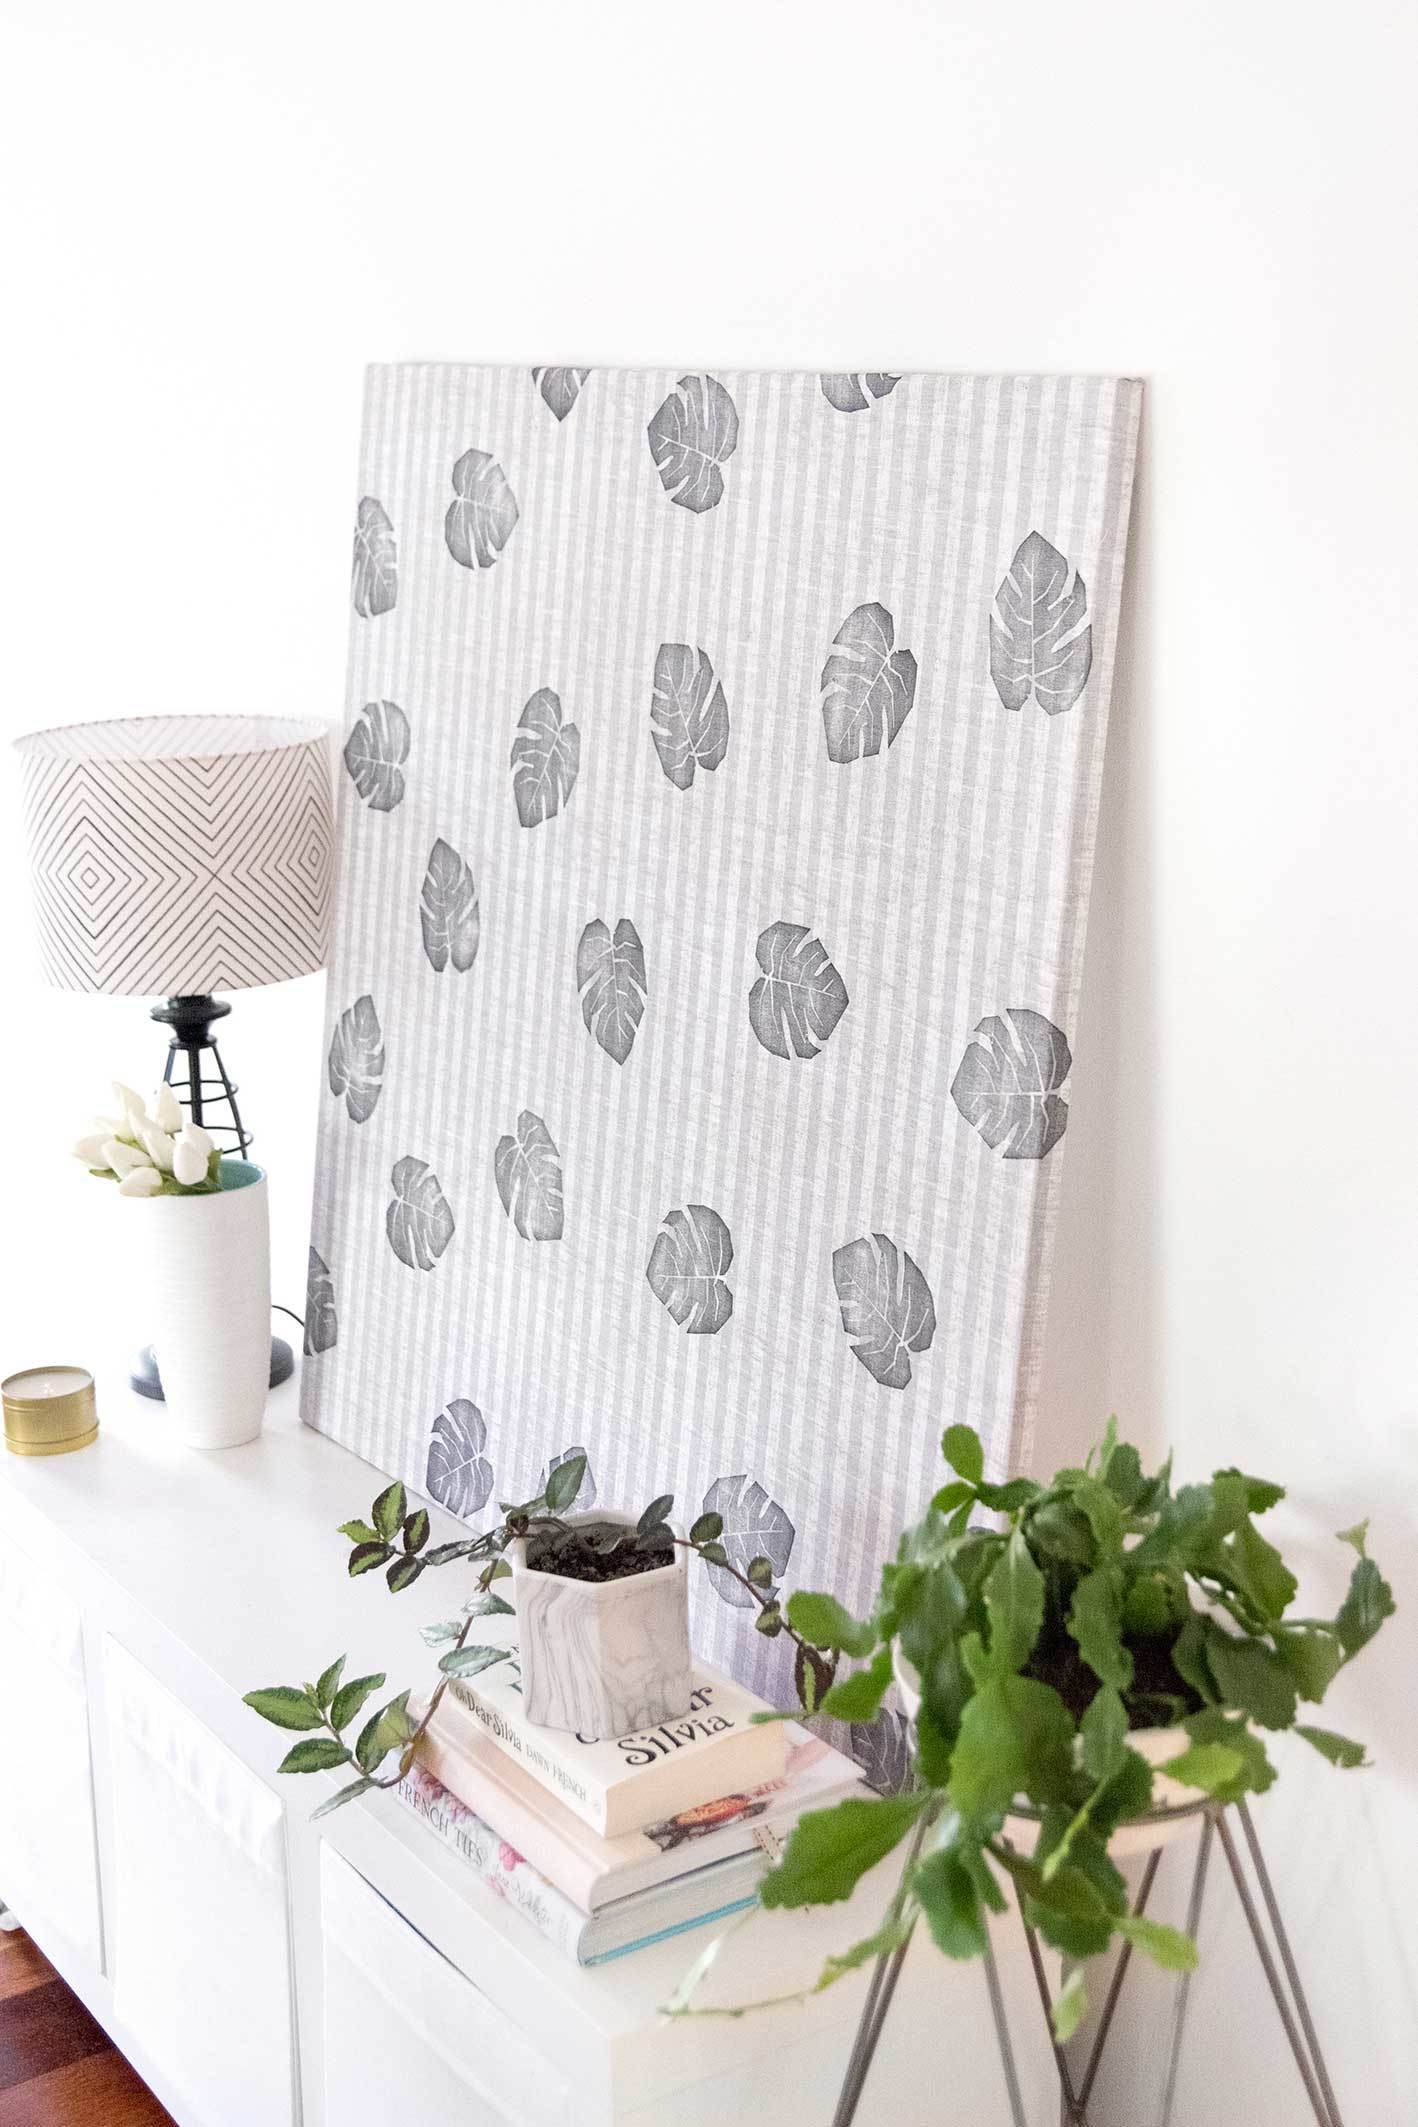
One of the best things about beautiful artwork is how it can instantly transform the look and feel of a room. Sadly, large scale wall art is often expensive, placing it out of many people’s budgets (mine included!).
That doesn’t mean we have to go without, though. Using just a piece of fabric and some wood, you can whip up your own statement piece of art in the space of an afternoon. And the best part of all? It doesn’t come with a hefty price tag! Follow along below to find out how to make your own fabric wall art…

Materials
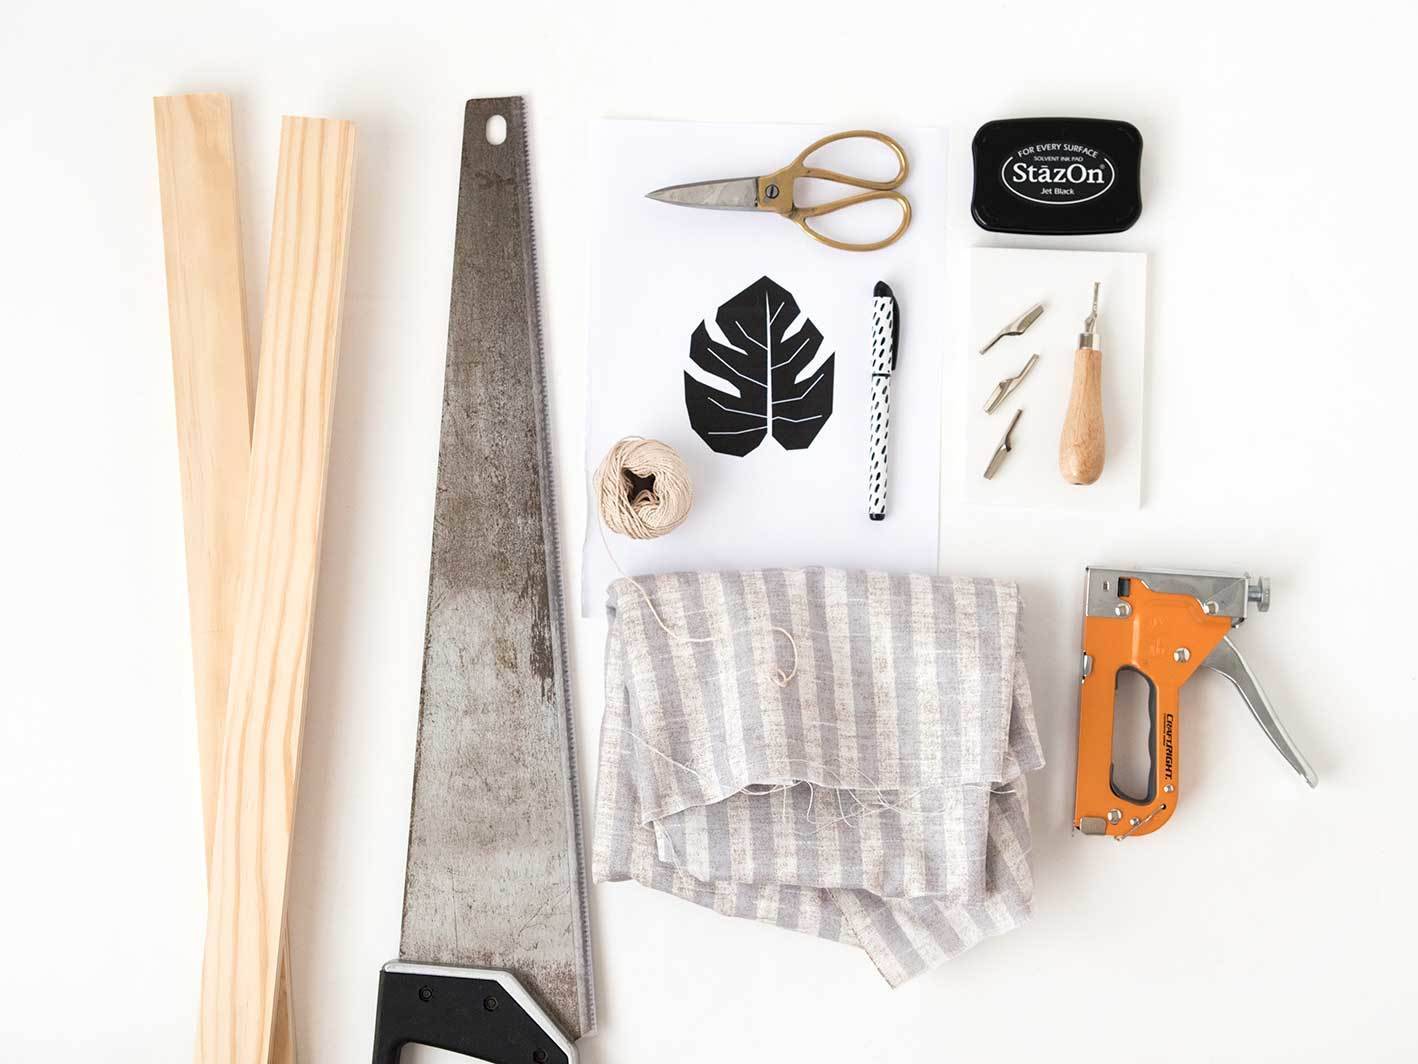
- Fabric (you can use any; I used cotton fabric with a subtle stripe print)
- A black stamp ink pad that’s suitable for fabric
- Lino cutting tools
- Lino
- Tropical leaf template
- Scissors
- Pen
- 4 x long pieces of wood (I used pine)
- Wood glue
- Power drill and/or screwdriver
- Long timber screws
- Staple gun
- Cord
Step
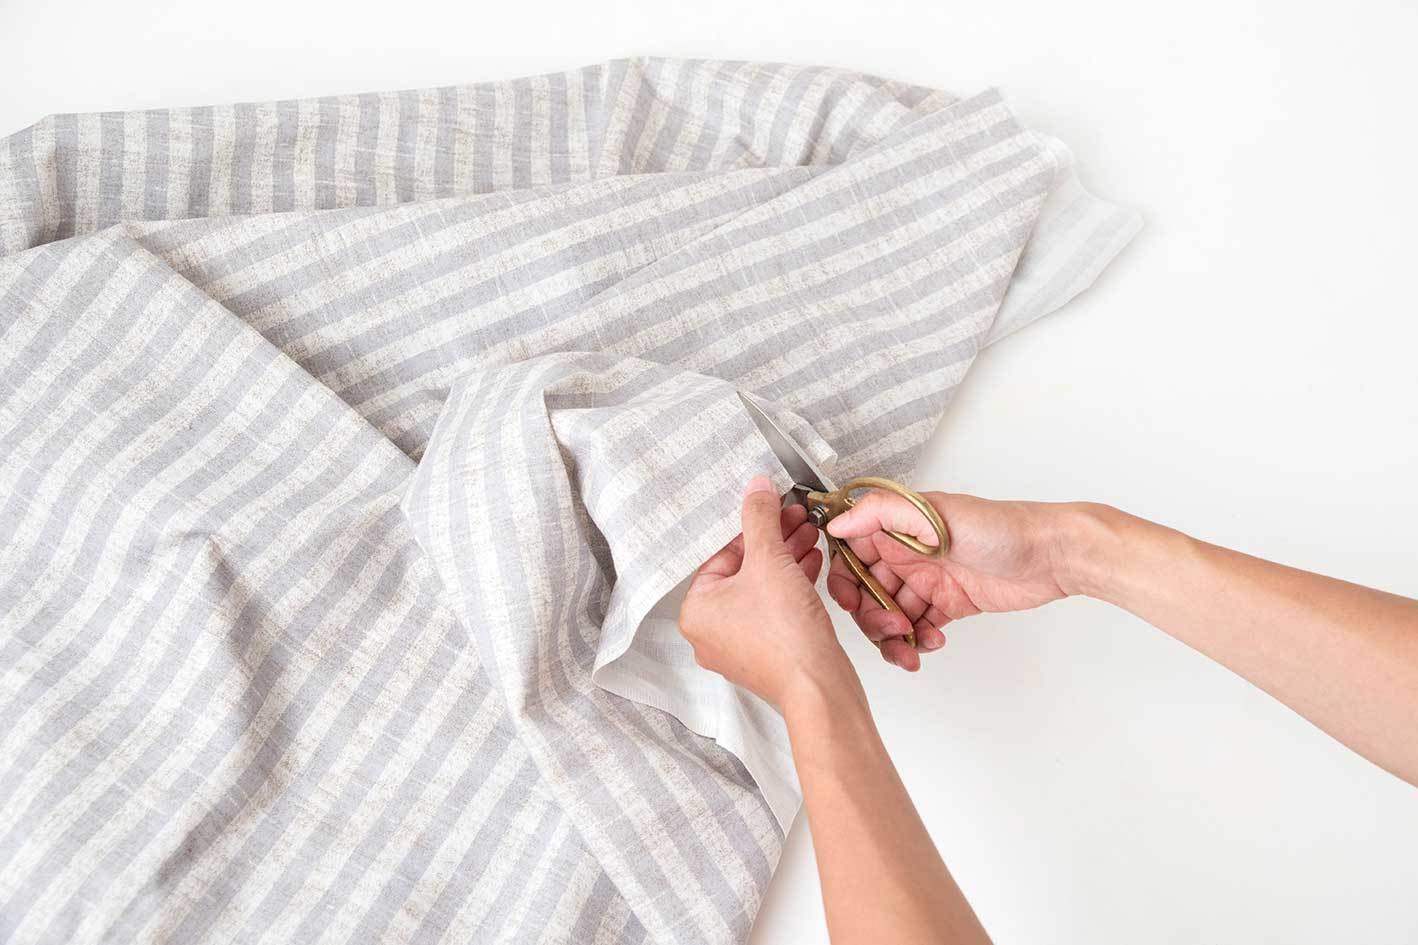
Cut your fabric to roughly the size you’d like your finished fabric wall art to be, making sure that you leave 2-3 inches (5-7cm) extra on each side. Later on, you’ll use the excess to staple the fabric to your wood frame.
Step
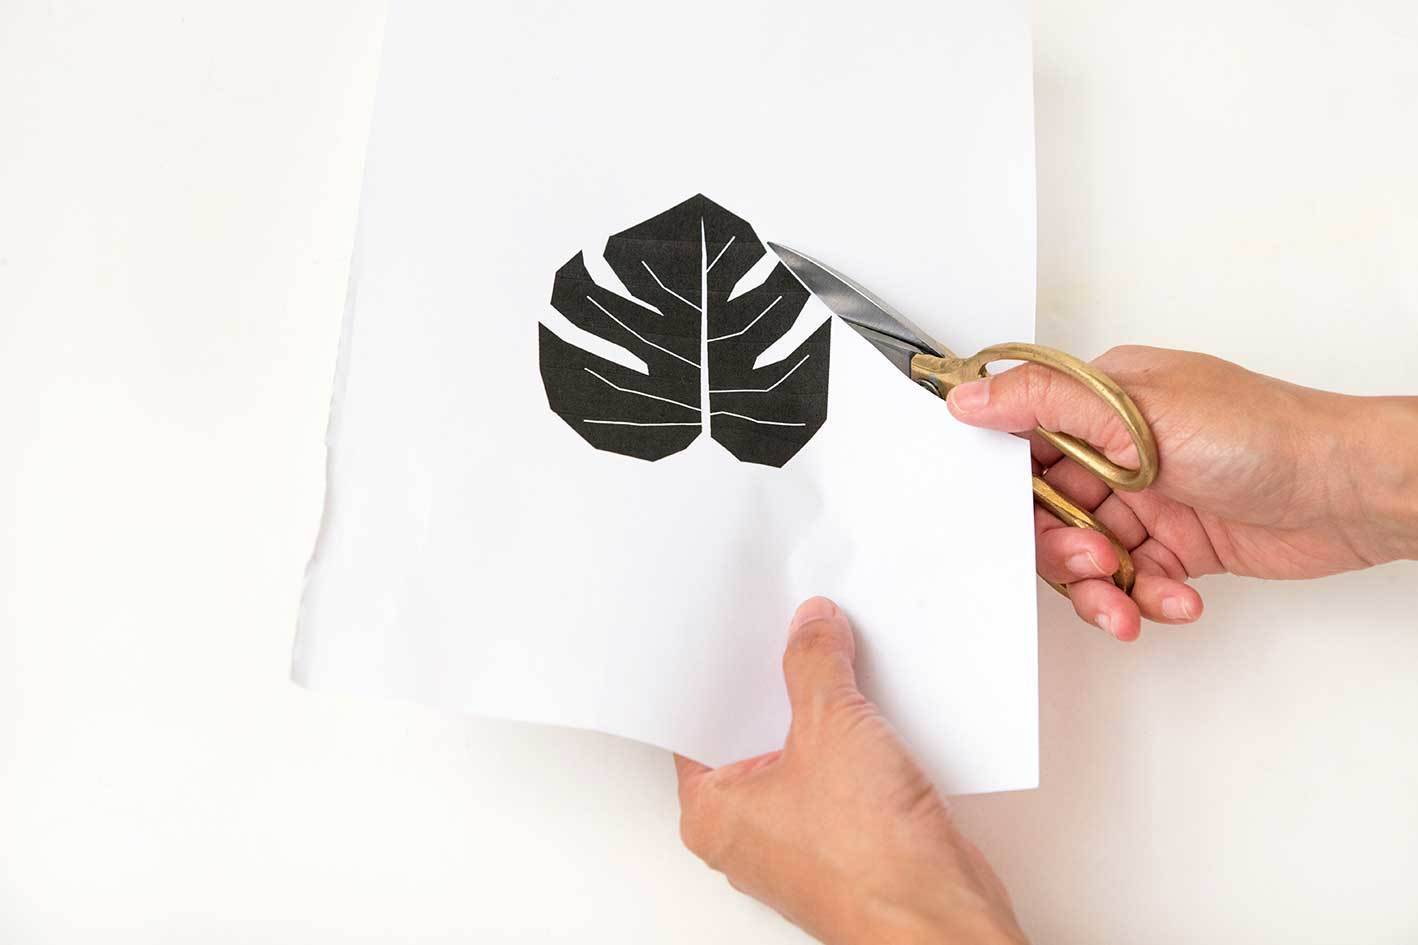
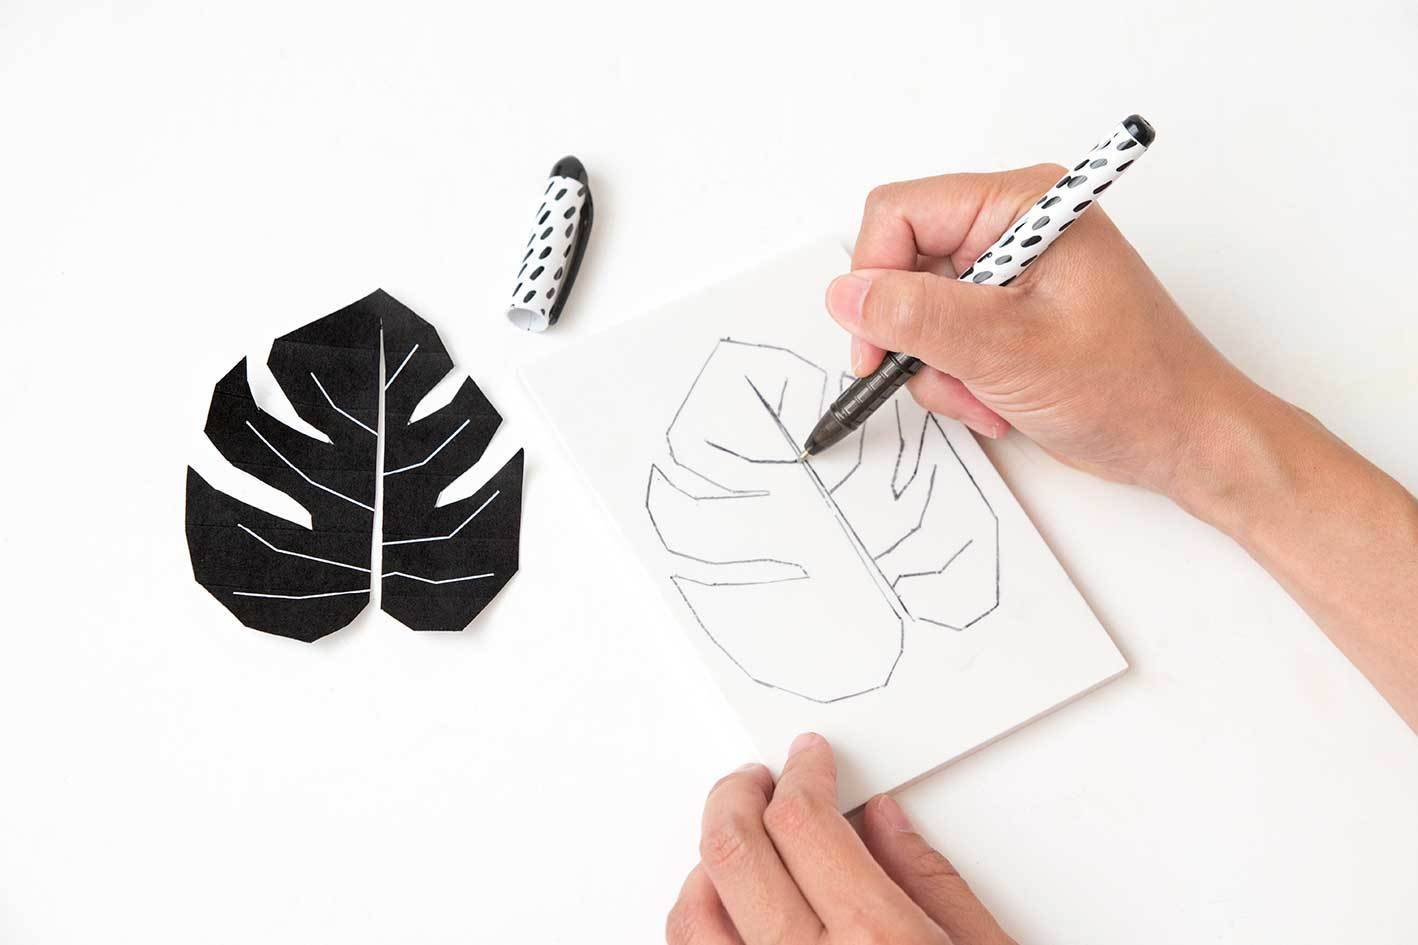
Download and print out the tropical leaf template. Cut out the leaf using a pair of scissors.
Step
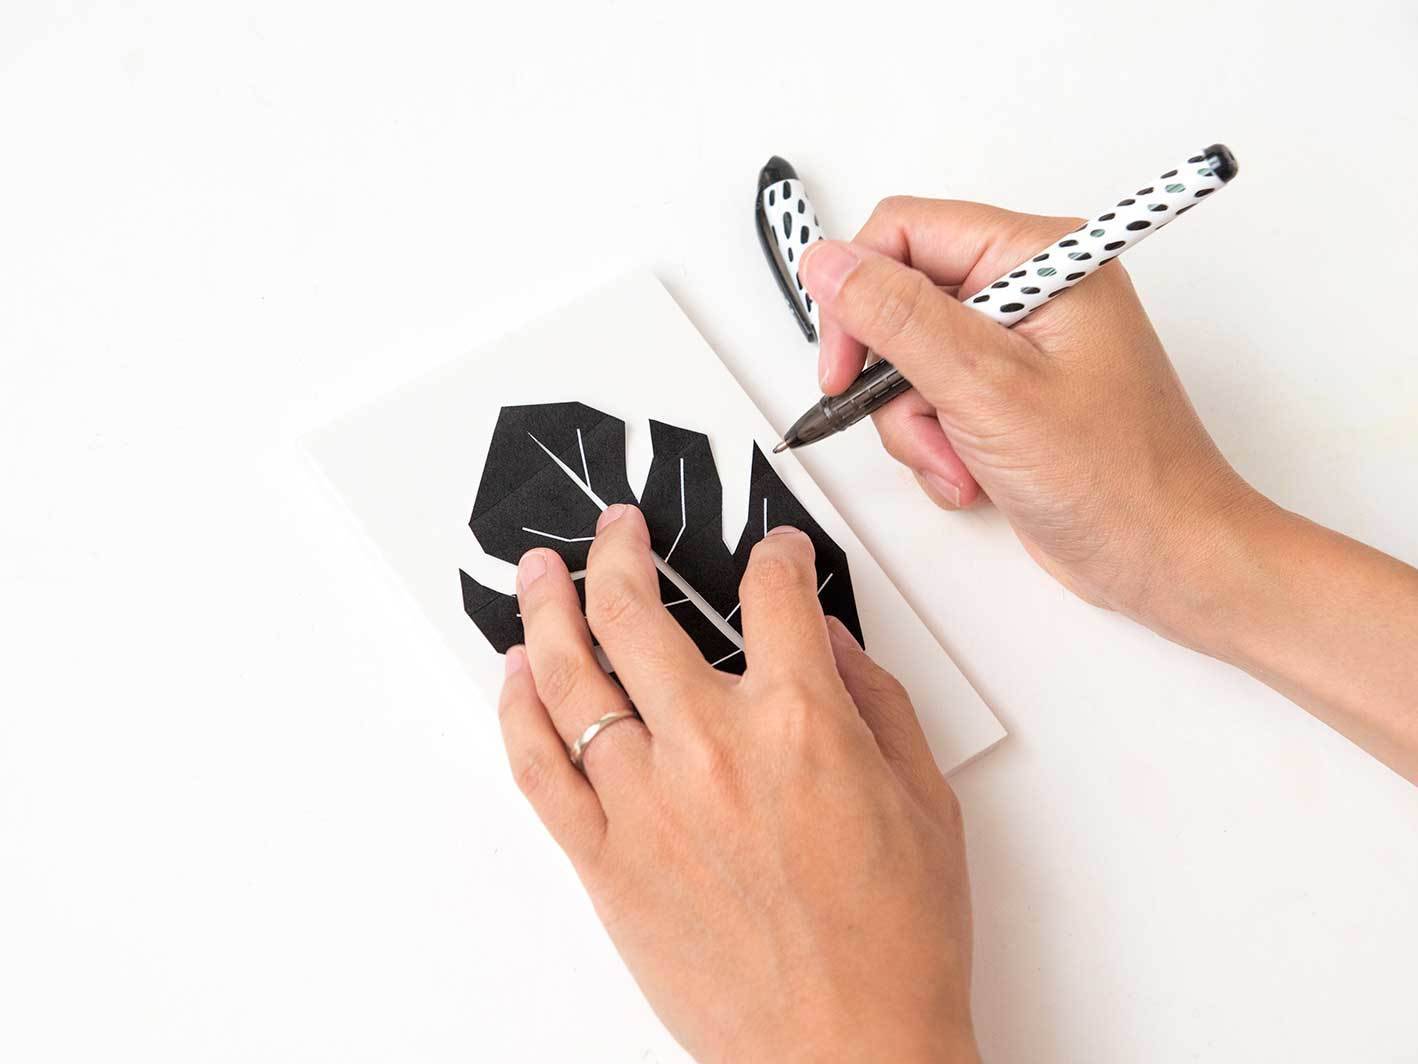
Cut a piece of lino that’s a bit larger than the size of your leaf. Place the leaf on top of the lino and trace around it.
Once you’ve traced around the leaf, draw in the stems down the middle.
Step
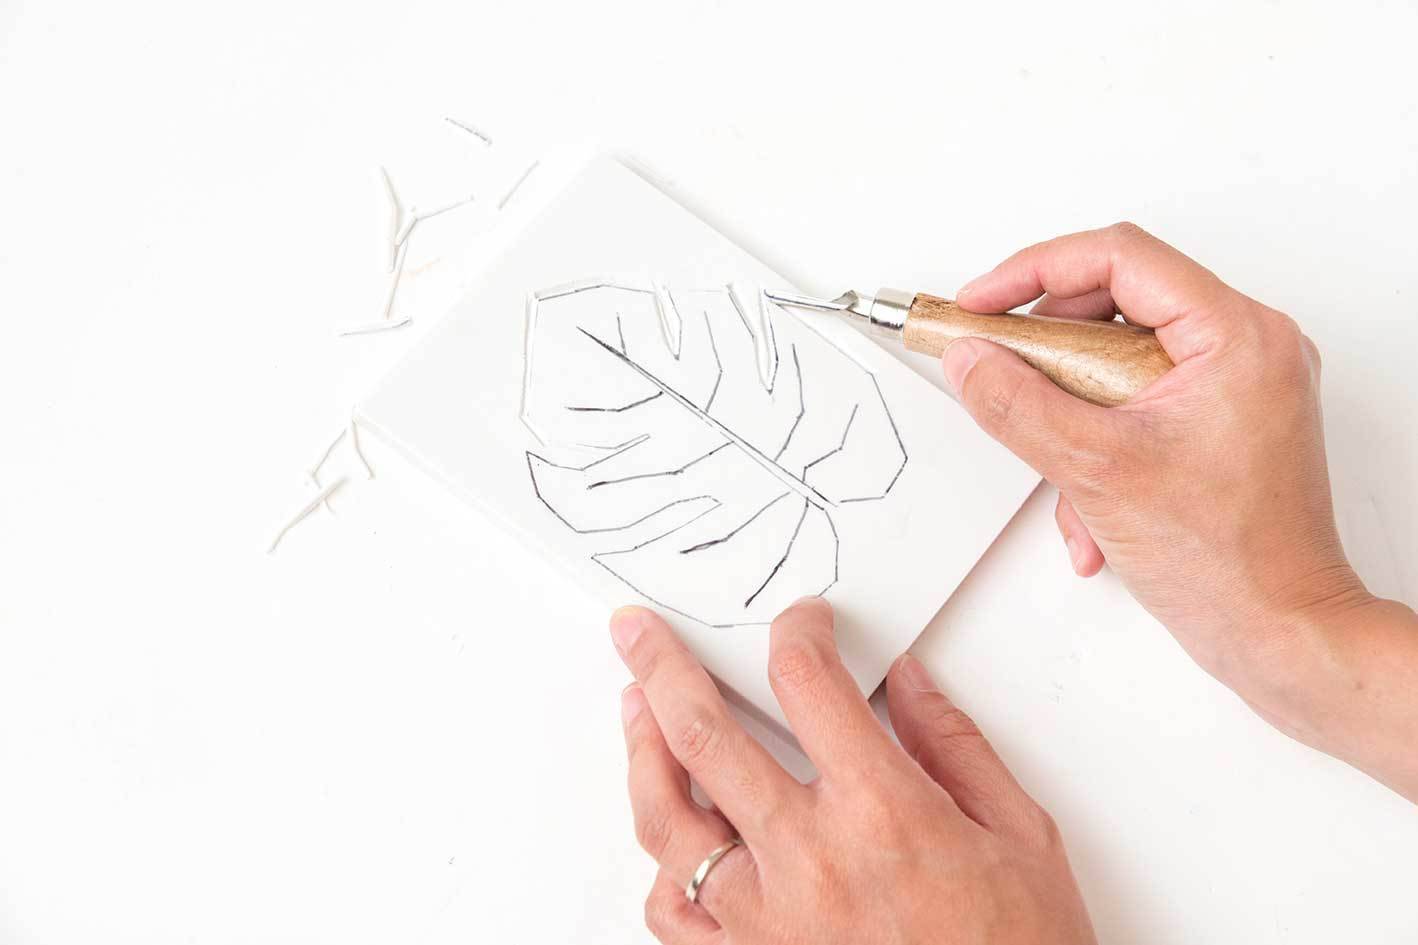
Use your lino tools to cut around the leaf. Since we want the leaf shape to be the part that’s inked and stamped, we’ll leave that section uncut and instead remove everything around it.
If you’re unfamiliar with lino cutting, make sure you practice on a scrap piece of lino first. Draw a shape, place the cutter right next to your shape outline and use medium pressure to push forward, carving out the lino as you go. Once you’ve got the hang of using the tools, you can get to work cutting out your leaf.
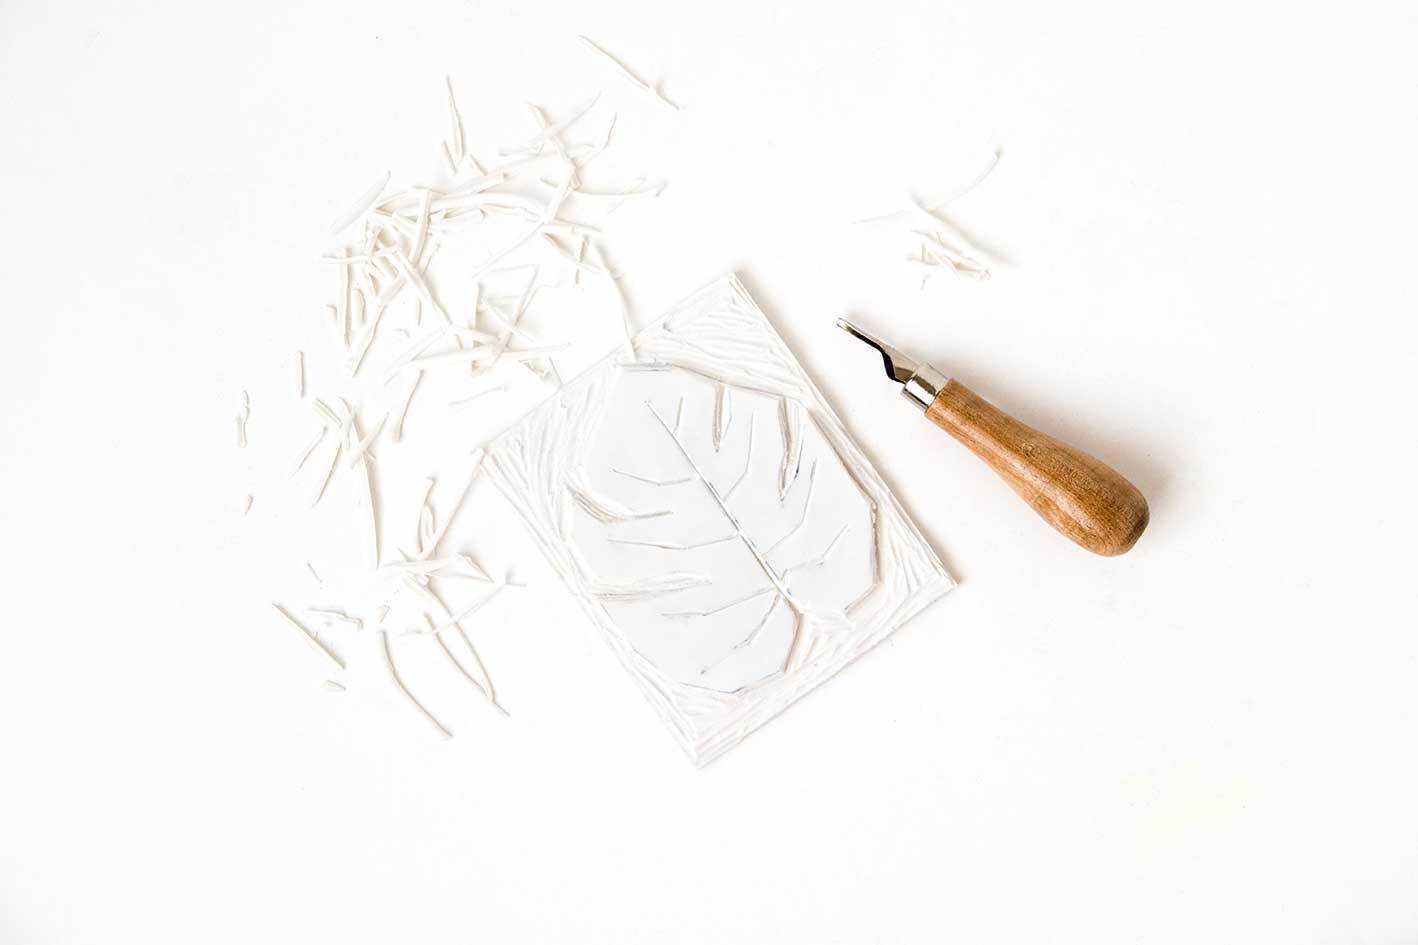
When you’ve removed the lino from around the leaf, use your narrowest lino carving tool to cut out the stems.
Step
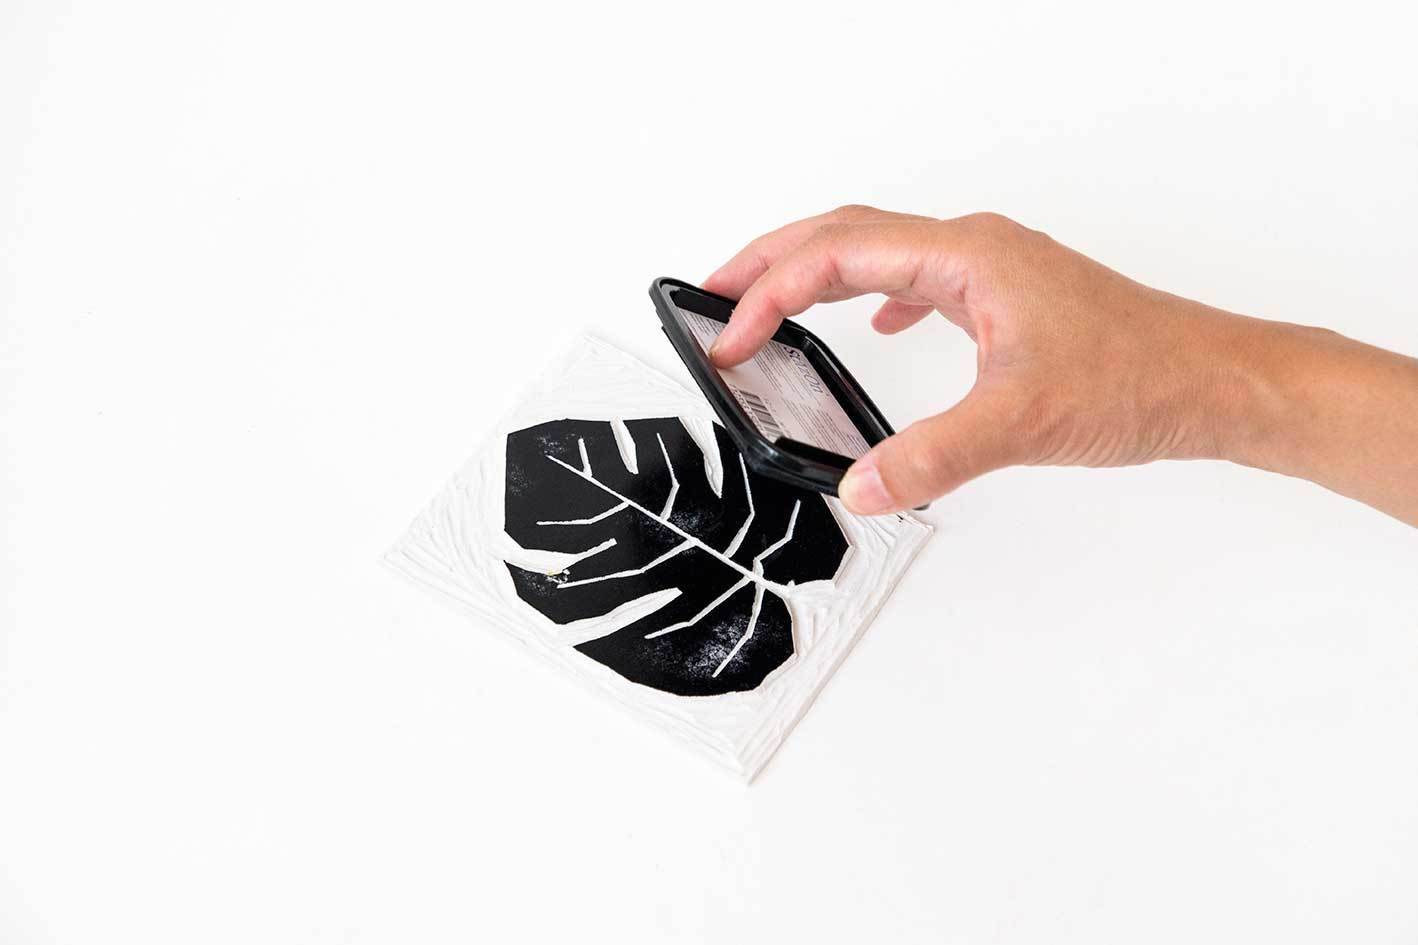
Place your finished stamp face up and, holding your ink pad upside down, lightly tap ink all over the surface of the leaf.
Step
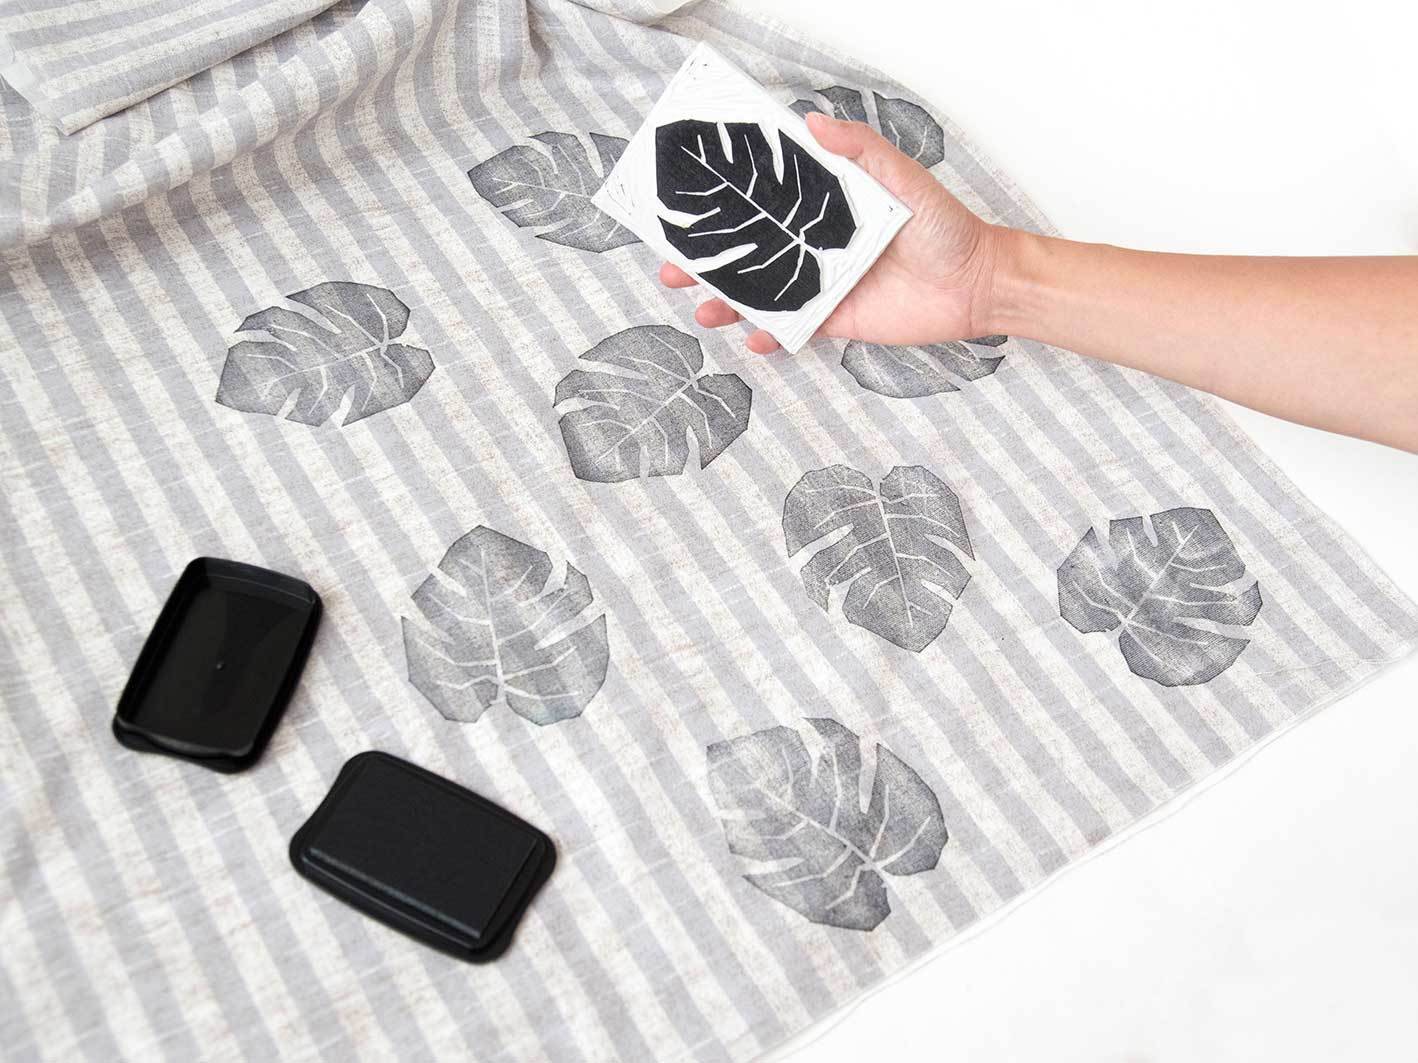
Stamp the leaf onto your piece of fabric. Continue inking and stamping until your fabric is covered in leaf prints. Try rotating the stamp as you go so that the leaves face in different directions. Then leave your print to dry.
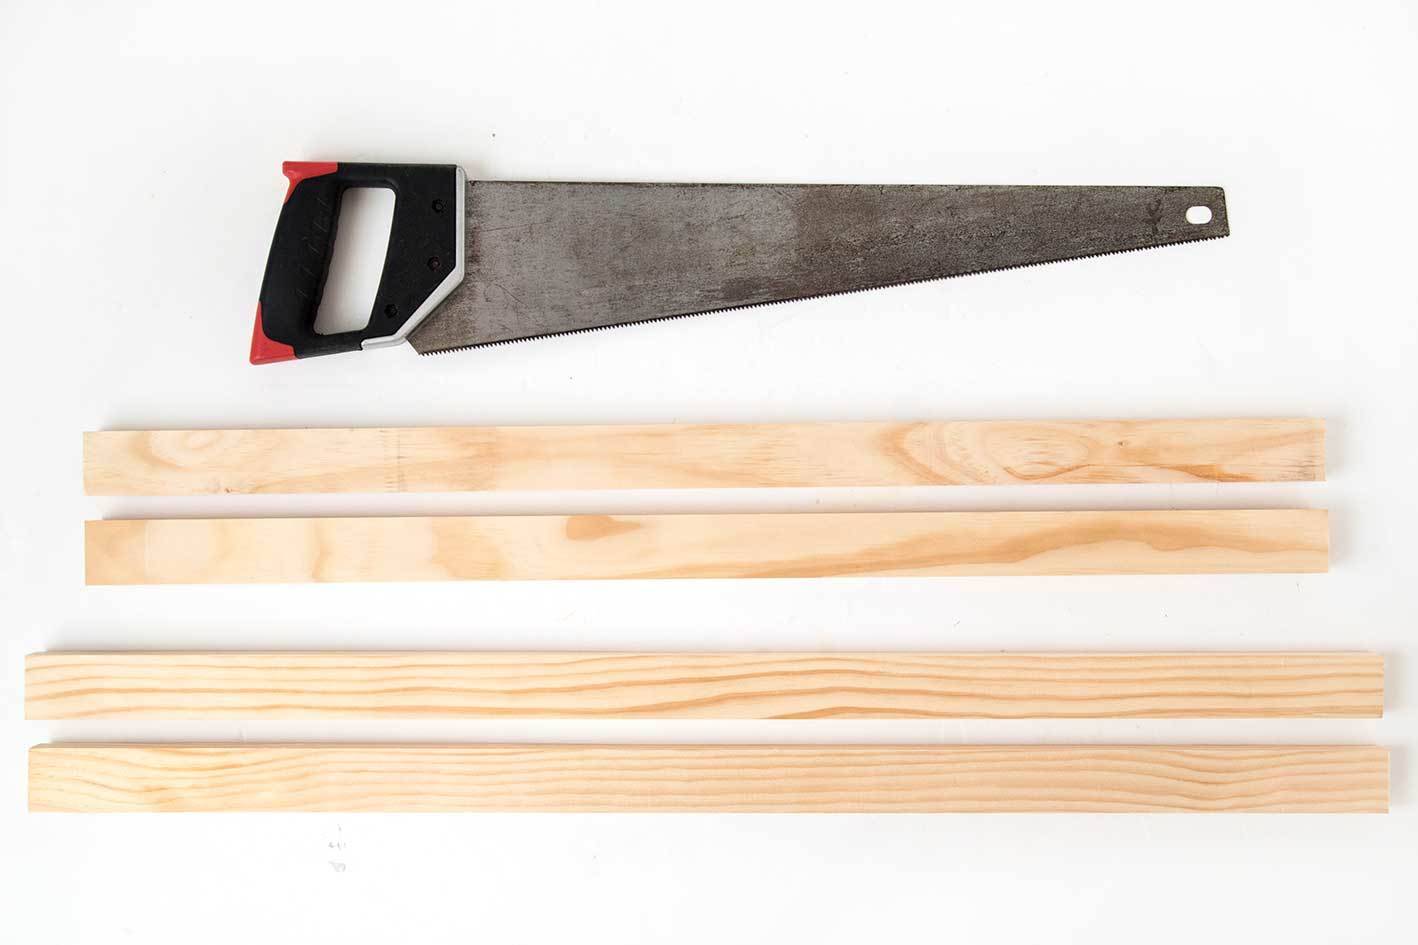
Step
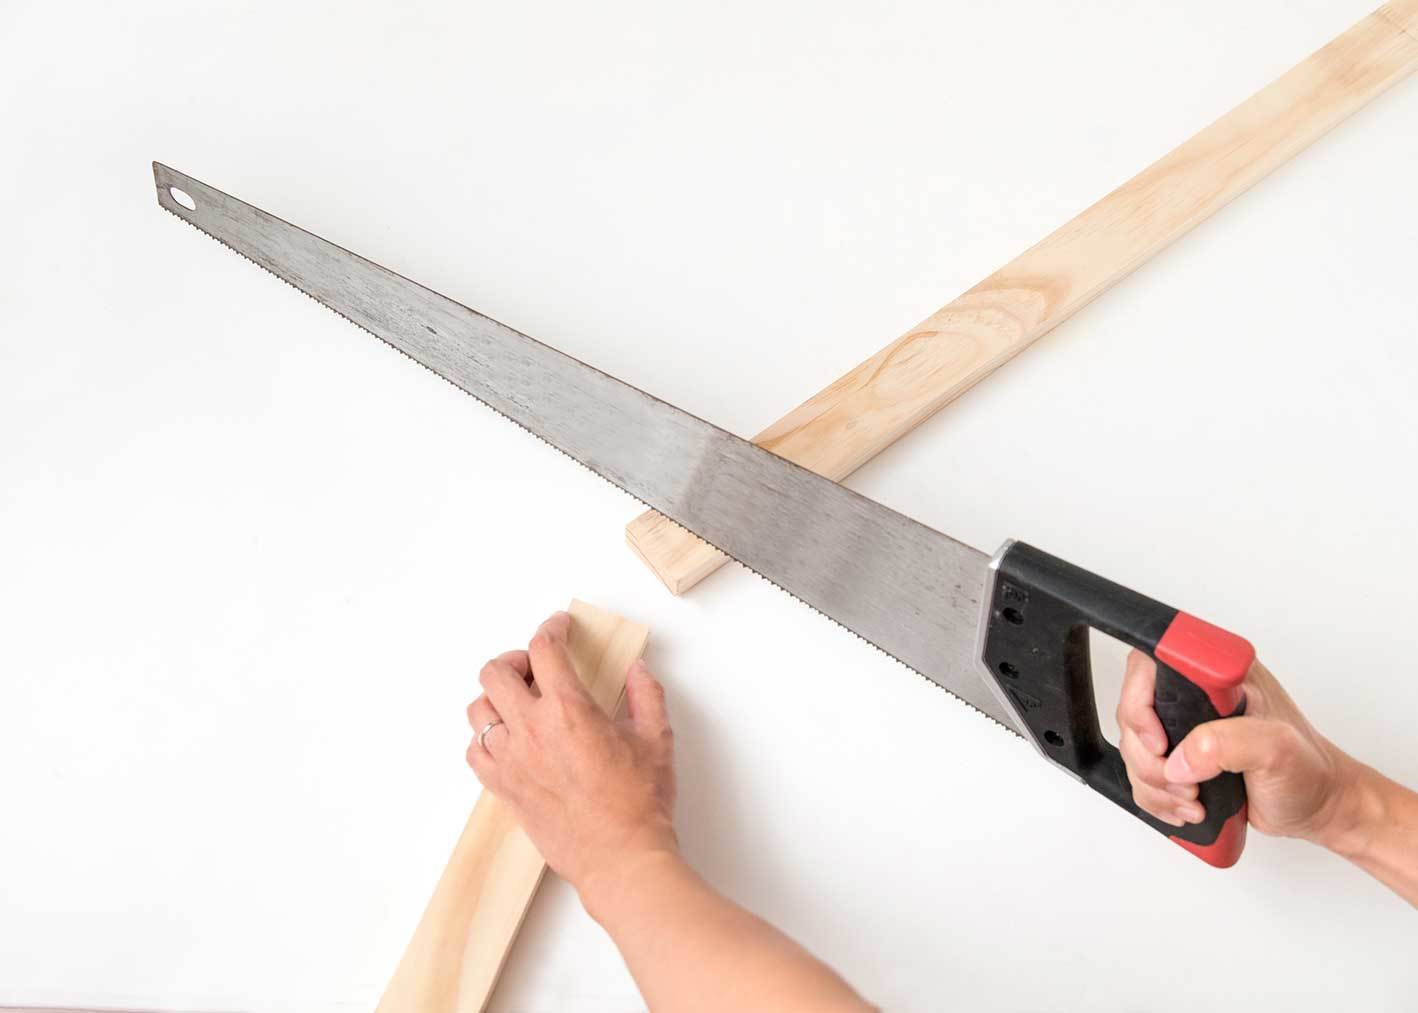
While your fabric is drying, measure and cut your wood to size using a hand saw.
The length of your wood pieces will depend on how large you’d like your finished fabric wall art to be.
I wanted to make quite a large square artwork measuring 35 inches on each side. Since my timber was 1.6 inches wide, I cut my wood into 4 pieces as follows:
- 2 x 35 inch long pieces
- 2 x 31.8 inch long pieces
Step
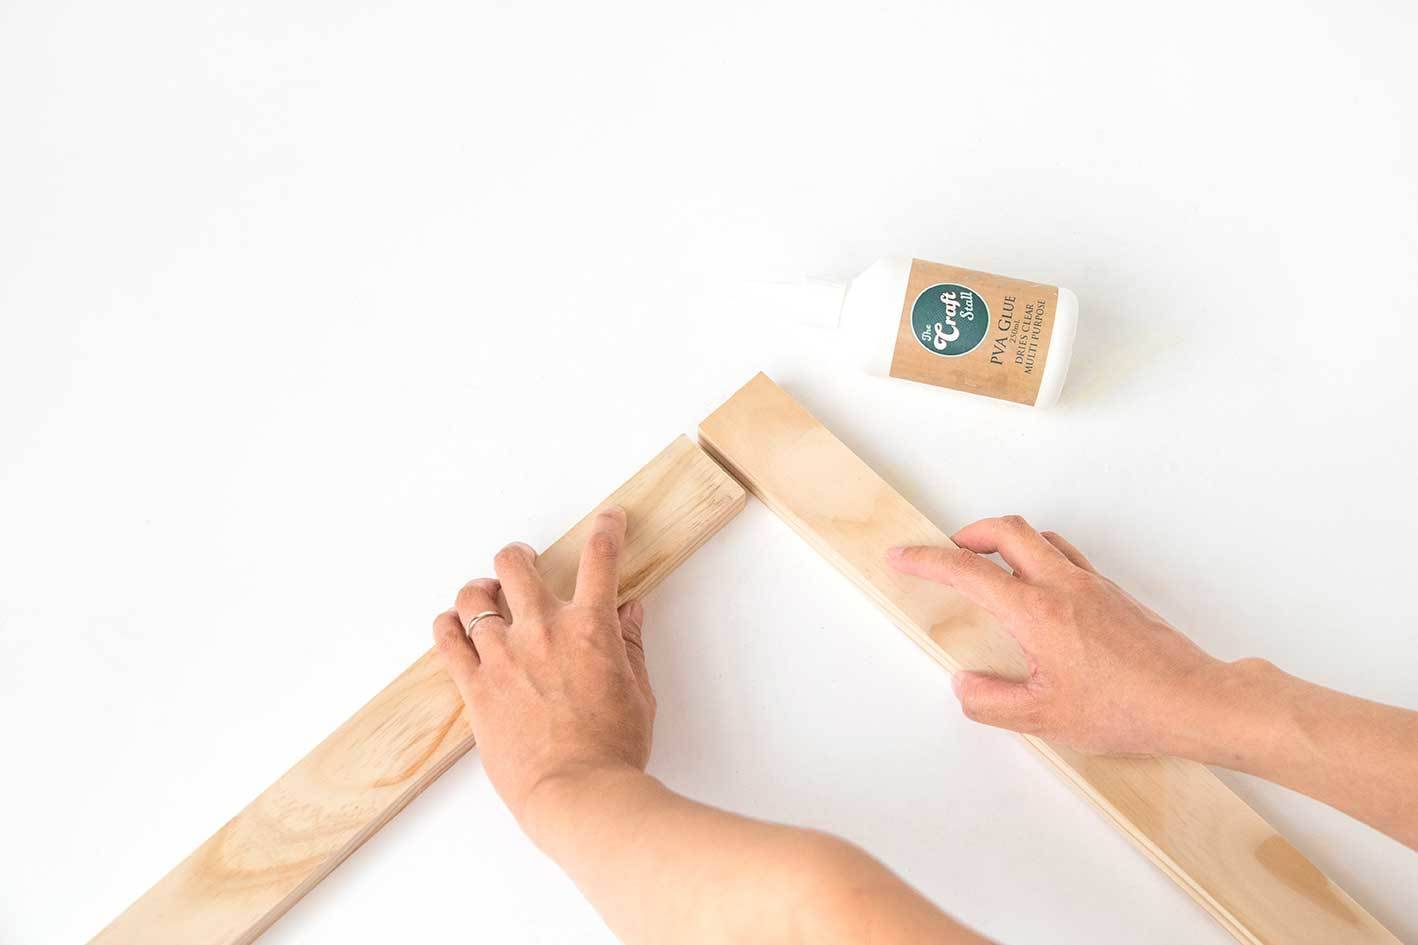
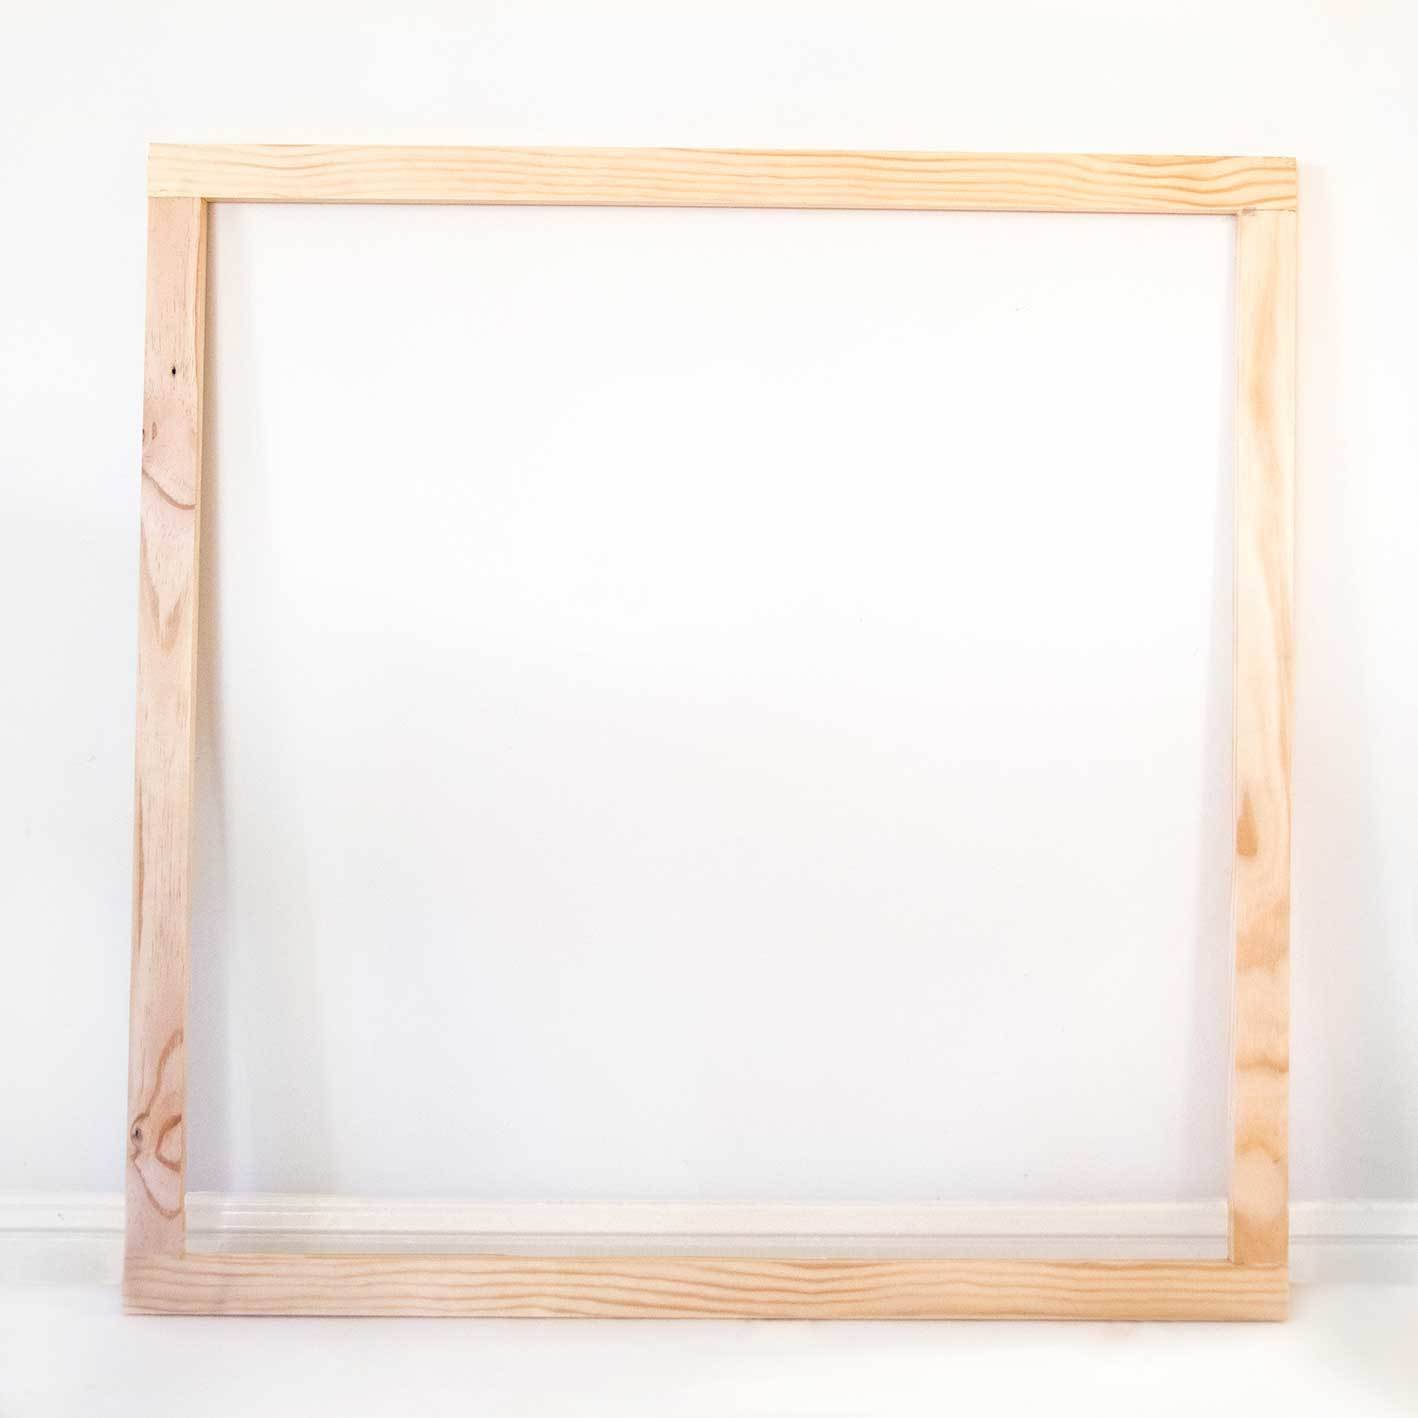
Stick your wood pieces together to form a square (or rectangle if you prefer) using wood glue.
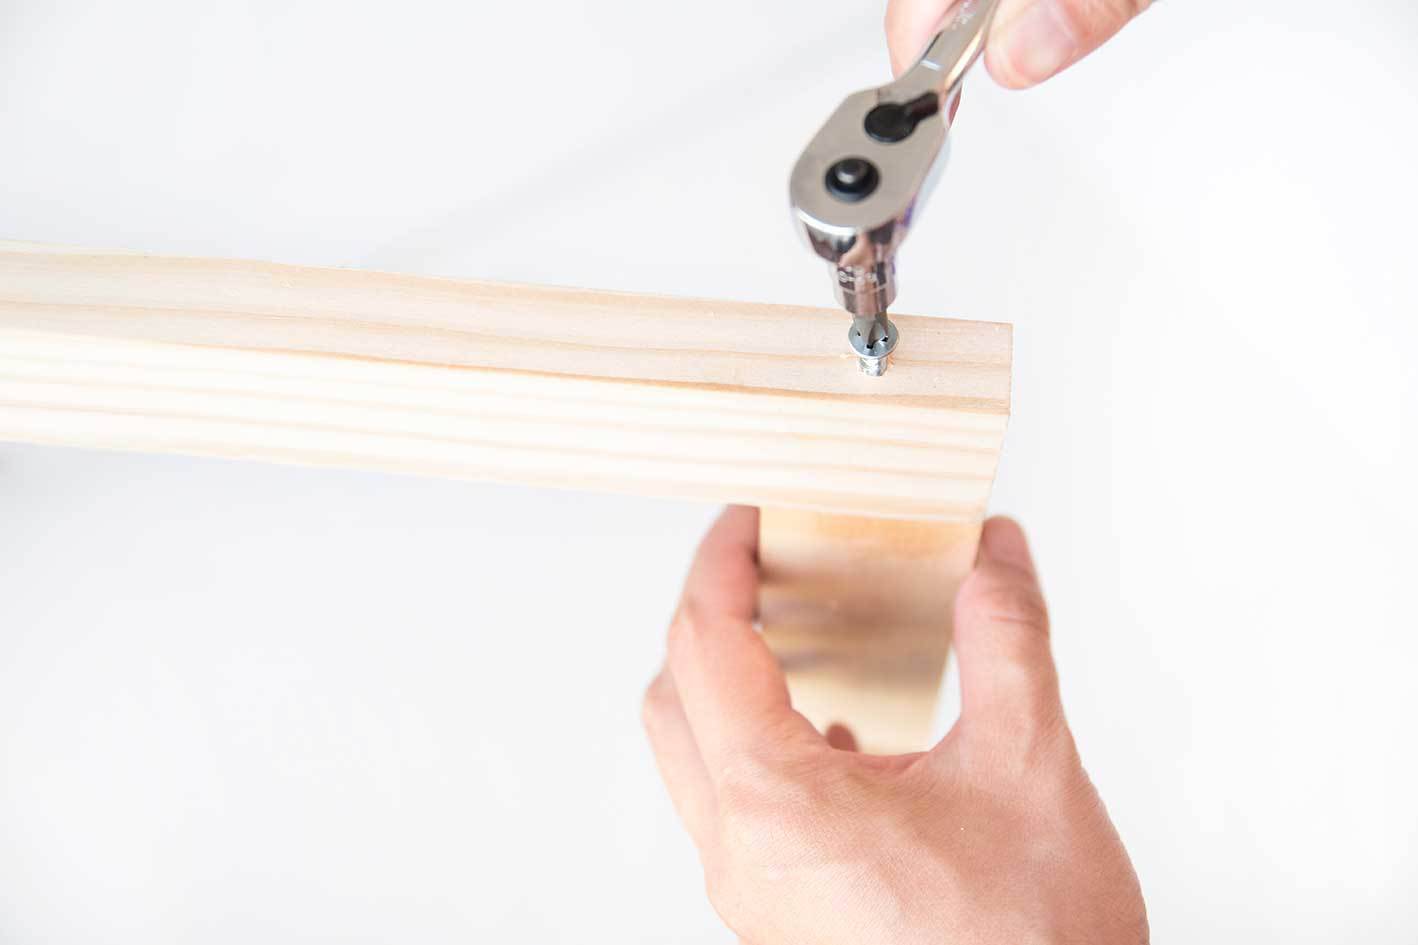
Once the glue has dried, screw the wood pieces together at the corners with long timber screws. This will keep your frame sturdy.
I pre-drilled a small hole with a power drill and then used a screwdriver to insert the screws, but you can just use a power drill to both pre-drill and insert the screws if that’s easier.
Step
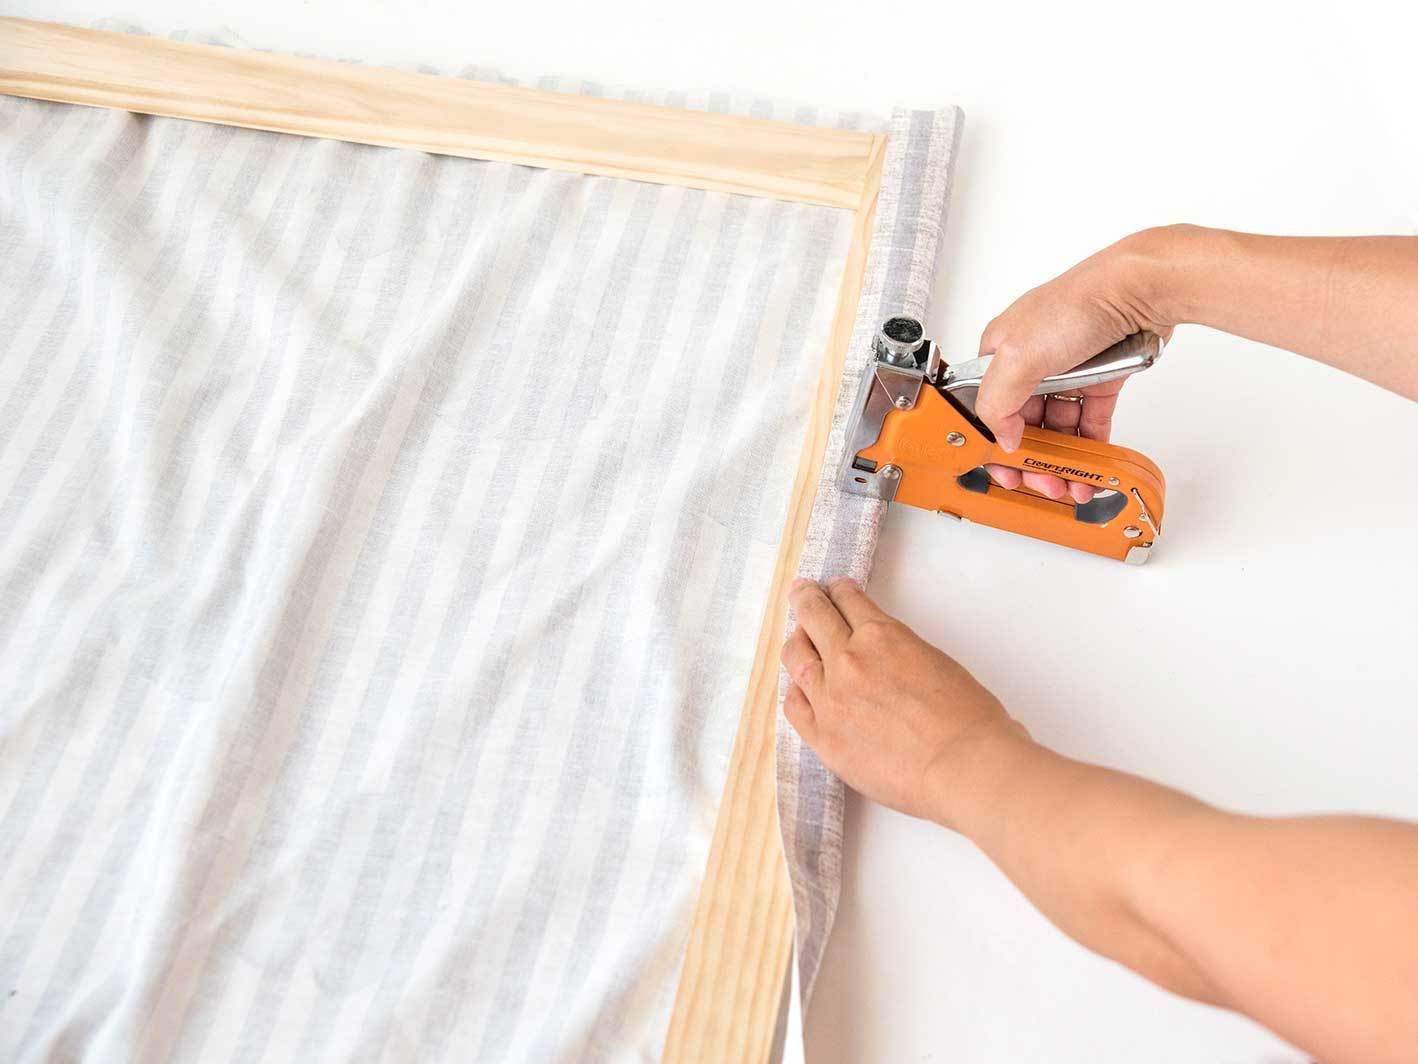
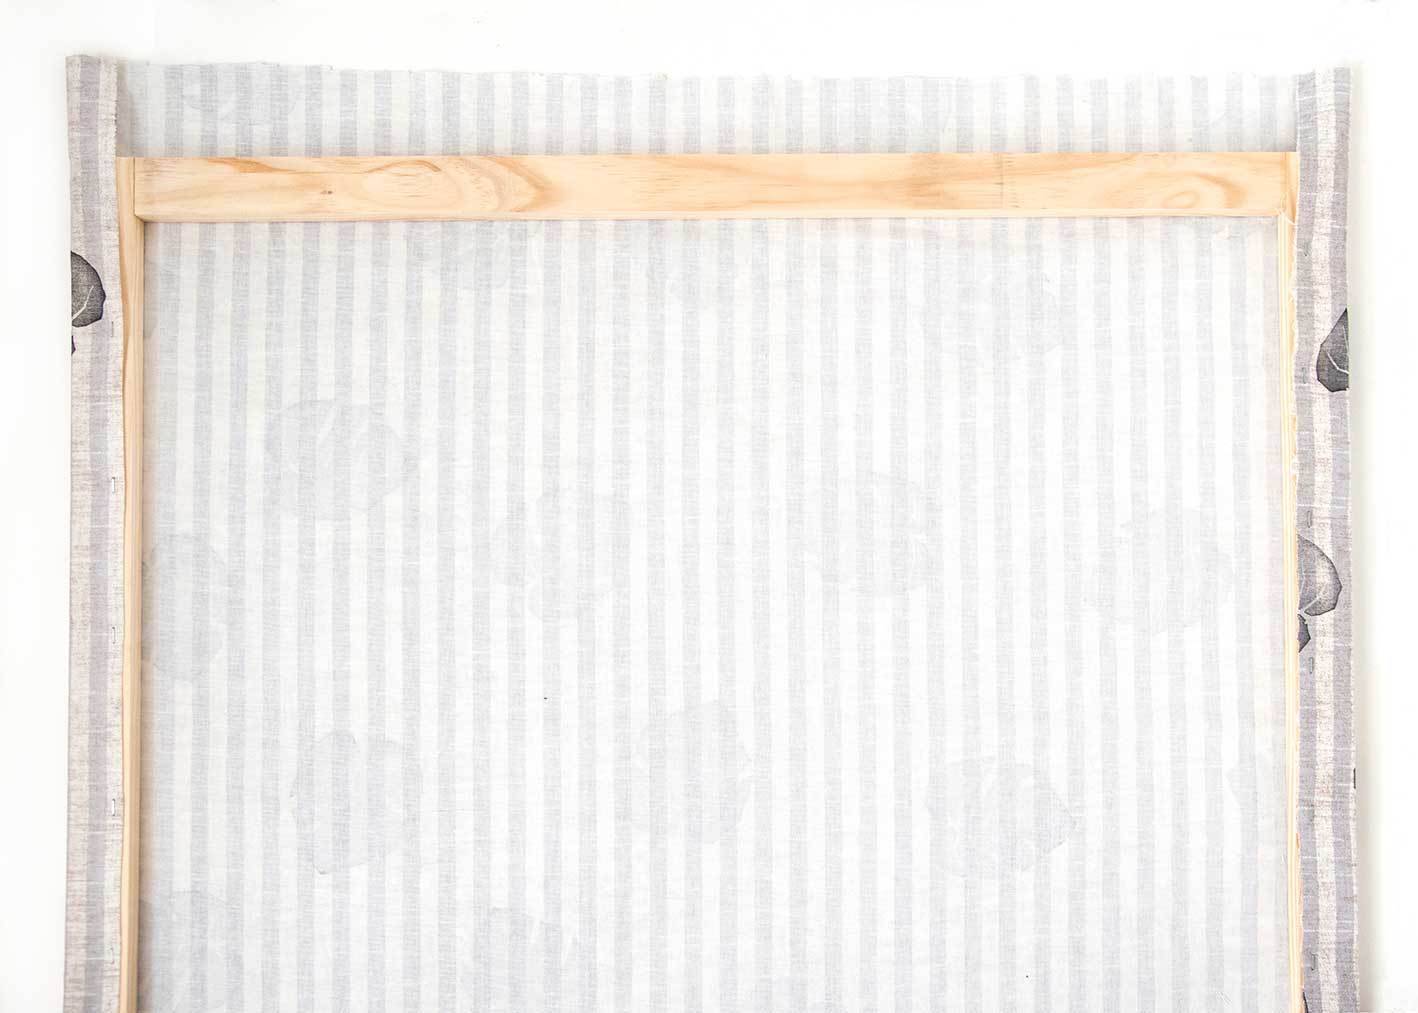
Lay your stamped fabric face down and place your wood frame on top. Pull one edge of the fabric over the side of the wood frame and using a staple gun to staple it to the back of the wood.
Repeat this process on the opposite side of the frame so that the fabric is pulled taut across the wood. Then do the two remaining sides.
Step
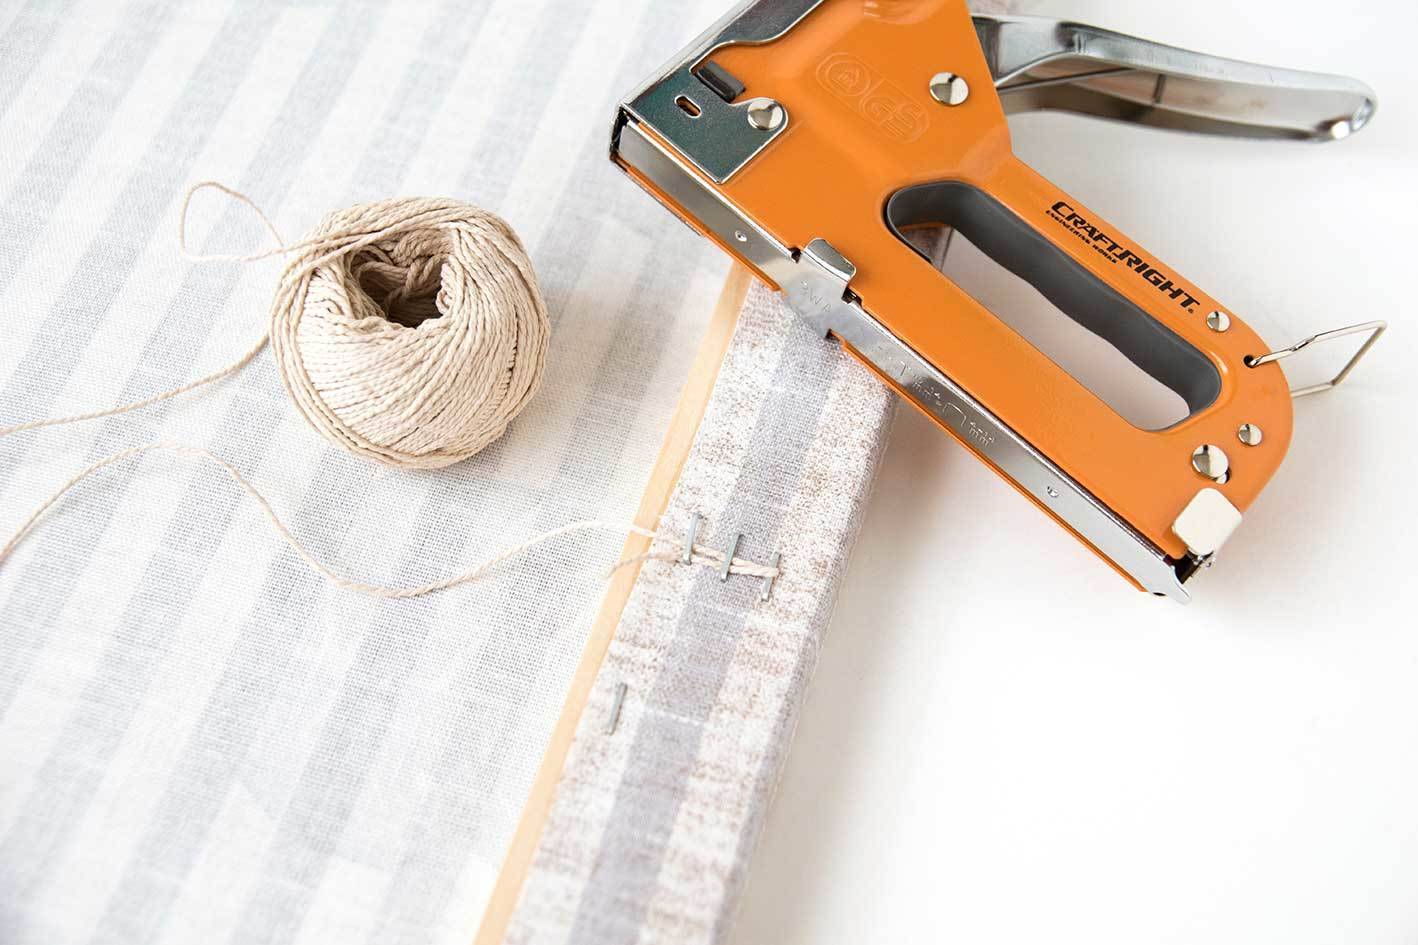
Lastly, cut a length of cord and staple it in place on the back of your frame. I positioned mine roughly one third of the way from the top of the frame. You can then use this cord to hang your fabric wall art up.
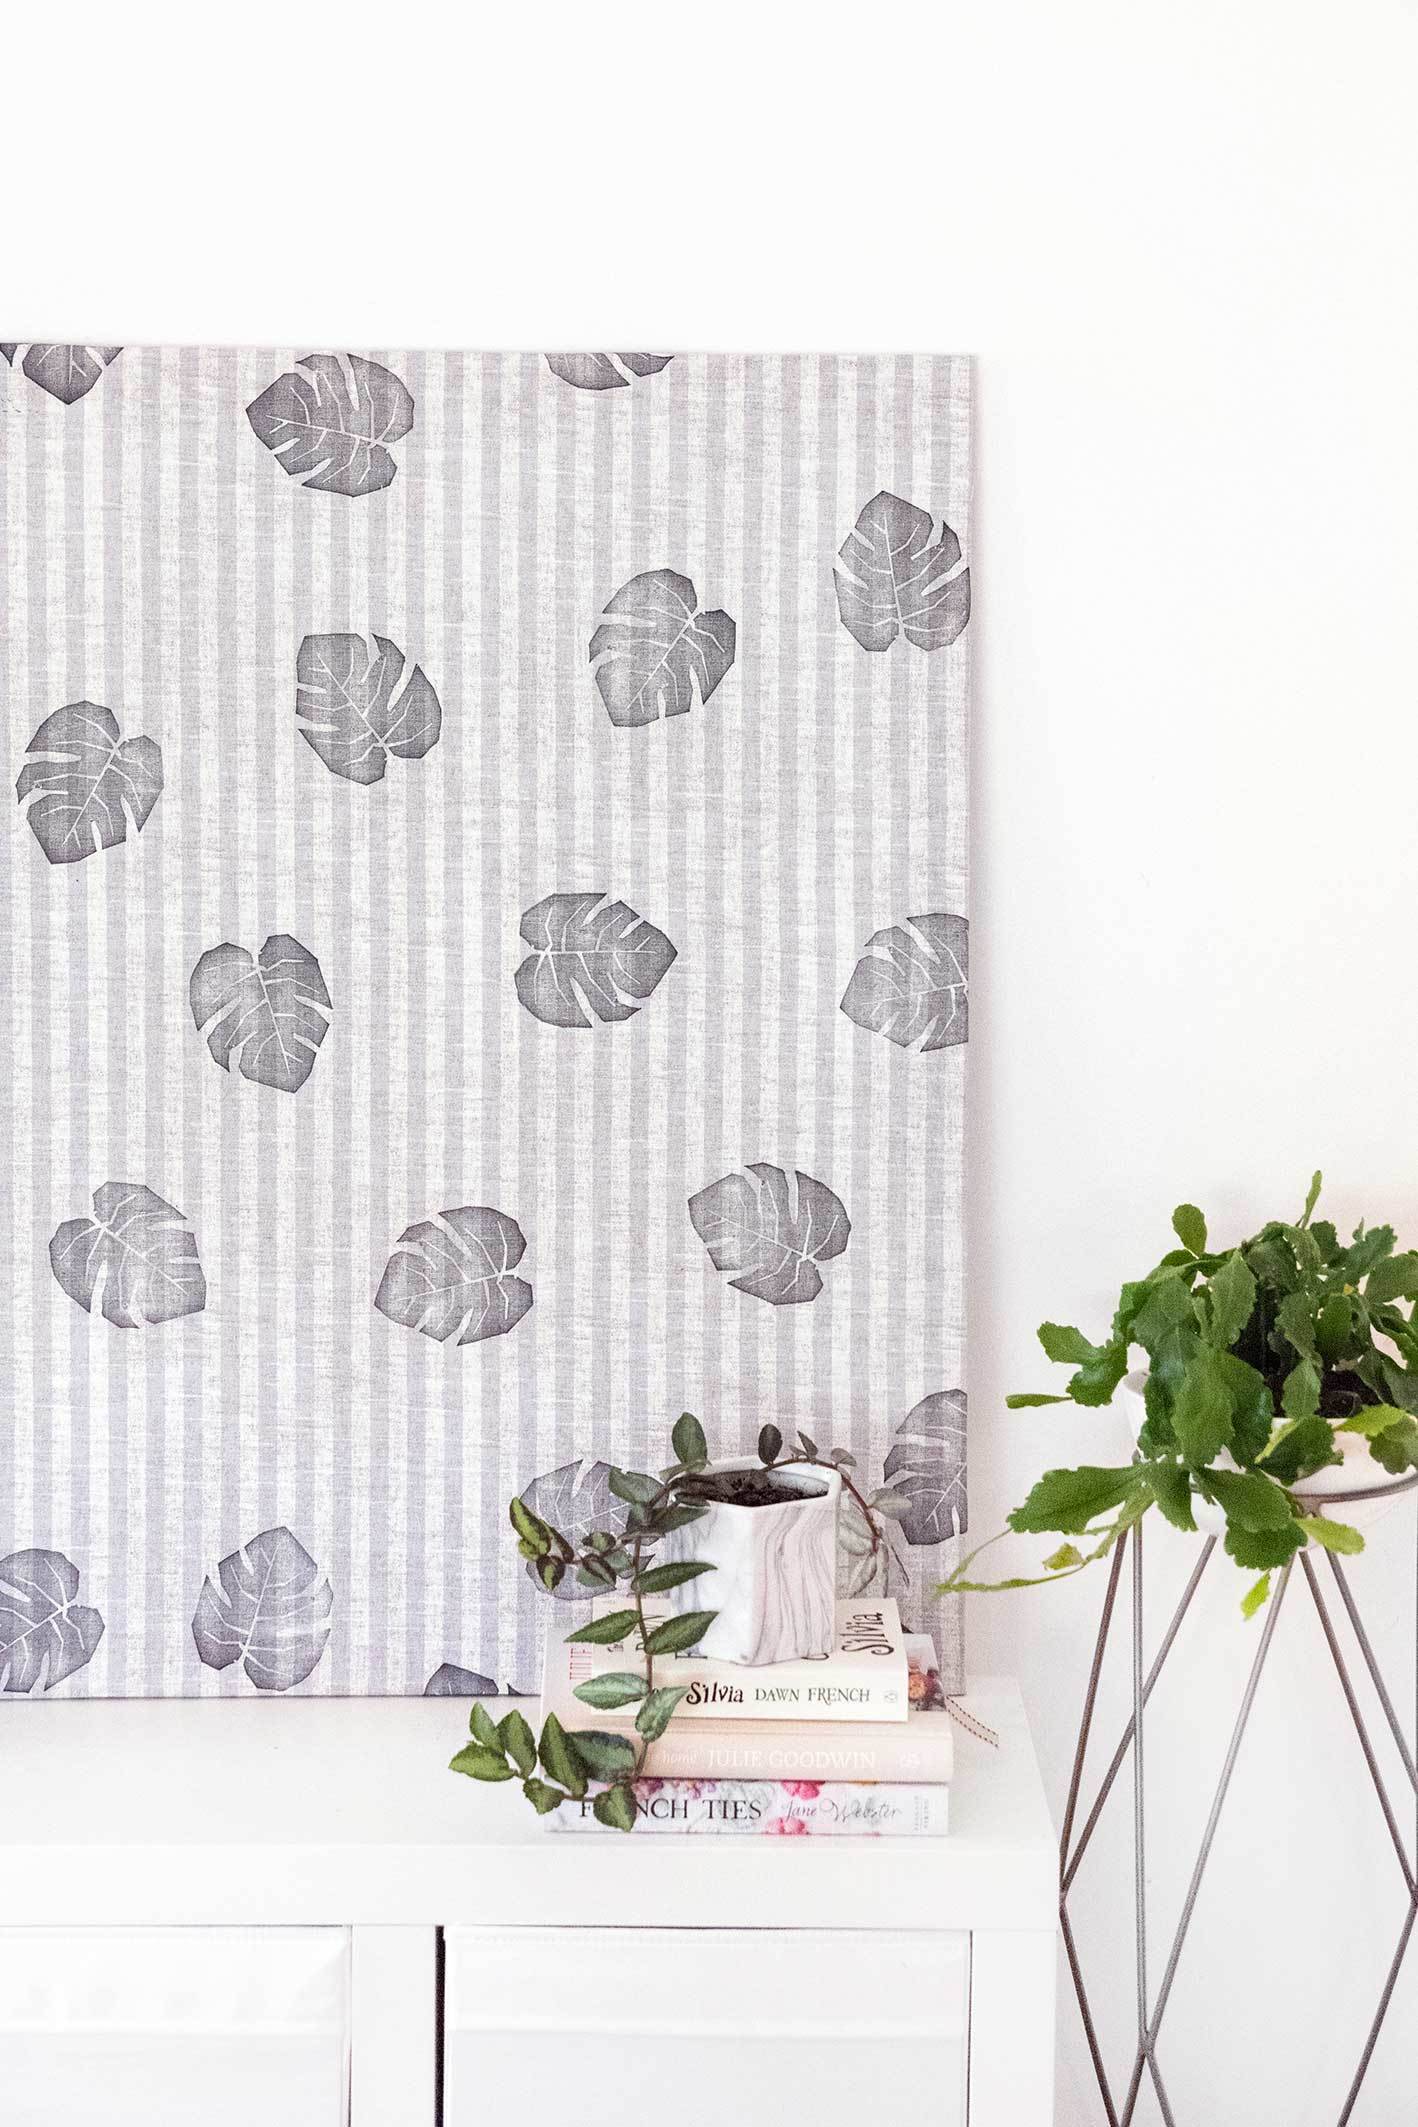
Lino printing is a great way to create a unique print that you can call your very own. And as an added bonus, you can tailor the colors and design to suit your interior decor.
If you’re short on time, don’t forget that you could just as easily skip steps 2 to 6 and use a store-bought patterned fabric instead. It’ll cut your project time in half and you’ll still have a beautiful piece of fabric wall art to hang!