Cats and playtime go hand in hand, and there’s nothing more satisfying for a cat owner than watching their feline friend engage in joyful play. Your fur babies will adore you for making these DIY catnip sticks for cats.

If you’re on the lookout for a fun and easy DIY project that will delight your cat, crafting DIY catnip toys is a fantastic option.
Specifically, catnip sticks for cats offer a unique combination of irresistible scent and enticing playability.
In this guide, we’ll walk you through the steps to create your very own DIY catnip stick sock toys that are sure to be a hit with your furry companion to chew on and play with.
Gathering Materials For Catnip Sticks For Cats
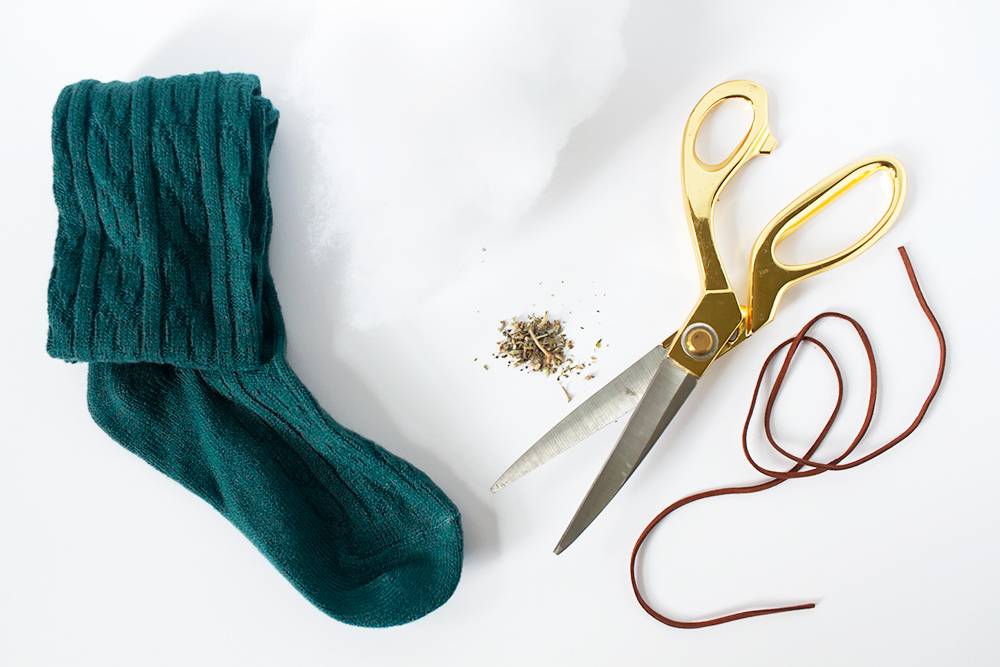
Before you start crafting your catnip stick sock toy, ensuring you have all the necessary items on hand is essential.
You’ll need a couple of knee-length socks. To enhance the visual appeal, consider opting for items that feature lively colors or cheerful patterns.
Catnip, which will be the main attraction for your feline, can be found at pet stores or online.
Fiber fill will give your toy its shape and texture, making it perfect for snuggling and biting.
A pair of scissors will be used to cut the sock to size, and faux leather lace or a similar cord is needed to tie off the ends securely.
Lastly, grab some E6000 or another clear, strong glue to reinforce the knots, preventing any spillage of the stuffing during play.
Having these materials prepared in advance streamlines the process, ensuring a smooth crafting experience.
Preparing Your Sock
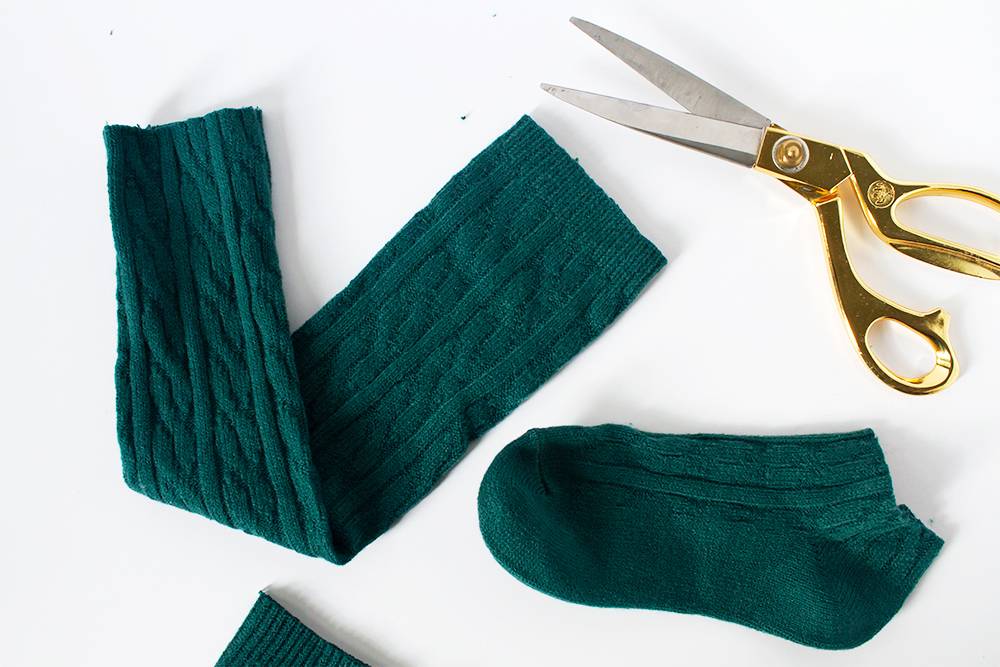
To begin transforming your knee-length sock into a fascinating catnip cat toy, initiate the process by snipping off the foot portion right above the heel.
This step allows you to adjust the sock’s length according to your cat’s size or your preference for the toy’s final dimensions.
If you find the sock to be overly lengthy, feel free to trim down part of the cuff to achieve the desired size.
This customization step ensures your DIY catnip stick will be just the right fit for endless feline fun.
Remember, the aim is to create a versatile and engaging toy that caters to your cat’s playful instincts, so tailor the length to suit their play style and size for optimal enjoyment.
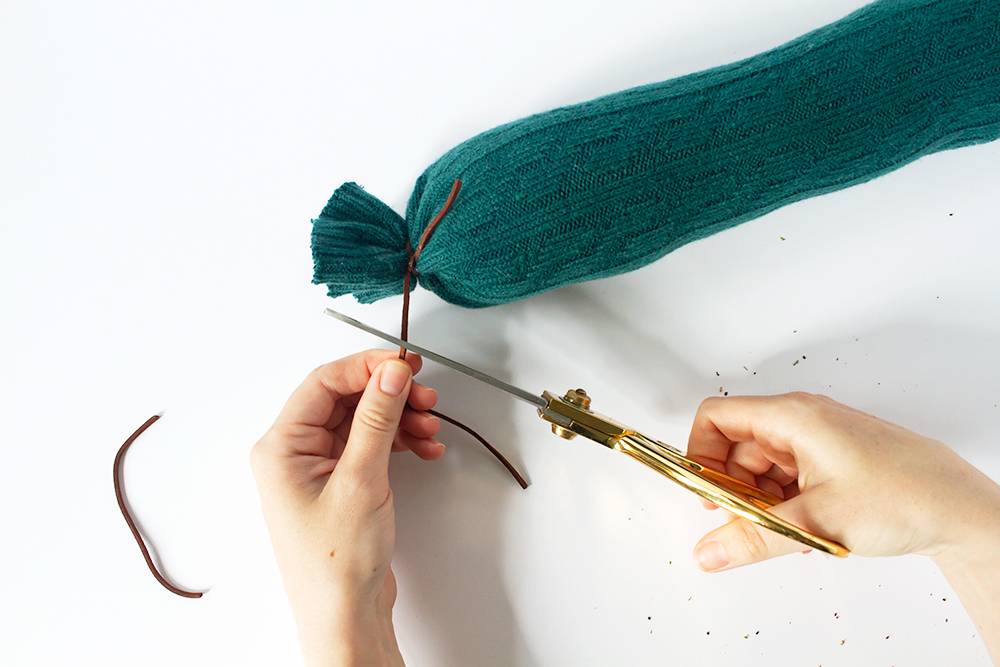
Creating a Secure Base For Catnip Sticks For Cats
Once you’ve customized the length of your sock, it’s crucial to establish a strong foundation for your catnip stick toy.
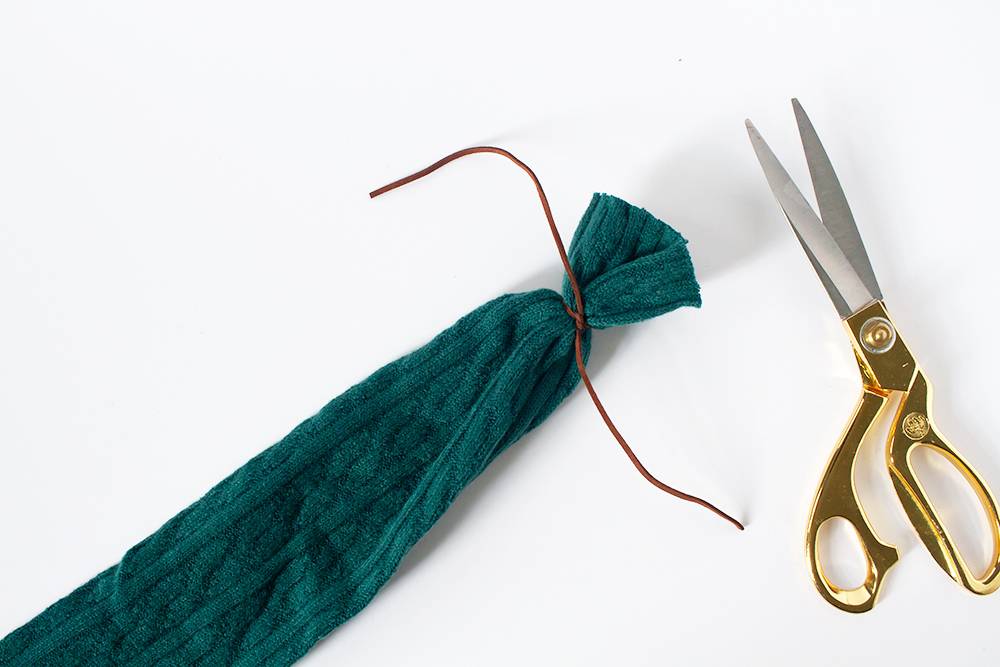
Firmly tie off one end with your chosen cord or faux leather lace, ensuring the knot is tight and secure.
This step is essential for keeping the stuffing contained during the rough and tumble of play.
To reinforce this base and prevent any potential spillage of the catnip and fiberfill, apply a small dab of E6000 or a similarly clear, strong glue underneath the knot.
To ensure a strong and reliable bond, it is imperative that you give the glue enough time to dry completely. Follow the instructions provided by the manufacturer.
This reinforcement guarantees that the toy will be durable and safe for your cat’s enjoyment. Making sure it is ready to withstand the enthusiastic play that’s sure to come.
Stuffing Your Catnip Sock Stick
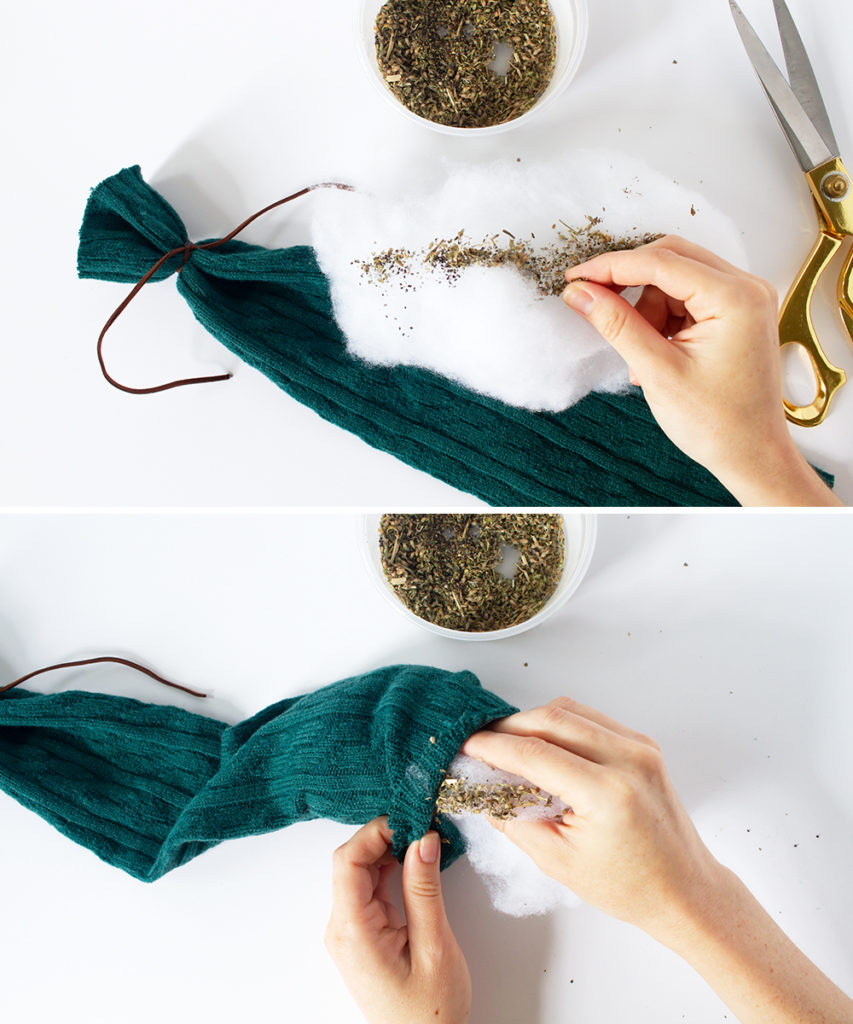
Begin by blending a hearty mix of catnip with fiberfill. Adjust the amounts based on the desired potency of the toy.
It’s important to remember that catnip can lose its strength once removed from its packaging. So don’t hold back on using a generous quantity.
Start filling the sock with this mixture, pushing down the contents as you go to ensure it’s densely packed.
This step is crucial, as a well-stuffed toy will maintain its shape better and withstand the vigor of cat play more effectively.
The aim is to create a toy that’s not only enticing due to its catnip content. But so that it is also durable enough to endure enthusiastic feline interactions.
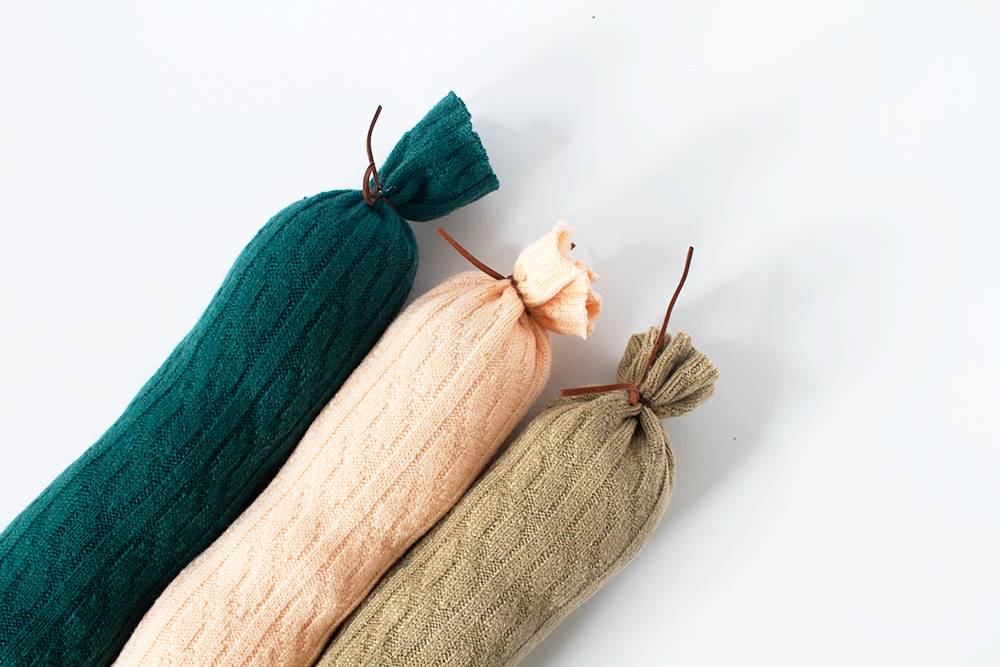
Sealing the Deal
After the sock has been adequately stuffed with the blend of catnip and fiberfill, it’s crucial to ensure that all the engaging contents remain securely inside.
To accomplish this, tightly tie the open end with a strong double knot, using your cord or lace. This act of sealing is key for the toy’s integrity during the vigorous play sessions ahead.
For an added measure of security and to mitigate any risk of the filling escaping, apply a small quantity of E6000 or a comparable durable glue beneath the knot.
It’s critical to allow adequate drying time for the glue, adhering to the manufacturer’s guidelines. This step is fundamental in strengthening the toy. It makes it a reliable and safe option for your cat’s enjoyment and interaction.
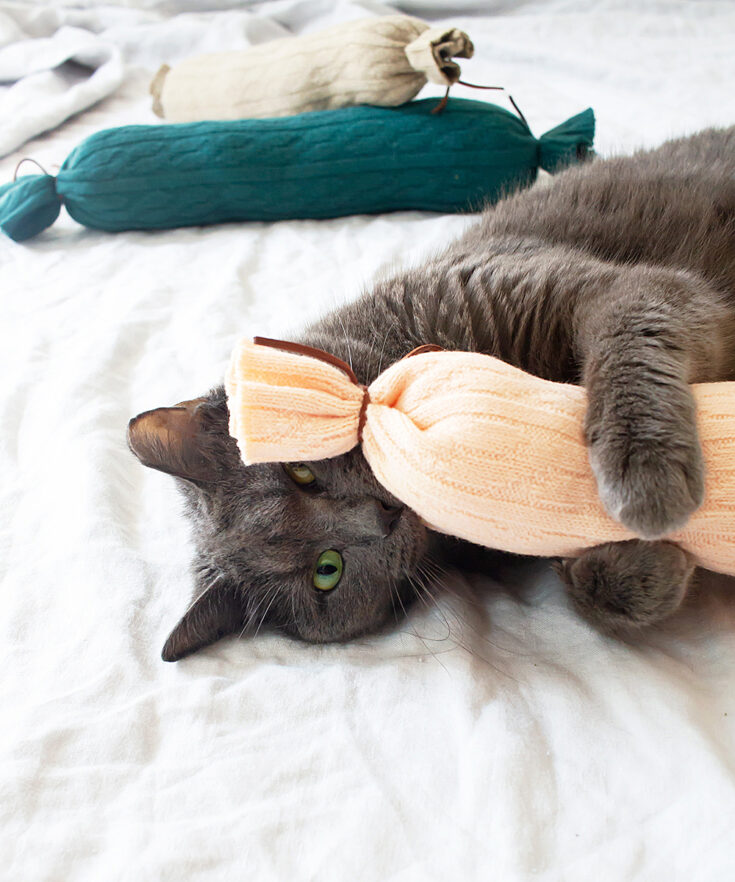
Final Touches and Playtime
Enhance your catnip sock stick with some creative flair before it’s playtime.
Incorporating additional knots using your cord or lace not only provides varied textures for your cat to explore. But it also improves the toy’s grip, making it even more engaging.
These added elements can significantly increase the toy’s visual and tactile appeal, captivating your cat’s attention further. Once every adjustment has been made and the glue has been completely set, it’s time to introduce this new toy to your feline friend.
Watch with delight as they delve into the excitement, the catnip enticing them into a frenzy of playful activity.
This DIY project does more than just pass the time. It enriches your cat’s day with fun and stimulation. And offers them a toy that’s both intriguing and filled with their favorite scent.
How To Make DIY Catnip Stick Sock Toys
Materials
Instructions
- Cut the foot off of a knee-length sock and part of the cuff if necessary (you want the final toy to be slightly shorter than the length of your cat’s body).
- Tightly tie off one end of the sock with a double knot. You can add a small dab of E6000 to the underside of the knot for extra security.
- Stuff the sock with fiberfill and catnip. I found the easiest way to distribute the catnip evenly throughout the sock was to spread out a bunch of fiberfill and sprinkle catnip on top of it. Then, push the fiberfill bunch into the sock. Continue until the sock is completely stuffed. Be generous with the catnip — you want the kitty to smell it through all the fabric, and dried catnip will lose some potency out of its sealed container.
- To finish the homemade catnip sock, tie off the end as before, and add a dab of glue under the knot.