Let’s face it—there’s nothing more frustrating than watching your carefully tended garden become a buffet for local wildlife! If you have had years of battling rabbits, squirrels, deer, and other hungry visitors, we have the perfect solution: a modular, three-tiered enclosed garden.

Don’t let the size of this project intimidate you. With some basic tools and a free weekend, you can create this functional and attractive vegetable garden system that will protect your veggies or plants while maximizing your growing space.
It’s broken down into simple, manageable steps that anyone can follow—no master carpentry skills required!
Note: This post is a project provided by JoAnn Moser of DIY Maven.
Navigate This Post
What You’ll Need For Your DIY Enclosed Garden Space
Materials:
- 2×12 exterior grade lumber boards
- 2×2 exterior grade lumber boards (for fence panels and cleats)
- 3″ exterior wood screws
- Poultry fencing (chicken wire)/hardware cloth/wire mesh
- Fencing staples
- Hinges (for doors)
- Hasp and carabiner (for door closure)
Tools:
- Measuring tape
- Pencil
- Saw (circular or miter)
- Drill with bits for pilot holes
- Speed square
- Clamps
- Staple gun
Creating Your Tiered Garden Beds
Prep Your Materials
First things first—let’s get all our wood cut to size! For the three-tiered planter boxes, you’ll need:
- 2 pieces of 2×12×72″ (these will be the long sides of your bottom planter)
- 8 pieces of 2×12×36″ (for the ends of the long planter and three sides of the smaller planters)
- 3 pieces of 2×12×33″ (for the center brace of the long planter and one side of each smaller planter)
- 8 pieces of 2×2×11″ (for the corner cleats)
We recommend that you cut all pieces at once so you’re not running back and forth to the saw—plus, seeing all those neatly stacked boards gives a little boost of motivation for the project ahead!
Build the Bottom Planter
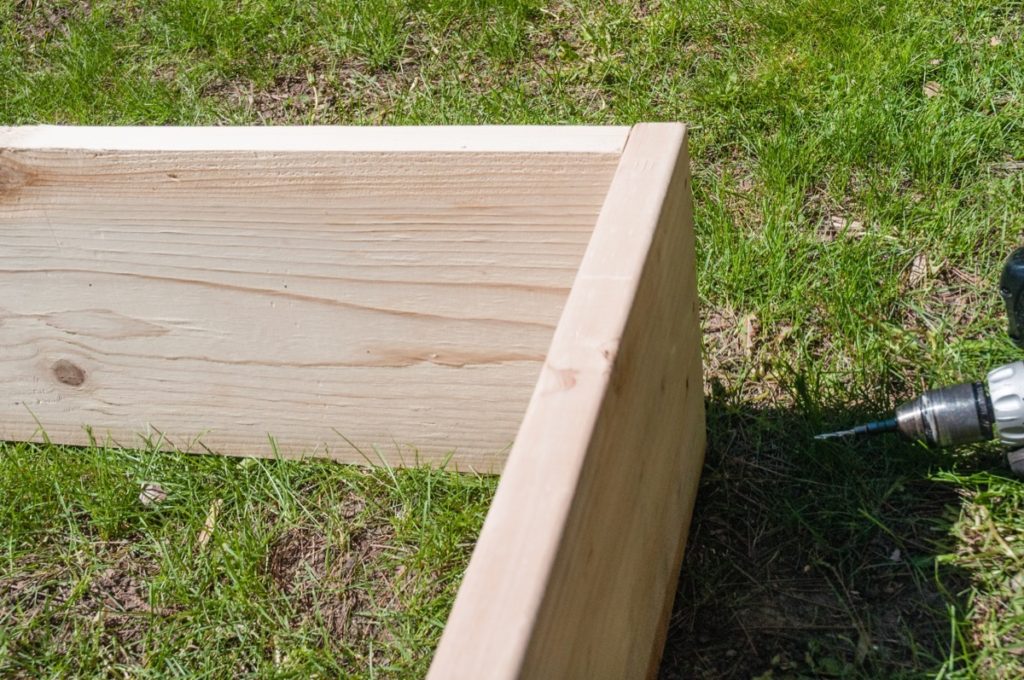
Let’s start with the foundation—our bottom planter. Take your two 72″ boards (the long sides) and attach the 36″ pieces flush to their ends using 3″ screws. Drill pilot holes first to prevent splitting, especially when working close to the ends of boards.

Once you have your rectangle, reinforce it by attaching one of the 33″ pieces as a center brace. Position it inside the rectangle at the center point (36″ from either end) and secure it with 3″ screws from the outside.
This center support prevents the long sides from bowing out when the planter is filled with soil.
Create the Two Smaller Planters
Now for the two smaller planters that will create our tiered effect. For each one:
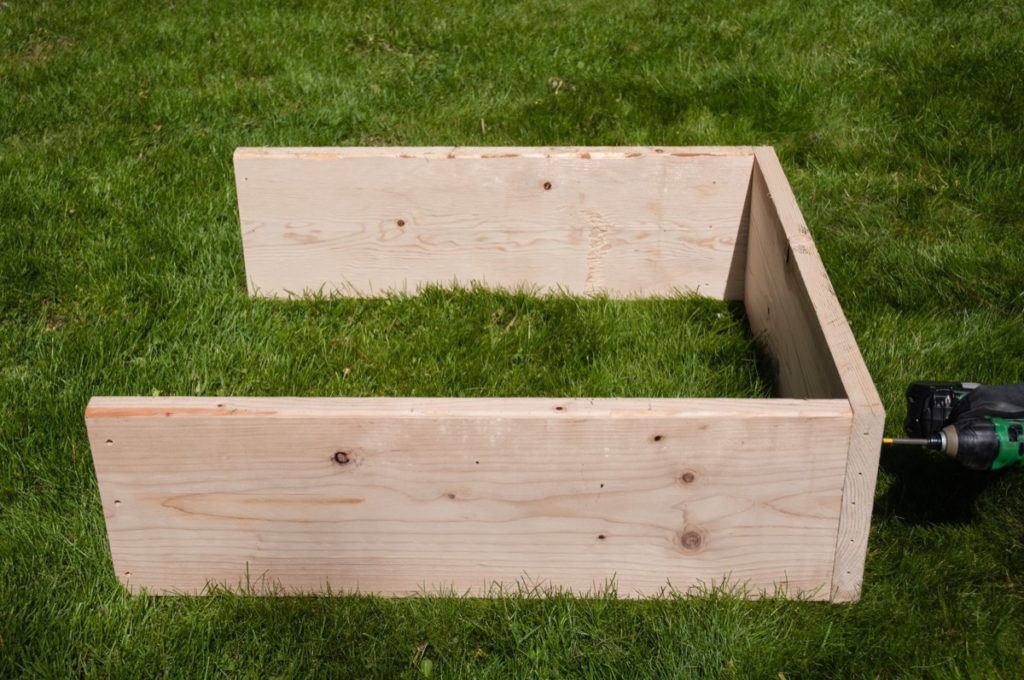
- Take three 36″ boards and arrange them in a U-shape, so the inside opening measures 33″.
- Secure the joints with 3″ screws, remembering those pilot holes.
- Slip the 33″ board inside the open end, making it flush with the edges.
- Secure it with 3″ screws through the side boards.
Complete the small planter box by slipping a 33-inch board inside the open end of the U, flush with the ends, and secure it in place with 3″ countersunk screws.
Repeat these steps to make the two small planters
It’s recommended to use a speed square while assembling to keep everything perfectly perpendicular. There’s nothing worse than a wonky planter that rocks when you place it!

Add Critter Protection (Optional)
If your bottom planter will sit directly on the ground, this step ensures maximum protection and can protect against burrowing rodents and animals by providing a bit of a barrier.
Simply cut a piece of poultry fence to fit the bottom and staple it securely. (You won’t need this for the upper planters since they’ll be stacked on top of other boxes.)
This little extra step can save countless carrots and radishes in your garden from being stolen from below!
Assembling Your Modular Garden
Position Your Planters
Now comes the fun part—creating your three-dimensional garden!
With your planters in their permanent home:
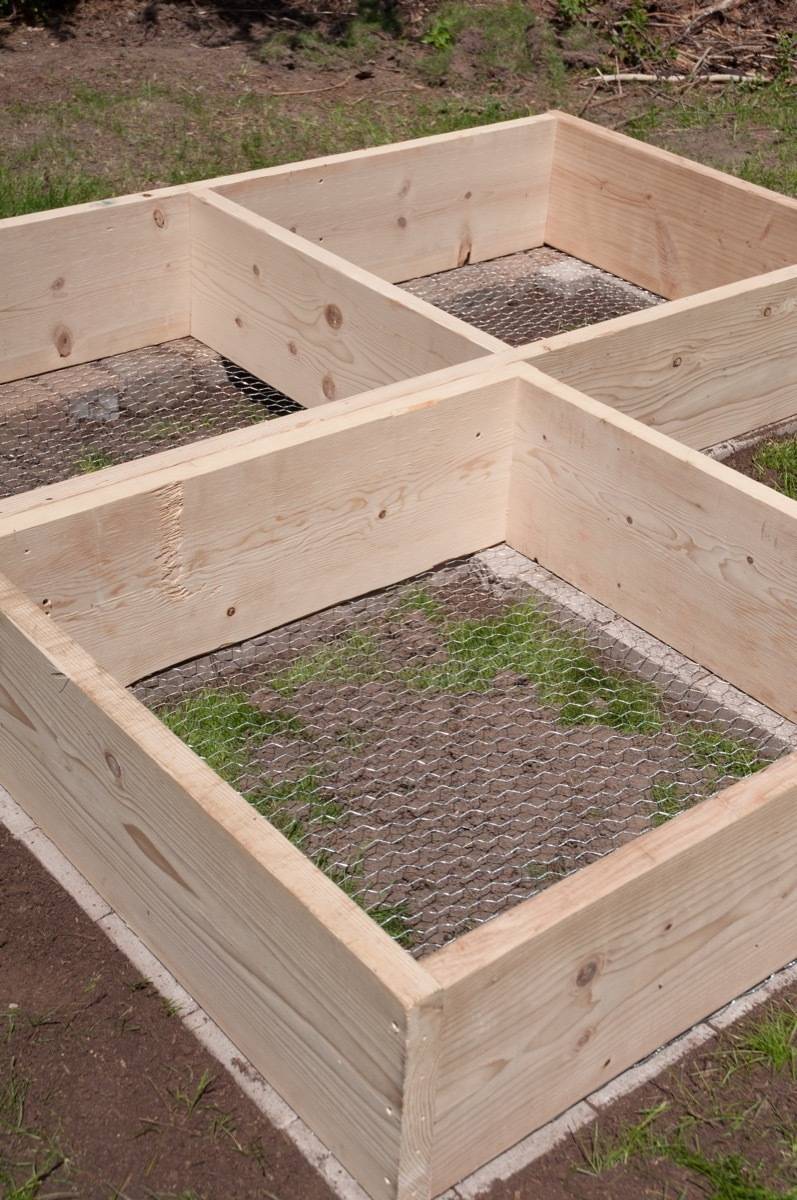
- Flip them over so any screen is facing down.
- Place one smaller box next to the larger box to create an L-shape. The 33″ board of the small box should be flush with one end of the larger box.
- Secure them together with 3″ screws, angling slightly so they don’t poke through the other side.
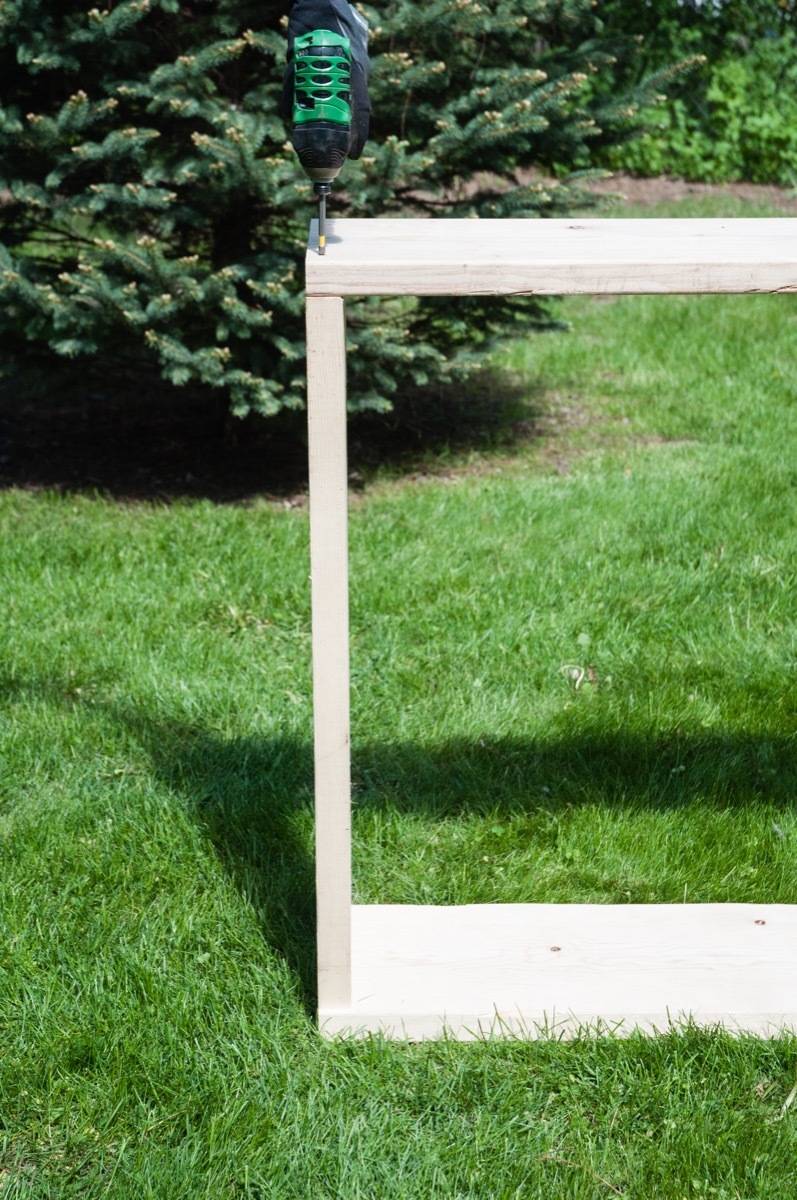
Add the Upper Tier
To create the third tier:
- Position the second small box on top of the larger bottom box.
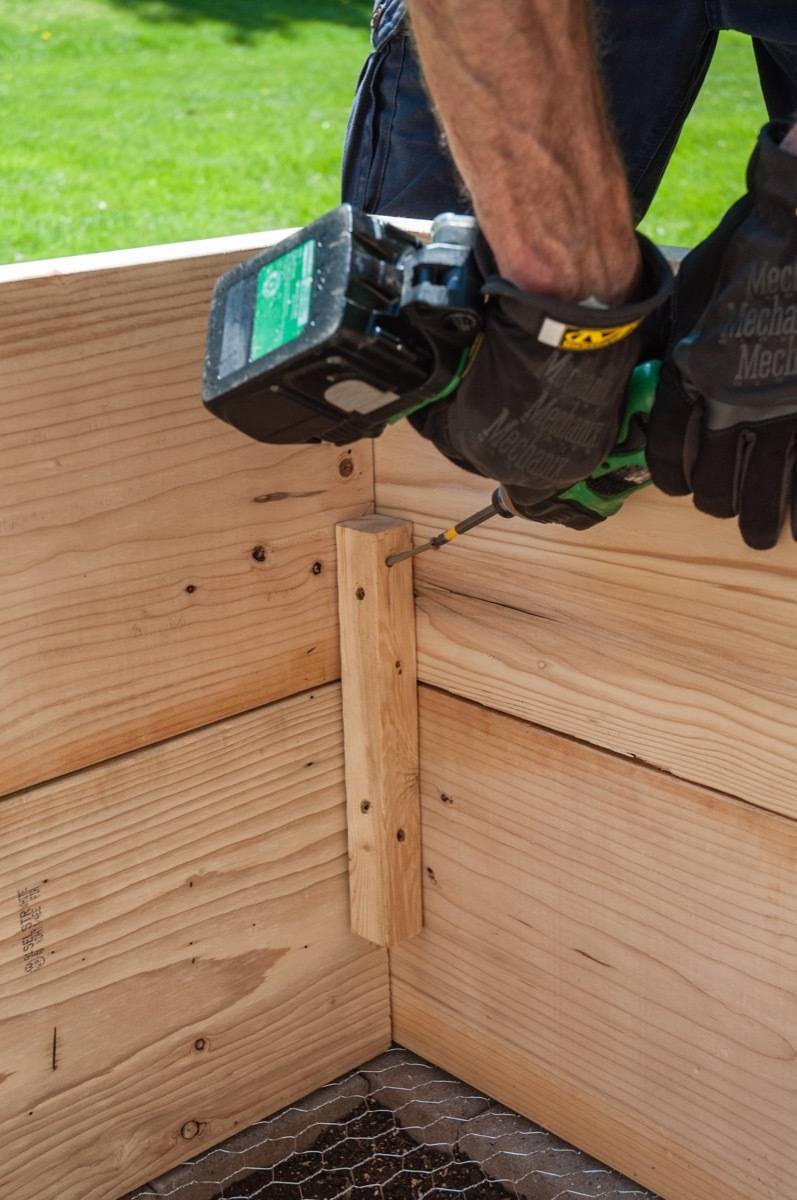
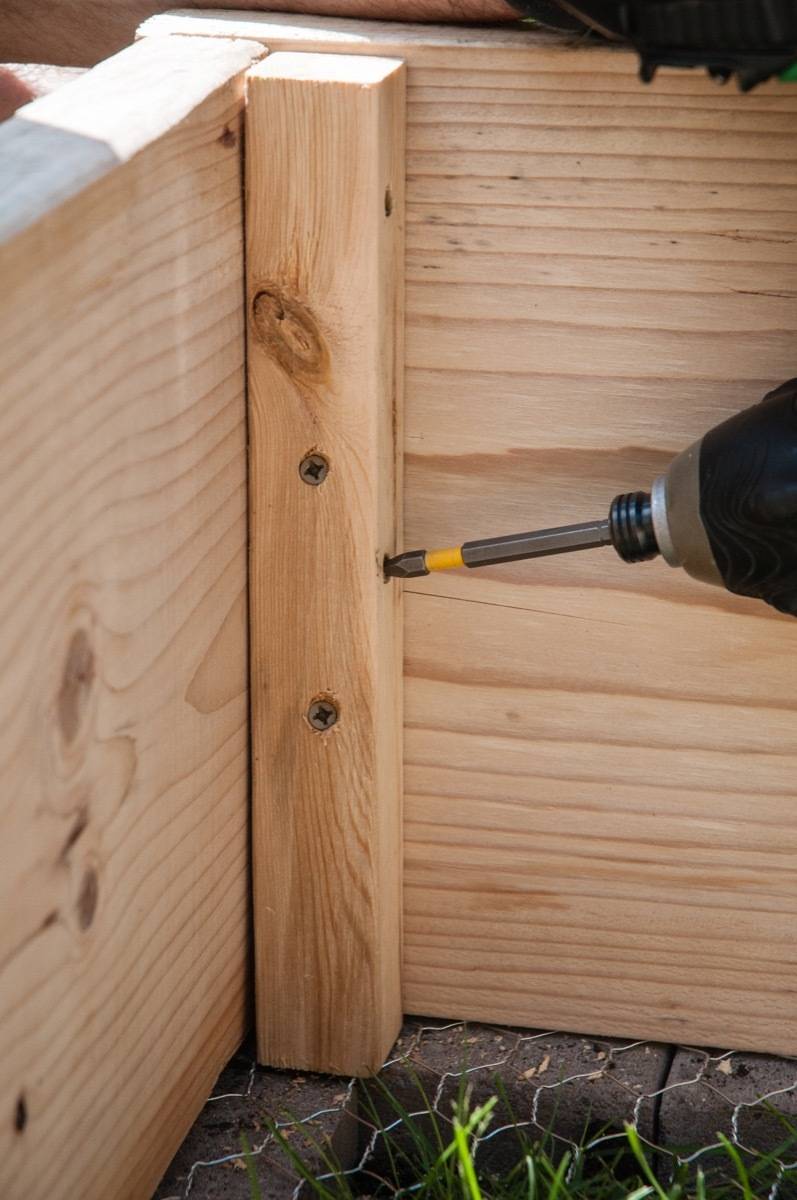
- Attach four 2×2 cleats to the inside corners of the smaller box.
- Secure the cleats with 3″ screws, again angling them to prevent protrusion.
For the remaining corners, install four more cleats to stabilize both the large planter and the adjacent smaller planter. This creates a super-sturdy structure that can handle the weight of all that rich garden soil and your future abundant harvest!
Building the Optional Critter-Proof Fence
If you have deer, while cute, they canbe pests when you have a garden.
If local wildlife like deer are persistent in your area, you’ll want to add the protective fence panels. Trust me, this extra effort pays off big time when your lettuce actually makes it to your salad bowl instead of becoming bunny brunch!
Create the Fence Panels
For the fence panels, you’ll need to cut:
- 13 pieces of 2×2×36″ (for tops and bottoms of panels and roof braces)
- 12 pieces of 2×2×60″ (for sides of panels)
- 6 pieces of 2×2×33″ (for center braces of panels)
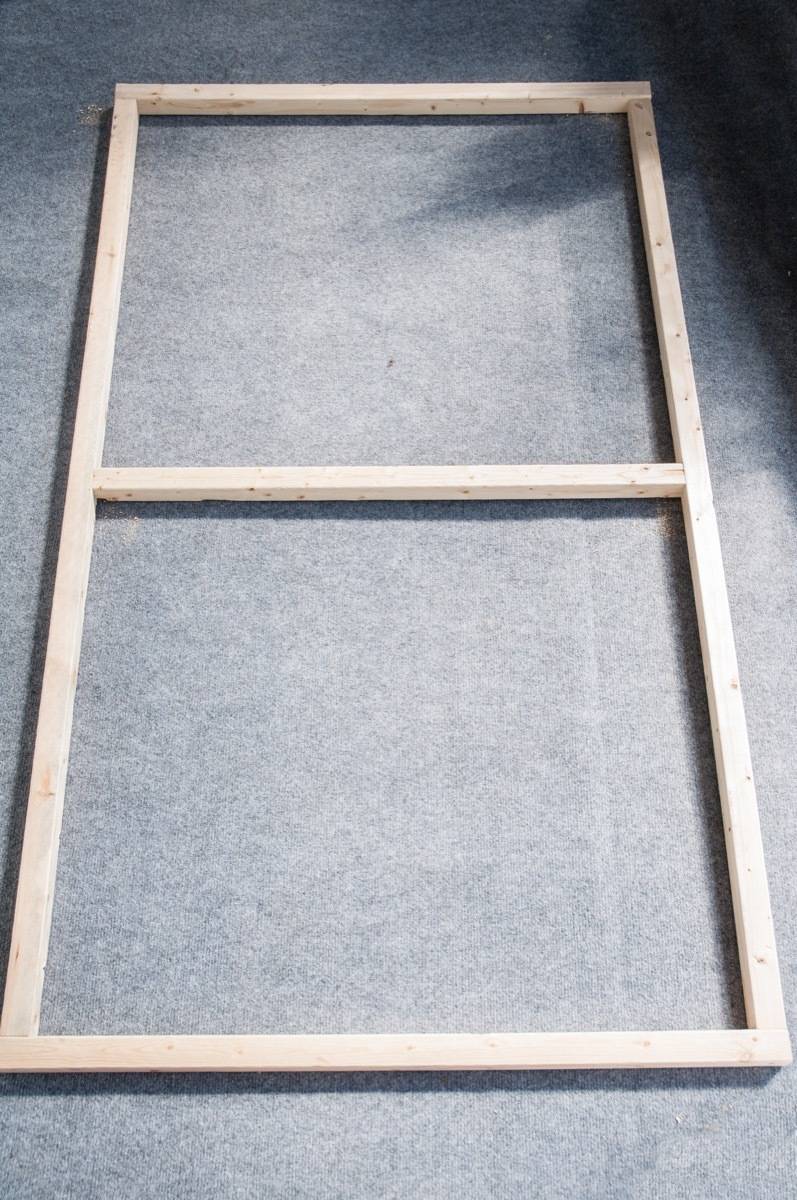
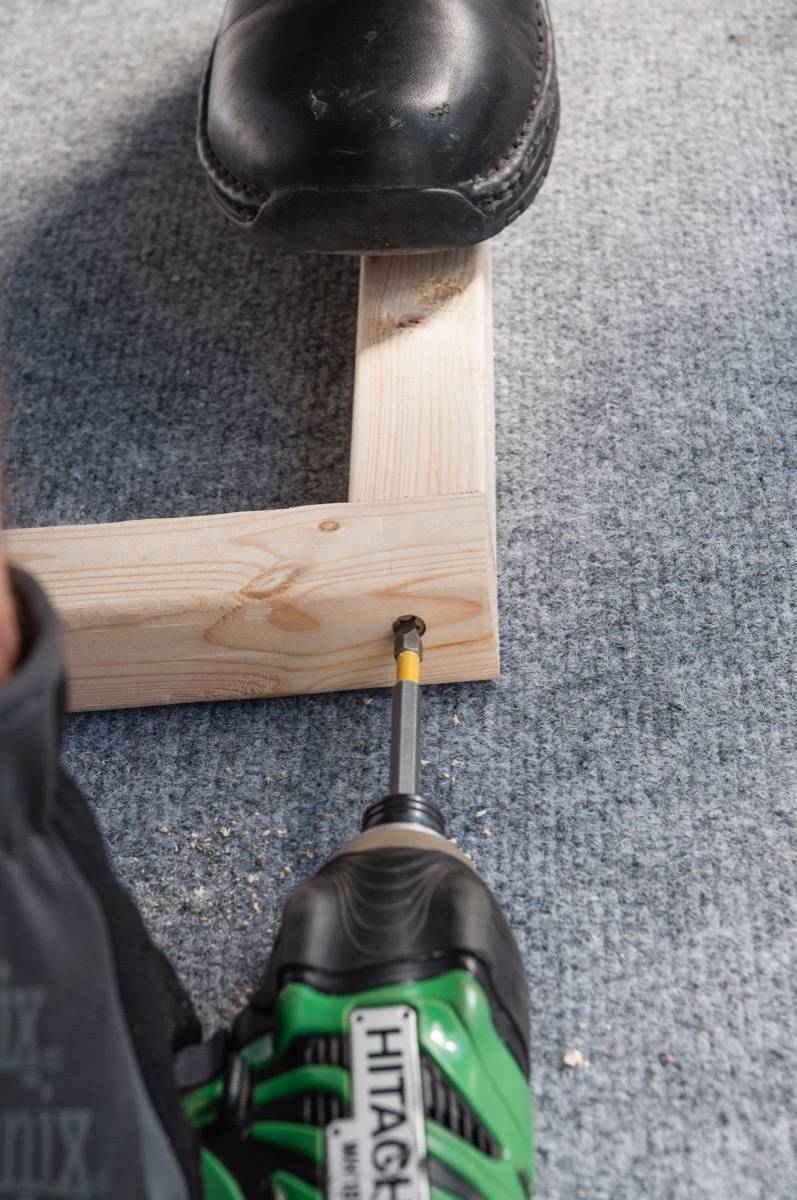
For each panel:
- Attach two 36″ lengths to two 60″ lengths to create a rectangular frame.
- Add a 33″ crossmember to the center of each frame for stability.
Build the Access Doors
What’s a garden enclosure without a way to get in? Let’s make two different-sized doors:
For Door A:
- 2 pieces of 2×2×59½” (sides)
- 2 pieces of 2×2×35½” (top and bottom)
- 1 piece of 2×2×32½” (center brace)
For Door B:
- 2 pieces of 2×2×59½” (sides)
- 2 pieces of 2×2×34″ (top and bottom)
- 1 piece of 2×2×31″ (center brace)
Assemble each door just like you did with the panels—sides first, then top and bottom, and finally the center brace.
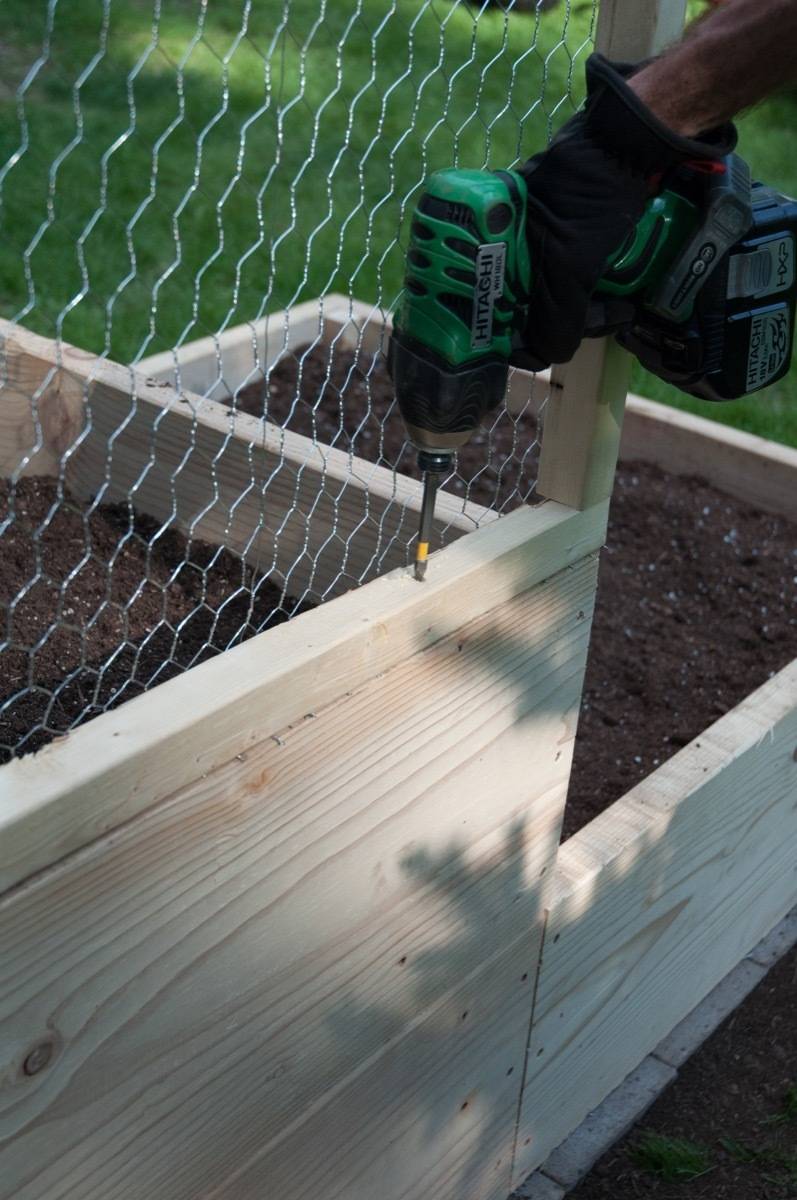
Add the Fencing Material


Now to make these frames actually critter-proof:
- Unroll the poultry fence over each panel frame.
- Cut it so it’s 1½” longer on one end (this will be the bottom).
- Staple the fence to the frame, with the fence facing what will be the inside of the garden.
- Fold the extra 1½” of fencing under the bottom 2×2 and staple it. This reinforces the bottom and covers those sharp wire ends.
For the doors, follow the same process but cut the fencing flush with the bottom of the door frame (no folding under needed).
Pro tip: We designed these panels to be 36″ wide specifically to match standard poultry fence width. This means you’ll have finished edges on the sides that don’t require cutting—much easier on your hands and tools!
Install the Panels
With your boxes in place and panels ready:


- Position each panel with the fencing facing inward.
- Screw the bottom of each panel to the top of the boxes below, except for the inside corners where your doors will go.
- Clamp adjacent panels together and secure them with 3″ screws. Angle these screws upward slightly so rain won’t collect in the holes.
Add the Top Bracing and Doors
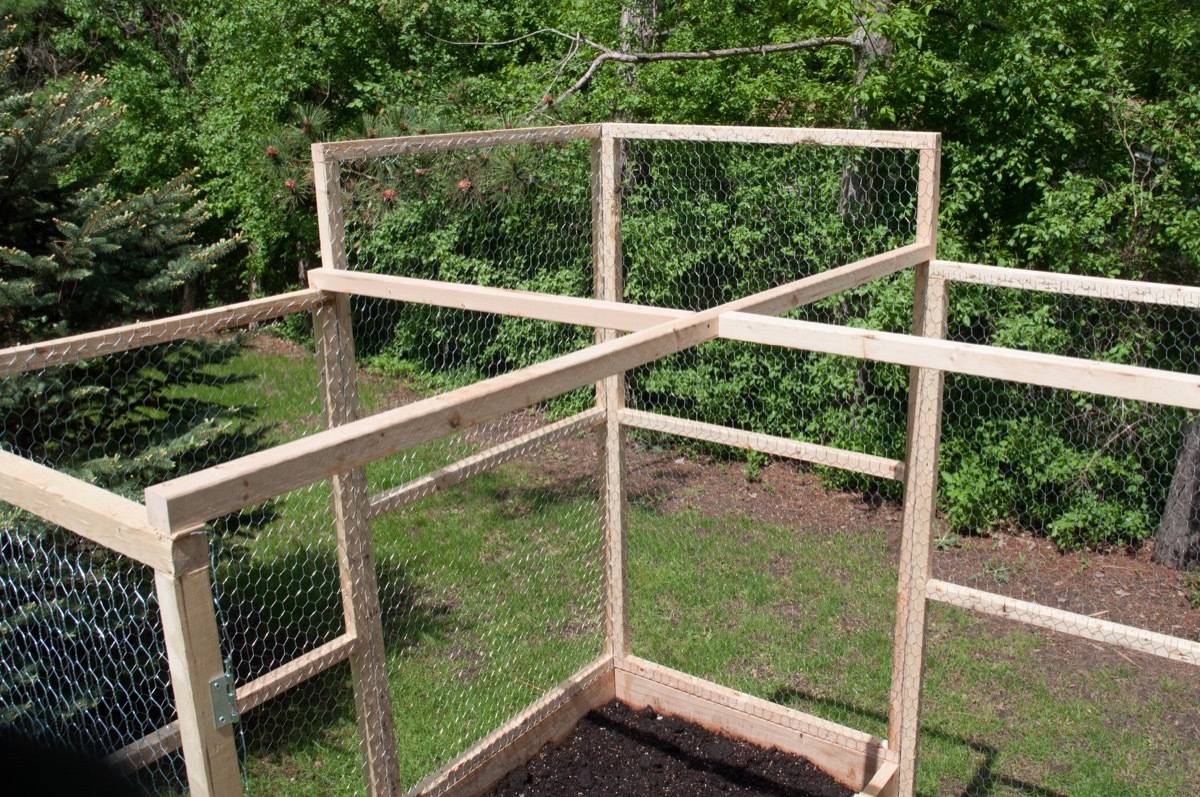
Almost there! To create the roof structure:


- Install the 71″ board opposite your door opening.
- Connect the 36″ and 38″ boards to create a U-shape across the top.
- Install the hinges on your doors according to the manufacturer’s instructions.
- Use shims to center the doors in their openings, then attach them to the side panels.
- Adjust as needed for proper door alignment, and trim any excess 2×2 material.
- Install the hasp and add a carabiner to keep those clever critters from opening your garden doors.

Enjoy Your Protected Garden Space!
And there you have it—a beautiful, functional garden that keeps your vegetables safe while creating an attractive focal point in your yard.
Remember, this project is modular, so you can adapt the design to suit your space.
Need a smaller version? Just adjust the dimensions.
Want to add more growing space? Create additional tiers or extend the bottom planter.
Have you tackled a similar project or found other ways to keep critters out of your garden? I’d love to hear about your experiences in the comments below!
Love this planter idea but can’t see how it would keep squirrels out. What did I miss?