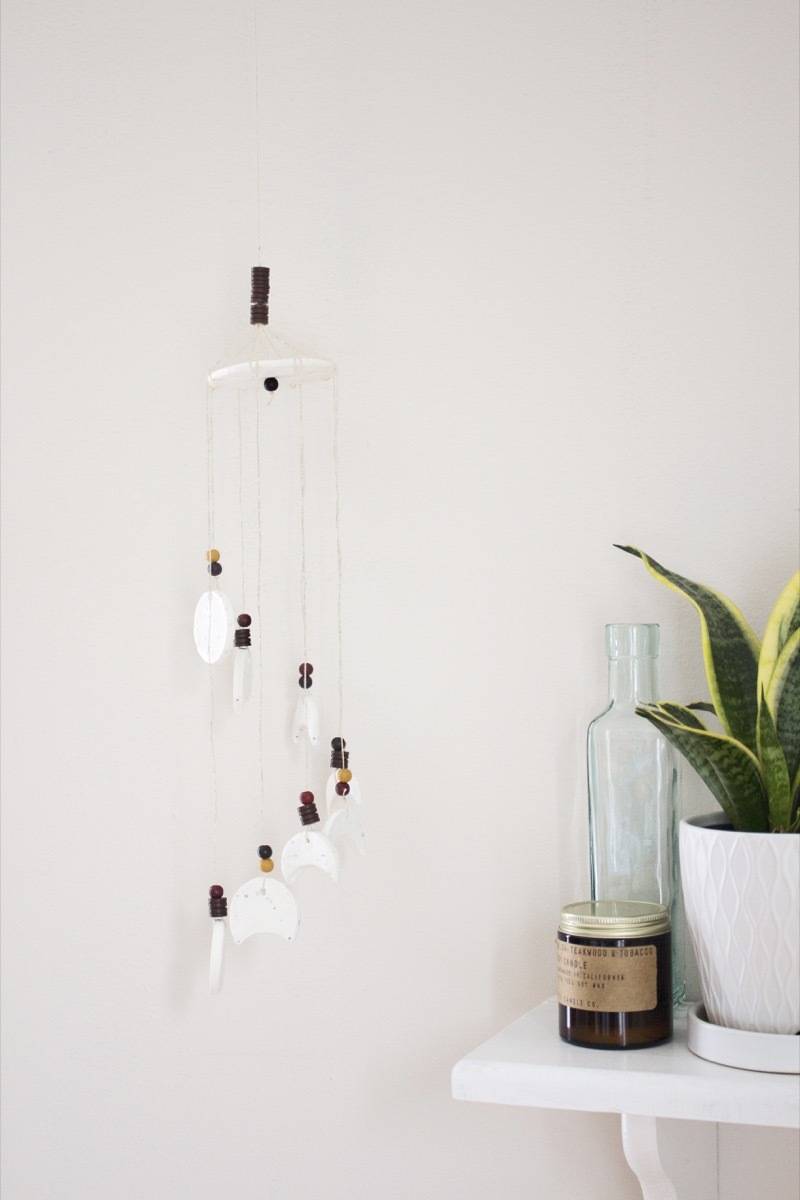
I think we can all agree that moon phases continue to be all the rage. Not wanting to pass up on this bohemian trend, I brought moon symbols into my home with a lunar wind chime – keep reading to see how!
Materials
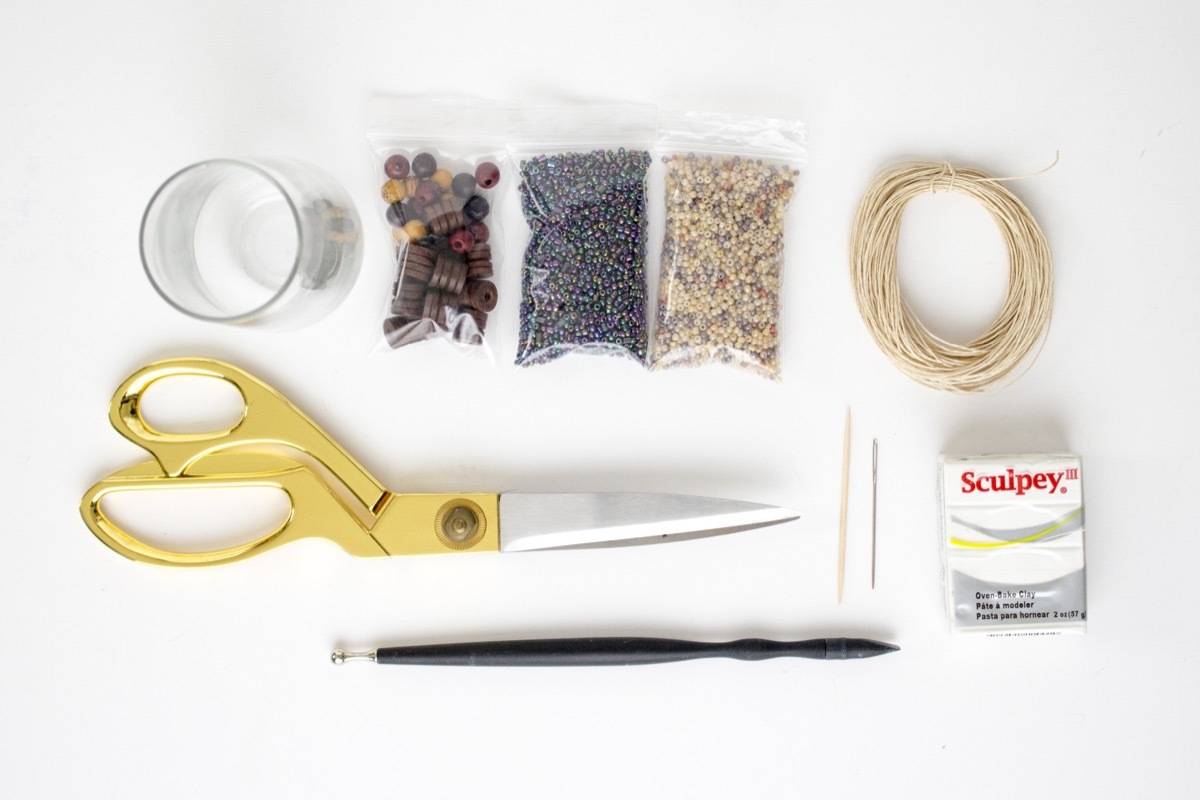
- Oven-bake clay
- Cording and embroidery needle
- Glass seed beads
- Wood beads
- Toothpicks
- A small glass with a thin rim
- A clay tool (optional)
- Parchment paper
Step
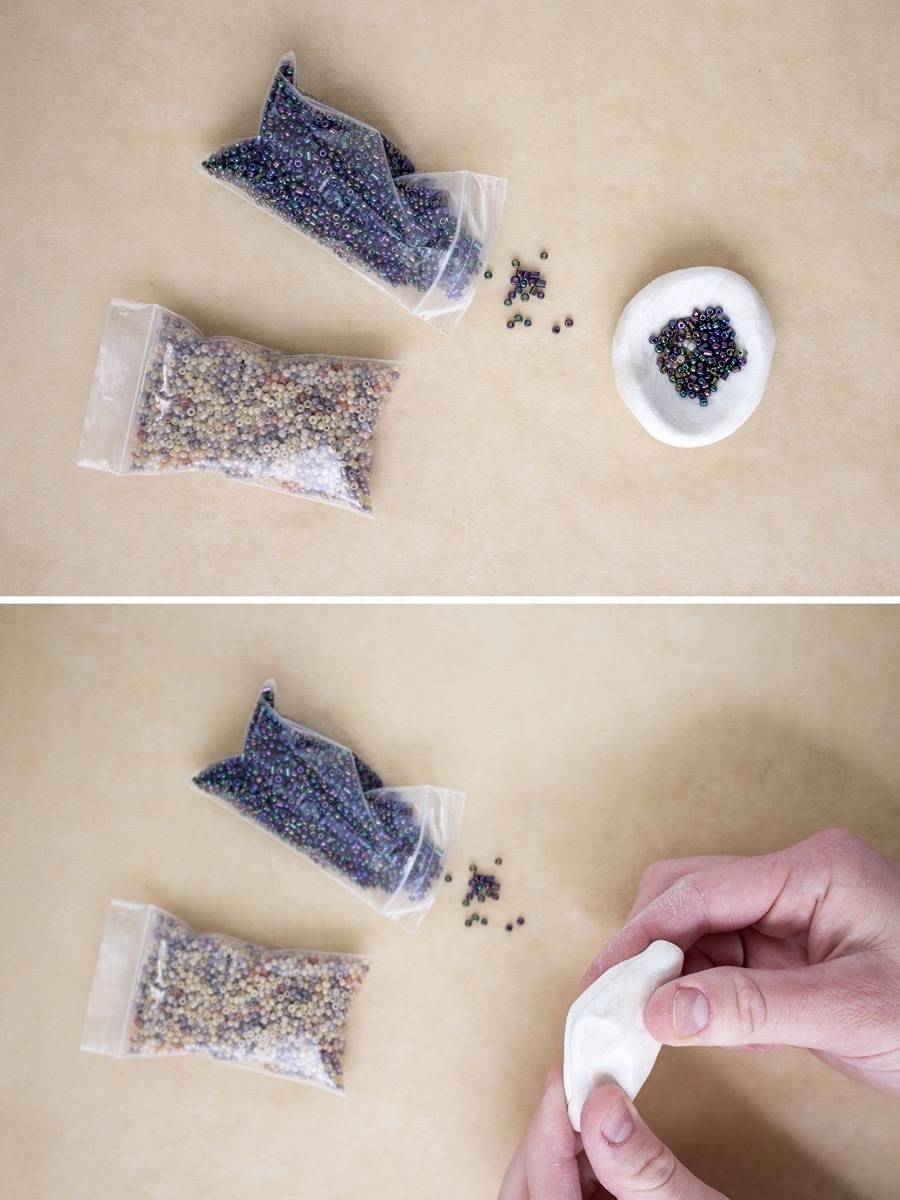
Lay down some parchment paper over your workspace. Knead the clay in your hands to warm it to a pliable state. Create a divot in middle of the ball of clay, and pour out some seed beads. Knead the beads into the clay.
Step
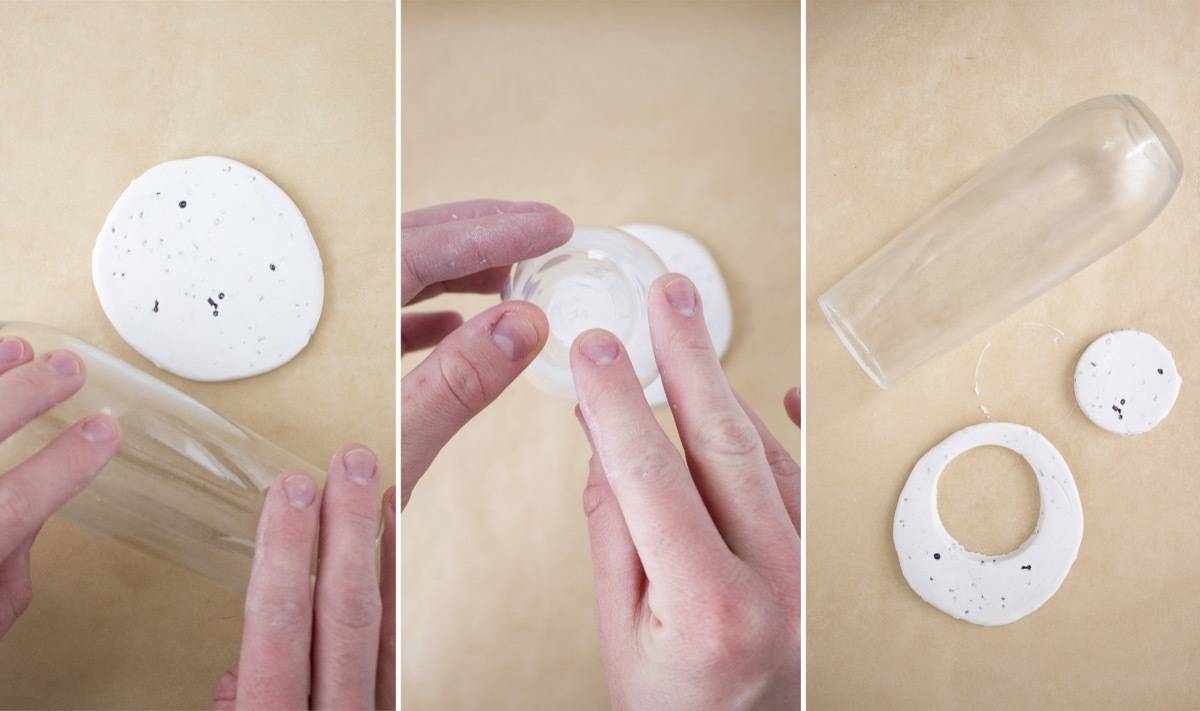
Roll the clay to a 1/4″ thickness (you can use your glass to do this!). Use the glass as a cookie cutter to cut out a circular shape. Full moon!
Step
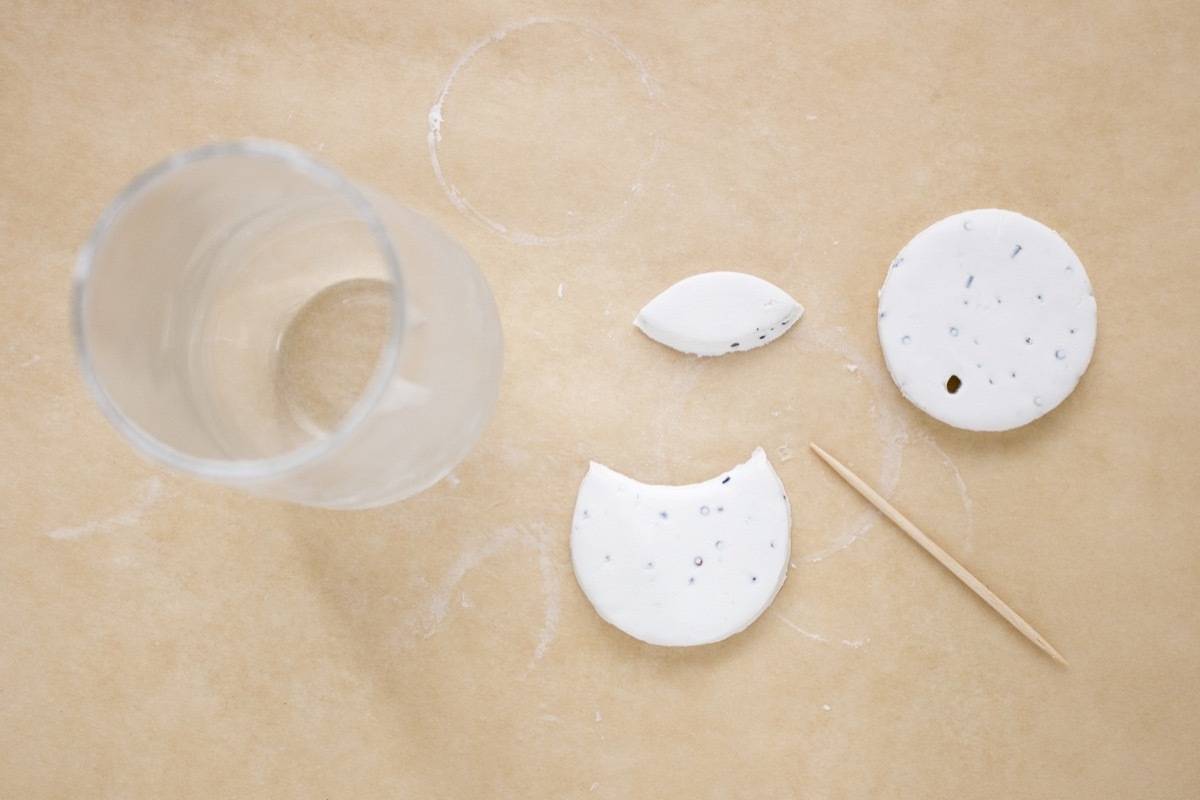
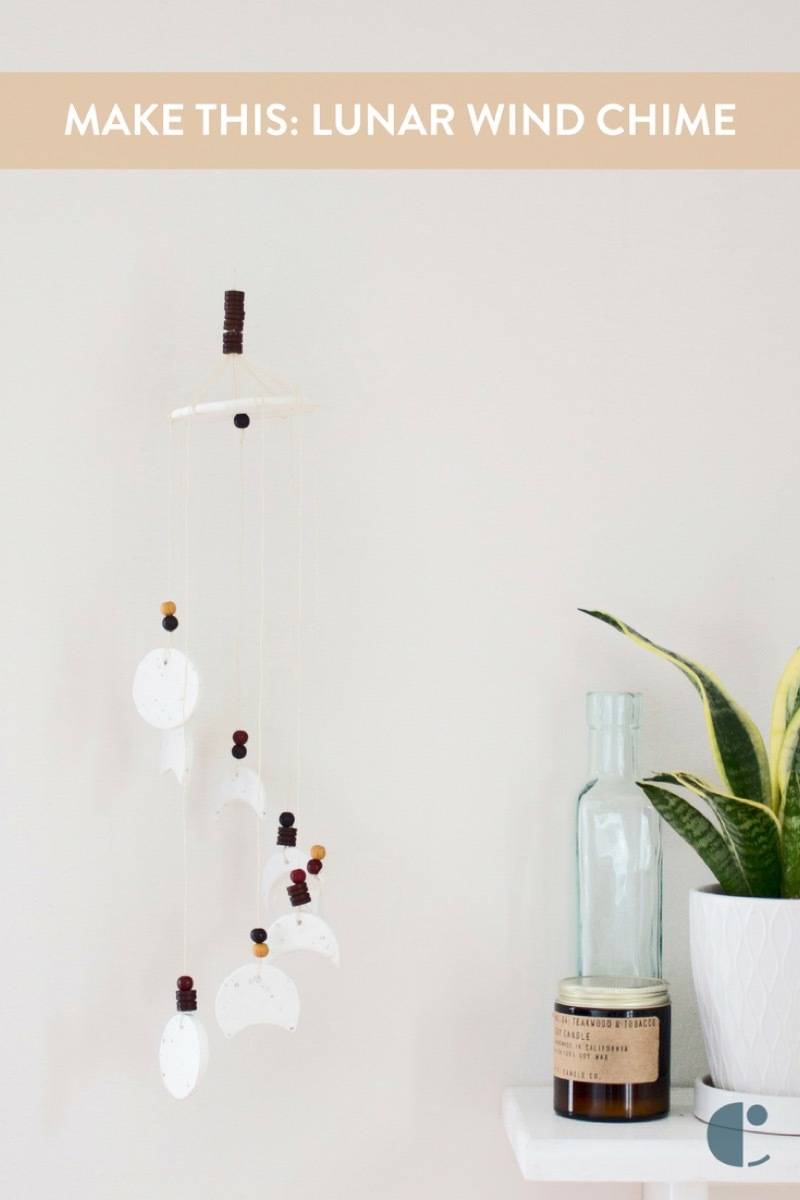
To create the first moons and quarter moons, start with a full moon as in step one. Shift the cup over, and cut a small segment out again. See below for a breakdown of the phases of the moon. Once you’ve stamped out all your pieces, use a toothpick to create a hole at the top of each moon.
Step
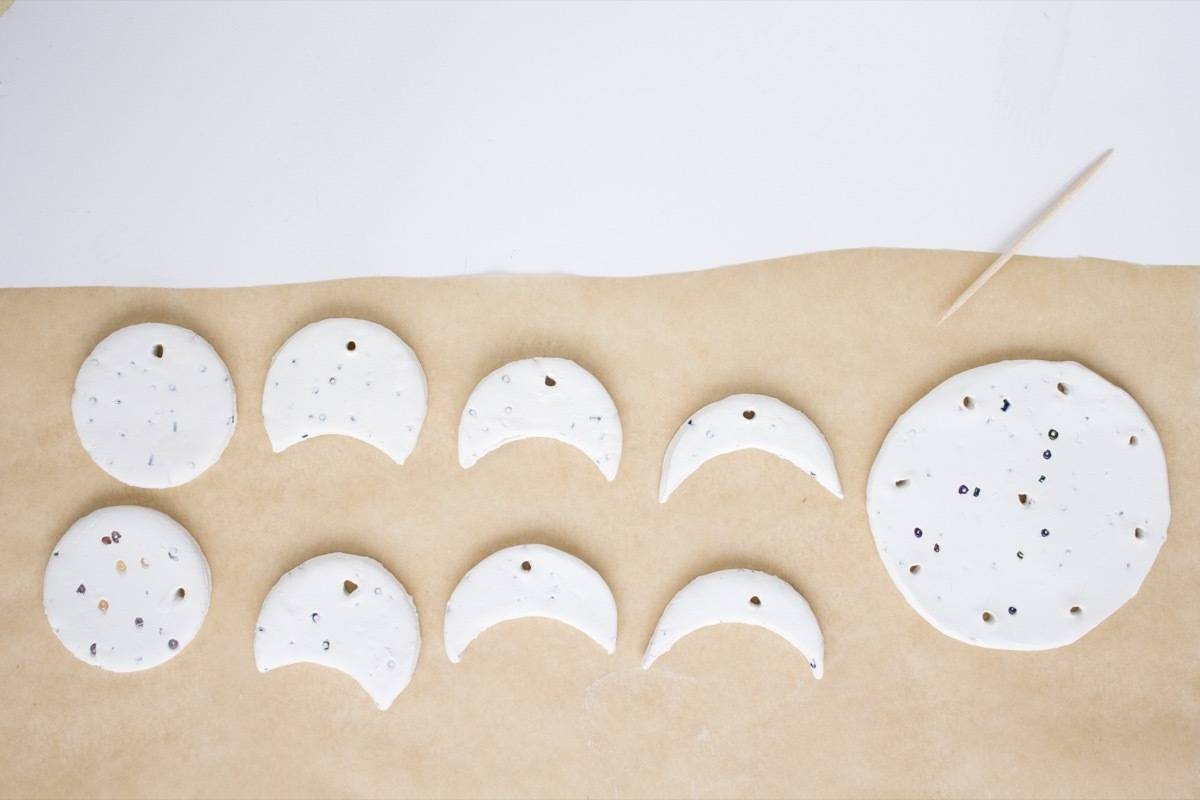
To create the top joining piece, roll out some more clay, and using either a clay tool or a larger cup, cut out a large circle. In this piece, use a toothpick to create a hole in the middle for the hanging cord, and 8 holes around the edge to string the moons.
Preheat your oven to 275º, and line a baking pan with aluminum foil. Bake the clay pieces for 5-7 minutes. Let cool before handling.
Step
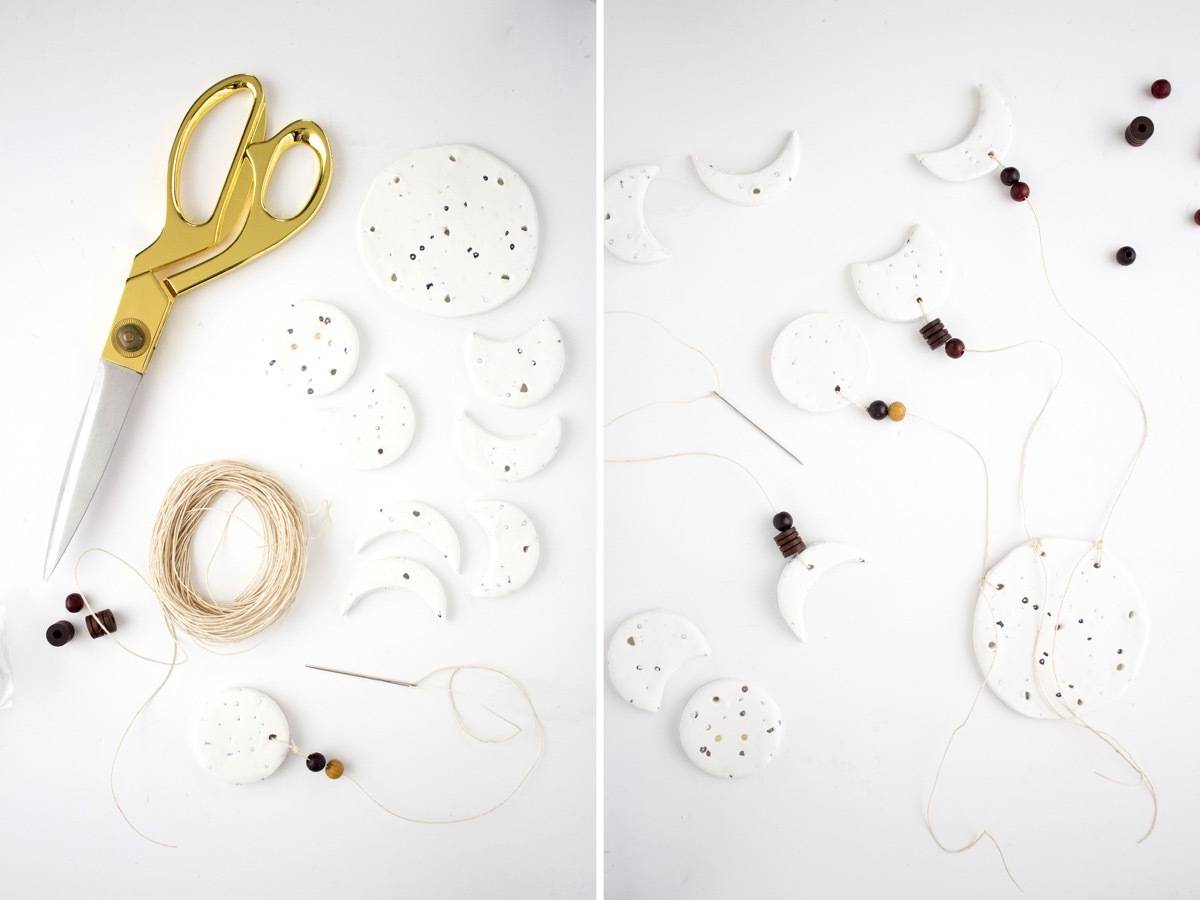
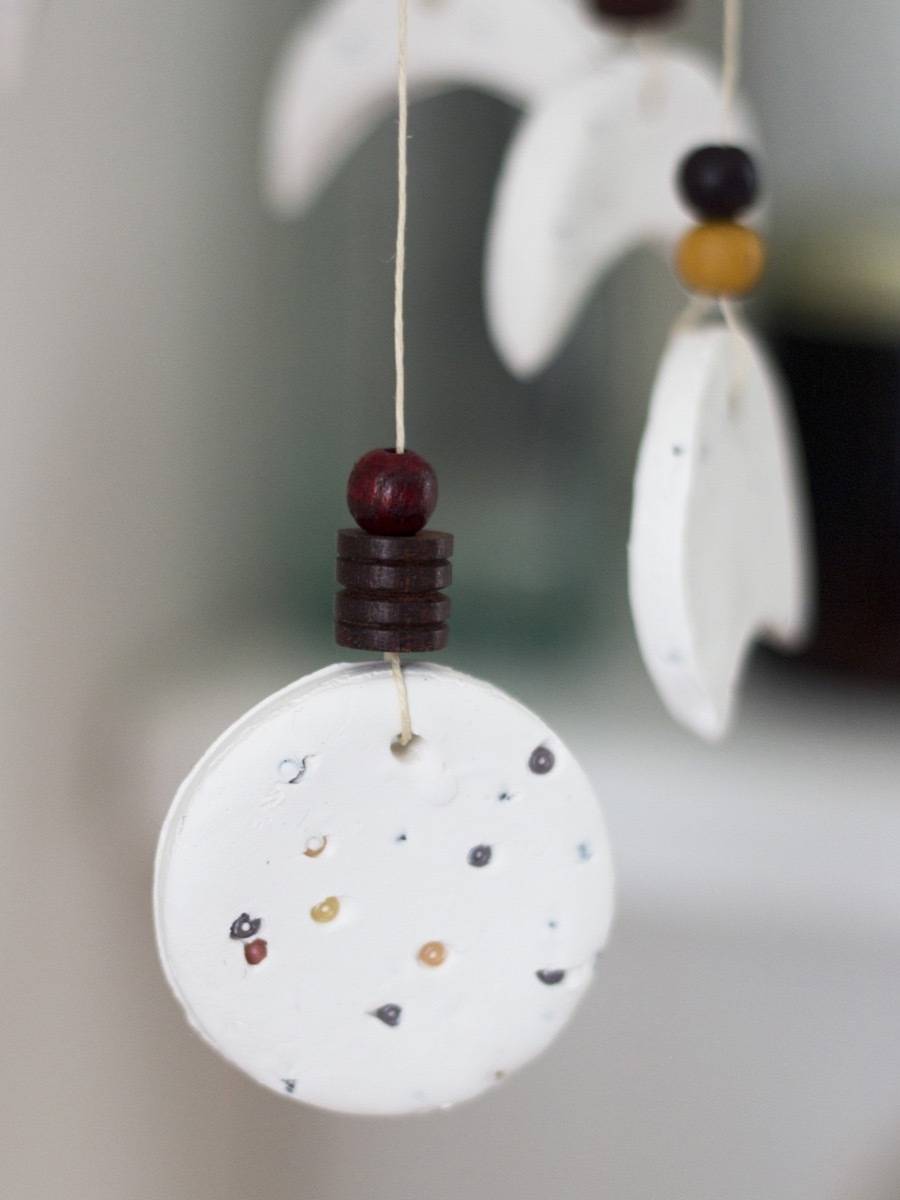
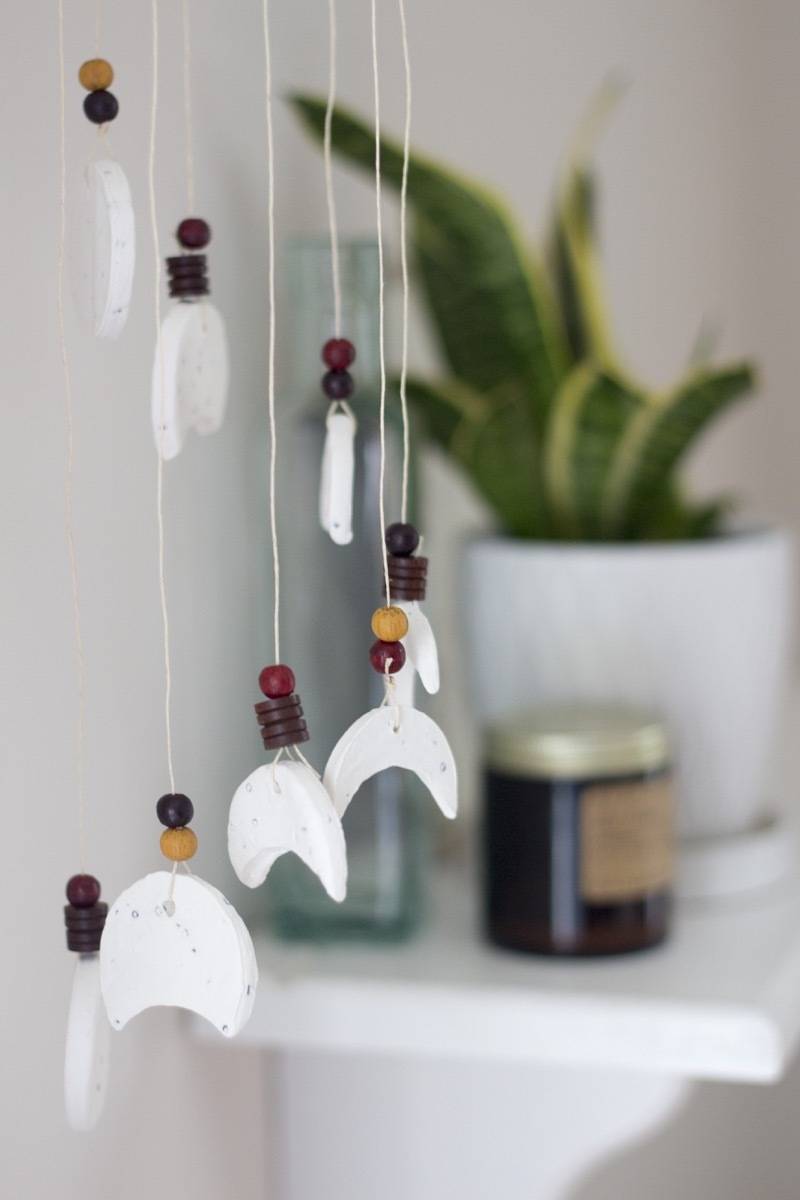
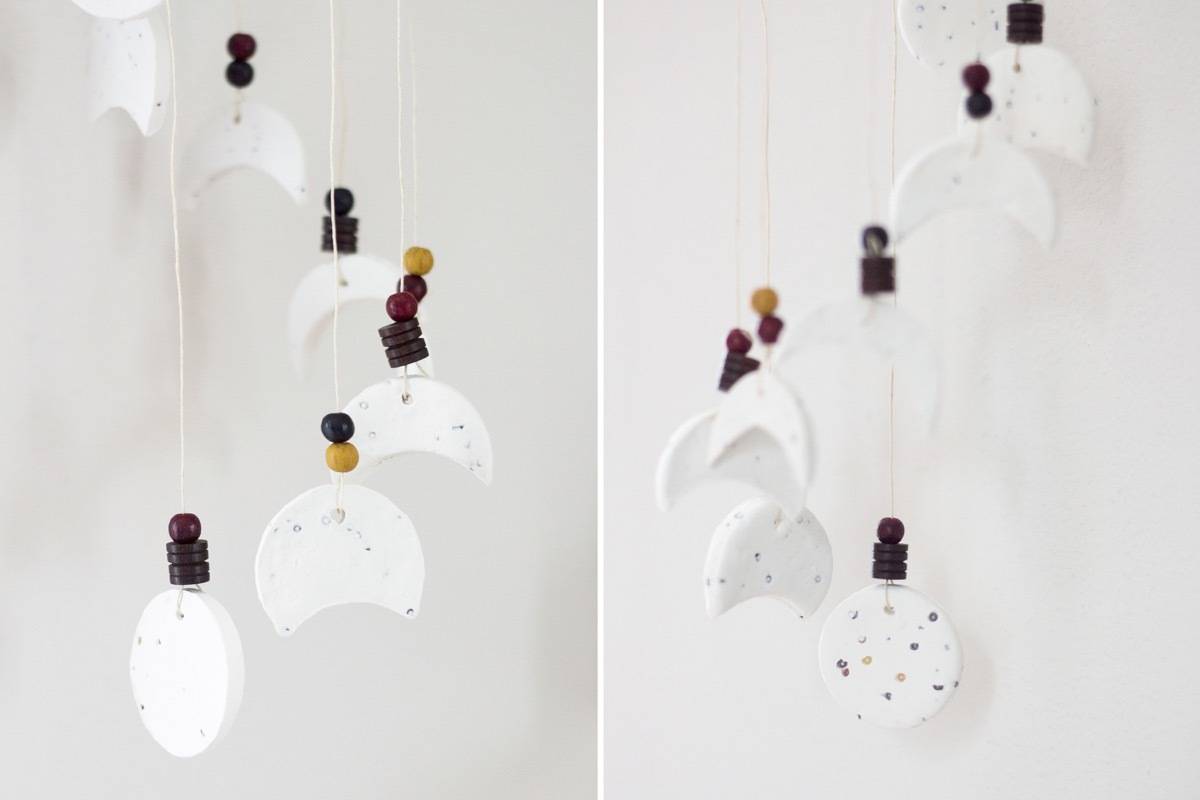
To assemble, use an embroidery needle to string a moon, then knot the cord. Add a bead, using the bead to hide the cut end of the cord. Add a few more beads, then string through the top piece, and knot. Leave excess cord coming from the top piece. String the moons in varying lengths, increasing the length as you go to give this lunar wind chime a cascading look.
Step
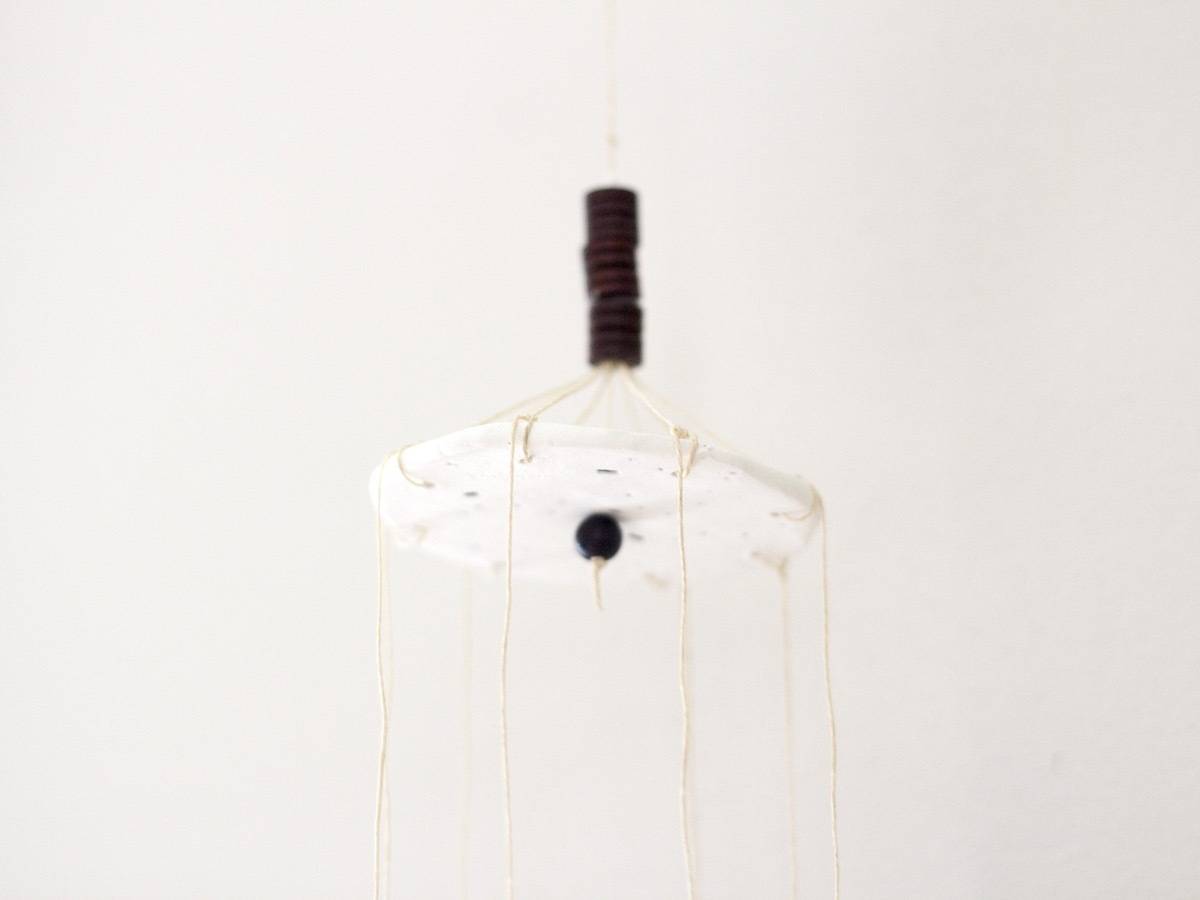
Add a string through the middle of the top piece, tying to a bead in the bottom to keep the string in place. Tie all the excess string from the moons together, and use a bead to hide the knot.
Now that you’ve learned how to make a lunar wind chime, are you looking for other crafty ways to fill your home? Make this all-seeing eye mirror next!