
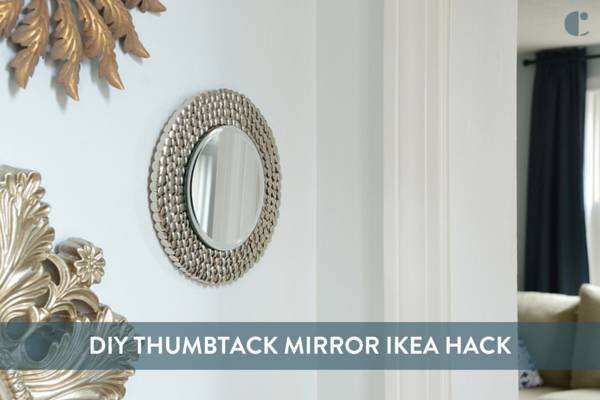
In case you haven’t noticed, I really like IKEA hacks. There’s something about customizing a mass produced piece that just feels so satisfying. So today I have another one for you! This time, we’ll create an IKEA mirror by transforming a cork trivet from IKEA into a glamorous wall mirror. Read on to check out this impossibly simple process.
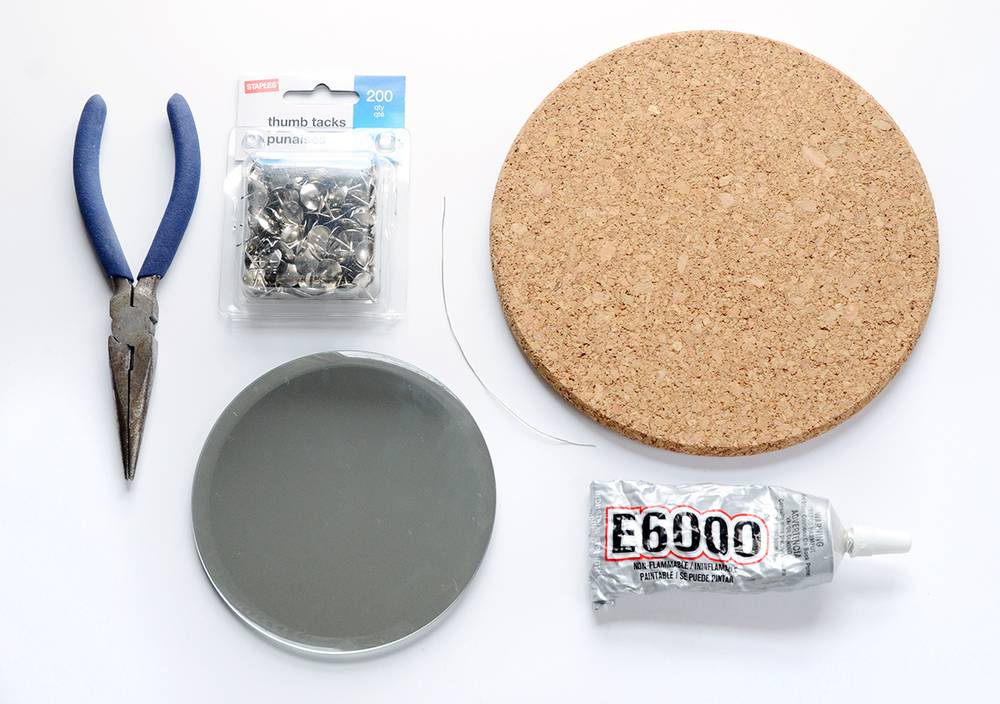
By surrounding a small mirror with a layer of metallic thumb tacks, a utilitarian piece can become a stunning piece of wall decor. Here’s what you’ll need for this project….
Materials
- 1 IKEA Heat Trivet
- Thumb tacks (I used 2 packages)
- 4 3/4″ diameter mirror
- 5″ piece of wire
- Pliers
- E6000 Glue
Step
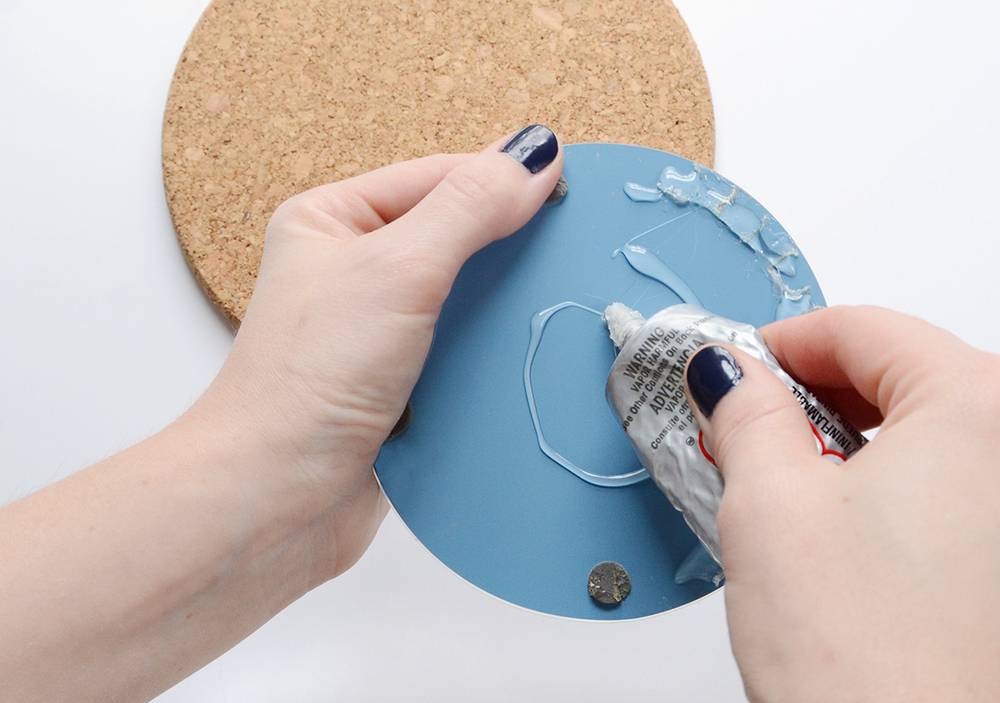
Begin by gluing the mirror to the center of the cork trivet. I found the mirror at my local craft supply store. I would recommend using E6000 glue because it has a strong bond, and it is somewhat repositionable which can be helpful while you’re inserting the thumb tacks.
Step
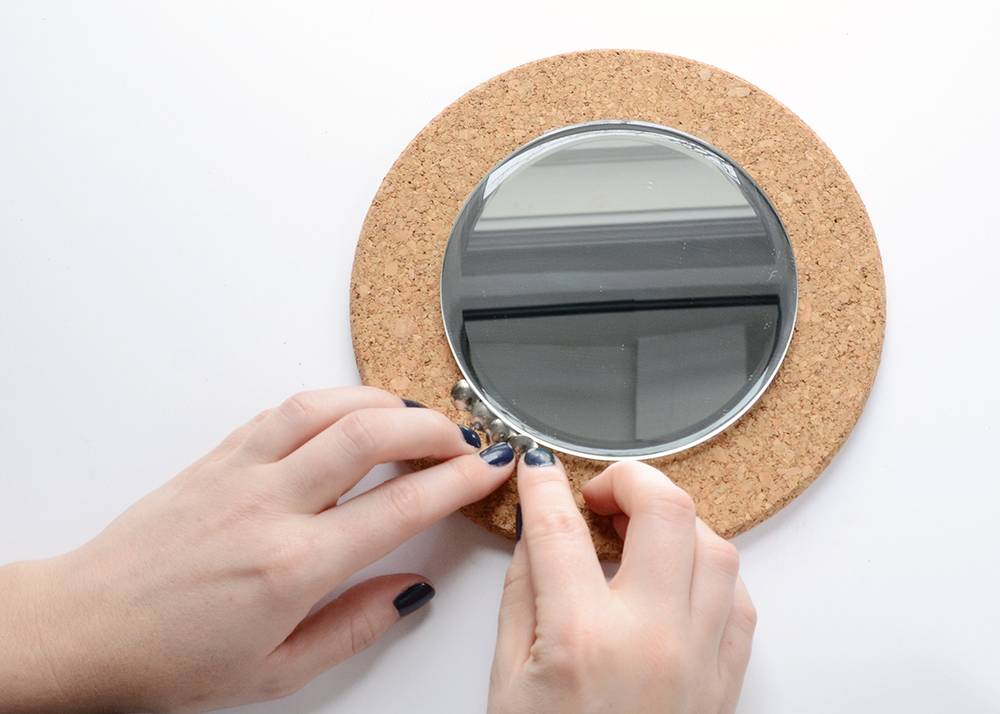
Next, begin placing the thumb tacks around the mirror. Push it stightly off center while you’re inserting the tacks, so that then you can slide it back over them slightly to cover any visible cork (see next photo). Overlap each tack with the next by about a quarter of an inch.
Overlap all of the thumbtacks… this will create a cool layered fish scale sort of effect.
Step
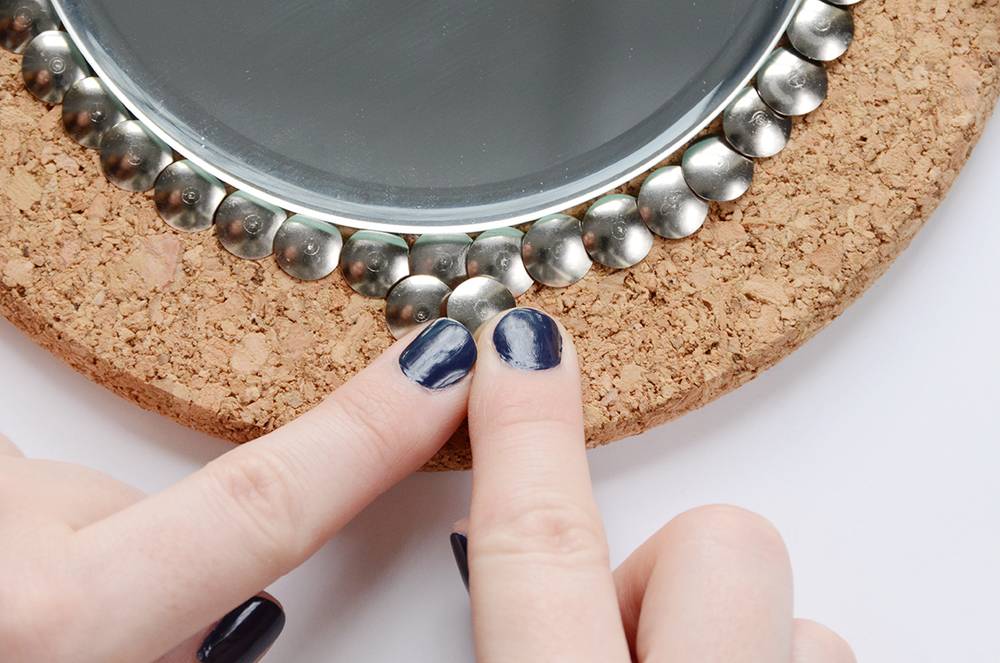
Continue shifting the mirror back and forth slightly as you add tacks around it. Once you’ve completed a full rotation, overlap the first row with the second.
Step
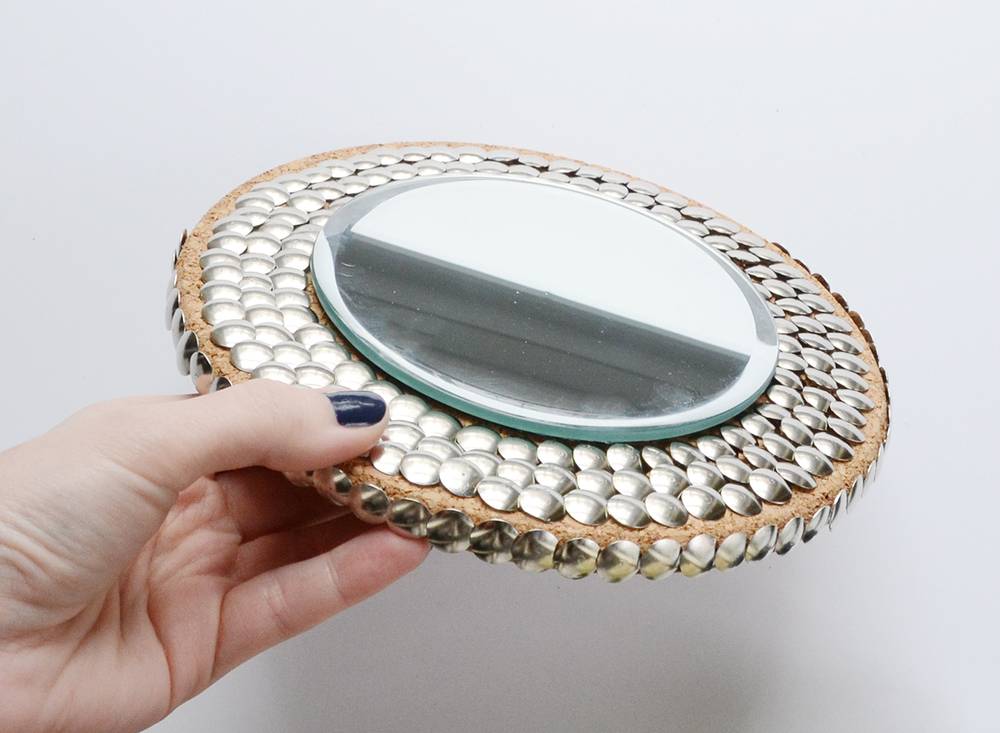
Once you’ve finished the third row, skip to the outside row as shown above. This way, the last remaining row will overlap everything to create a finished look.
Step
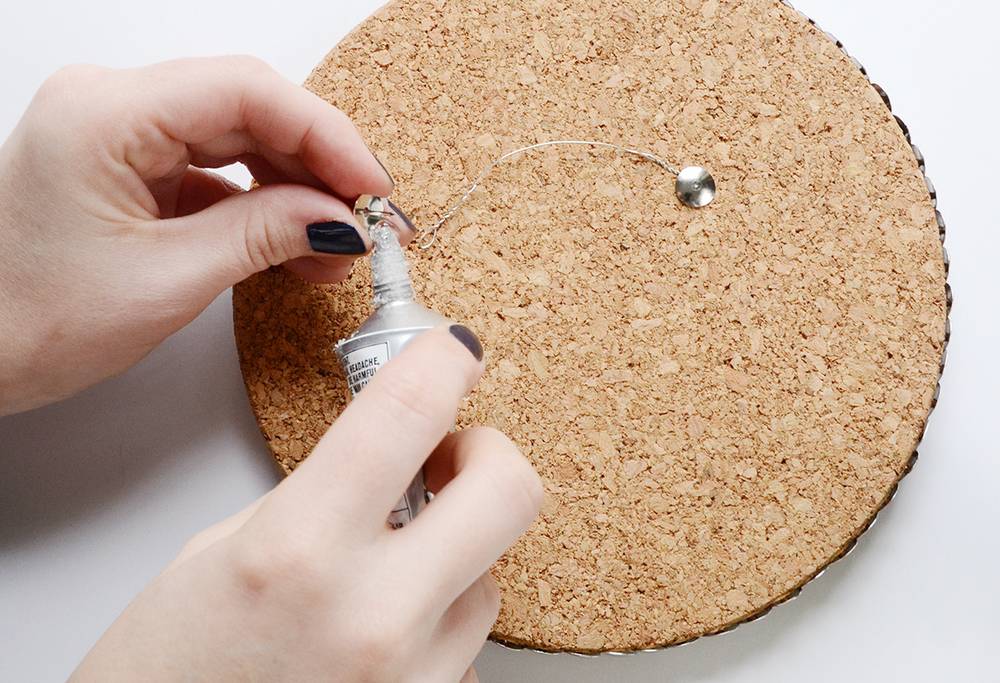
Flip it over and twist the ends of the wire to form two secure loops. Apply a dab of glue to the underside of a thumb tack and stick it through the loop and into the cork. Do the same on the other end. This will create the hanger for your mirror. And that’s it, you’re finished!
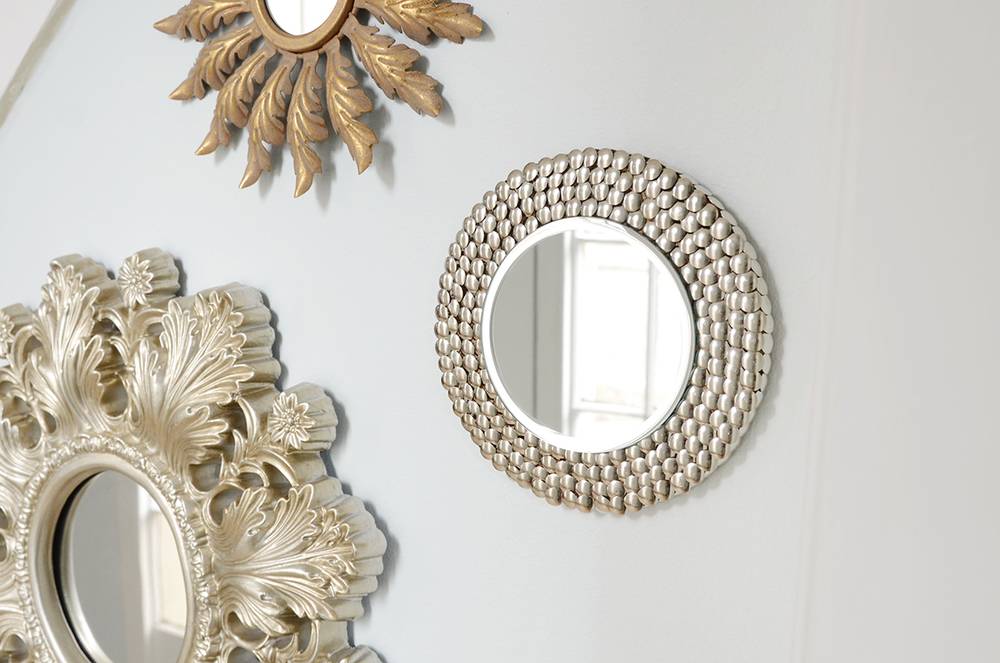
Here are some pictures of the final piece….
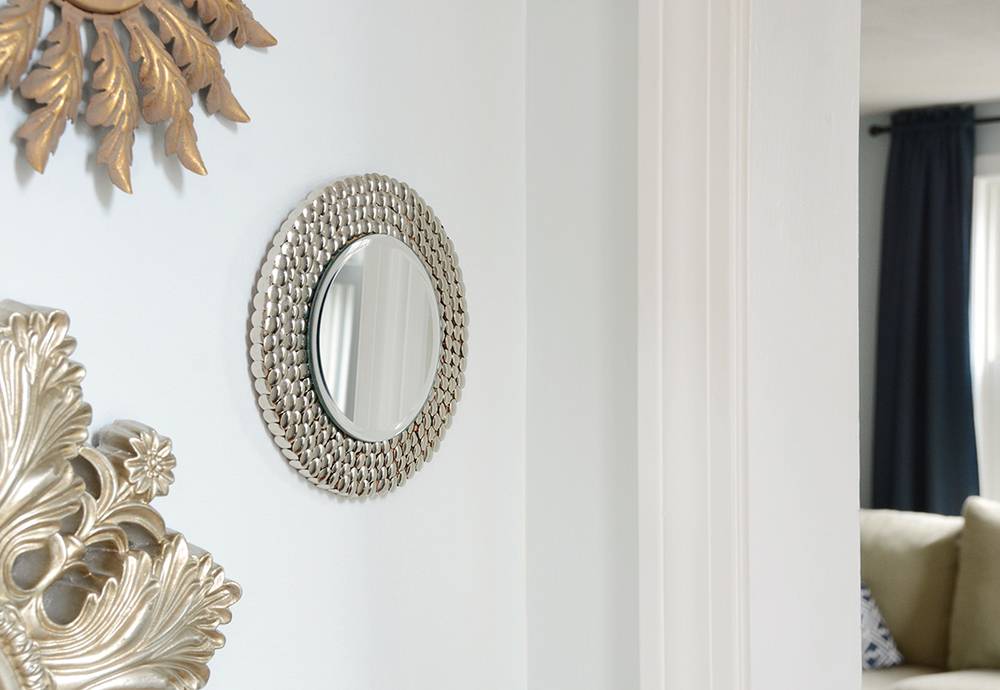
I love the layered effect, it reminds me a bit of chain maille or armor. And the metallic silver-y finish of the thumb tacks looks so glam on the wall!
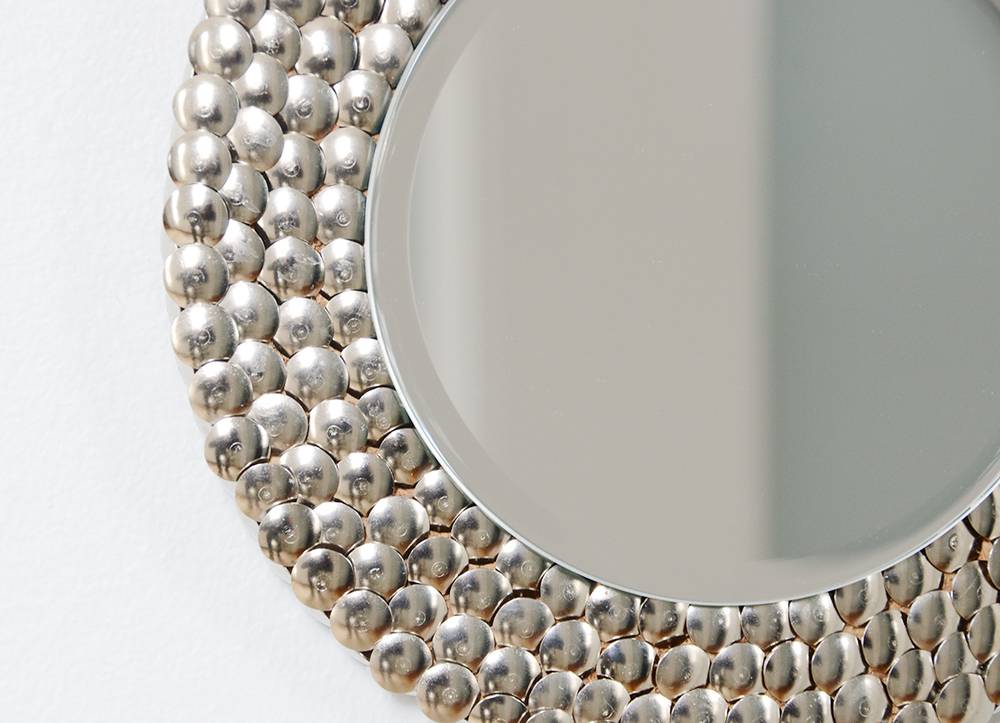
Photo: Faith Towers
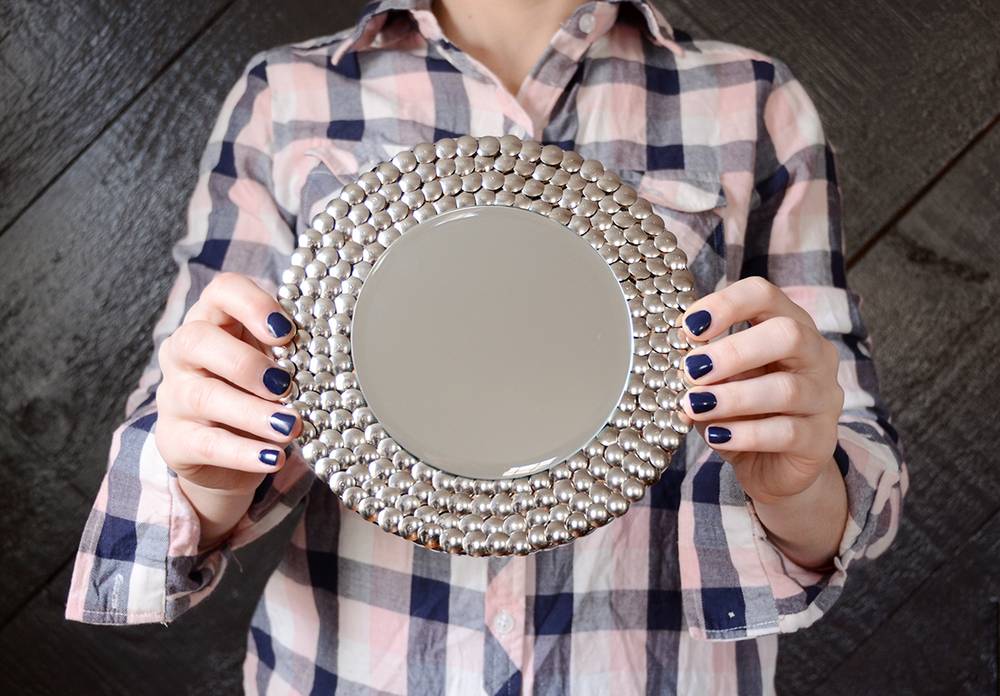
Photo: Faith Towers
If gold is more your thing, you could try to hunt down some gold thumb tacks online for a different take on this project. Happy crafting!
It’s thumbtacks?! I would have never guessed. It looks amazing!!
Thanks Lisa! I know, surprising right?!
Very cool craft! Where did you get your other 2 mirrors?
@victoria thanks! I think I got the other two at HomeGoods… I’ve had them for quite a while.
Nice! Also, I can imagine this with the same gold spray paint you’d used on your Ikea Hyllis shelving unit! It’d look even *more* amazing still! (though this is very nice already, just as it is!)
But a spray of paint would have the added bonus of filling in all the little areas between each thumb tack, to make it all look like one cohesive metallic surface!
…(though it’d either mean having to mask off the mirror to do so in retrospect –if you or someone else were to want to do so after the fact– or would need to be done BEFORE affixing the mirror in place… perhaps putting the mirror on the cork with a temporary adhesive at first while working the thumb tacks all around… and then removing the mirror for the painting process and affixing it permanently afterwards.)
I’d also be tempted to try this idea with furniture tacks too, as some come in interesting shapes and textures, so can really “fancy” it up even more!… though that would likely make it a MUCH more expensive project… so perhaps not such a practical idea… but could also look quite stunning, I think!
Anyways, looks great… thanks for sharing this! 🙂
Great idea FeNiX, thanks for sharing!