
Anyone who knows me knows I’m ALL about organization. When you live in small spaces, organization is the key to maximizing space and keeping your home feeling decluttered. One of the most cluttered areas of my home tends to be my entryway, so I decorated a simple box to create this wood box hook display for catching keys, sunglasses and other small items that normally end up cluttering the table!
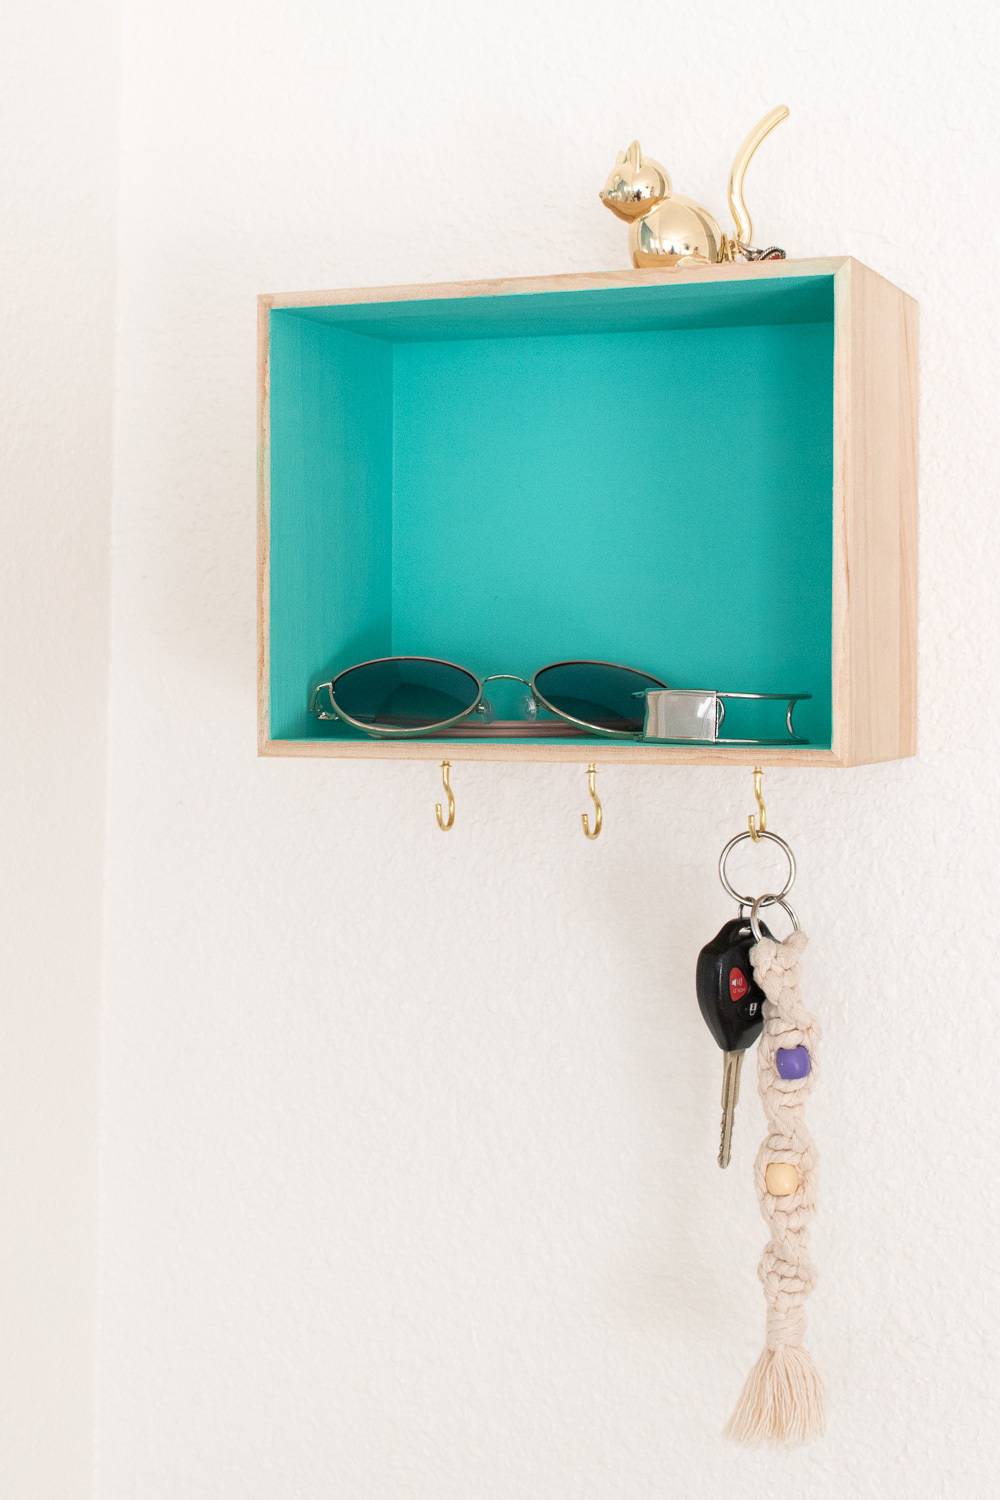
This box is about 8.5 inches wide, which was perfect for this small wall next to our entryway table. It’s actually a very low quality wood box from a craft store, but it means that’s it’s extremely lightweight, so I could hang it with Command strips rather than hammering additional nails into my walls. Of course, this is up to you! If using a thicker or higher quality wood, or if you plan to use this for heavier items, I would recommend adding comb hooks to the back of the box in order to hang it on your wall.
PS, that macrame keychain is another DIY here on Curbly!
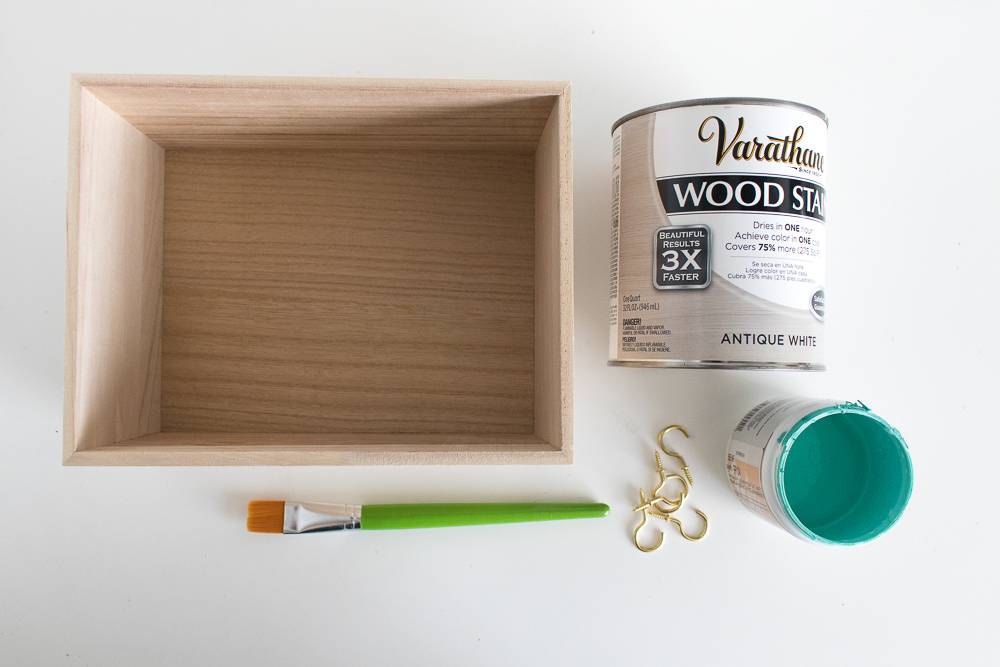
Materials:
- Wood box, top removed
- Wood stain
- Matte colored paint
- Paintbrush
- Mini hooks
Step
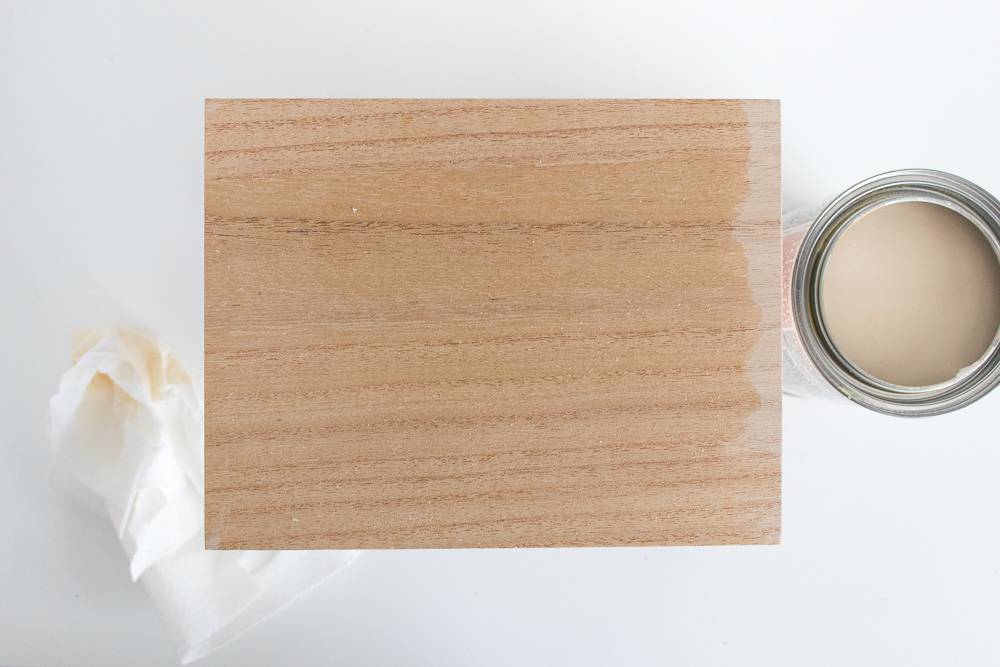
Stain the outside of the box with desired color, or leave unfinished. I used a very light stain.
Step
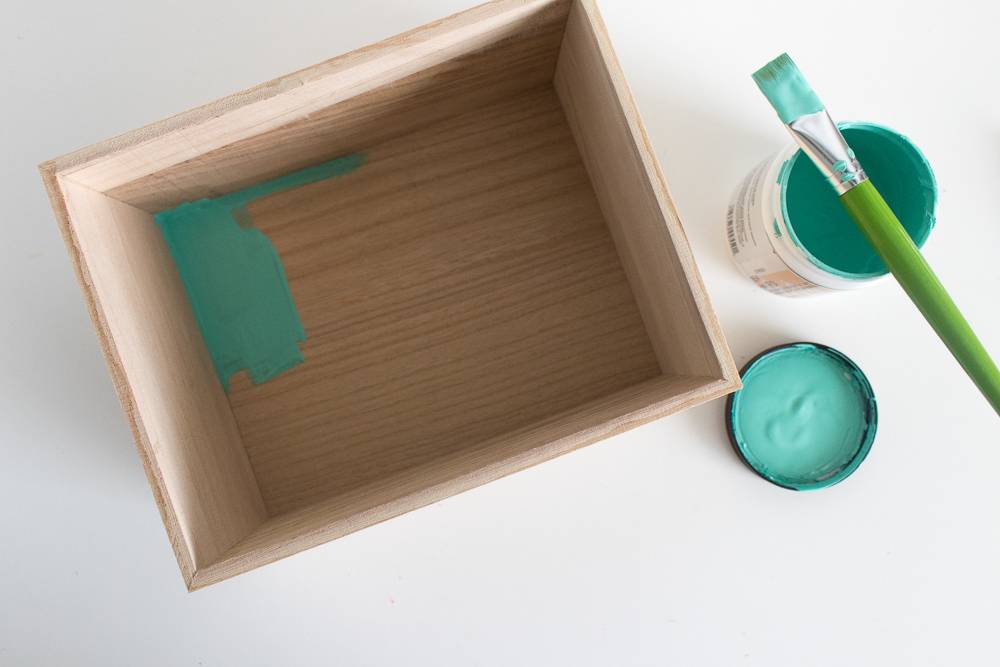
Once the outside is dry, turn it over and paint the inside of the box with colored paint to make it pop. Alternatively, you could stain or paint the entire box one color. Let dry, and paint a second coat if needed.
Step
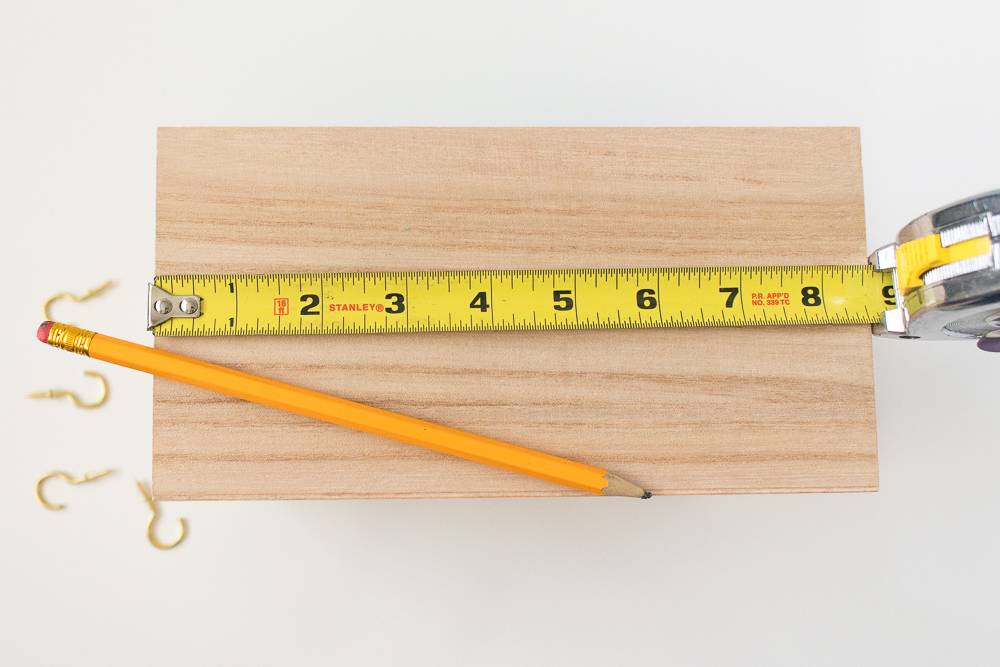
Once dry, use a tape measure or a ruler to determine the approximate middle of the bottom of the box and mark where the hooks will go. I used three hooks and spaced them about 1.5 inches apart.
Step
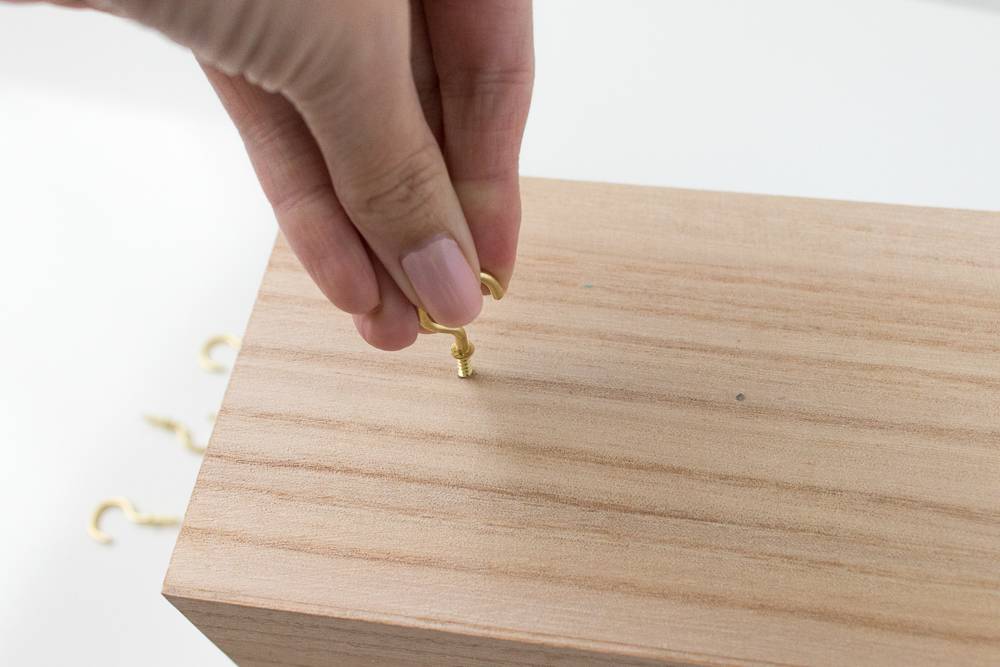
This is a very soft wood, so I simply screwed the hooks in by hand. If using a harder wood, you may want to drill guide holes before screwing the hooks in place.
Then your box organizer is ready to hang! Use command strips to hang it on a wall, or add comb hooks depending on how you plan to use it. I just love having a spot to hang my keys and drop my sunglasses when I walk in the door and keep the clutter off my table.