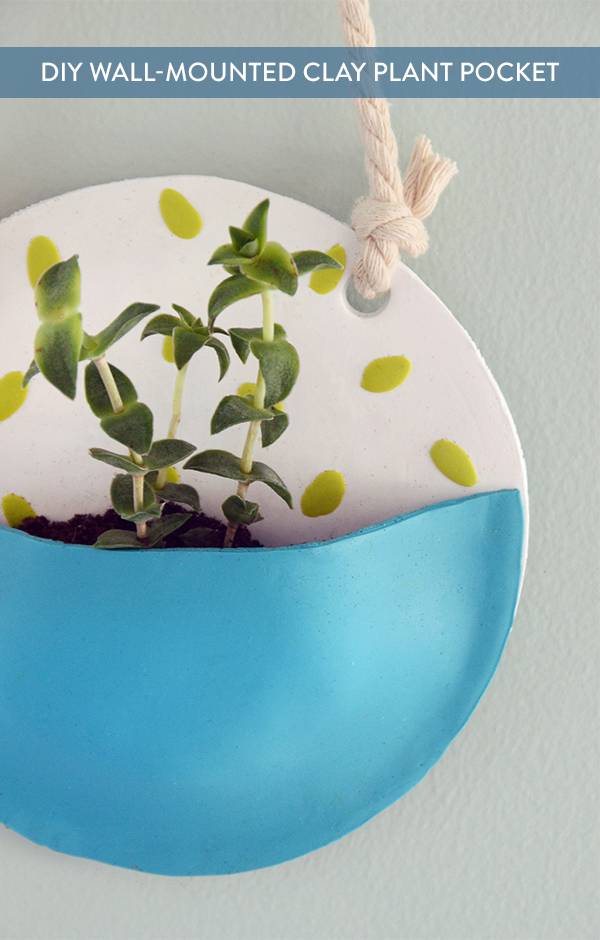
There are no two ways about it… I’m a plant person. And my obsession has gotten so bad that I’m running out of places to put my greenery. So today I’m sharing a fun project that will give you another spot to display your beloved succulents – on the wall!

Materials
- Polymer clay in three colors
- Rolling pin
- Plate (the size you want the back of your plant pocket to be)
- 3 feet of cotton rope
- Scissors
- Knife
- Rock (not pictured… should be the size you want your pocket to be)
Step
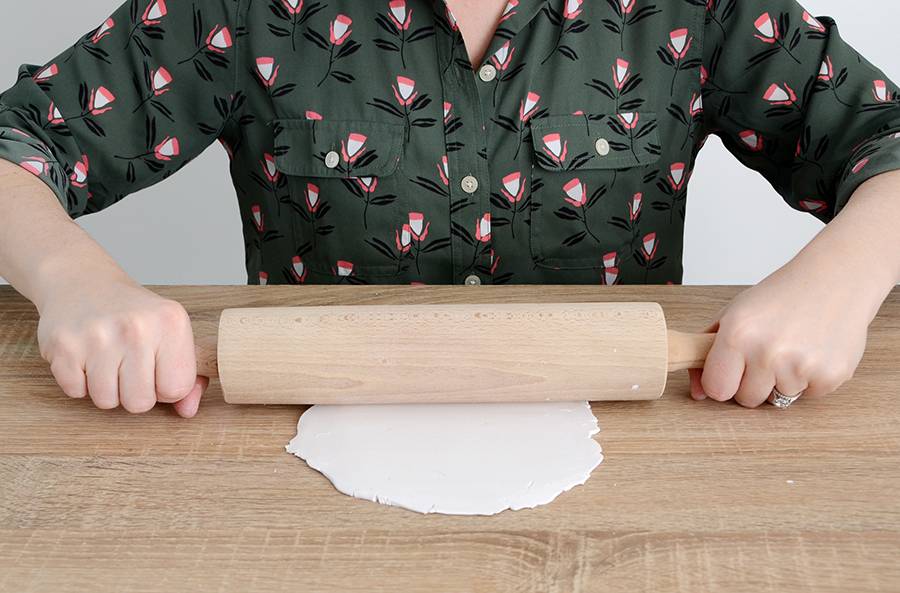
Begin by rolling out a large piece of clay to create the back of your plant pocket. Roll it until it is about 1/4 inch thick, and wider than the plate that you’ve chosen to use as your guide. Polymer clay is difficult to work with until it warms up, so keep working it and rolling it… it will take a few minutes to get it to this point.
Step
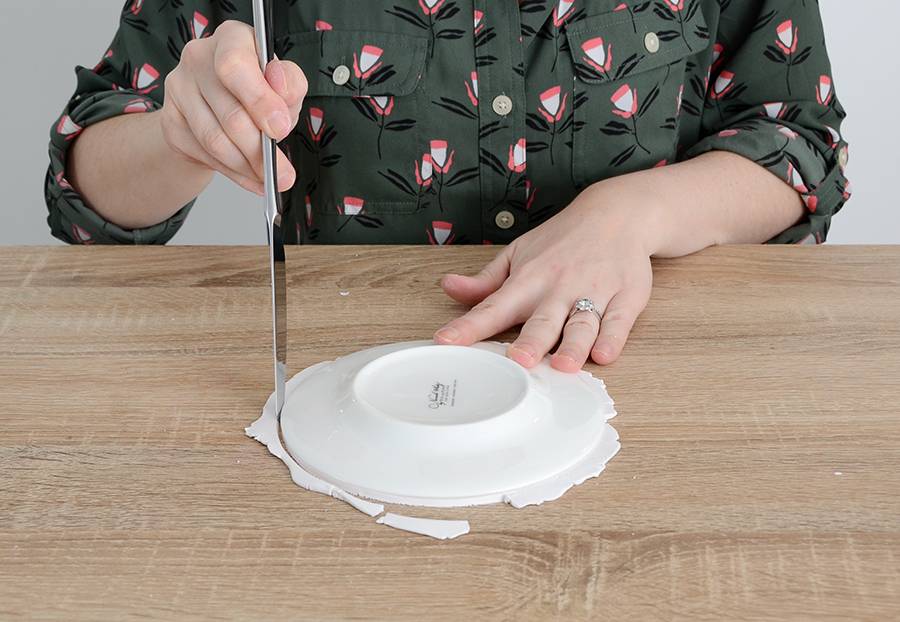
Next, place the plate on top and use a knife to cut around the edge to form a perfect circle.

Step
Pick a different clay color and place tiny tube shaped pieces on the surface of the circle. Gently roll them into the circle using the rolling pin so they are flush with the other clay.
Step
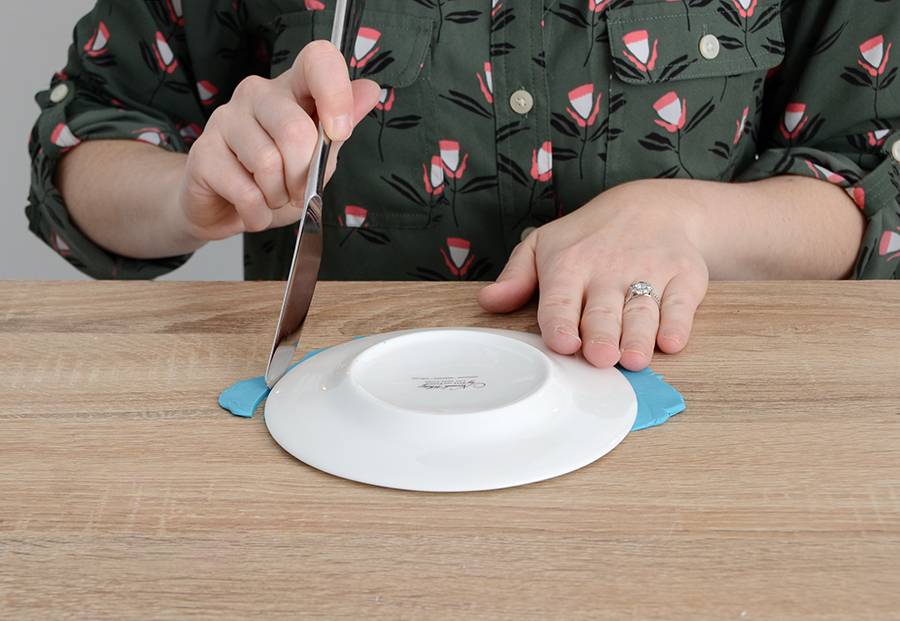
Now it’s time to create your pocket. Roll out a semi-circle using the third clay color and place the plate on top again and cut around the bottom section. Use a ruler or other straight edge to cut the top part so it is straight.
Step
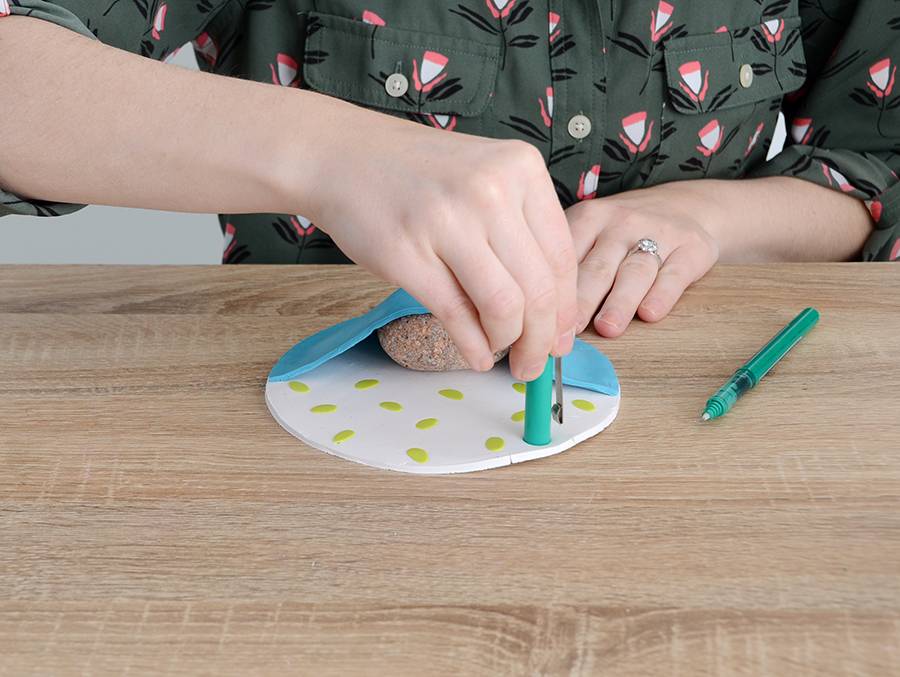
Place a rock on the bottom of the circle and then put the semi-circle on top of it. Stretch it a bit until the edges reach the edges of the circle and gently press to connect the two pieces. Use a pen cap to cut two holes in the top of the circle.
Step
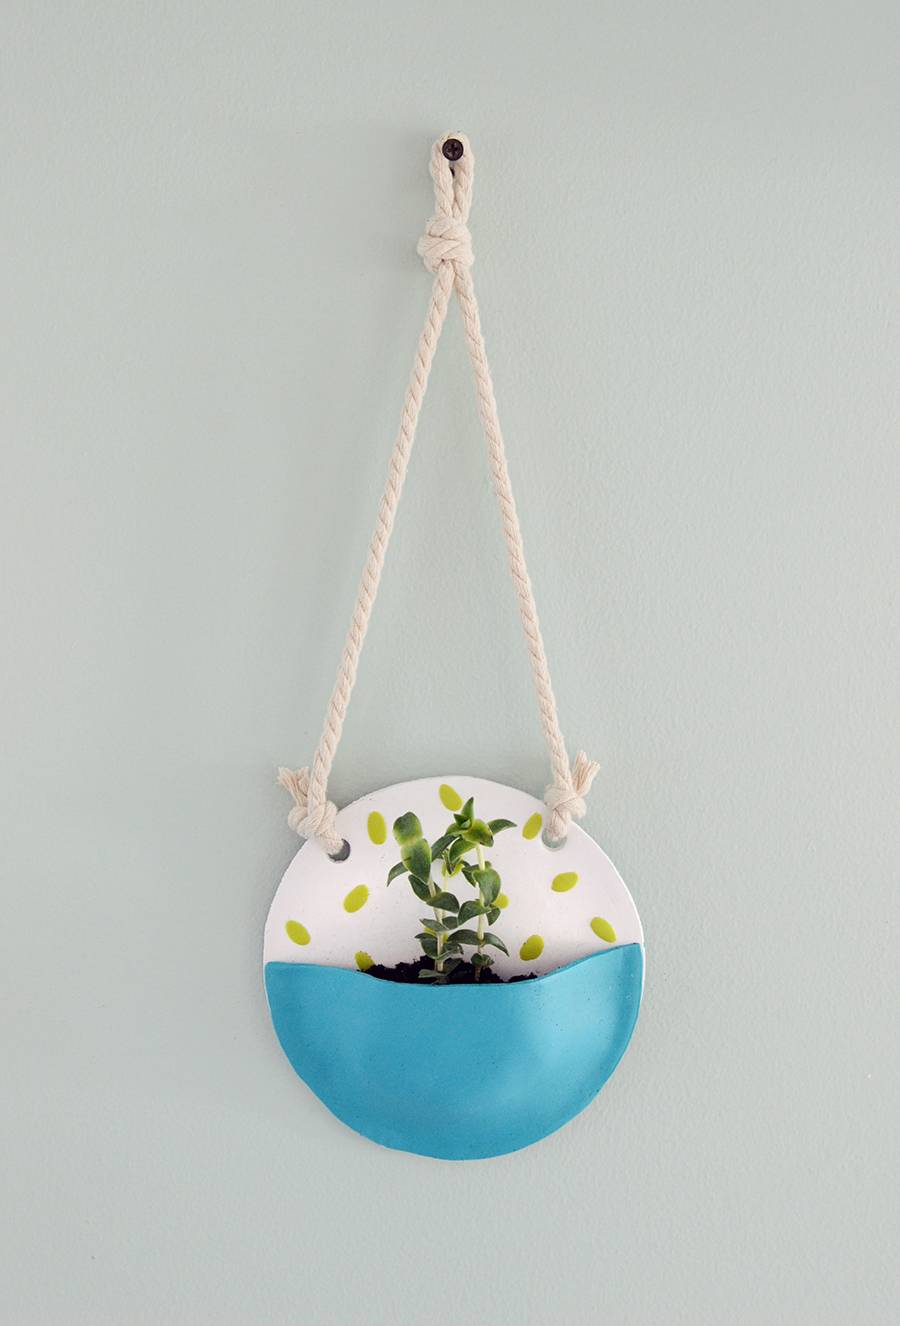
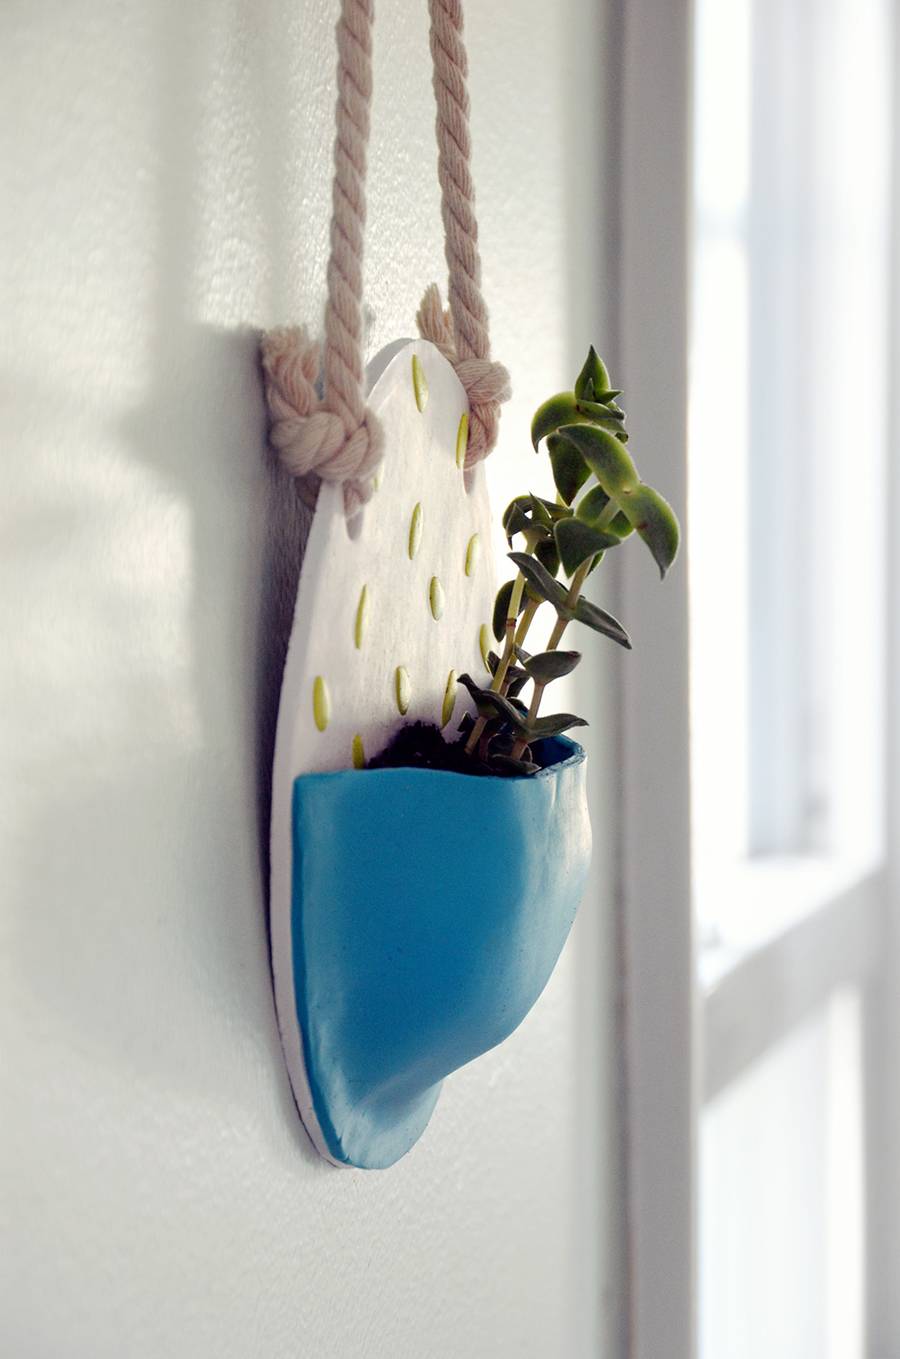
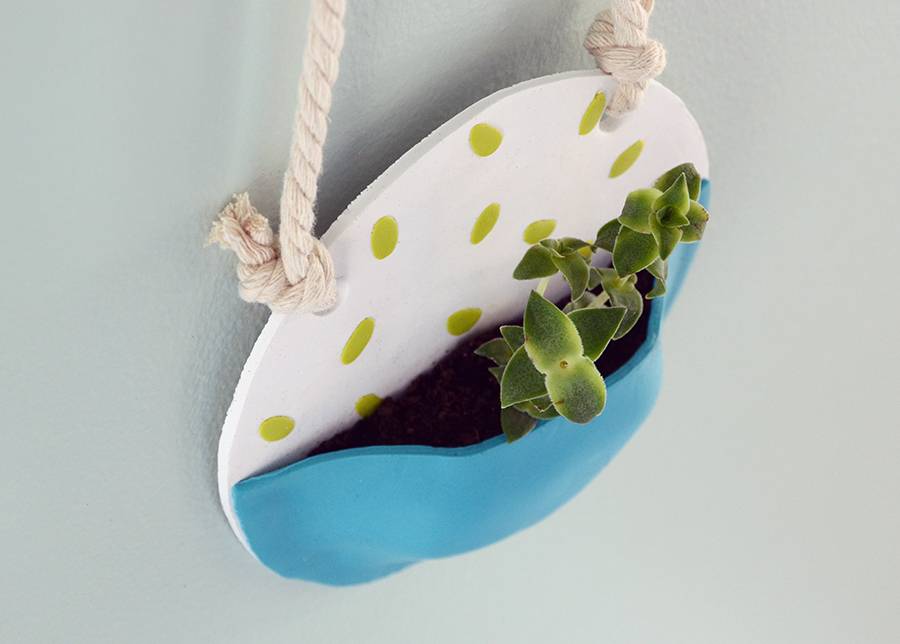
Bake it in the oven according to the directions on the package. Once it has cooled, attach the rope and plant a succulent in the pocket. Be sure to put some stones in the bottom to create a place for drainage.

The final piece is colorful and whimsical, and will surely add a bit of personality to any corner of your house.
It’s a great solution for small spaces, too… if floor or counter space is hard to come by, make a few of these so you don’t have to sacrifice your greenery!
You can go crazy with the design, too – you could try different colors, patterns, or even shapes… a rectangle would work well also!