
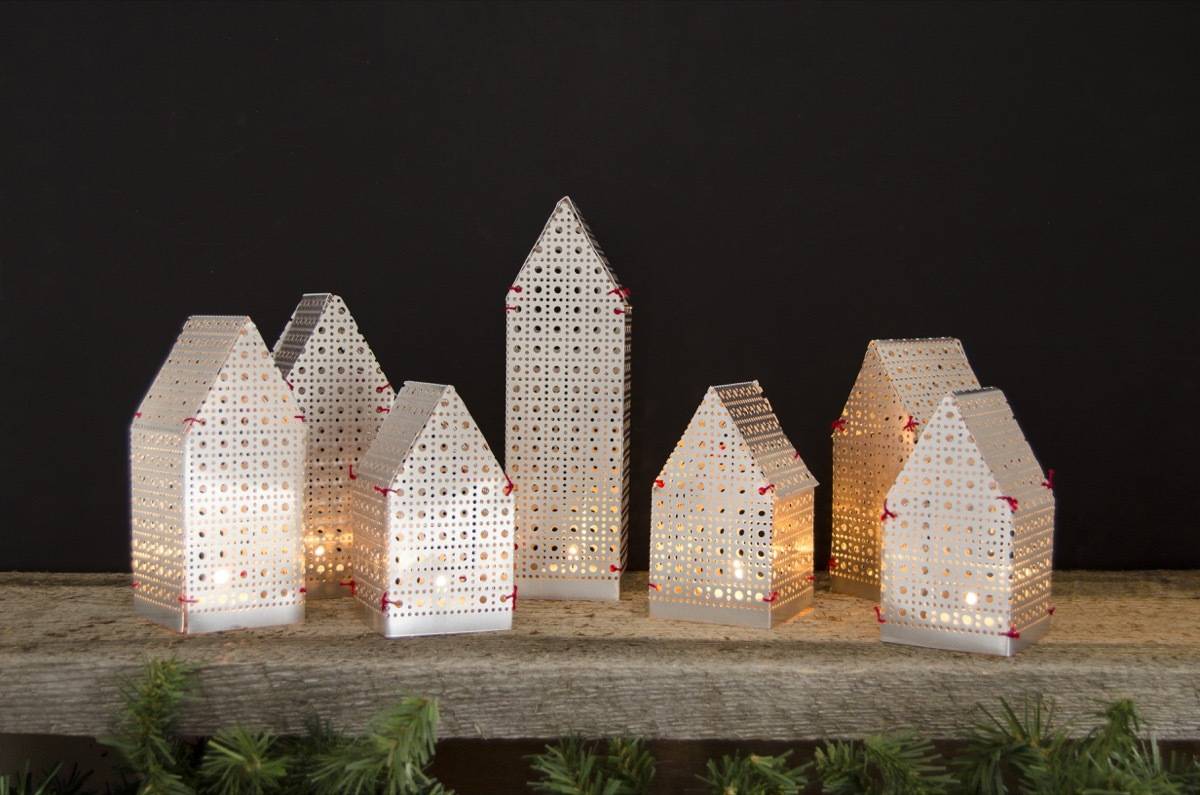
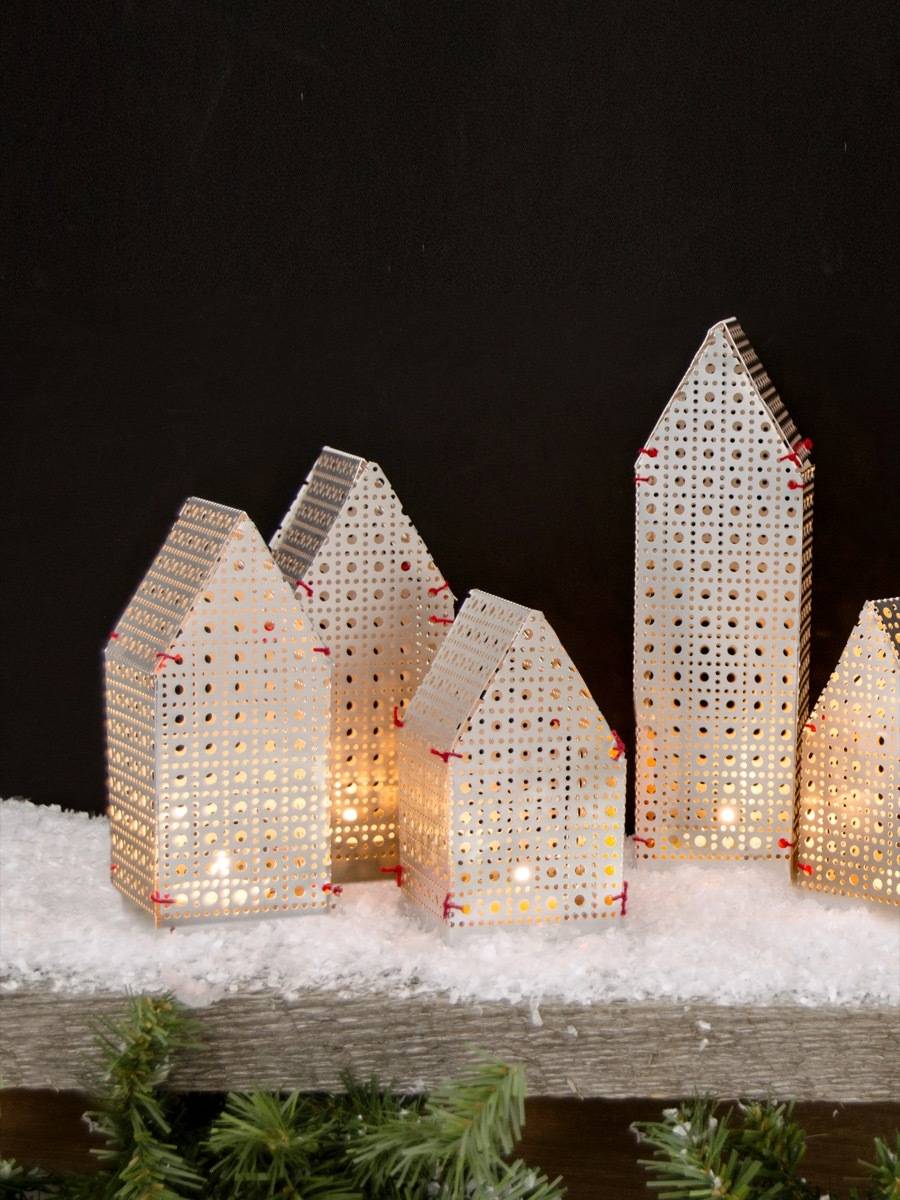
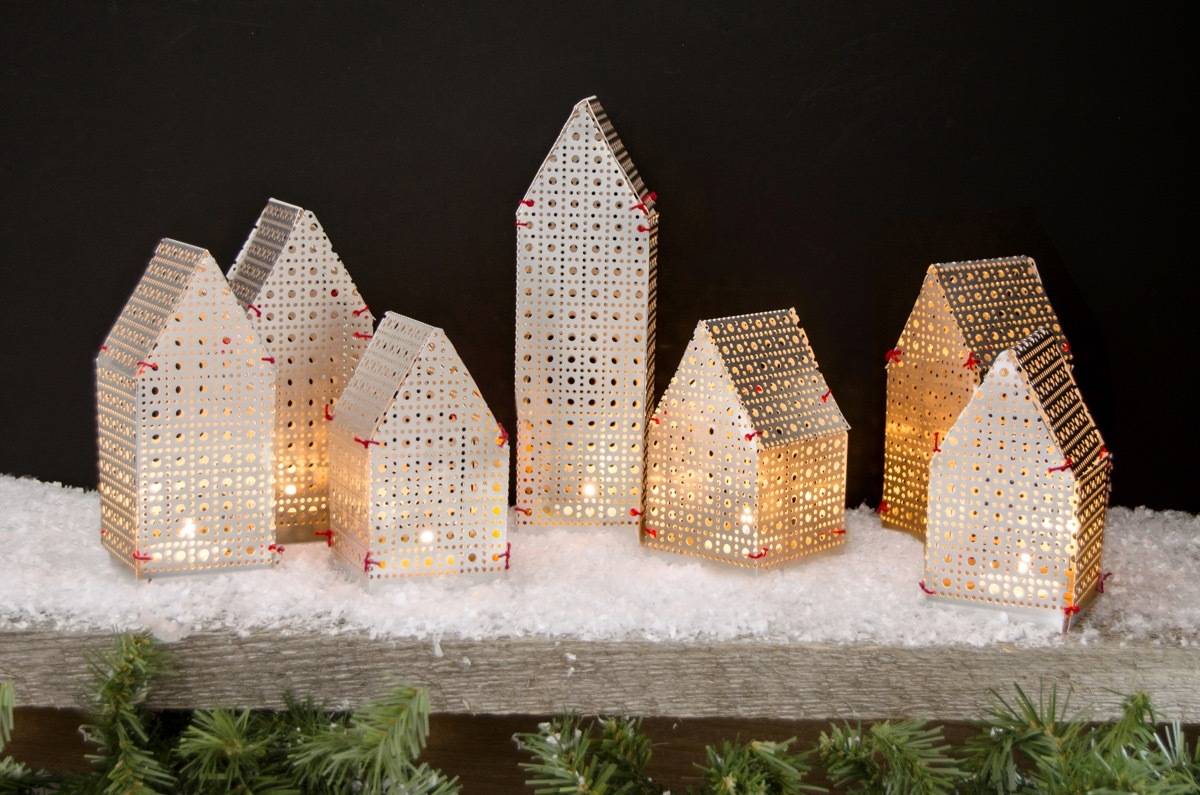
Wintertime is in full swing here in Minnesota. Early in the week, we experienced a few rounds of snow and ice, resulting in the outdoors being treacherous and uninviting. While I definitely have holiday-related errands to run this weekend, staying off the roads and keeping indoors is pretty tempting. I’m a homebody for certain, and I’ve learned how to keep the stir-crazies away during these colder months. Part of staying sane while being stuck inside has to do with how you light your home. Coziness is a must, and these DIY holiday luminaries are just that – cozy!
Watch the video to see these house-shaped votives come together in real time (and to see how the metal-cutting tool works, because it’s pretty neat to see), and keep reading for all the details!
Materials

- Ryobi One+ 18Volt Offset Shears
- Safety glasses
- Decorative aluminum sheet
- Electric tea light candles
- DIY Holiday Luminaries template (click here to print)
- A marker
- Embroidery thread or string
Step
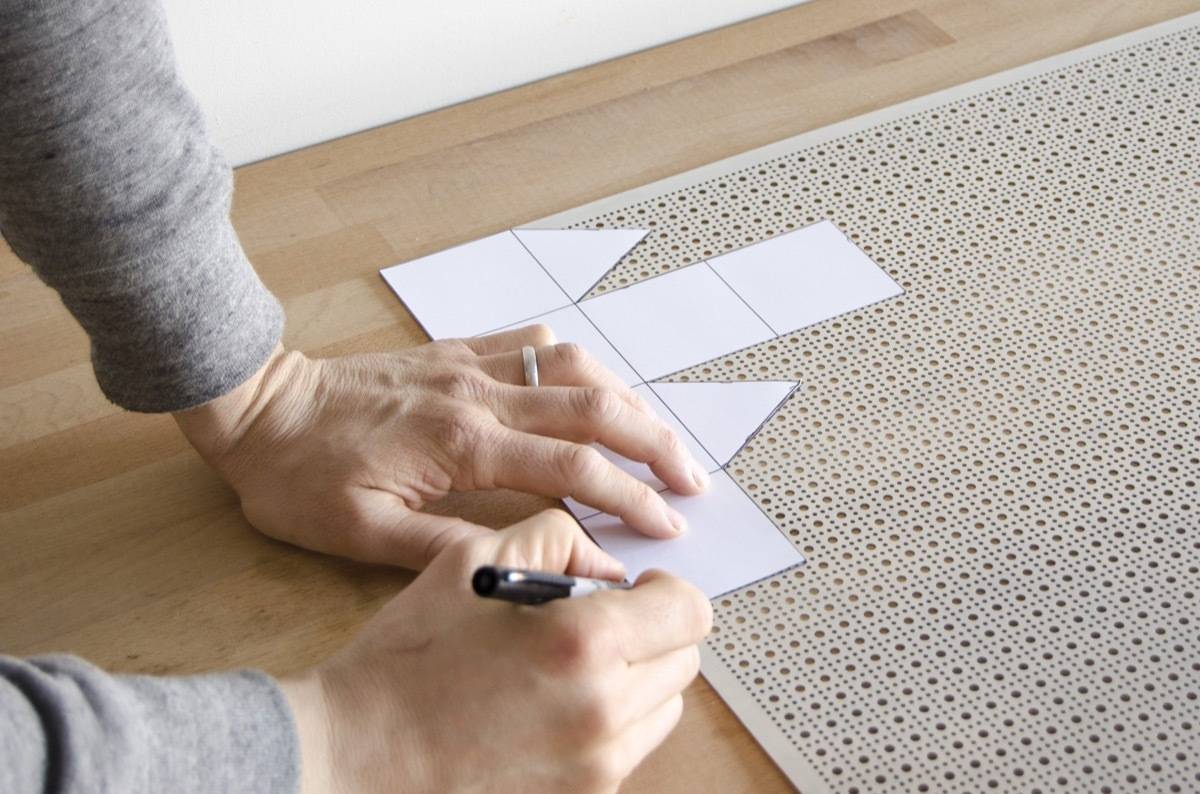
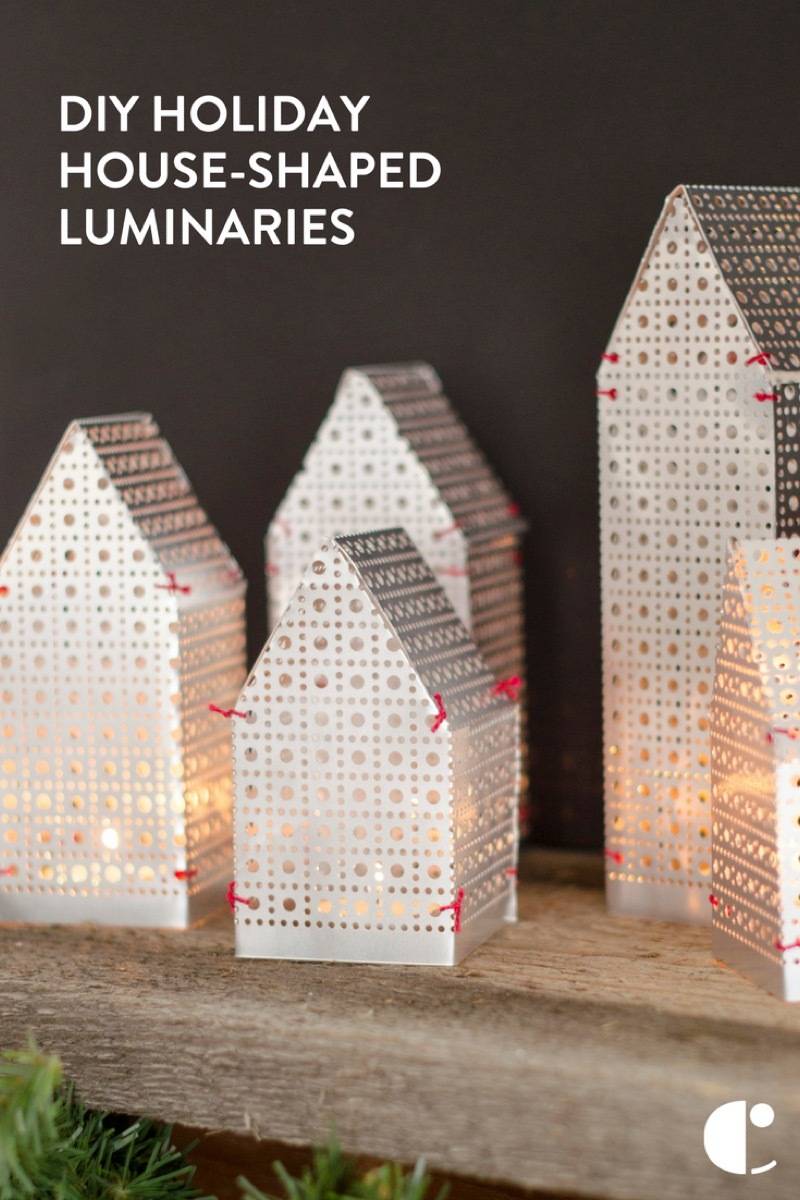
Start by printing out the DIY Holiday Luminaries template, then cut out the template. Use a marker to trace the template design on the decorative sheet metal.
Step

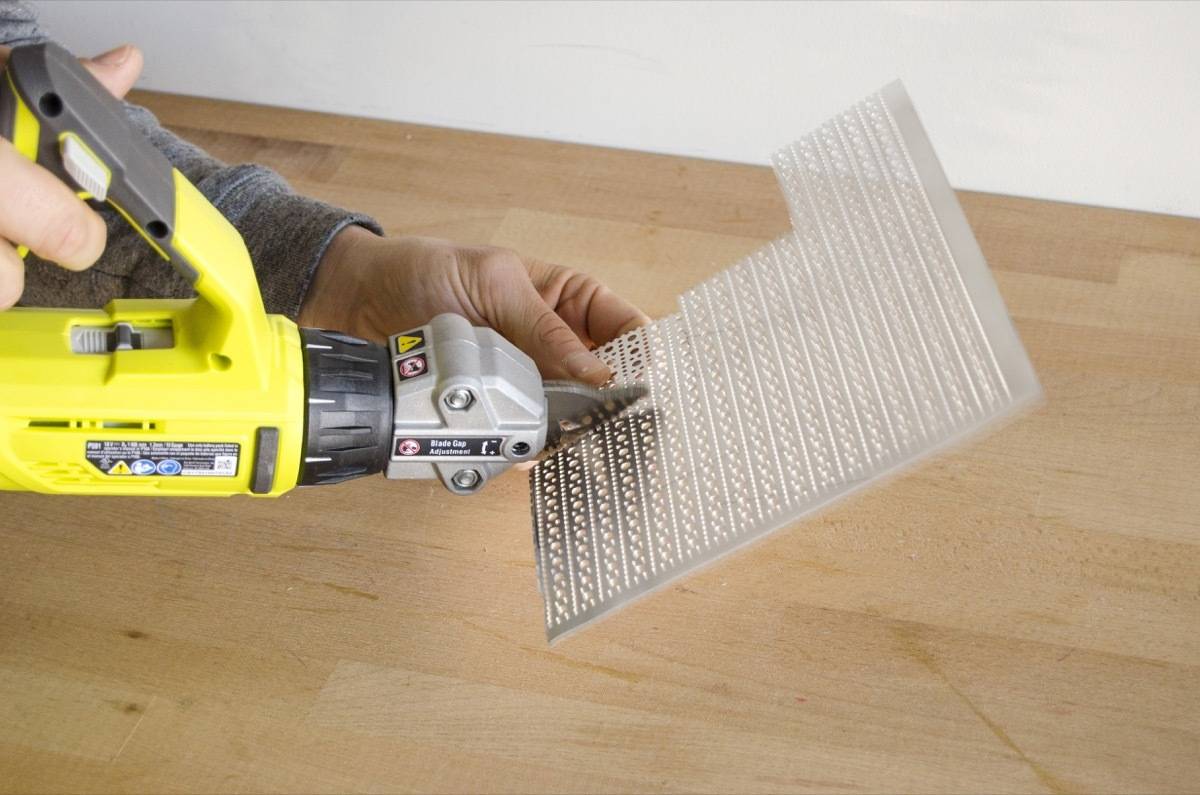
Now it’s time to get to the cutting! We used the Ryobi One+ 18Volt 18-Gauge Cordless Offset Shear, which, a) was super fast, and b) didn’t require a lot of muscle! The cutter blades on this tool work to “munch” through metal, rather than slice. It’s also supposed to be great for cutting vinyl siding and shingles, which, after seeing how easily it cut this metal, we can totally believe.
Using the offset sears, cut out the drawn template from the aluminum sheet. Make sure you wear your safety goggles, and watch out for the sharp corners on the metal.
Step
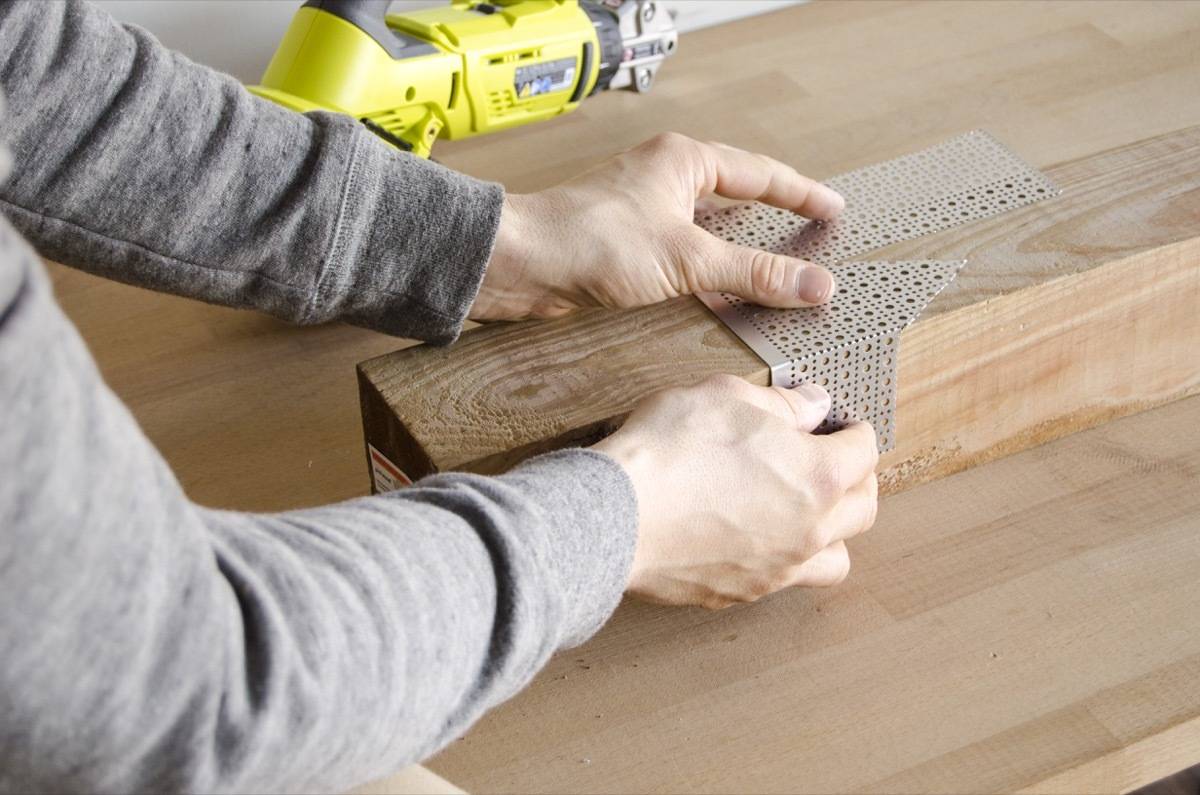 Fold the house-shaped luminary together. It helps if you have a sharp edge to fold against, like we did with this piece of wood. The longest piece of the template acts as both sides of the roof. Watch out for sharp corners!
Step
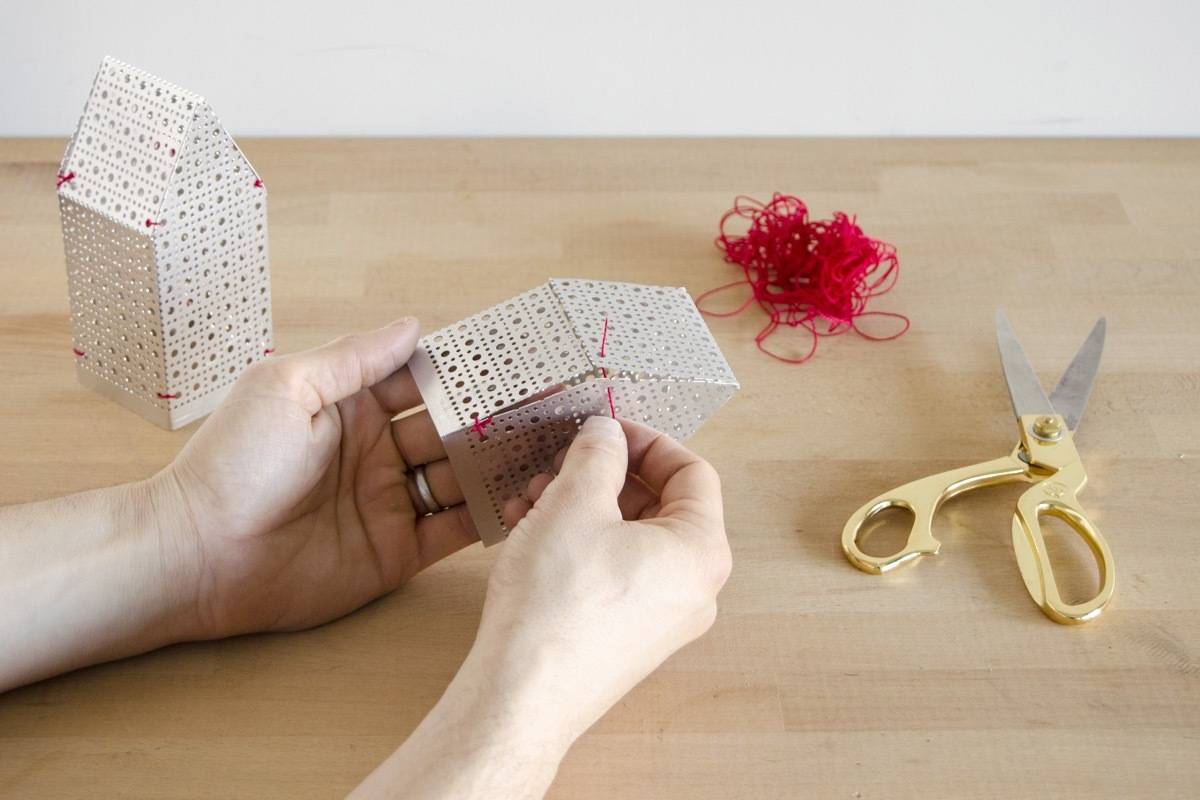
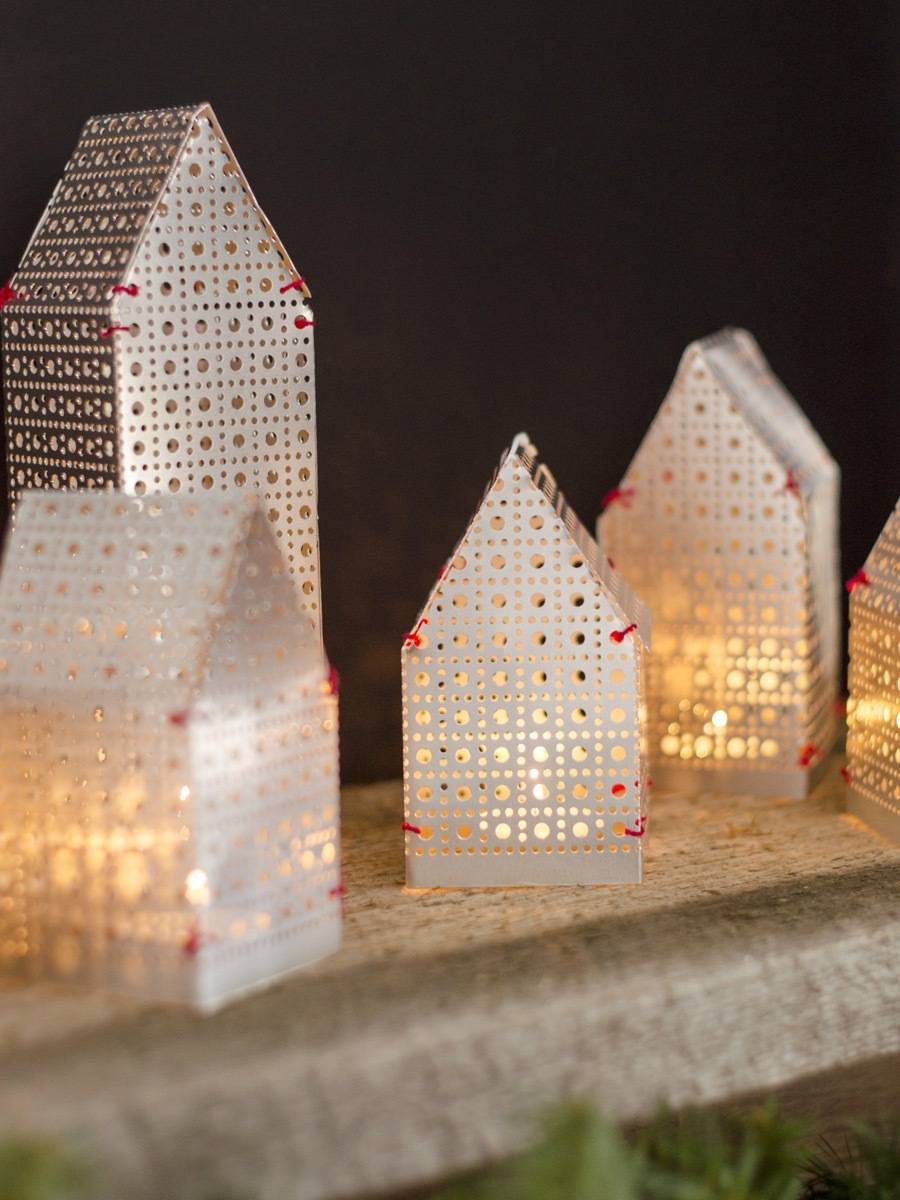
For the house to keep its shape, tie the loose edges together with thread. If you want to use real candles instead of L.E.D. ones, use wire instead of thread. Be aware, however, that the luminaries conduct heat very quickly, so if you’re going to use real fire inside them, they will get hot!
Do you have a lot of errands to run this weekend? If you live in our neck of the woods, be careful out there! Those roads are slick!
This post was sponsored by The Home Depot, but all opinions are mine alone. We love working with companies that support DIYers, and thank you for supporting the brands that help make Curbly possible! This post contains affiliate links; if you click on them and buy a product, we may get a commission from the sale.