
When it comes to Christmas Day activities, it’s fair to say that the adults in our household could just eat and chat from morning ’til night. After all, there’s a lot to catch up on when the whole gang gets together!

But now that our family is starting to expand with the next generation of littles, having something to keep the kids entertained has become much more of a focus than it was in years past.
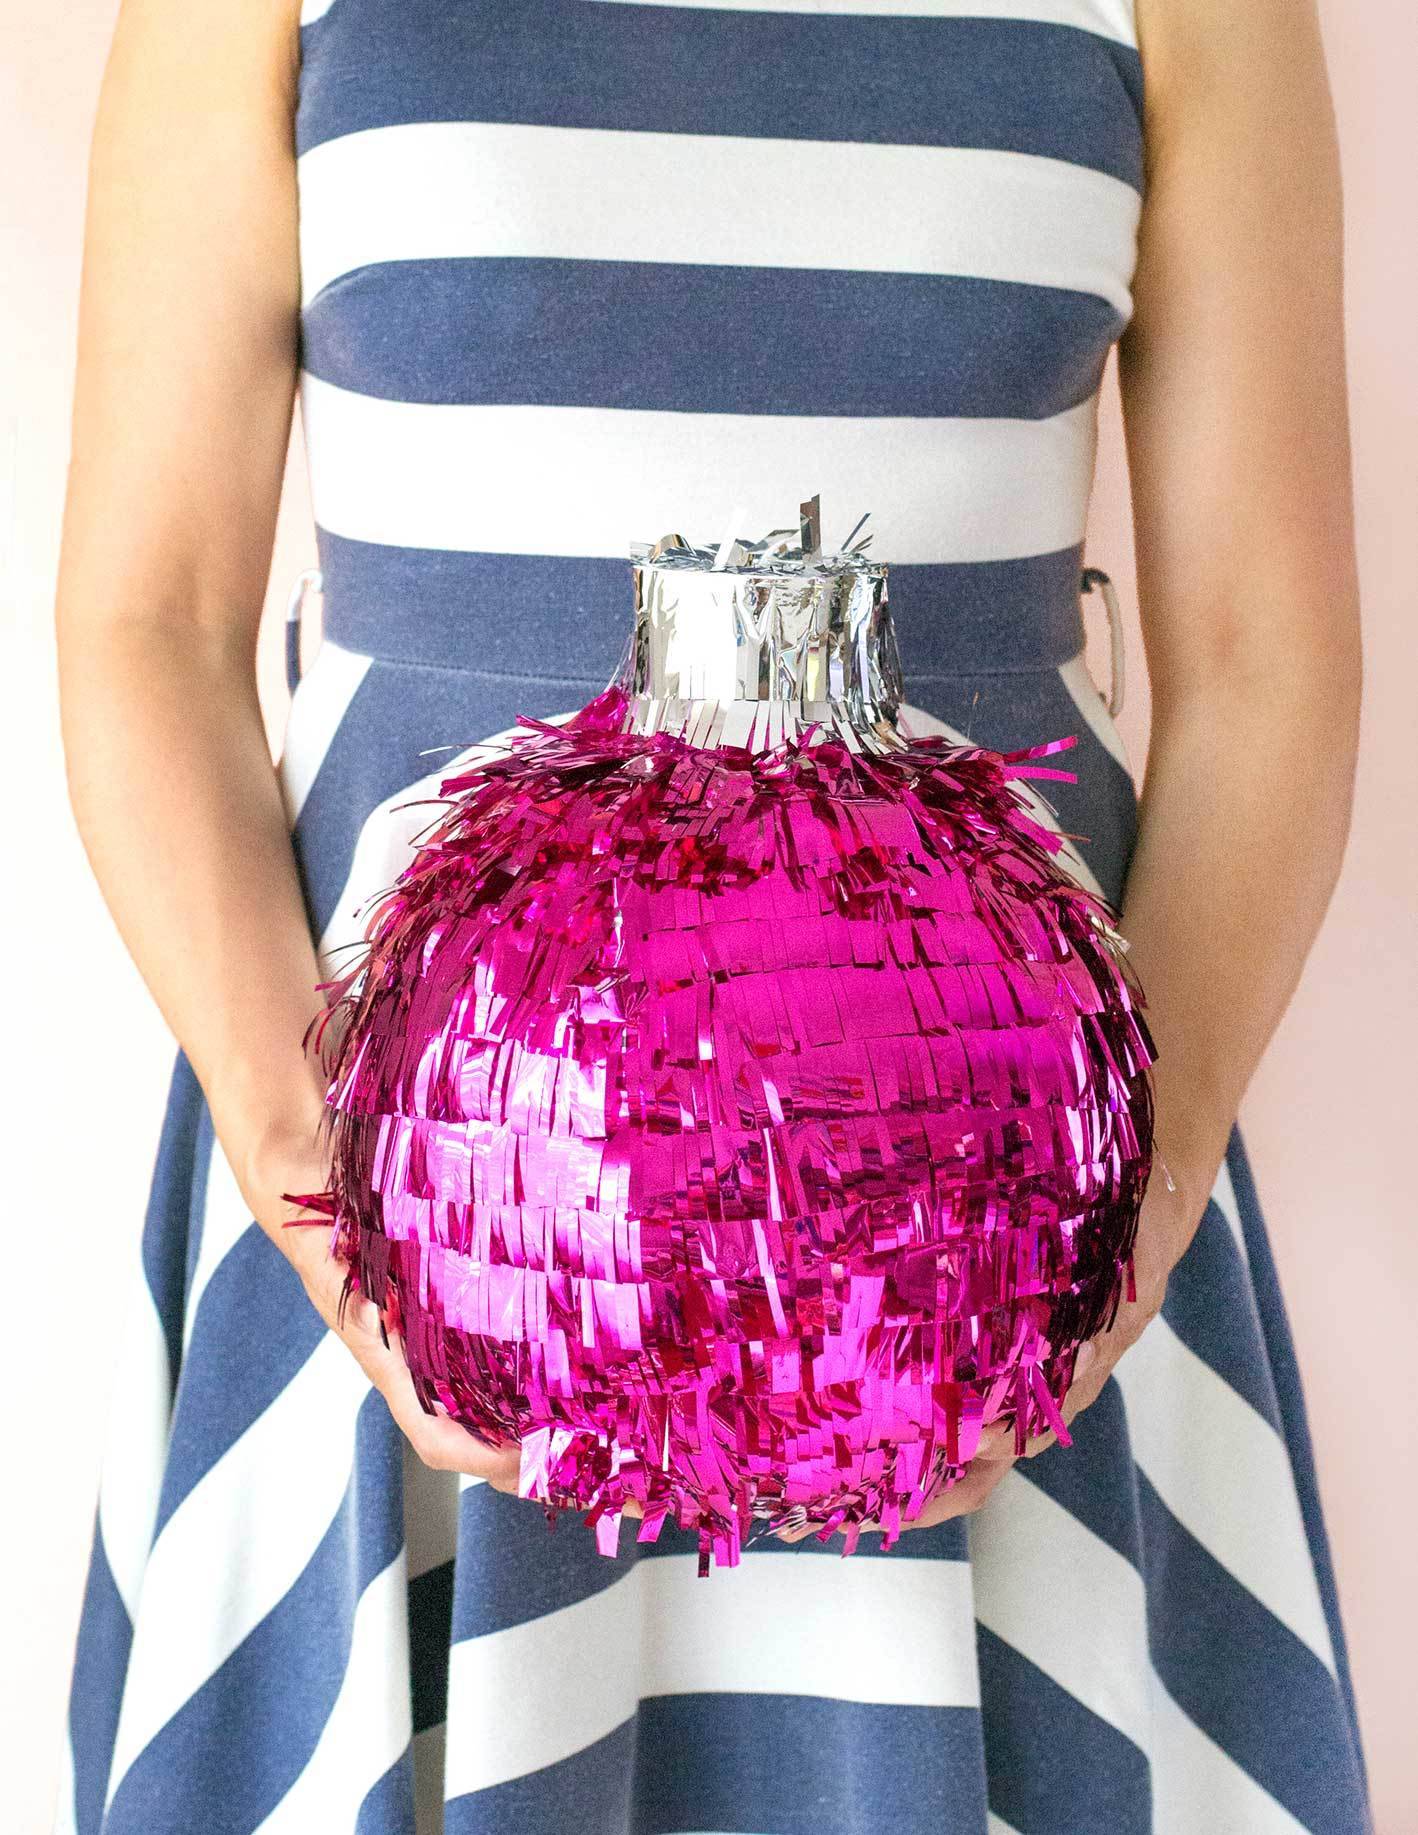
And since piñatas are a big hit with both the young and young at heart, I thought I’d try my hand at whipping up a bauble-shaped one for this year’s festivities. Best part of all? It’s mess free, no paper mache required!
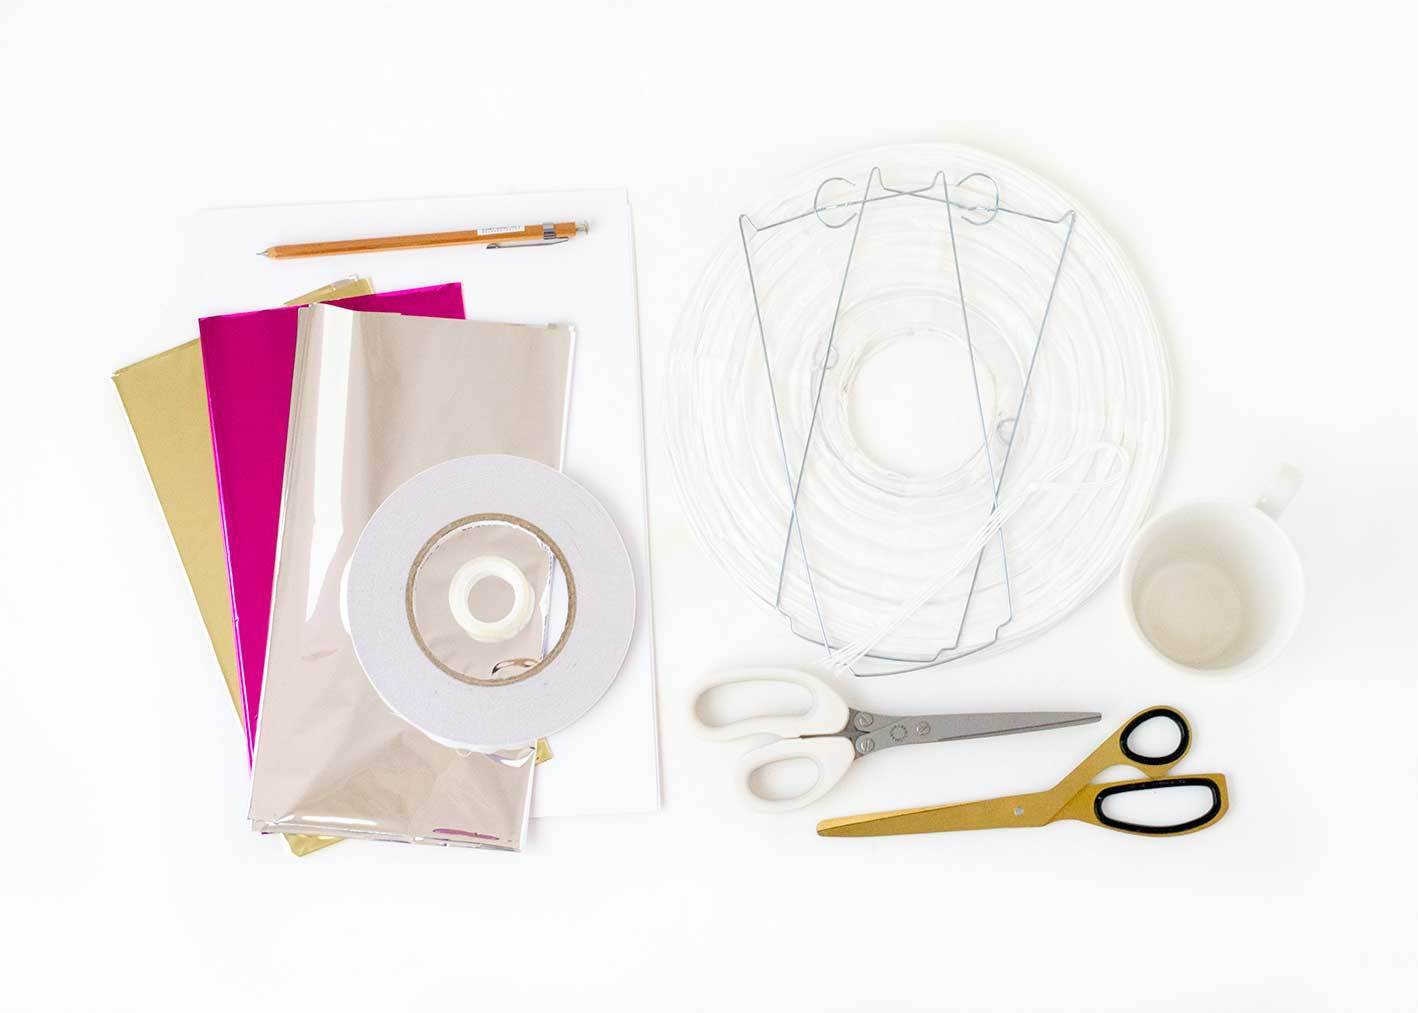
Materials
- Paper lantern
- Metallic tissue paper or cello sheets
- Double-sided tape
- Regular sticky tape
- White card
- Scissors (regular, plus fringing scissors if you have them)
- Medium sized circular object (a cup will do)
- Pencil
- Ruler
- String or twine
- Candy
Step
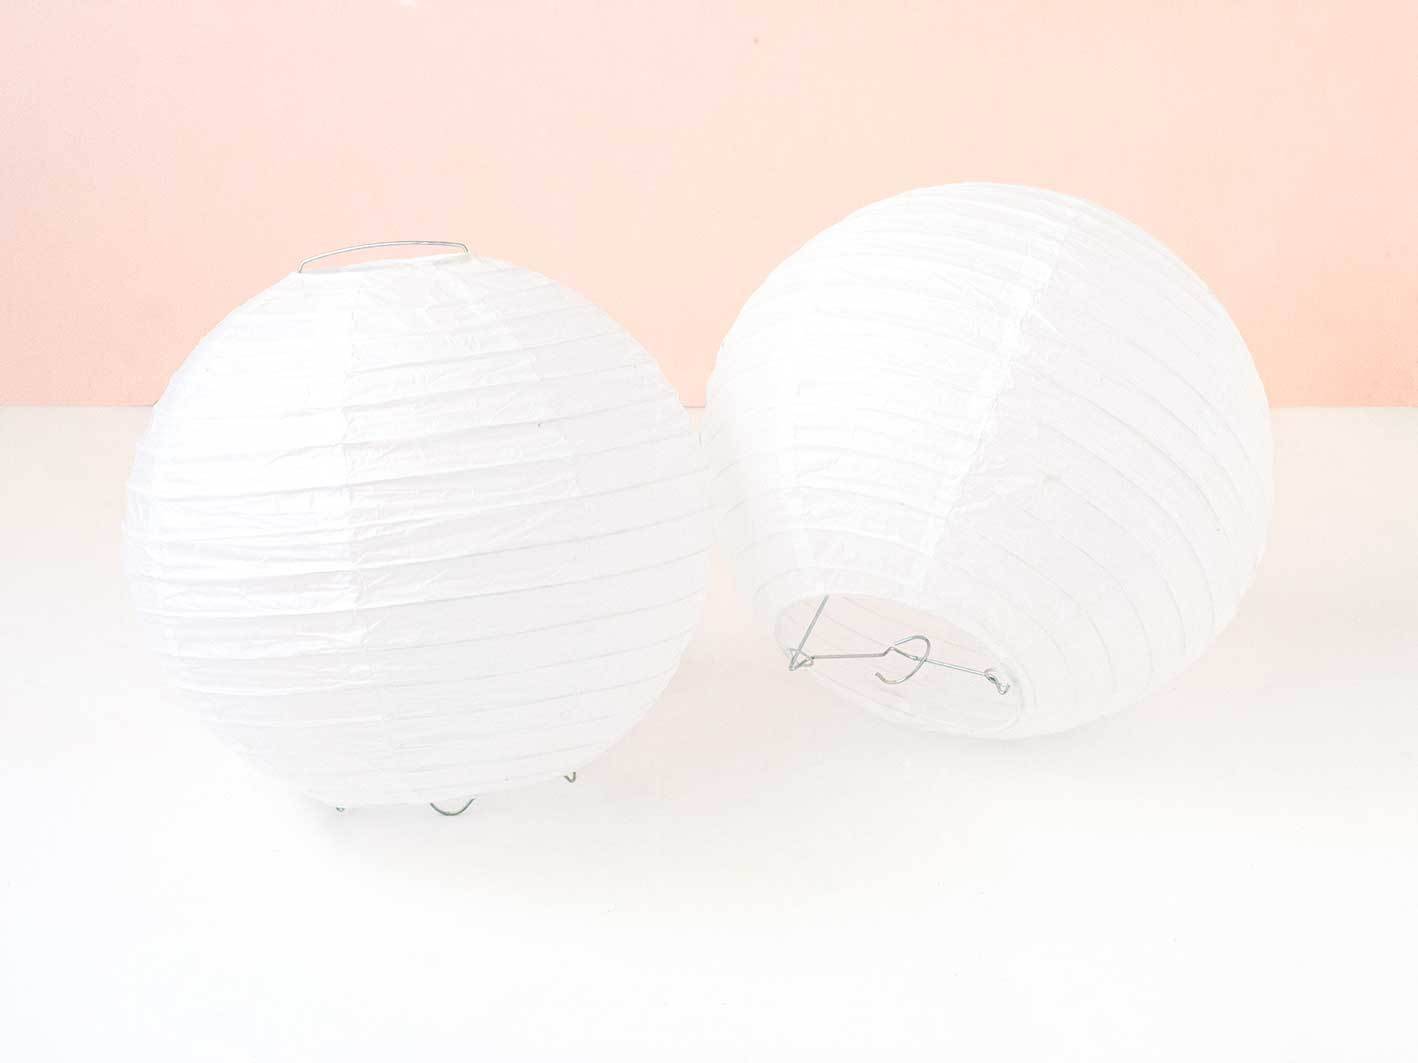
Assemble your paper lantern according to the instructions on the packet.
Step
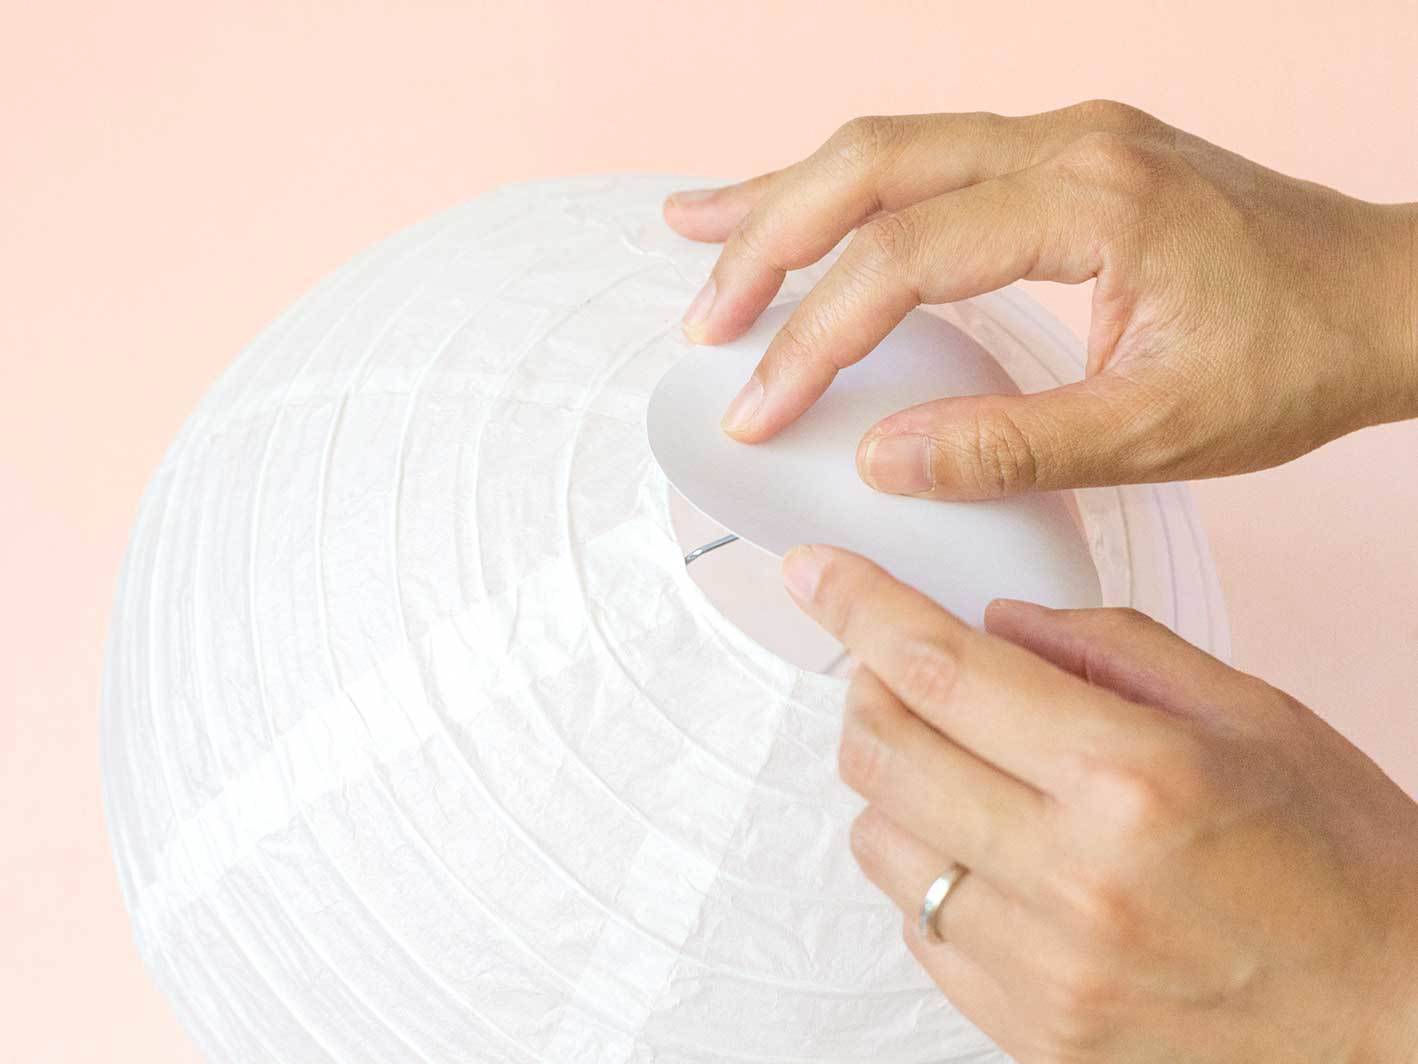
Close up the hole at the bottom of the lantern with a cardboard circle taped in place.
Don’t worry about making this part look good – you just want to ensure that the bottom of the lantern is sealed off so that your candy doesn’t fall out. The fringing will eventually hide the cardboard from view.
Step
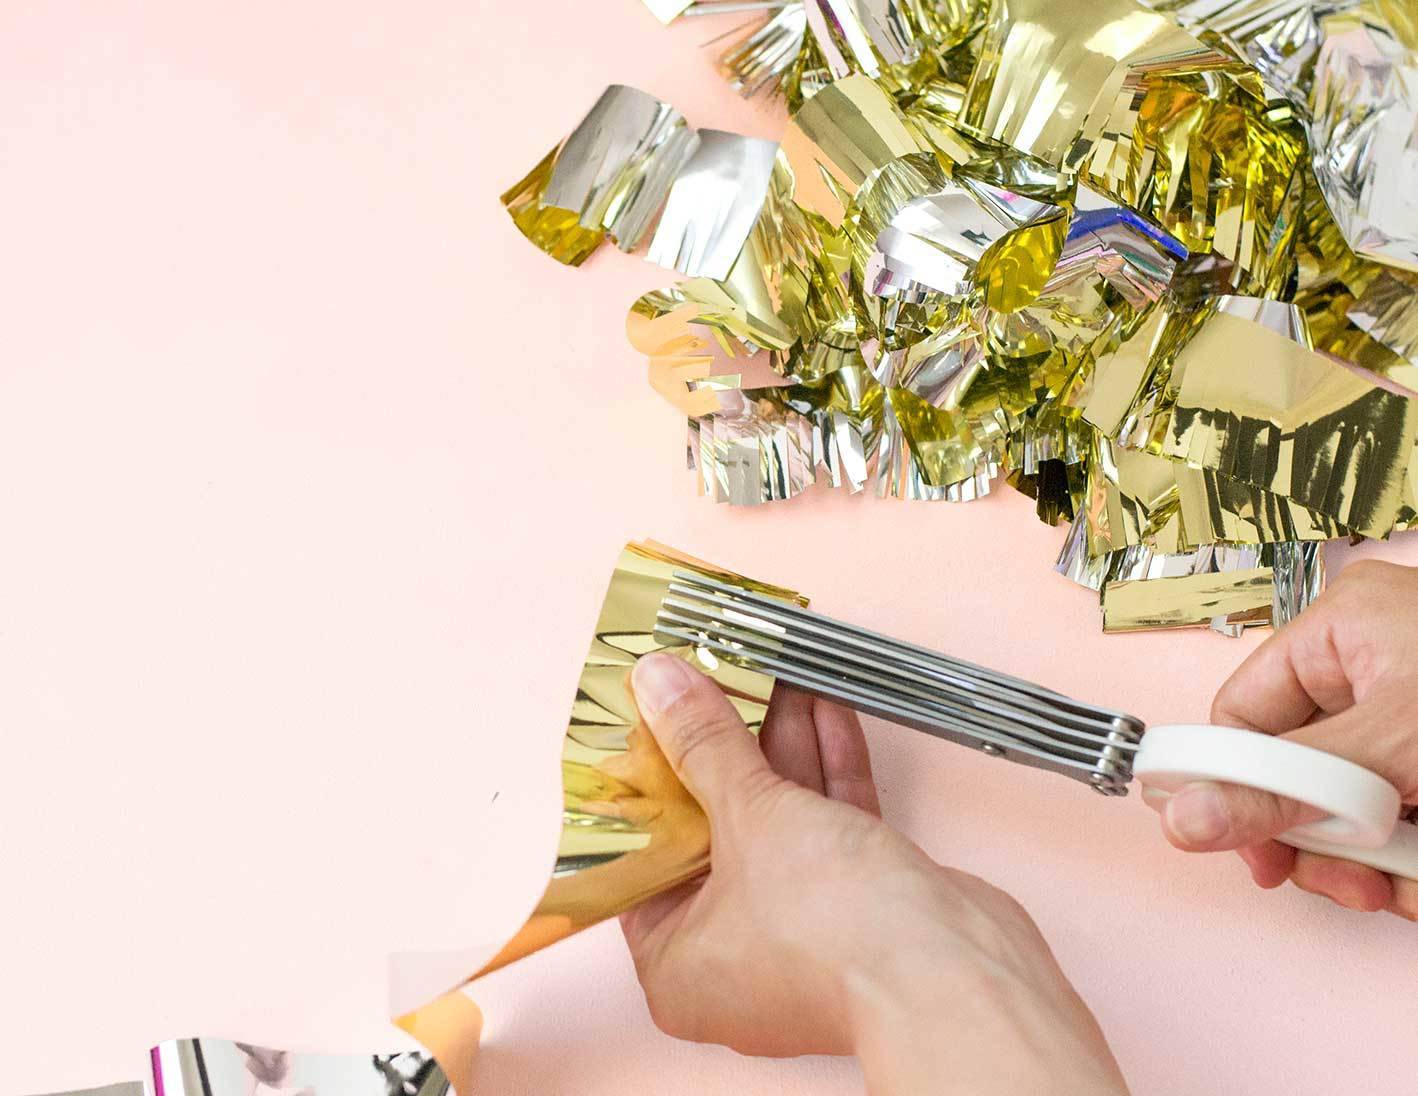
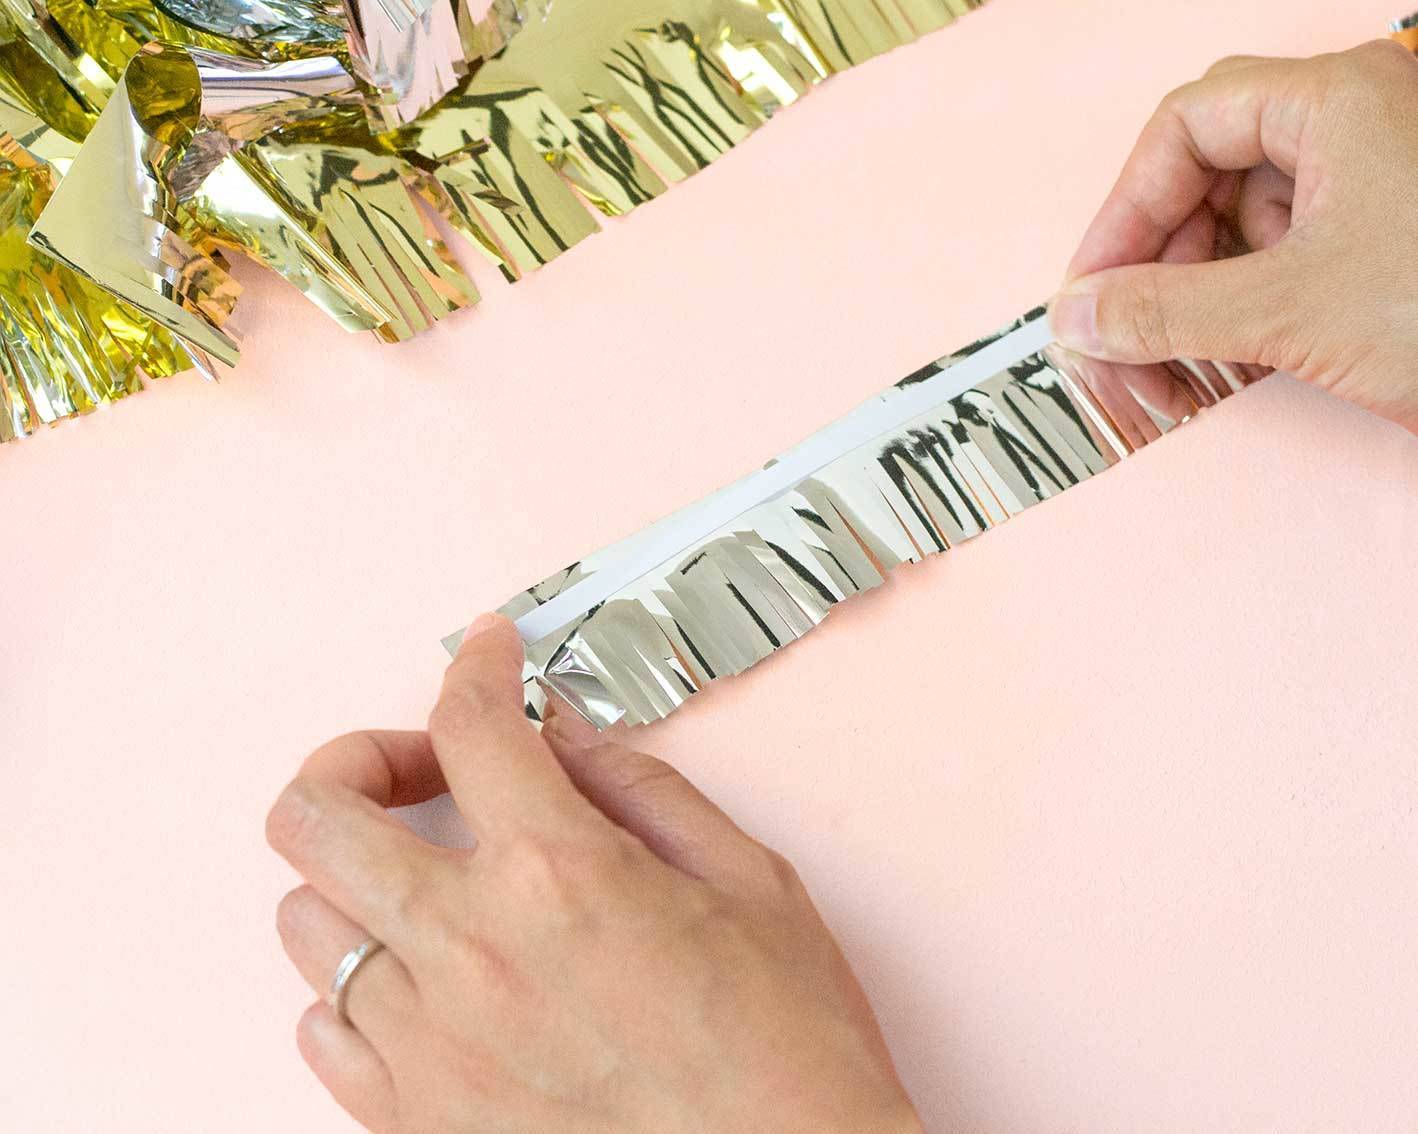
Start cutting your cello sheet into strips (I made my strips around 2 inches wide).

Step
Once you’ve cut all your strips, start trimming them to create a fringe. To do this, snip partway into your strips at regular intervals, stopping before you cut all the way through.
Pro tip: Invest in a pair of fringing scissors to make this step go a whole lot faster!
Step
Begin covering your lantern with the fringed cello strips.
To do this, apply a length of double-sided tape to the back of your fringe, on the uncut part.
Then start from the bottom and wind your way up to the top, sticking fringed strips around the lantern in a spiral.

When one strip of fringe runs out, stick the next one on and keep working your way around the lantern.
Make sure you overlap each layer of fringe so no part of the lantern peeks out.
Step
Once you’ve reached the top and your lantern is fully covered in fringed strips, fill the lantern with candy.

Step
When your lantern has been filled, cut two semi-circle pieces of white card to cover up the hole in the top. Stick them down with sticky tape, leaving the metal hook exposed.
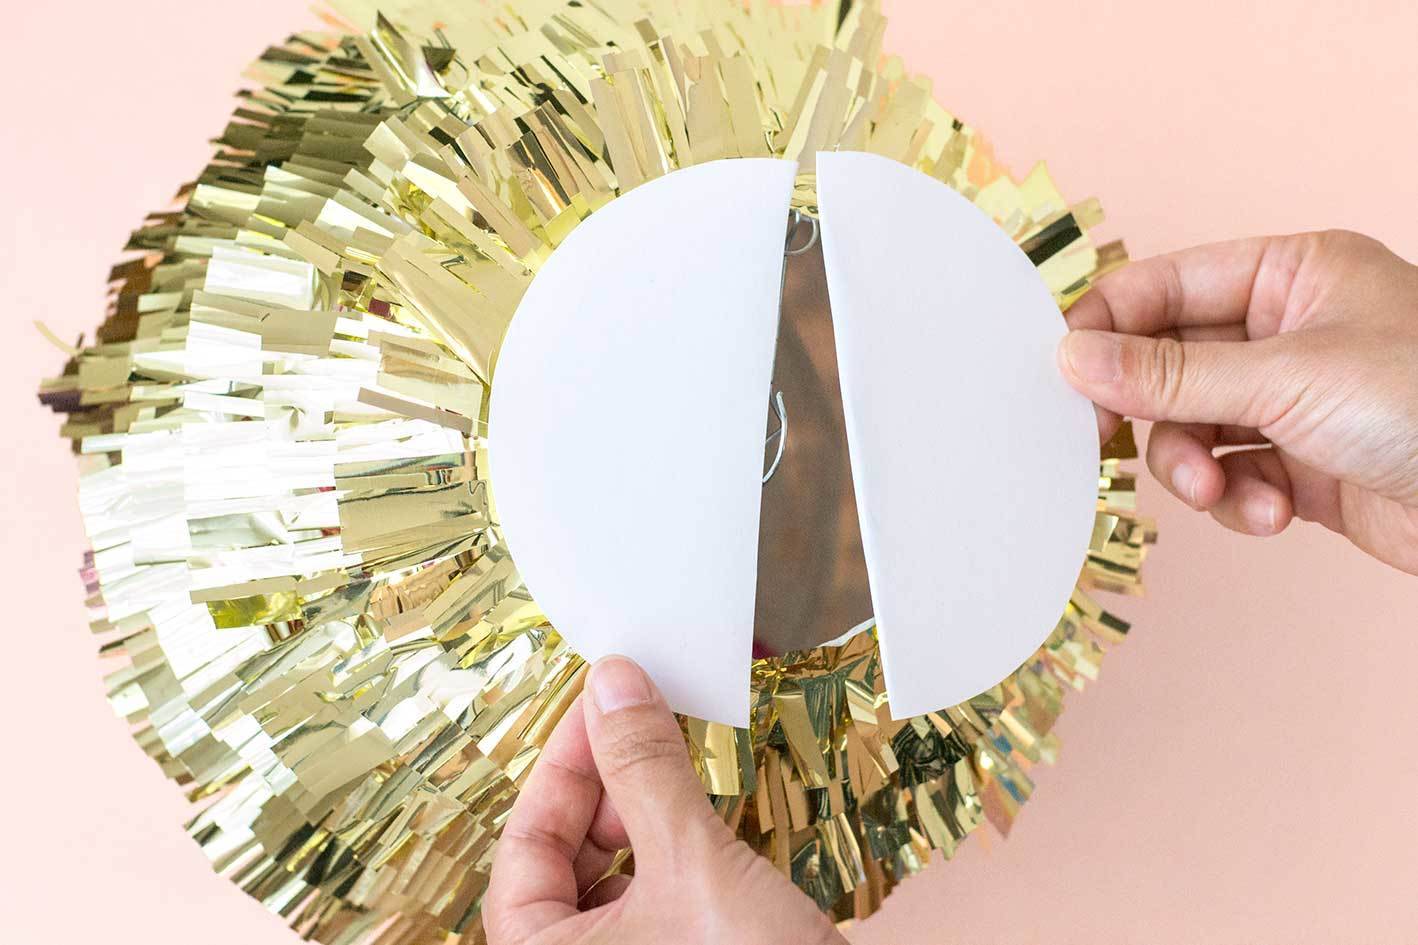
Then add more fringe to conceal the cardboard.

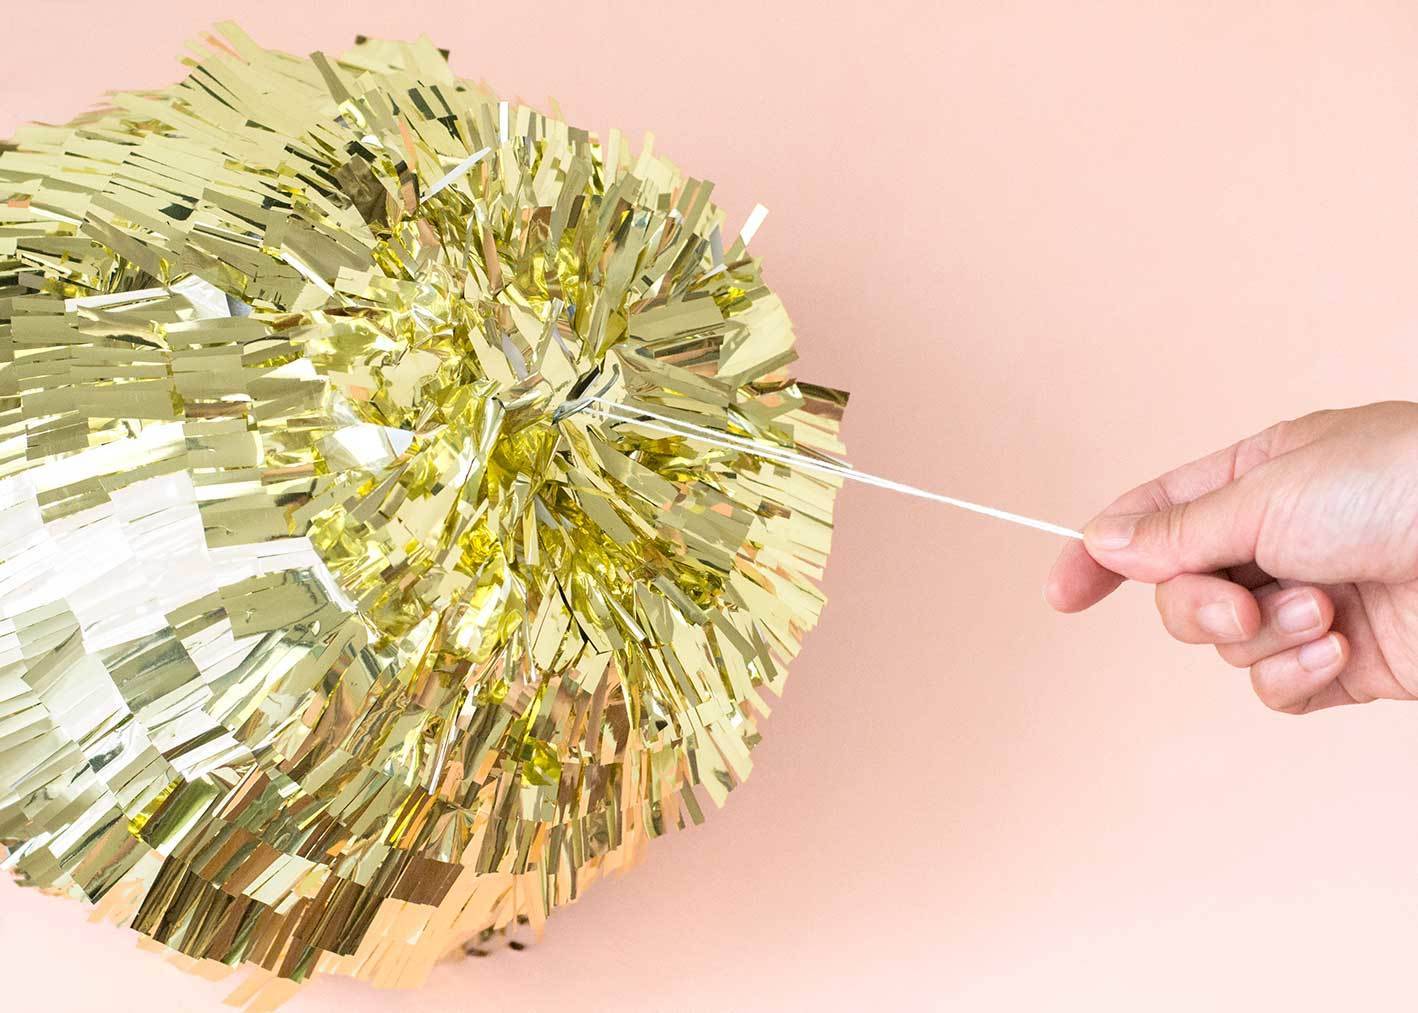
Step
Tie a piece of string or twine to the metal hook at the top of your paper lantern.
Step
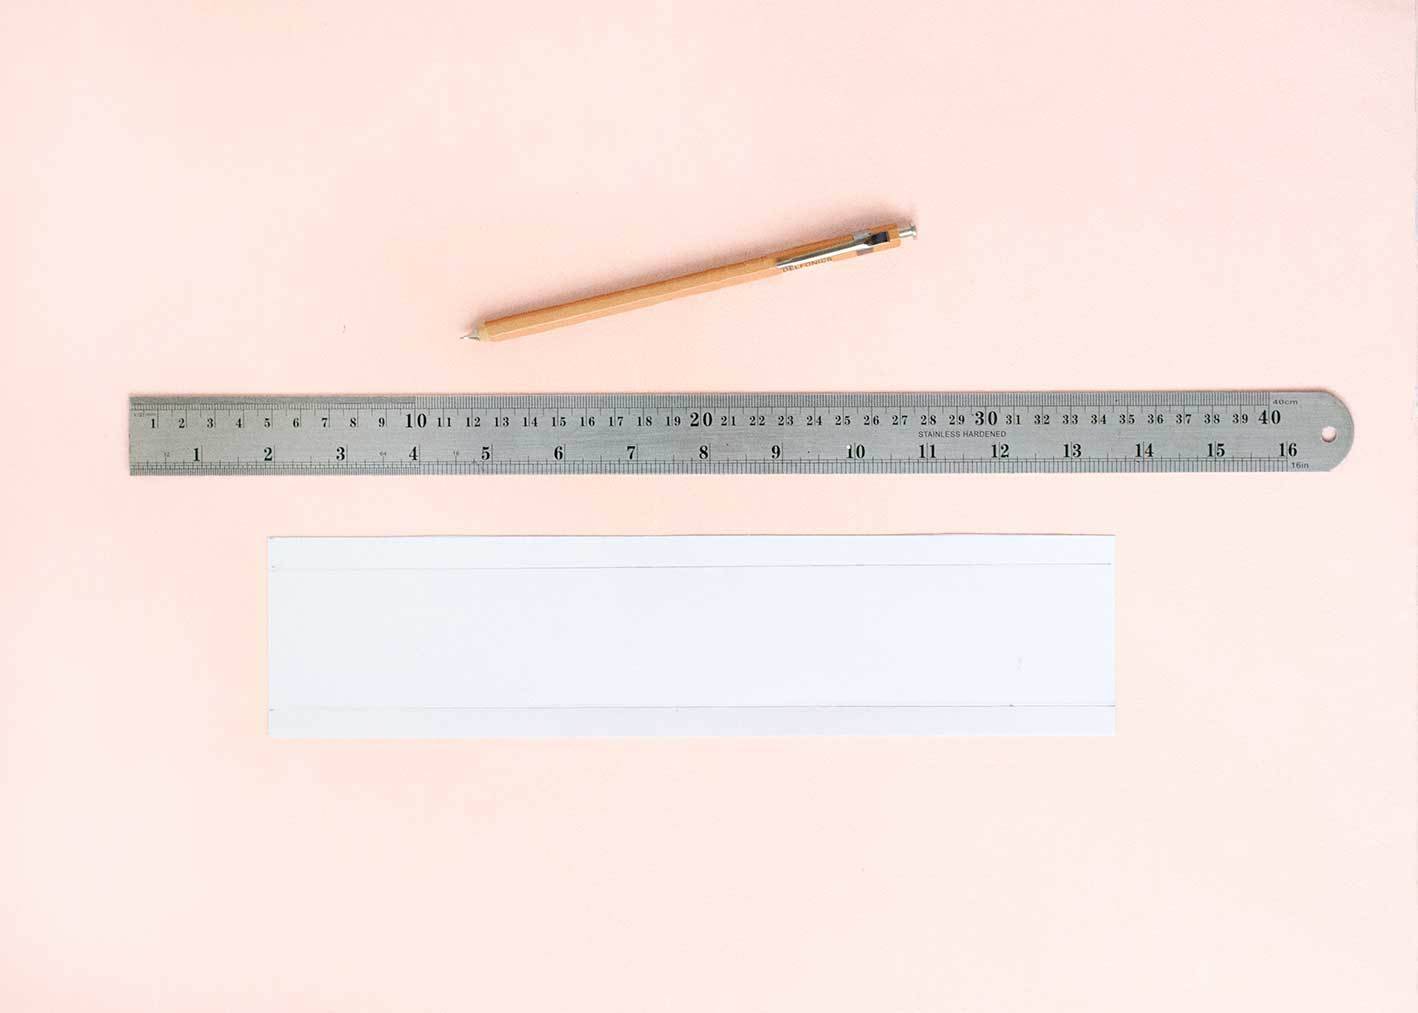
Draw a small circle on white card by tracing around a circular object (like a cup). Then cut out the circle with a pair of scissors.

Step
Cut a length of card that’s around 3 inches wide and long enough to bend all the way around your cardboard circle.

Step
Use a ruler to divide the length of card into 3 sections: 2 ‘tabs’ that measure 0.5 inches each and a larger section in the middle, which should measure roughly 2 inches wide.
Step
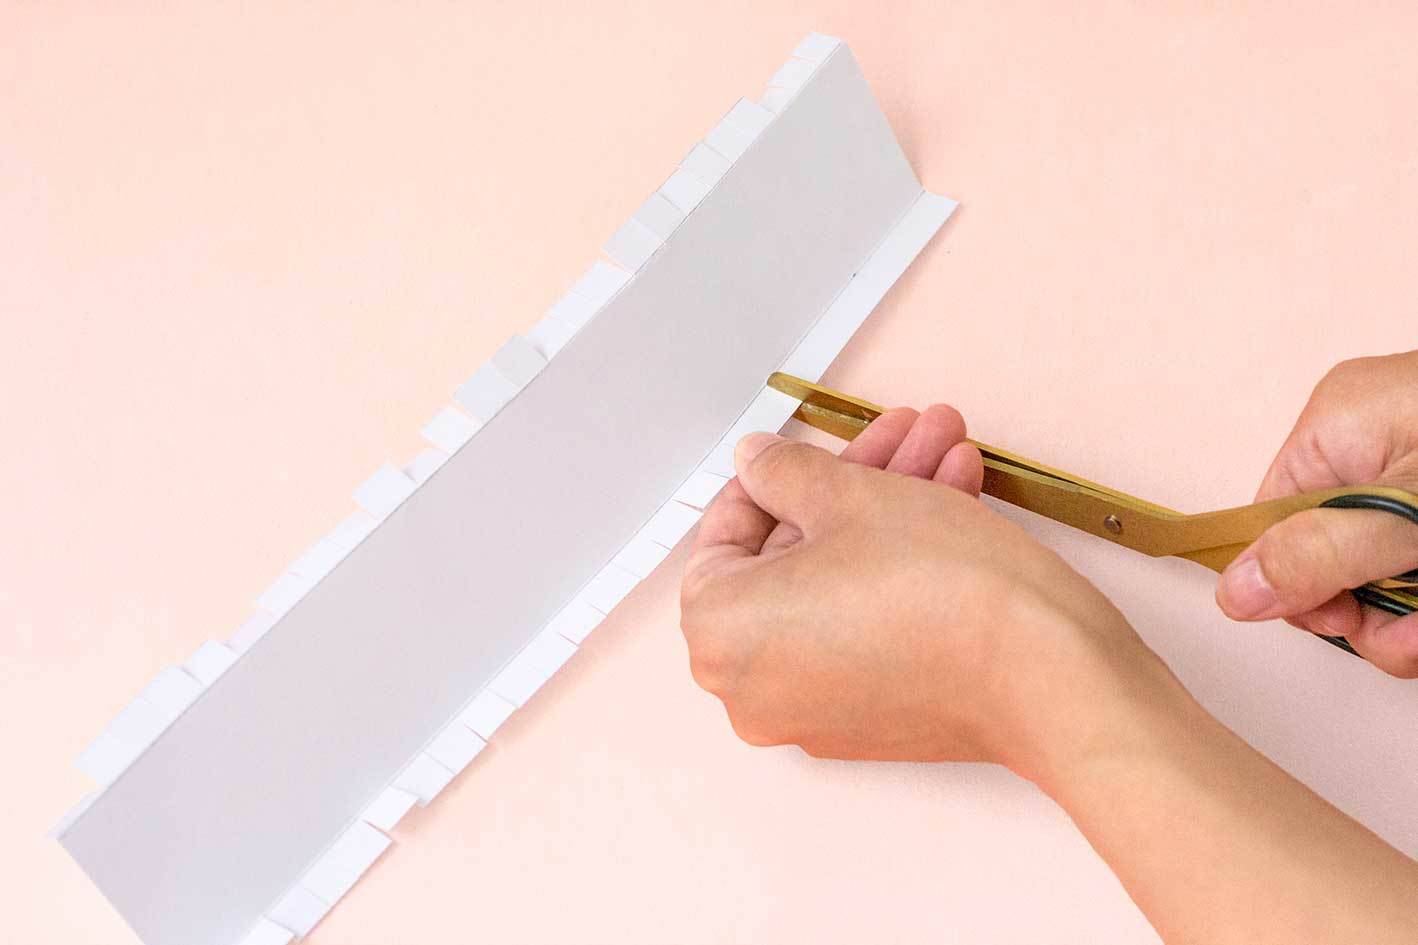
Fold the length of card along the tabs so that they point in opposite directions.
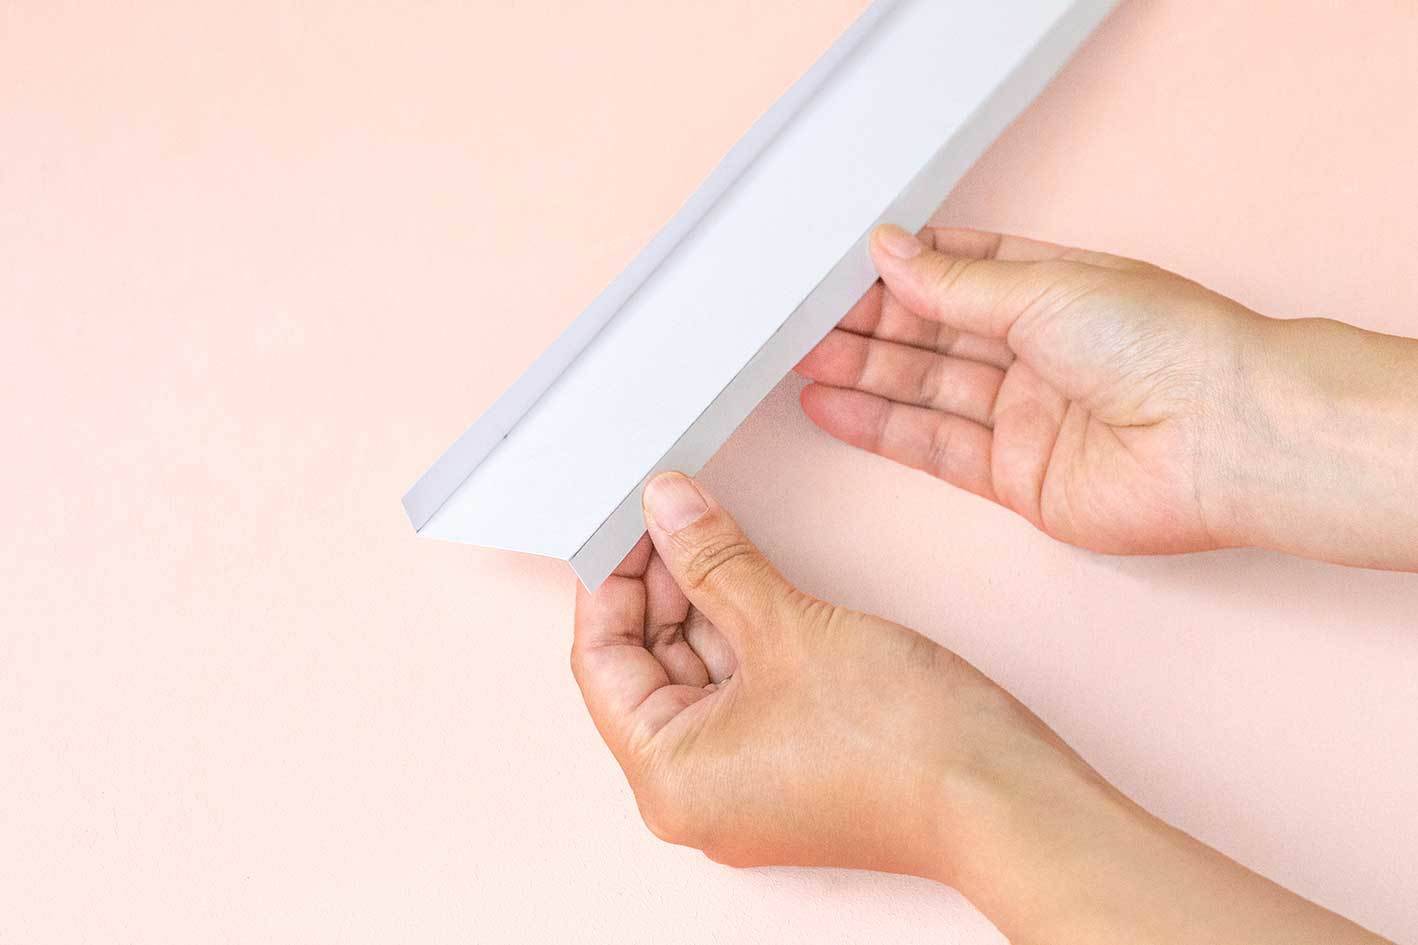
Then use a pair of scissors to make little snips in the tabs at intervals of around 0.5 inches.
Step
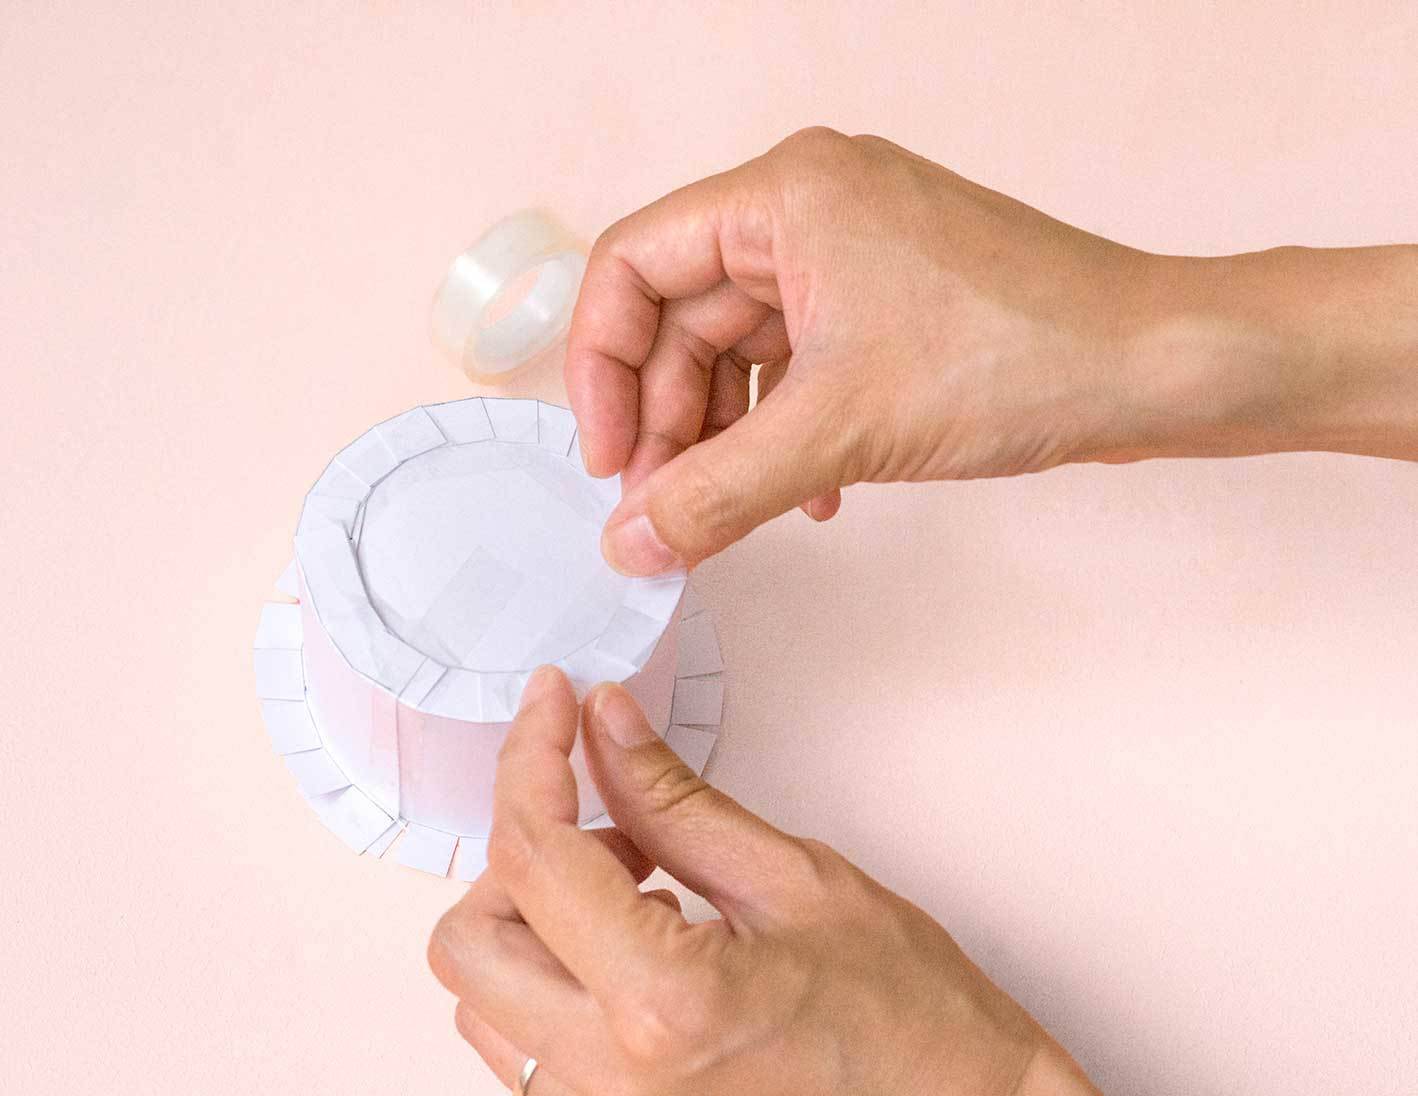
Bend your length of cardboard around the circle you cut in Step 9. Use the tabs and some tape to attach the circle to your cardboard strip.
You should now have an open-ended cardboard cylinder.
Step
Poke a hole in the middle of your cardboard cylinder and thread the string you tied in Step 8 through the hole so that the cylinder sits on top of your fringed paper lantern.
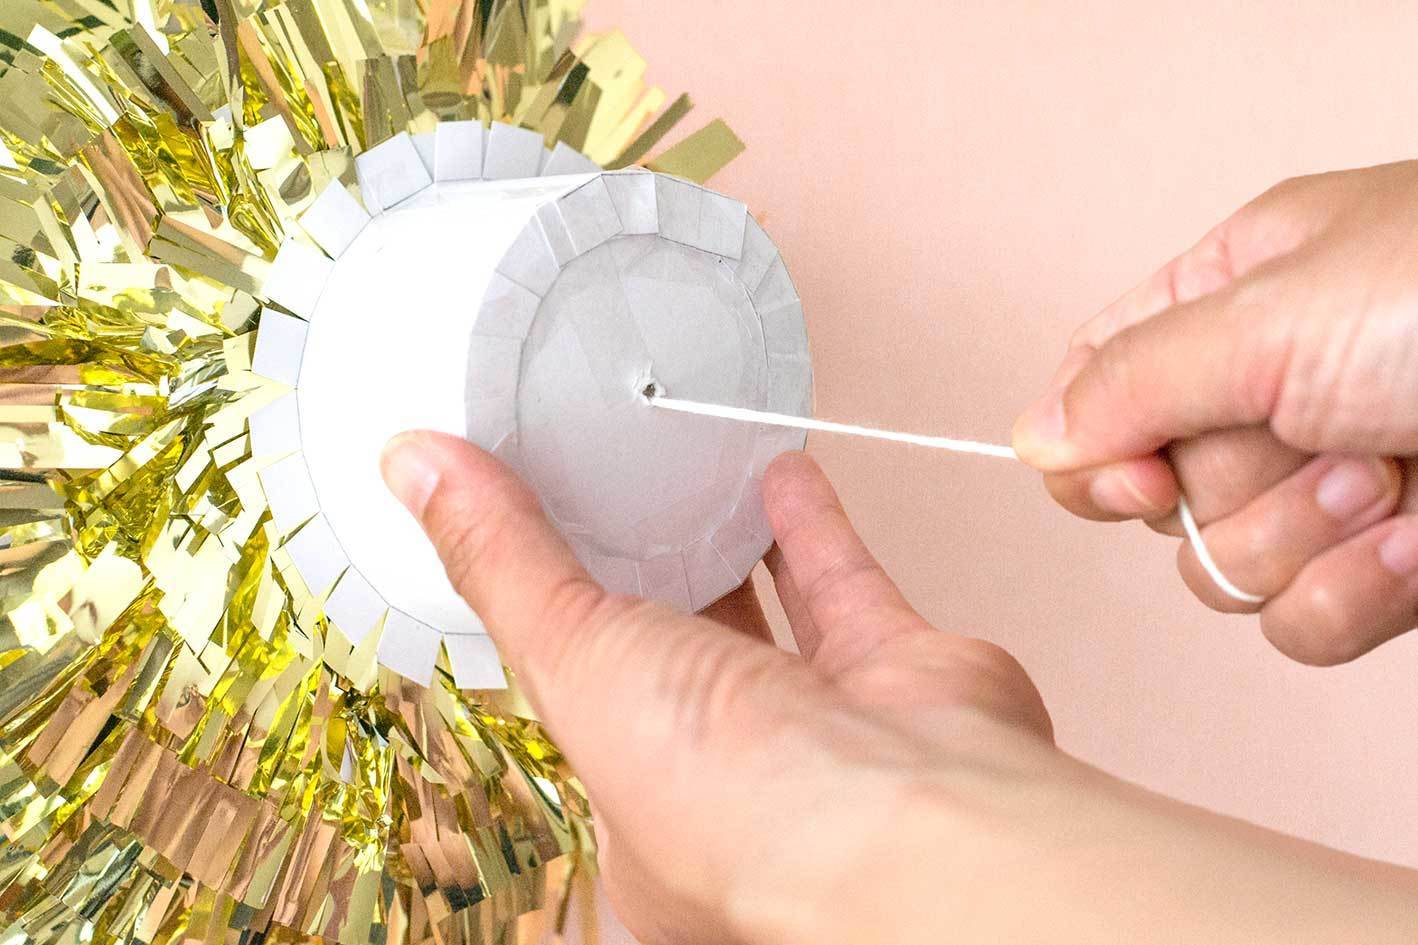
Step
Fix the cardboard cylinder firmly in place by taping it down along the tabs.

Step
Cover the cardboard cylinder with silver metallic fringing.
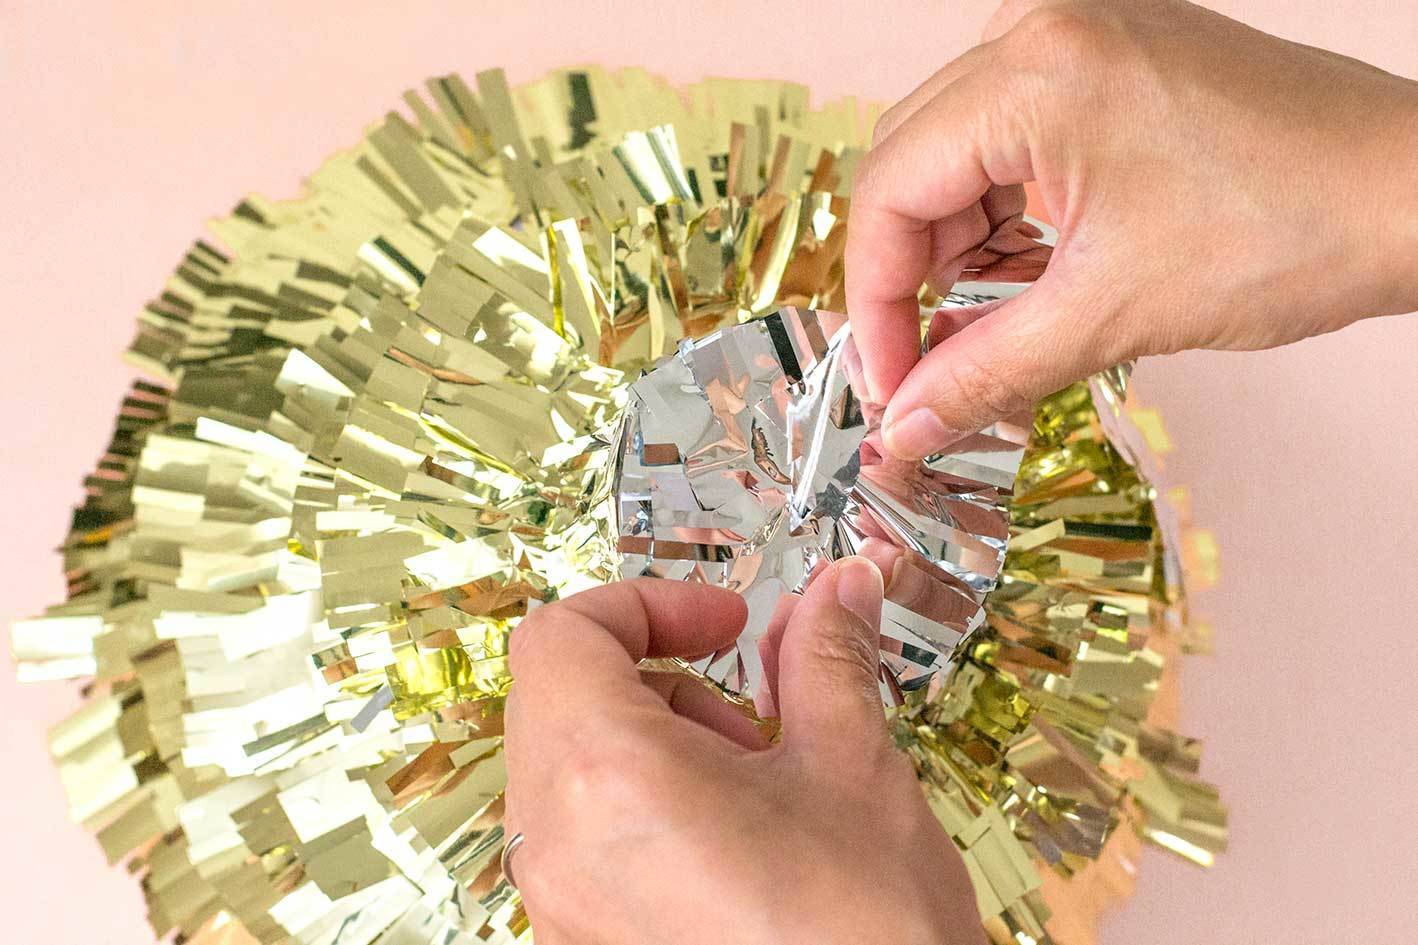
Once your cylinder is completely covered, your bauble piñata is ready for display!
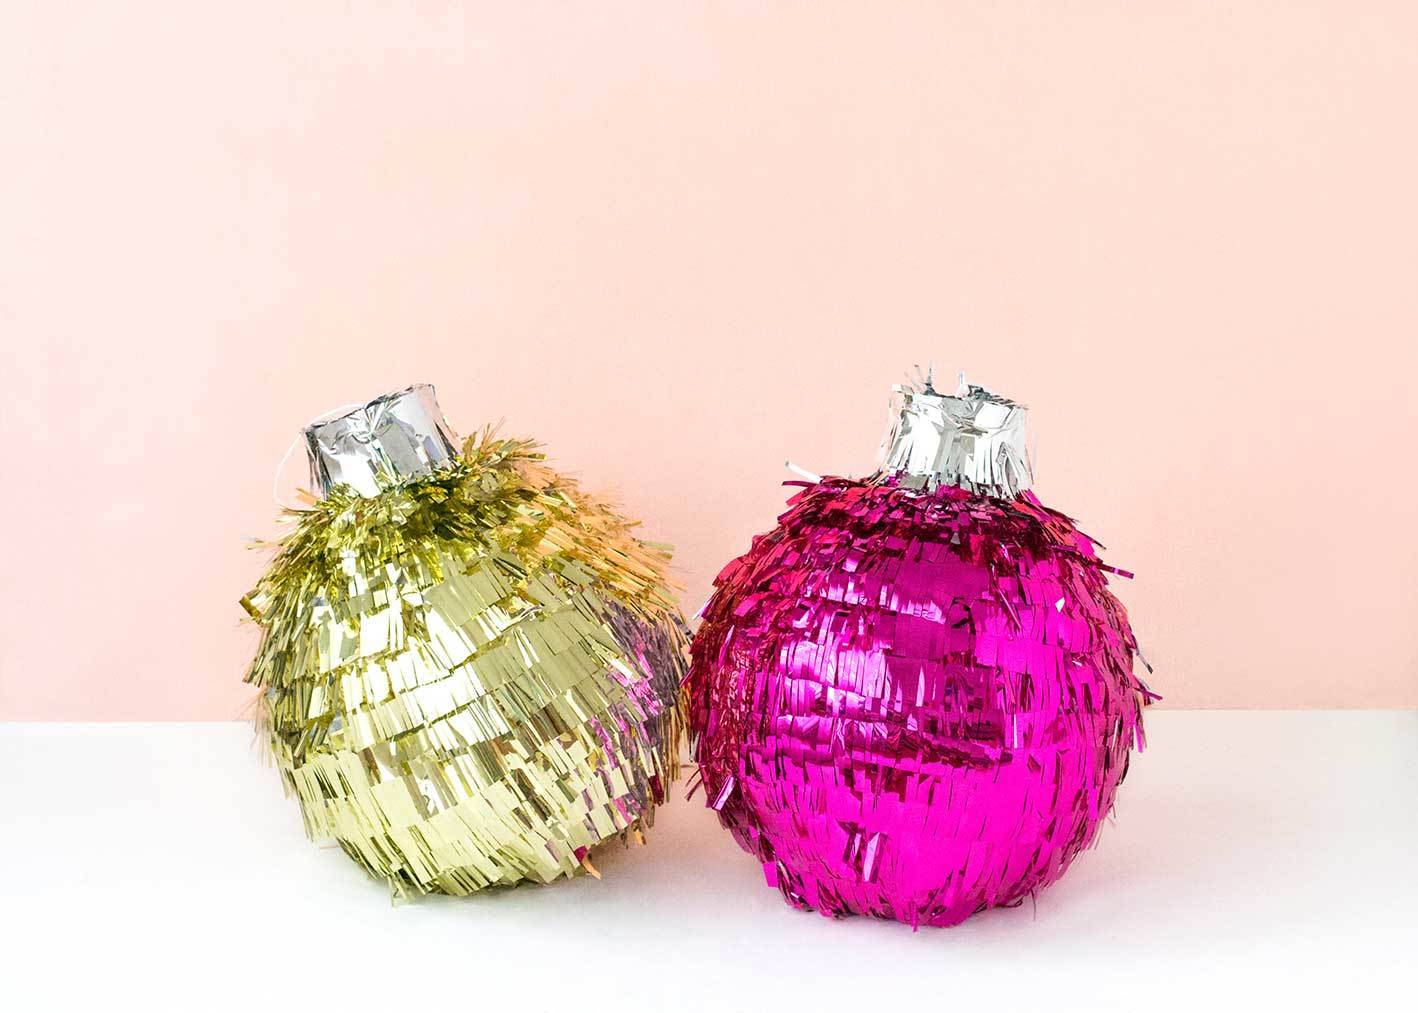
These piñatas do double duty during the festive season – make them early in December and hang them up as part of your holiday decorations, then bring them out for a good pounding on Christmas day!
