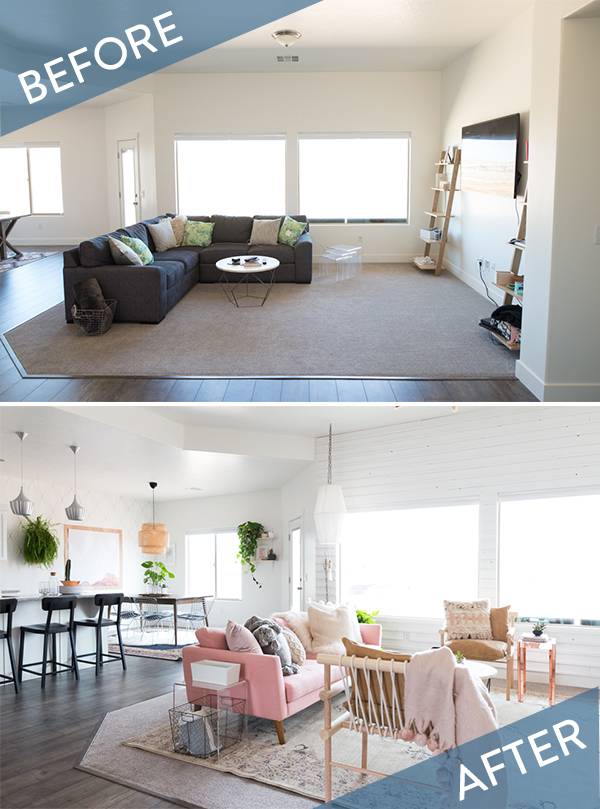
Sometimes large open spaces are harder to decorate than smaller ones. It’s sort of like someone asking you what your favorite food is… the sheer number of options is intimidating! All kidding aside though, it can be tricky to decide where to put what and how to fill up the space. Read on to find out how the problem was tackled in this living space.
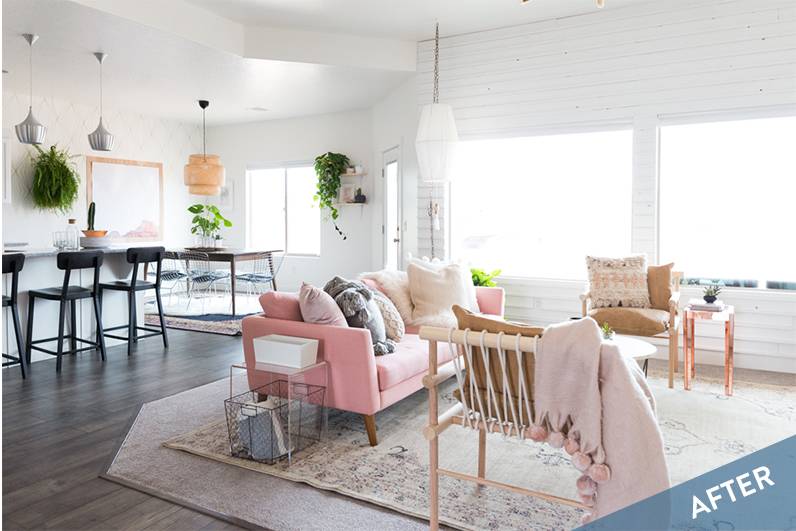
The new design is warm and inviting, and full without feeling overcrowded. Here are a few tips on how to achieve this look in your own home:
1. Create zones. Begin by deciding what function each area will play, and then delineate those areas. Be sure to add space for people to walk between each zone.
2. Use rugs to your advantage. Rugs are a great way to anchor the zones that you just picked out in step 1. Leave the walkways in between rug-less.
3. Consider each area individually and as a whole. Be sure to examine each zone with a detailed eye, but do also step back and make sure everything works well together too.
4. Try a variety of wall treatments. As you can see in the space above, the walls are all white but each zone has a different wall treatment. Ideas you might consider are wallpaper, shiplap, subtle painted patterns, etc.
5. Layer, layer, layer. When dealing with a large open area, you run the risk of it feeling stark and cold. To combat this, make sure you layer like crazy with a variety of different textures. This will make the space feel much more inviting.
To check out lots of more photos and info on this lovely makeover, head on over to Vintage Revivals.