
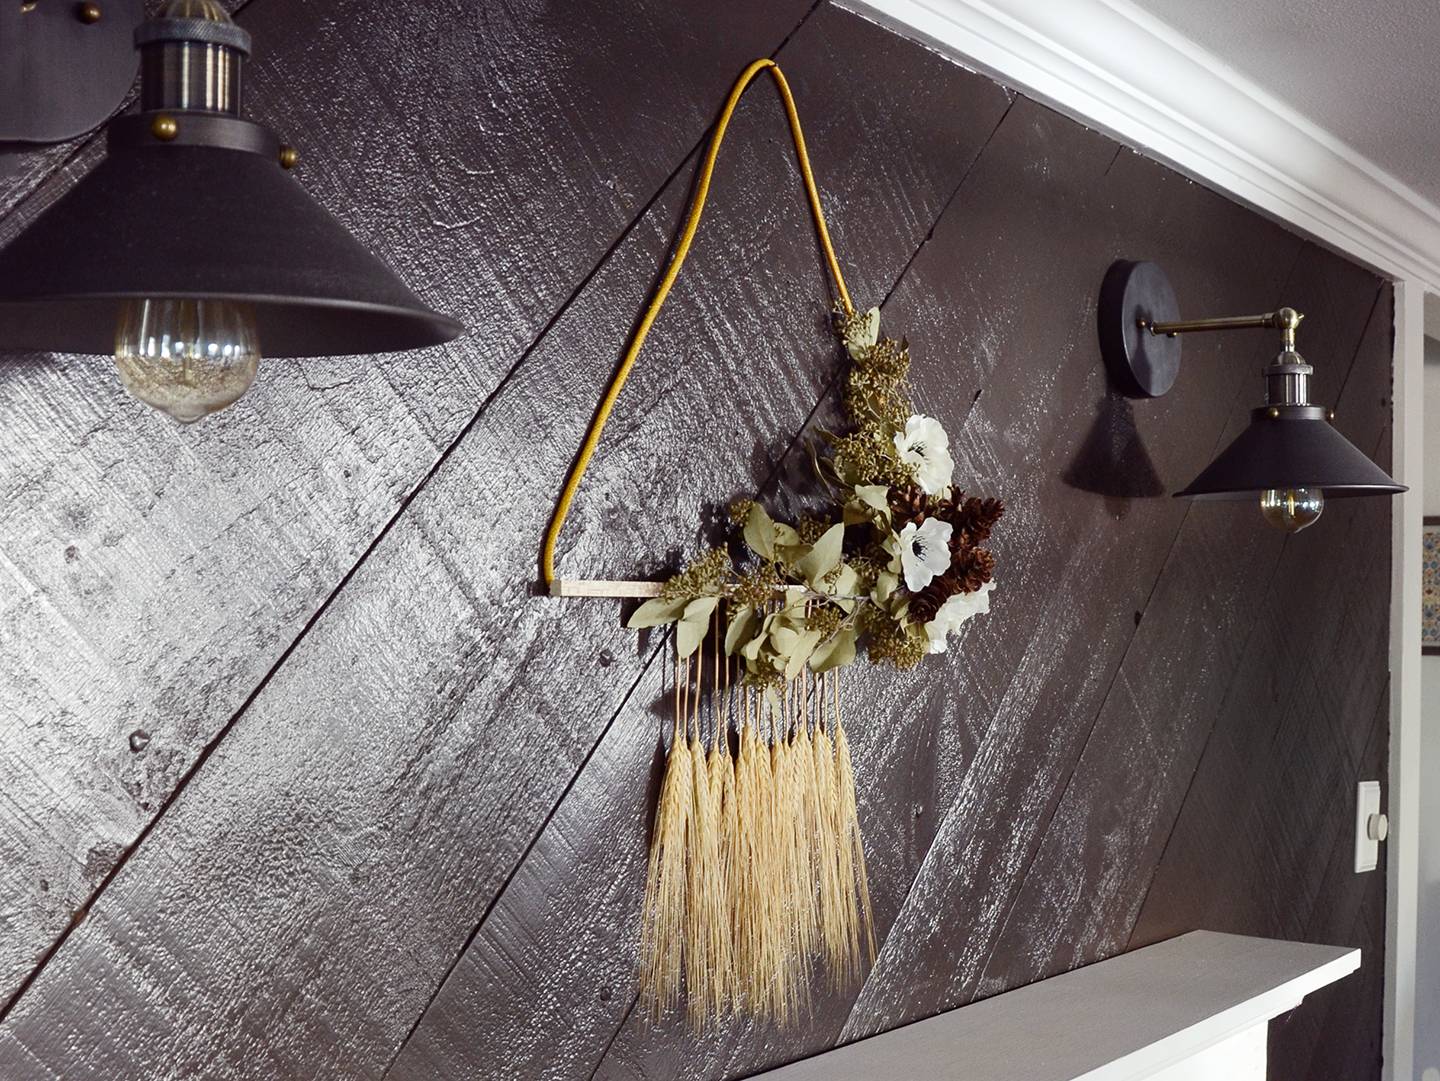
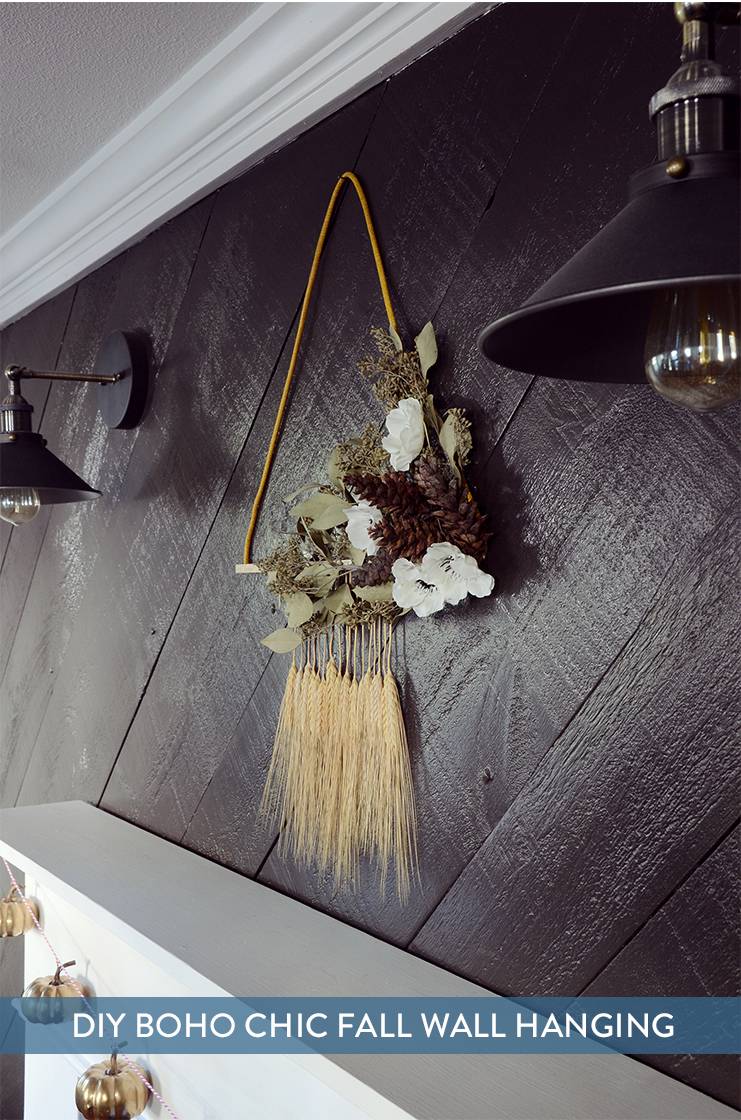
Whenever falls rolls around, I like to experiment with unique decorations that stray a bit from the traditional orange pumpkins and red leaves. This year I made a unique triangular shaped wall hanging with a decidedly bohemian vibe… and today I’m sharing the tutorial with you guys. Keep reading to check out the full tutorial!
Materials
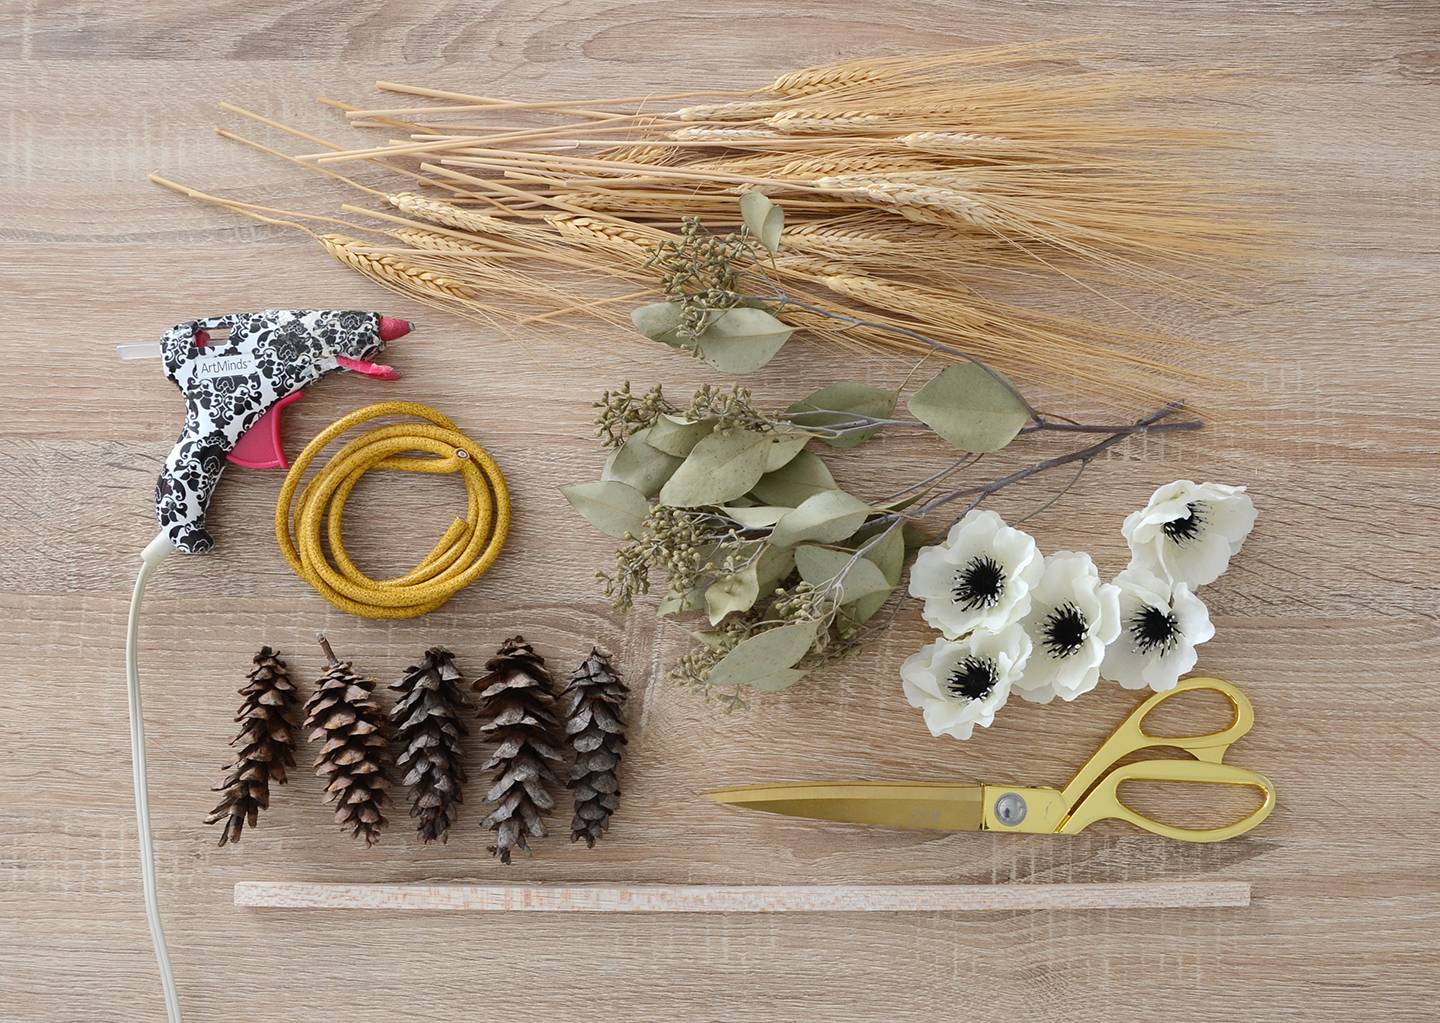
- 3/8″ square dowel rod, 16″ long
- Leather (or vegan leather) cord, 36″ long
- Pinecones
- Dried wheat, about 15 pieces
- Seeded eucalyptus (can be dried, artificial or fresh)
- White artificial anemone flowers
- Scissors
- Hot glue gun
- 2 small nails for mounting
Step
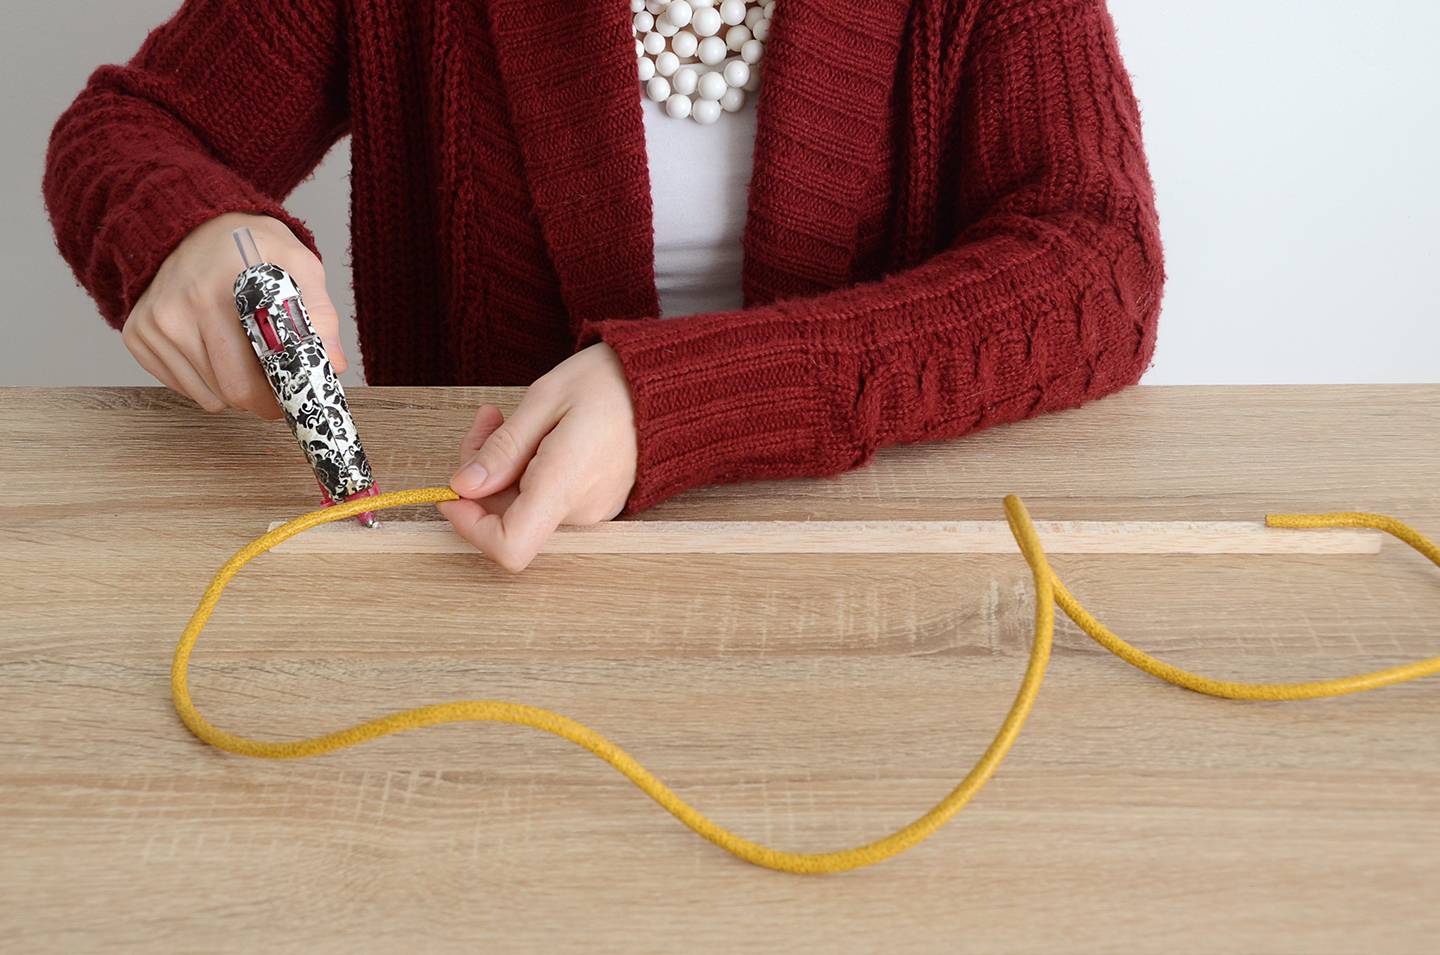
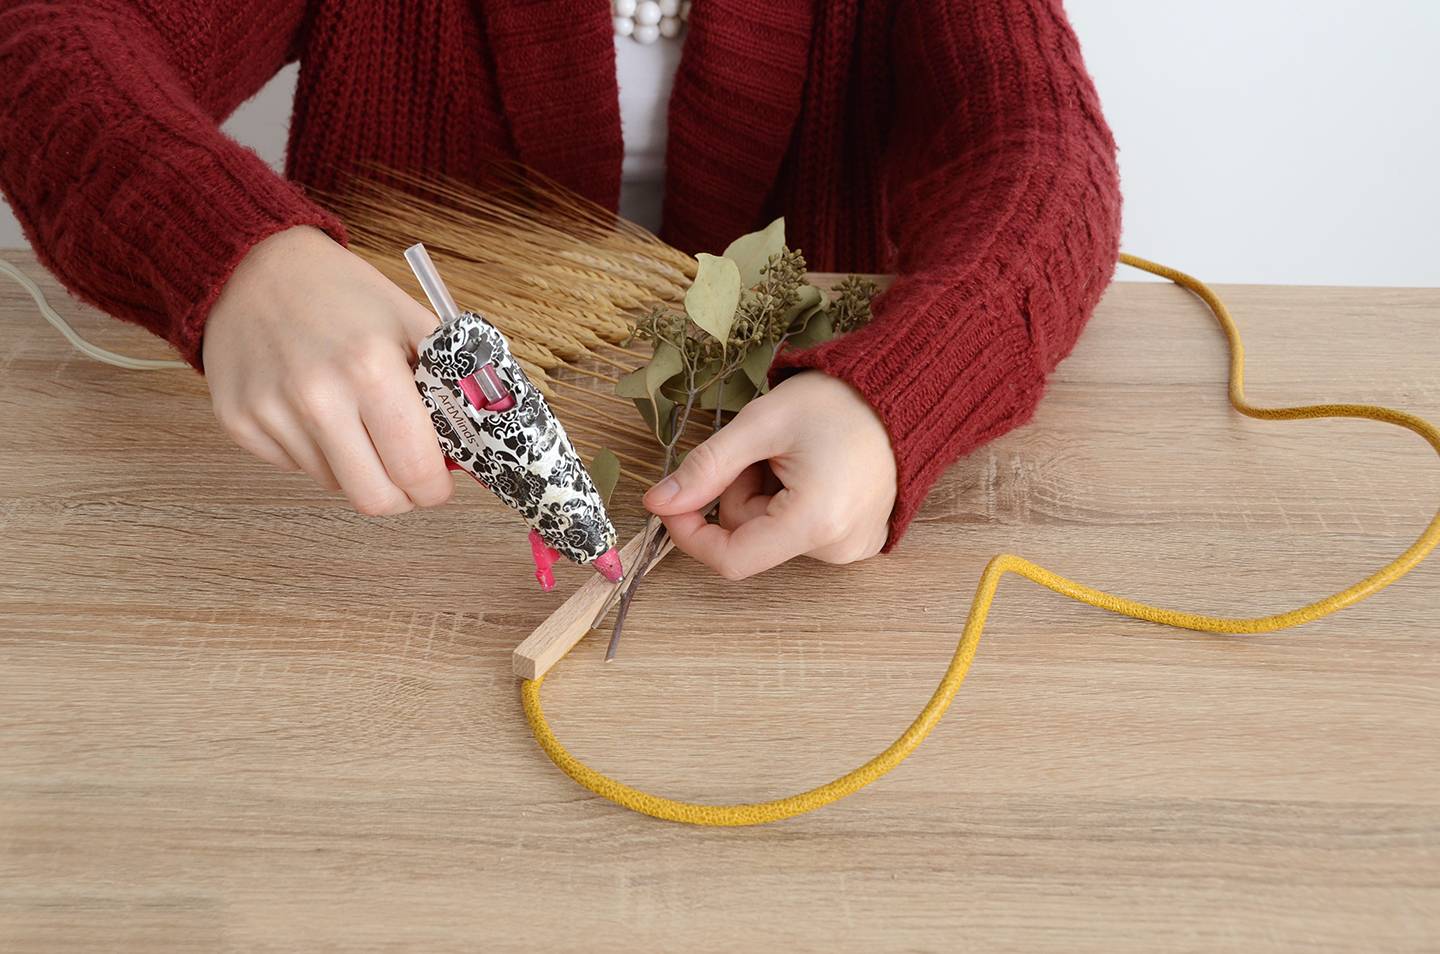
Begin by gluing the ends of the leather cord to the ends of the wooden dowel on the back side. Overlap the wood and cord by about 2 inches.
Step
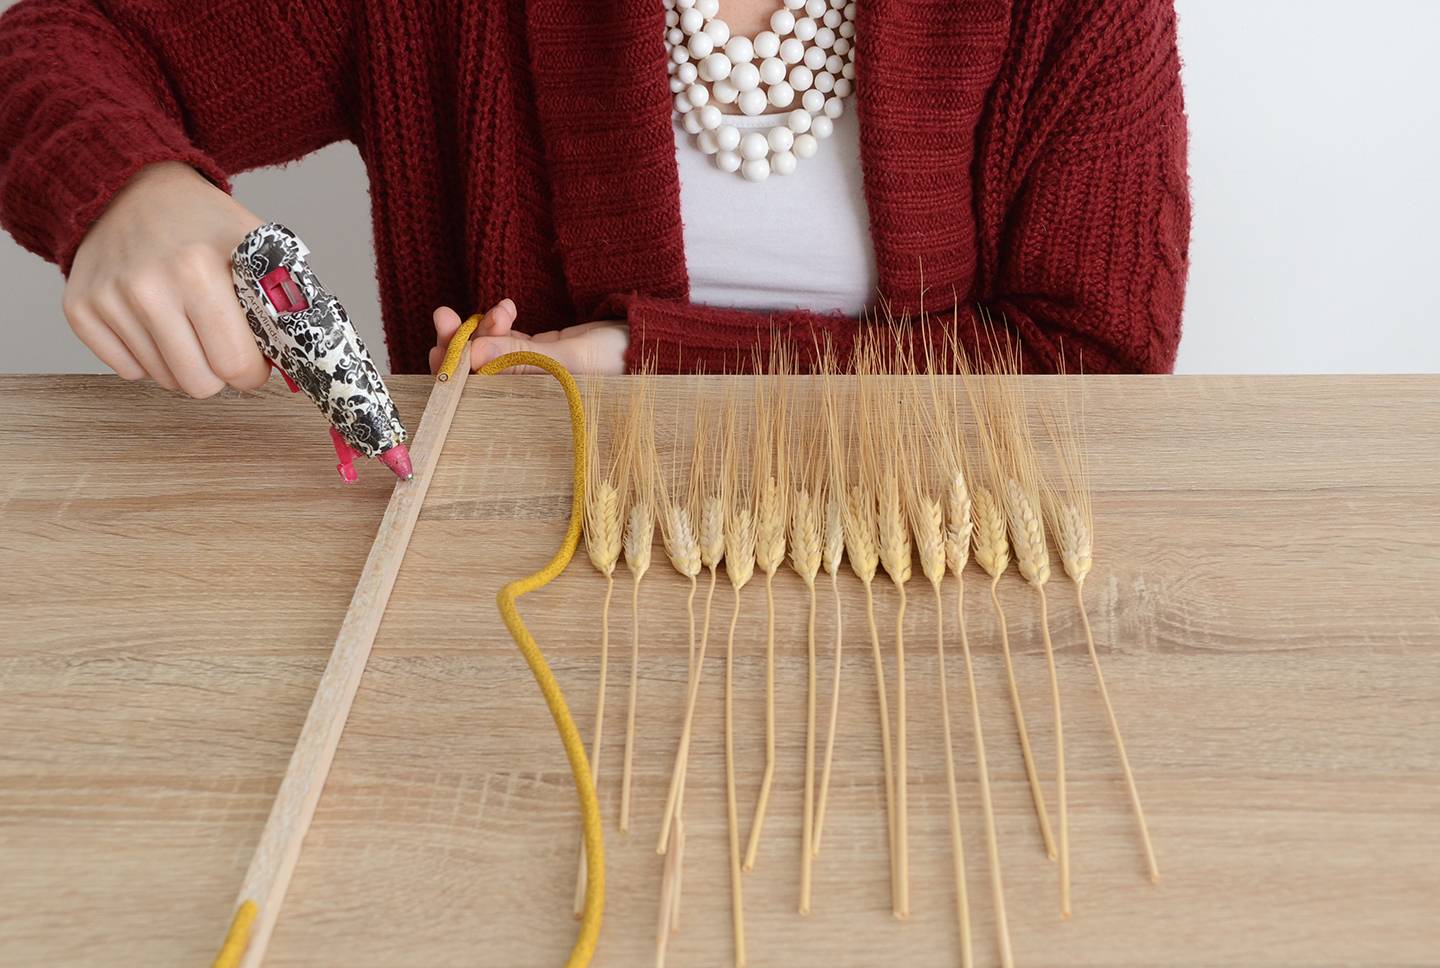
Next, lay out 15 pieces of dried wheat so that the pods are aligned. Put a line of hot glue along the back of the dowel and quickly place it on the wheat stems (about 4-6 inches above the pods).
Step
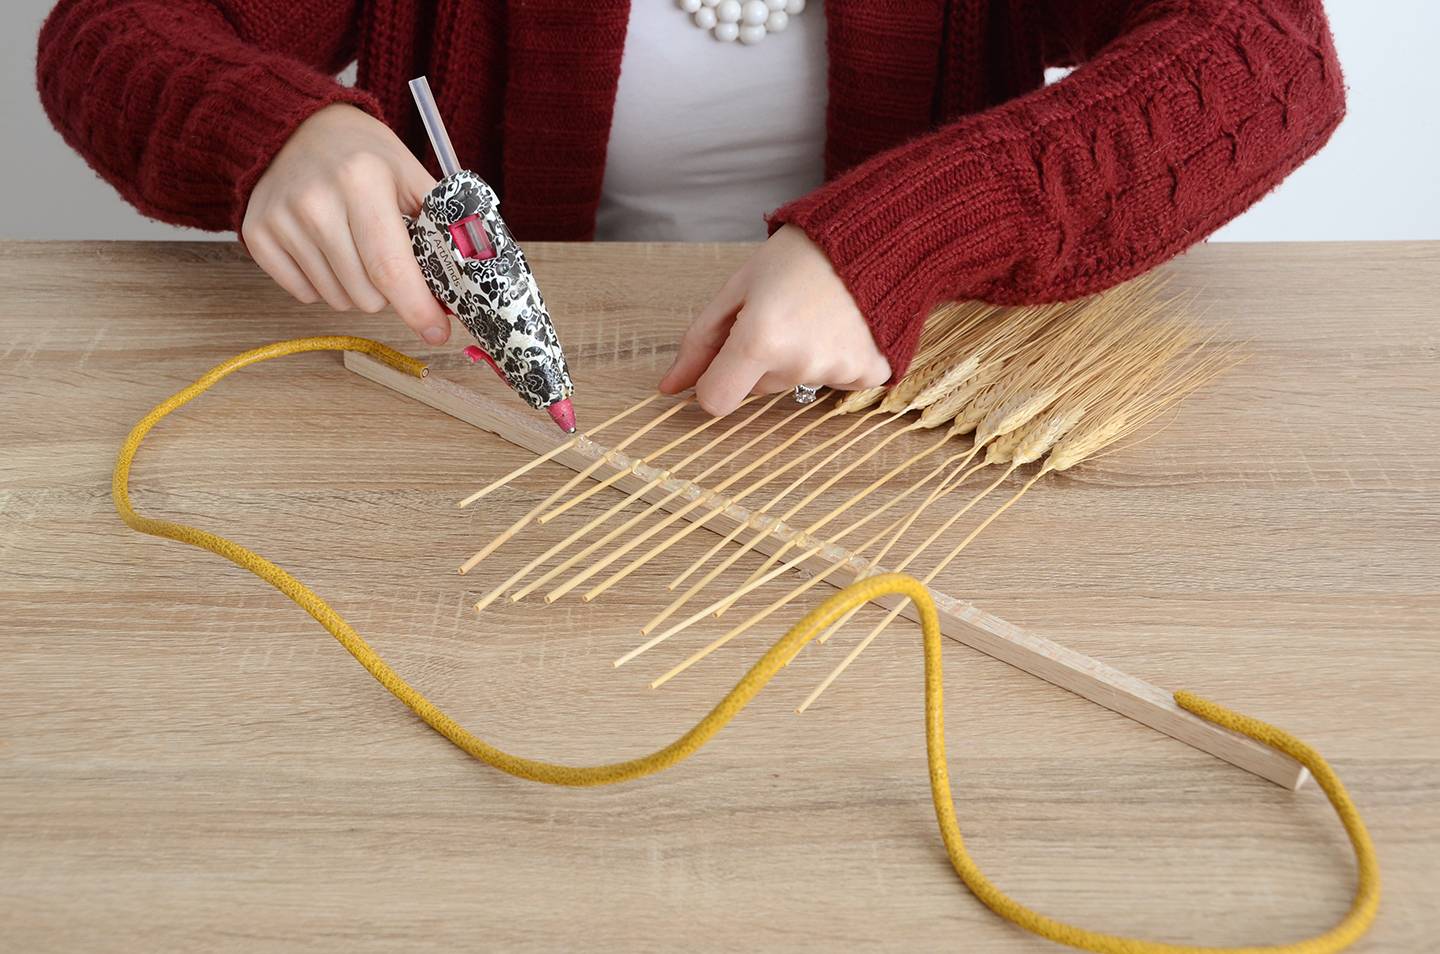
Once the glue has dried, carefully flip everything over and put another line of glue over the stems to made sure they’re secure. Let the glue dry and then trim the excess off of the stems.
Step
Now it’s time to attach the eucalyptus. You’ll want to cluster it in the bottom right side of the wall hanging so that it extends about 2/3 of the way across the dowel and 2/3 of the way up the right side of the cord.
Step
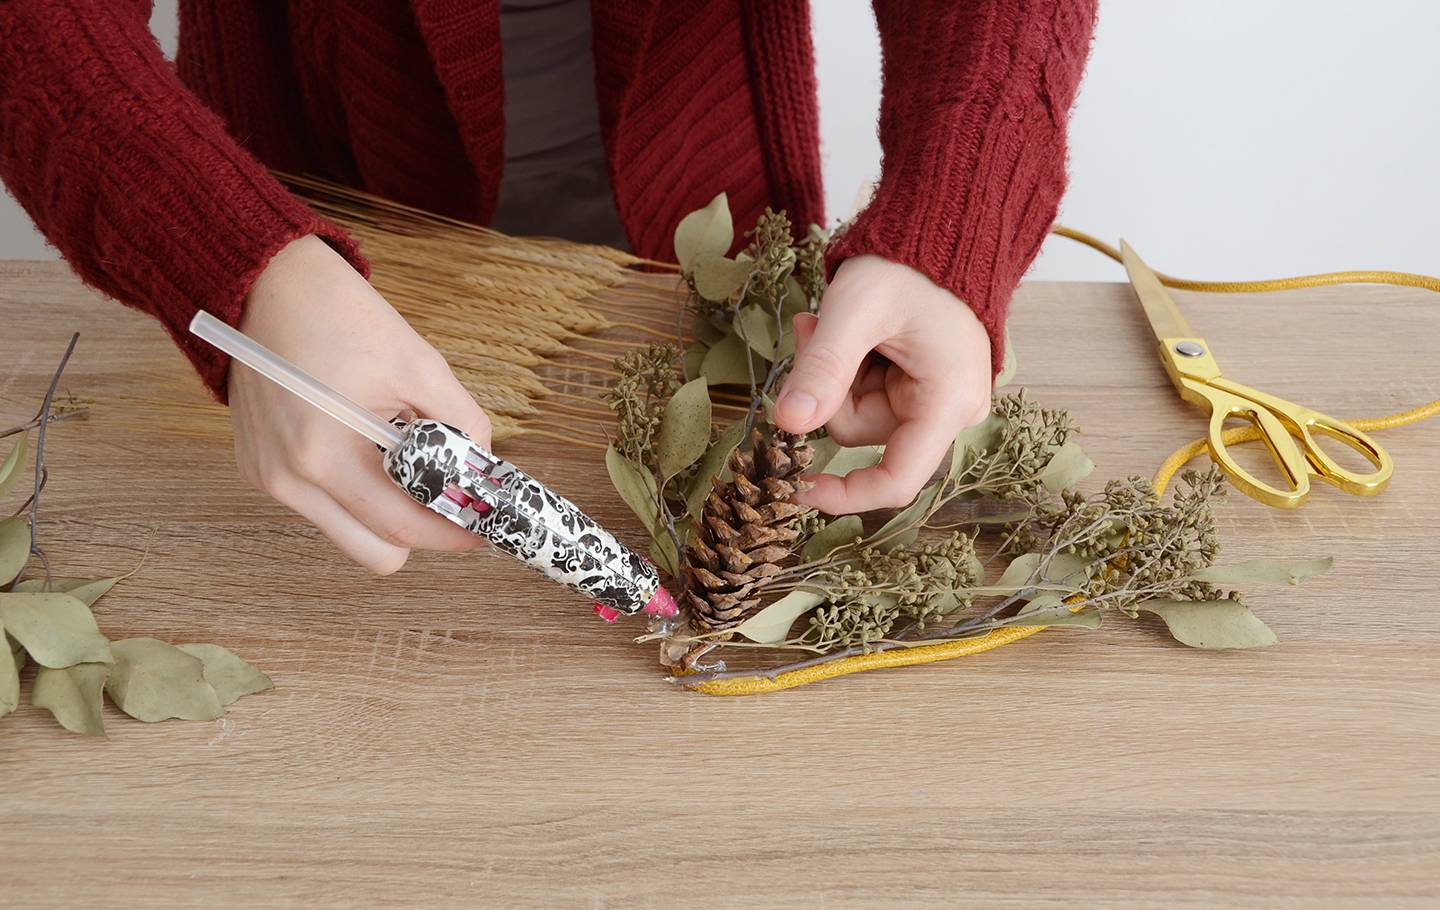
Next, add some pinecones to the corner. Use them to hide any noticeable globs of glue. Attach them so that they point in a variety of different directions. Last, glue the white flowers in random spots surrounding the pinecones.
Step

The last step is to mount it on the wall. You’ll need two nails for this: one for the top, and one for the bottom left corner where the wood meets the leather (otherwise your wall hanging will be super crooked since the right side is heavier than the left).
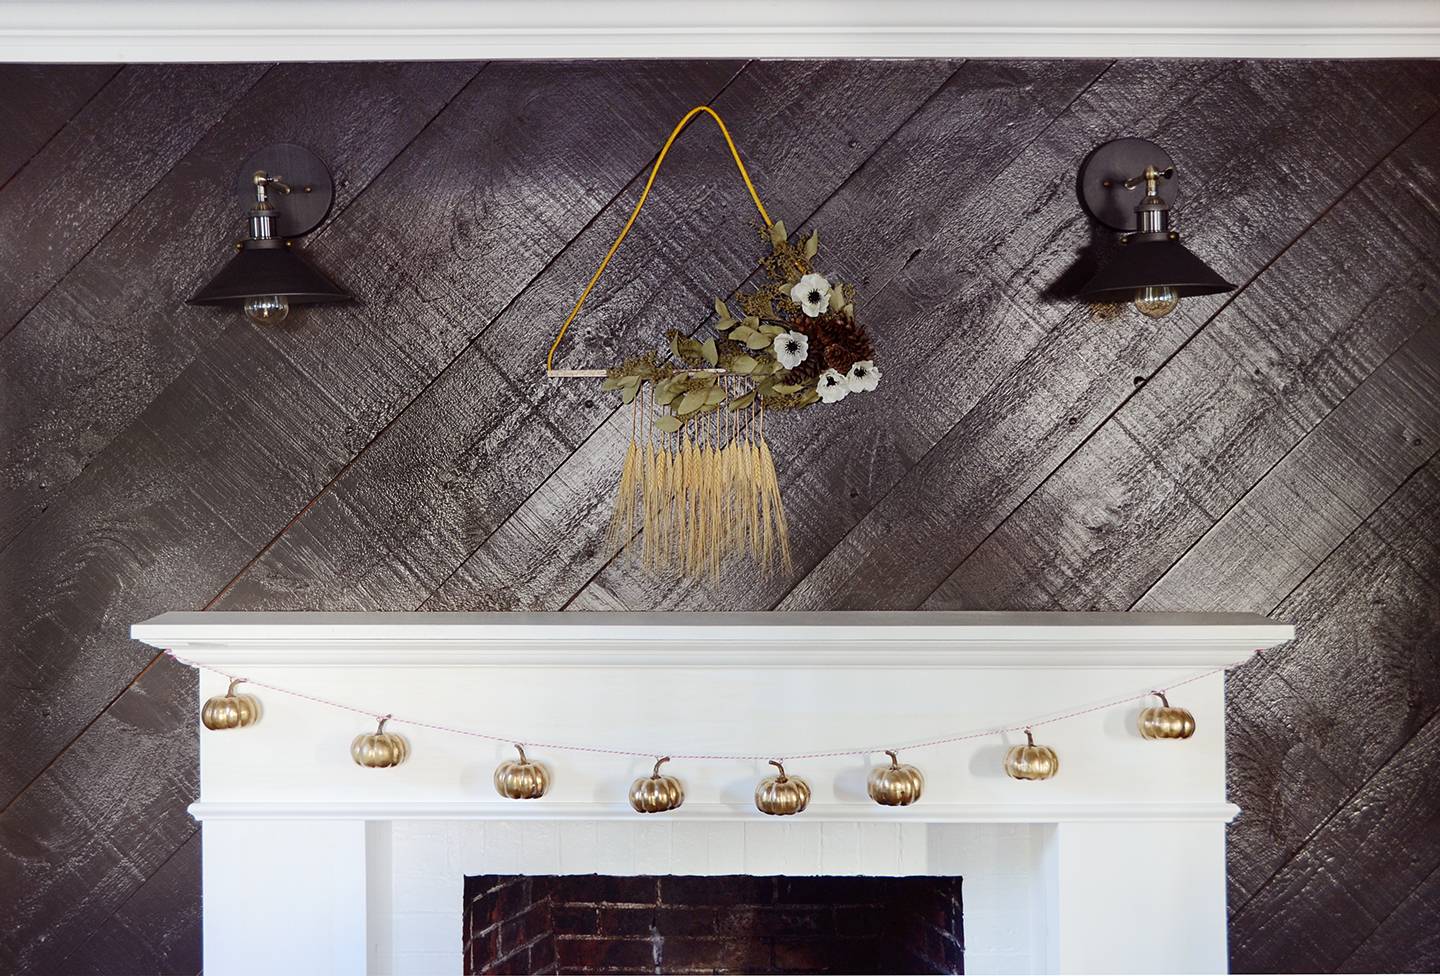
And that’s it! This wall hanging is perfect for fall, with its muted color scheme and autumnal elements.
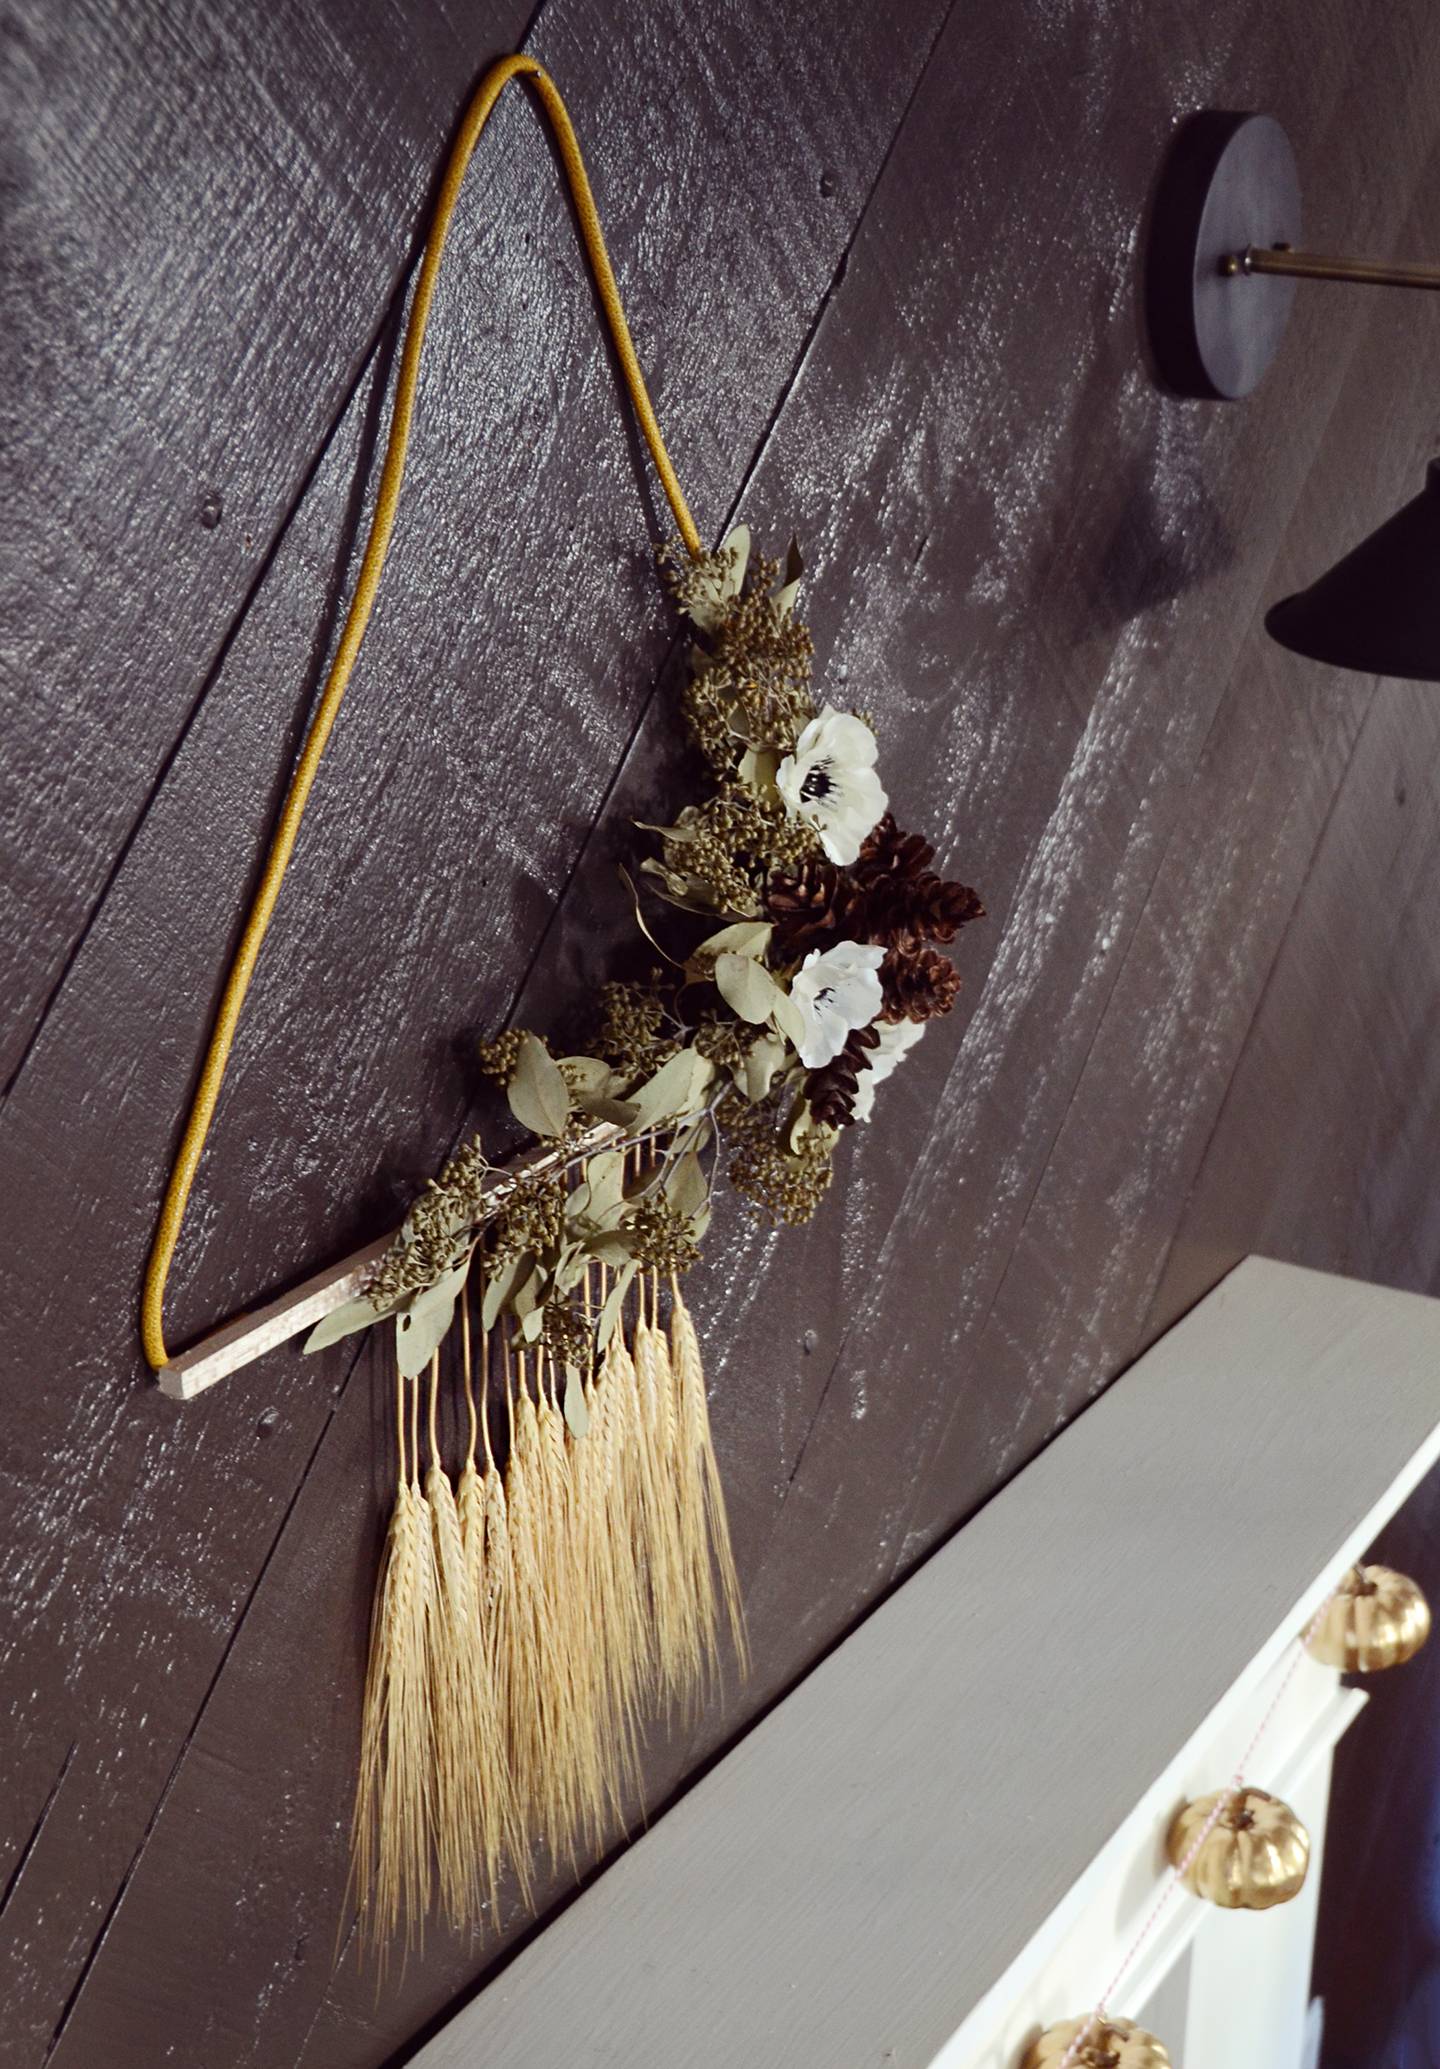
There’s something about the triangular shape and materials that lends a super bohemian vibe to this wall hanging. The boho trend is wildly popular right now, so this is a great way to dip your toes into this fun style.
And as with most of our projects here on Curbly, this one can be customized to fit your style – try brightly colored flowers or another kind of cord for a different look. Happy crafting!
Unique way of decorating for Christmas. thank you for Sharing.