
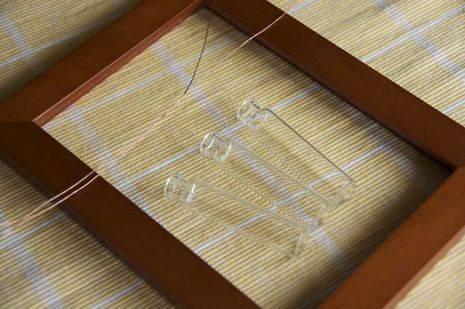
Last week I posted a Super Simple Floating Frames tute that resulted in a leftover frame sans glass. Then, this week, I posted about my adventure at my local surplus store and mentioned something I’d found there that inspired a how-to. Today I combine the two and show you how to make a Frame Vase.
Supply list:
- a secondhand 5 x 7 frame, sans glass
- 3 small, lipped, vials (I found mine in the lab equipment aisle of the surplus store. They’re 2 3/4″ long and 5/8″ in diameter.)
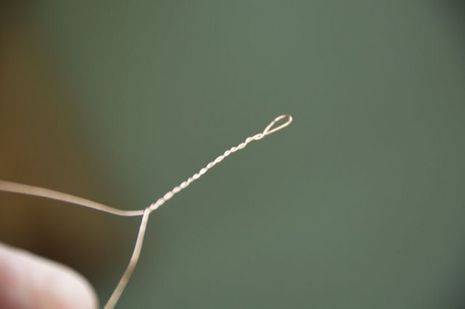
- 2′ of 24 gauge wire (I used some copper I had on hand.)
- two small nails & hammer
- wire cutter or utility scissors
- glue, if necessary
Step 1: Fold the wire in half and twist it for about 2 inches. DO NOT OVER-TWIST or you’ll break the wire.
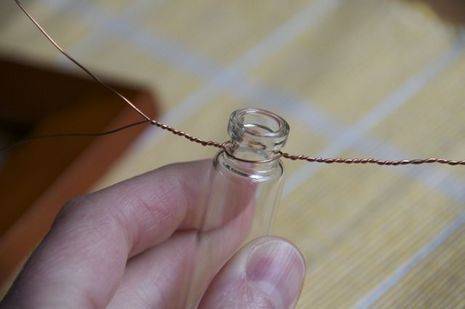
Step 2: Place a vial between the wires and twist the wires for about an inch. Repeat this step for the two remaining vials.
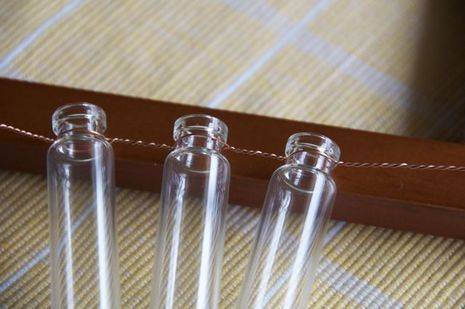
Step 3: When you’re done with the 3rd vial, twist the wire about 2 more inches. When you’re done, your vials and wire should look something like this:
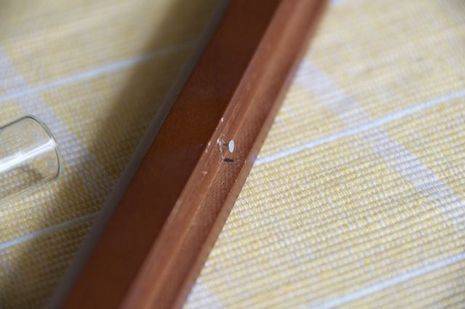
Step 4: Drive your nails into the inside of your frame as pictured below. (I put them in 3 1/4″ up from the bottom opening of the frame so short or longer-stemmed flowers would be framed within the frame.)
Step 5: Wrap the ends of your wire around the nails. It might be easier to remove the nails to do this. If you do remove them, you might need a bit of glue to hold them tight when you put them back into the nail holes.
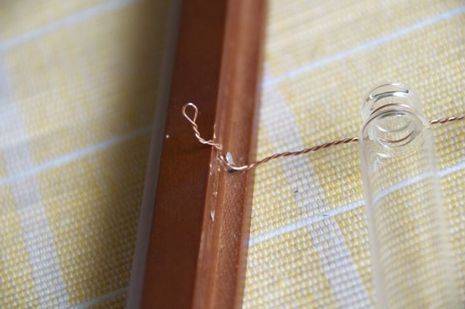
Step 6: Clip the excess wire, straighten the vials and add water and flowers.
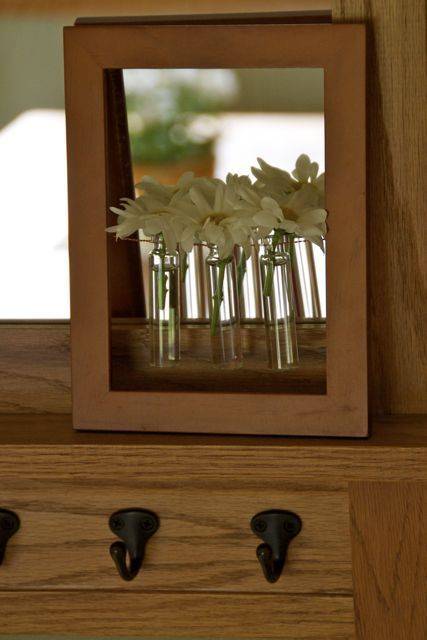
And that’s it!!! I intended to hang my Frame Vase, but it looked so pretty ‘leaning’ I just did that…leaned it.
