Remember the light fixture from my dollar store kitchen makeover?

Well I’ve finally slung together a tutorial for it and here it is…
First I just want to put a caveat out there. I did this with fairly heatproof materials and there’s no contact at all between light bulb and shade or between shade and any wires. If you even have to wonder “Huh, is this going to burn my house down?” Then it’s probably best to go and get a real light fixture.
That said, here’s how I made mine:
I used:
- One plastic salad bowl from the Dollar Store. It’s not TOO thick a plastic, but it’s not a disposable one either.
- A flexible plastic chopping board. Also from the Dollar Store
- A sharp craft knife
- Some fairly fine sandpaper.
- And an already existing light fixture
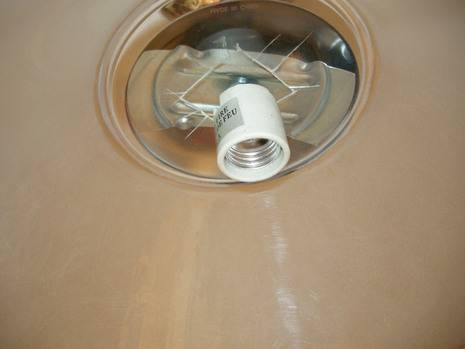
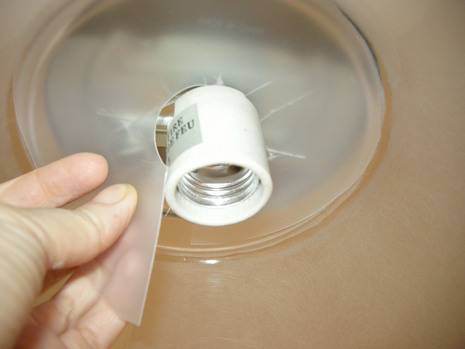
This is the light fixture I had in place already.
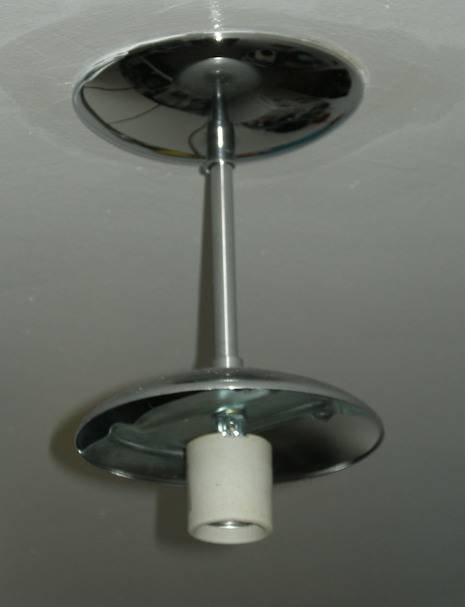
There was an “incident” with the glass lampshade that was on it (My sweetie accidentally broke it by doing it up too tightly, I’m sure I heard him mumble “HULK SMASH”).
The first thing I did was figure out how big the hole in the salad bowl needed to be to fit over the part that holds the bulb.
So I measured. Then found the center (roughly) of the salad bowl and marked it out.
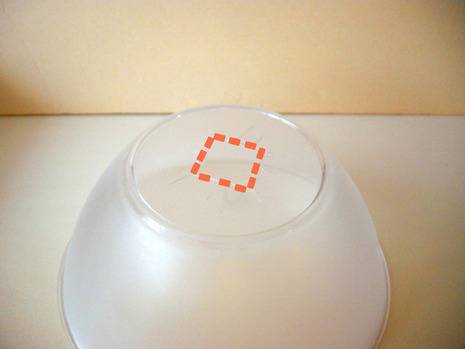
You’ll notice that I’ve marked out a square hole even though the thing it’s going over is round, that’s because cutting a circle is WAY harder.
Next I VERY slowly scored around the markings. Really. Slowly and with not too much pressure. Or your plastic can crack, and make you say swears. Then I did it again and again and again. Until I was completely sick of it and there was a hole in the bowl (and also some cracks. Ggrrr).
The next thing I did was sand bowl so it looks kind of like frosted glass (at least in my head it does). I used a fairly fine grade of sand paper and built up layers of opacity, so I guess three or four all-over sandings.
Next I needed a way to get the shade to stay on the fixture so I whipped out the trusty flexible plastic chopping boards. Flexible plastic chopping boards might be my favorite medium, I use them for EVERYTHING. Like this, and this and these guys.
I cut out two circles with holes in the center. They’re super hard to photograph but this is the shape I used:
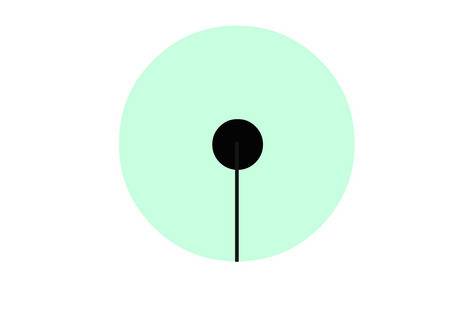
Except they’re not Turquoise, they’re clear/frosted plastic. I just really like Turquoise. The black bits are the cut-away parts. And hey, now I come to think of it, this looks a tiny bit creepy. Huh.
Anyway, if your salad bowl is heavier than mine you could use more than 2 circles.
The I put the whole lot together. Like this:
And voila. One $2 light fixture makeover.
Ours has been up for a month and I haven’t noticed the plastic doing anything weird (like melting or warping). So yay.