I found instructions for these beautiful folded paper stars in an old magazine called The Workbasket. Not only were the directions indecipherable, the picture illustrations were misidentified. Although your first attempt might be a challenge, it’ll be worth it as the final product will impress your friends and family.
Use them to decorate your trees and presents for your holiday party, or hang them from your light fixtures for your New Years Eve bash.
Supplies
Paper
Scissors or, better yet a Fiskars Rotary Paper Trimmer
Ruler, if using a scissors
A little patience
Note: I used two red and two white paper strips so you can better identify them.
Steps
1. With scissors or paper cutter, cut paper into 4 strips measuring ½ by 14 inches.
2. Fold strips in half.
3. Thread strips through each other, as shown below.
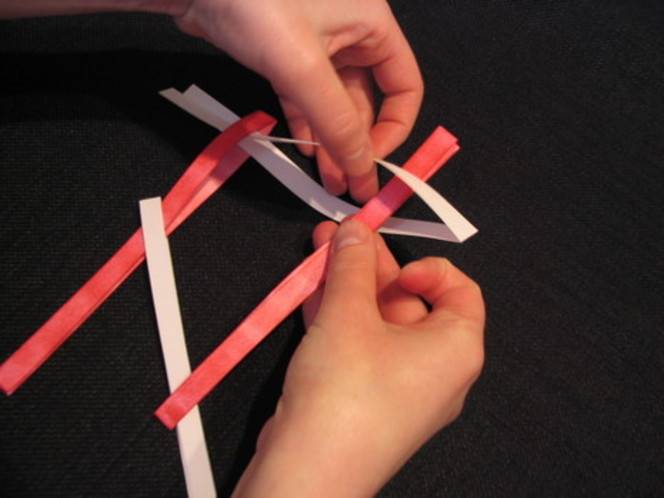
4. Pull together.

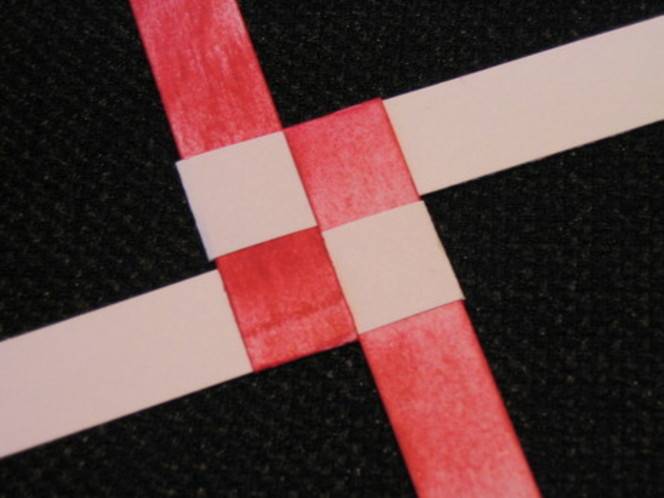
5. Lift one of the top four strips backward across the strip below. In a clockwise fashion, fold back the other three top strips backward across the strips below.
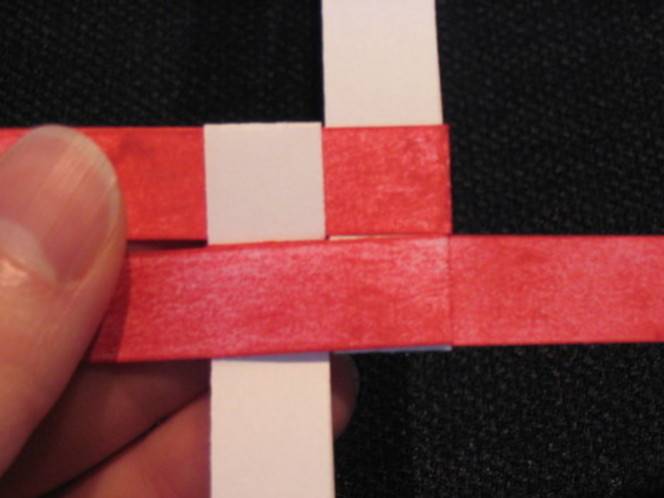
6. Tuck the last strip folded backward under the first strip to lock strips together.
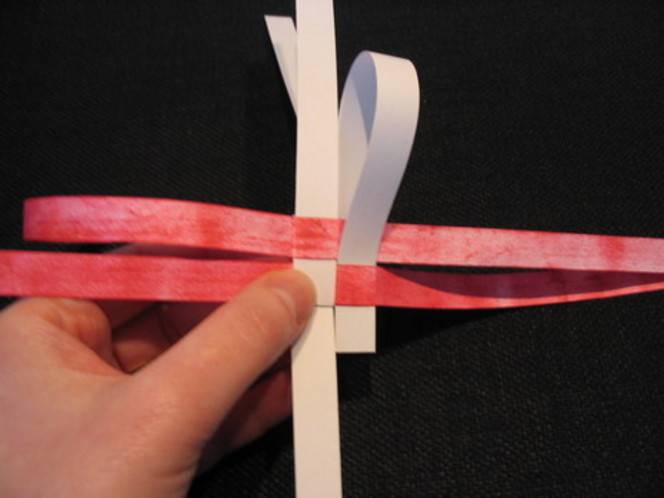
7. Fold one strip underneath at a 90 degree angle, creating a triangle, as shown below.
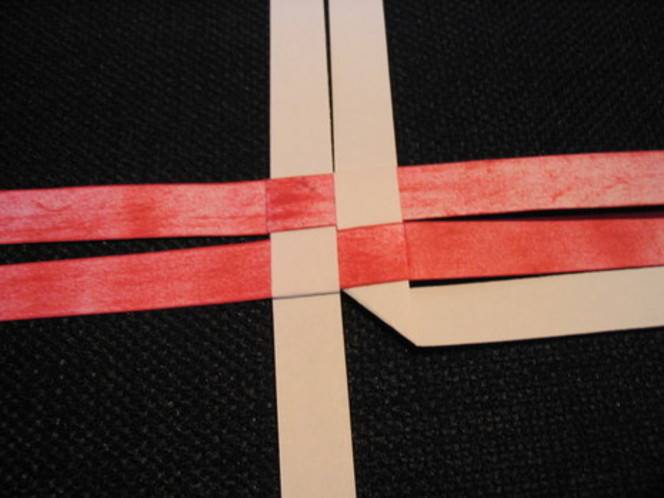
8. Loop the folded strip forward and around and pass it under the square directly below the triangle shape you just created. Pull strip taught and crease to make a sharp edge, creating another triangle on top of the one below.
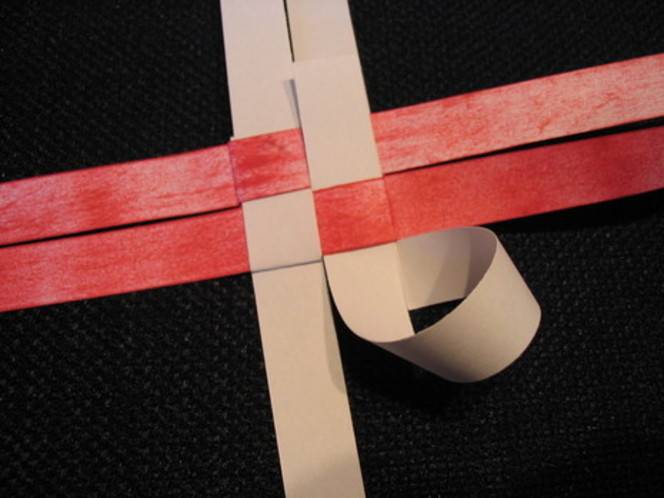
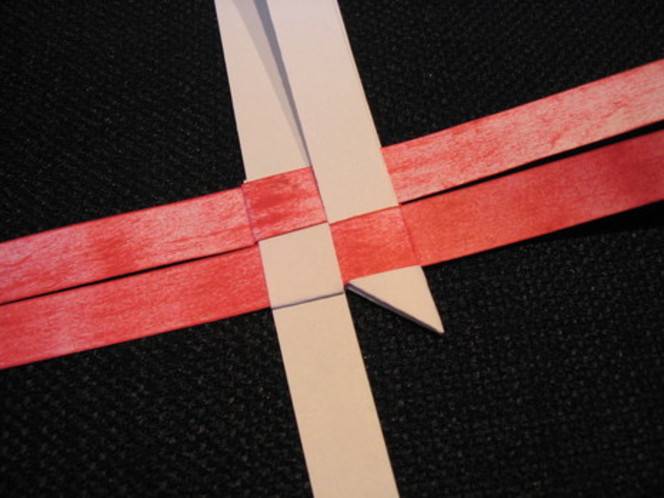
9. Working clockwise, skip the next strip, then repeat step 8 for the next strip. Repeat step 9 to create a total of 4 points.
10. Turn piece over and repeat making points (starting with step 7) on the other side. You’ll have a total of 8 points after this step.
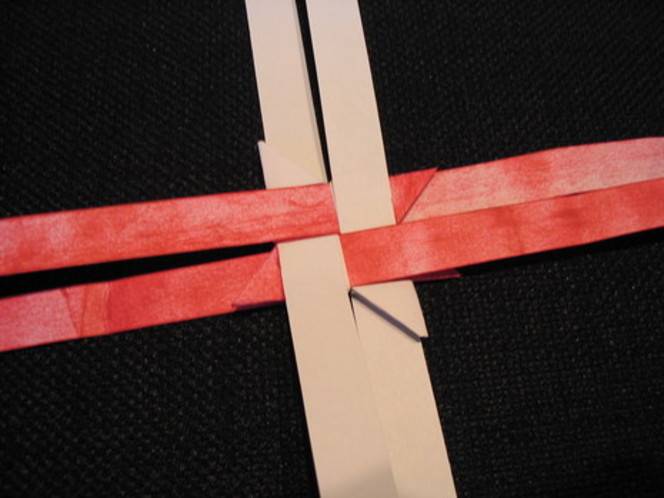
11. Find the 4 strips on top. Pick up the one pointing towards you and push it back, holding it away from you.
12. With the other hand, take the top strip pointing to the right and loop it under and flip it a quarter turn to the side. Turn it a quarter turn again as shown. Pass strip under the square below. Pull strip to fashion a point.

13. Working in a clockwise fashion, repeat steps 11 and 12 until you have 4 points facing you. The last strip will be passed under the first point made.
(Bonus Hint: to make a bow for a present, stop here. Cut the ends of the strips off as close to the points and possible.)

14. Flip the star over and repeat steps 11-13.
15. Cut the ends of the strips off as close to the points as possible.
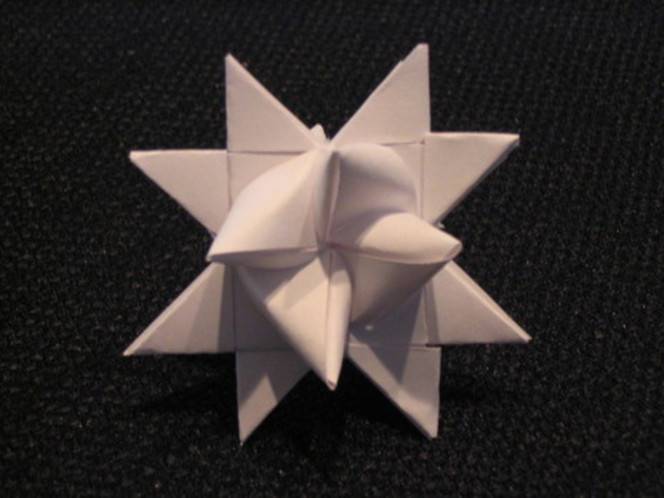
Attach thread or monofilament for hanger.
P.S. Feel free to post any difficulties you encounter, and I’ll do my best to talk you through them or modify the instructions. Good luck!
Did you like this?
Hello, Will you be able to repost the photos? They are gone from the page. Also, would you mind if I make copies of your page to handout to a class? Thank you for your help!
Lovely! Years ago I saw this star in a book about the ancient Romans – it was being made then, and I was awed by the potential history of the making of this star. Of course I have no idea what the book was and have looked for validation online to no avail, so I do not have proof…. I enjoy the thought tho’.
My family has been making these stars for generations. I just made 18 of them from paper strips my grandmother and I worked with when I was a child of around 8-10 years old. The colored paper strips are at least 60-65 years old. I’m 68 years old. I was thrilled to find someone else making them as I have never seen them anywhere else until now! How exciting!