
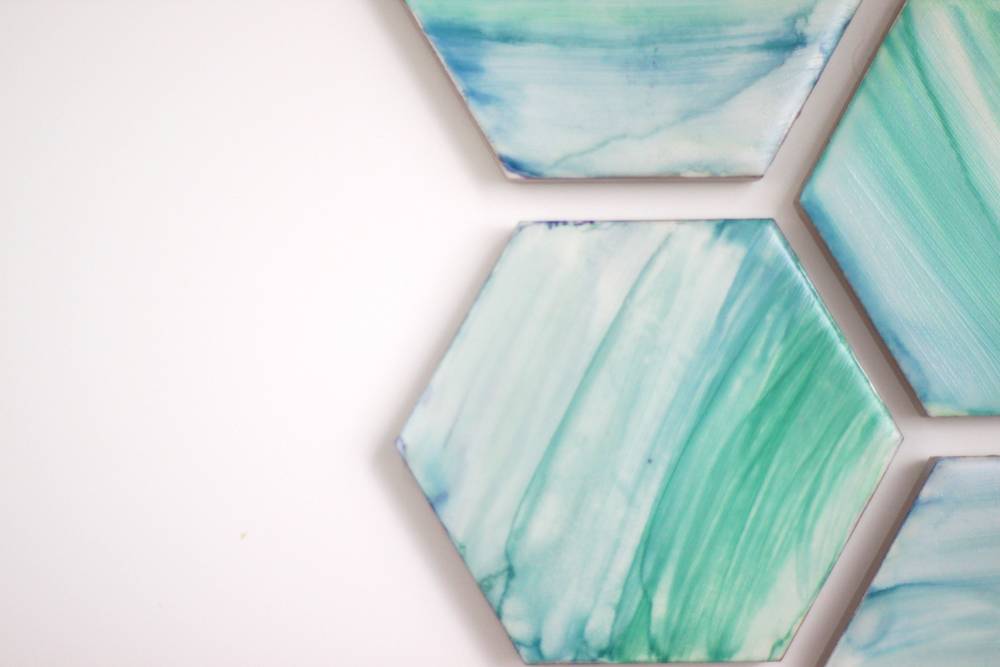
It’s day three of my whirlwind adventures in guest blogging here on Curbly. Today, it’s all in the details…of home decor, that is. Sometimes in DIY home accents, it isn’t about the big, striking pieces. Often, it’s the lovely, custom details that add up to make a space. Like these DIY coasters. They can be any color, and the watercolor effect is both elegant and whimsical.
Making a set of these takes less than an afternoon, and they would definitely make great gifts. Think of how sweet a matching set would be for a housewarming party, or a patio get together!
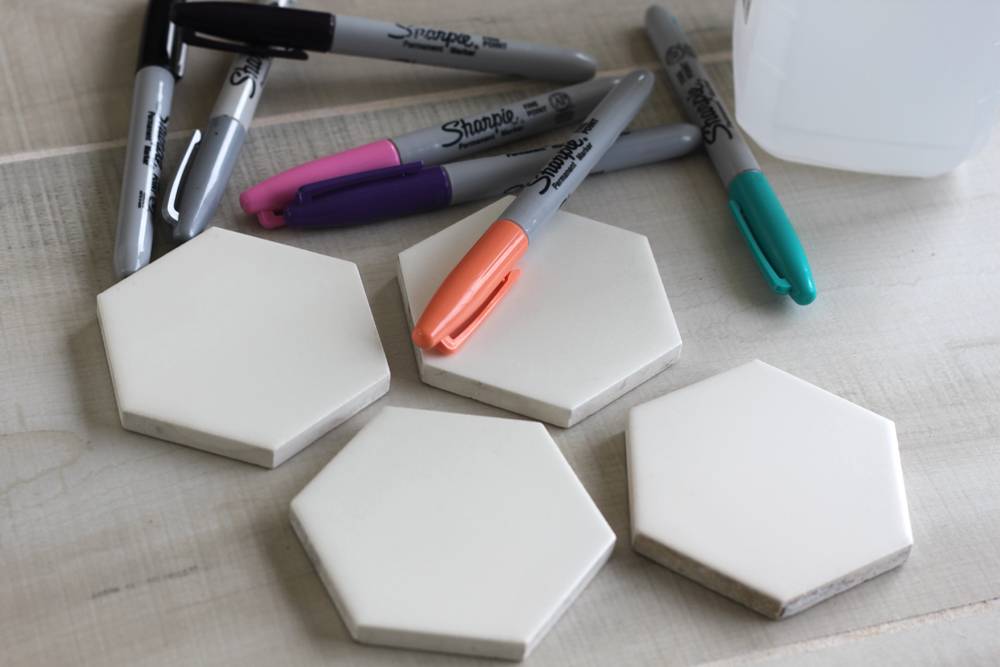
Materials
- 4 – 6 ceramic tiles
- Permanent alcohol based markers (I collect Sharpies in all colors)
- Rubbing alcohol (90% or higher)
- Paint brushes
- White felt
- Craft Glue
- Accent paint for the edges
- Dishwasher safe Mod Podge (I got mine on Amazon.)
Step
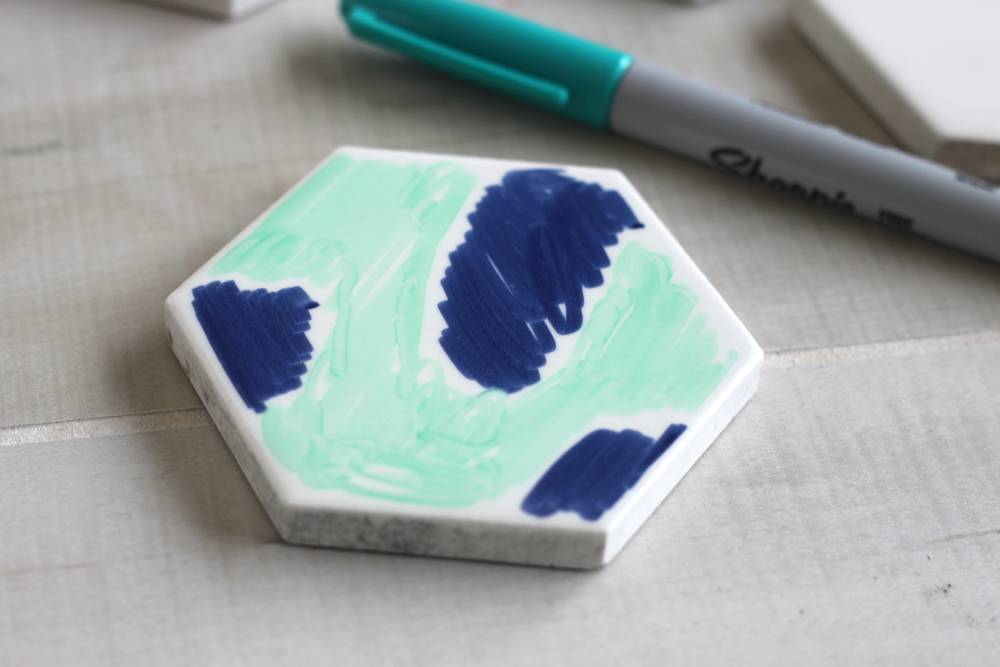
Begin by cleaning your ceramic tiles thoroughly to make sure that there isn’t any dust or oils on the surface. Then, begin by scribbling some of the permanent marker on the shiny surface of the tile. Not all of the colors react the same to the rubbing alcohol in step two, so feel free to experiment with a couple of shades in the pallet you are hoping to achieve.
Step
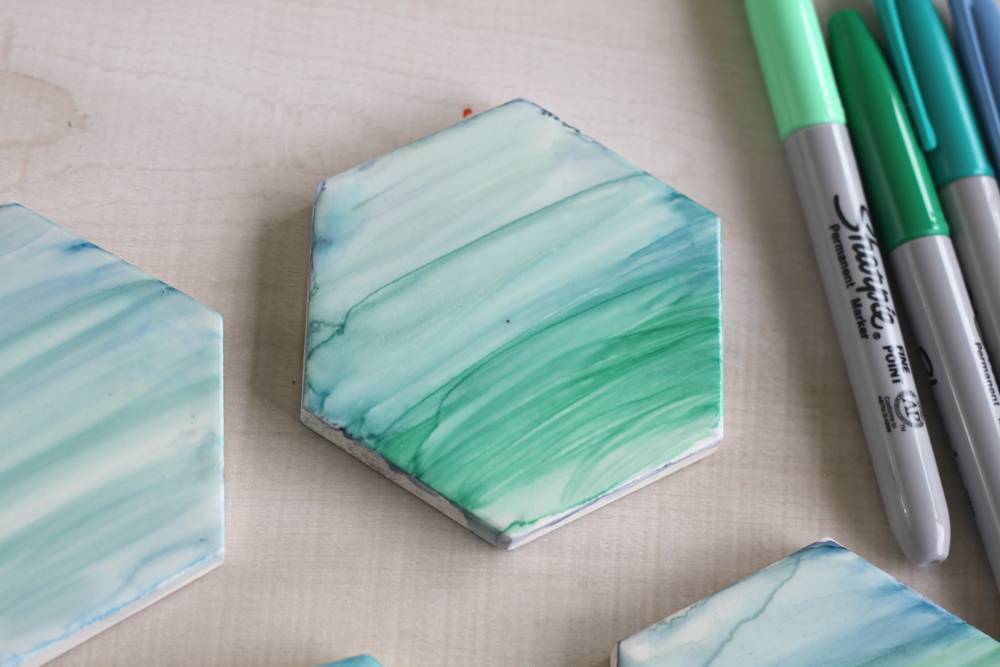
After you’ve got your colors on the tile, use a soft bristled brush dipped in the rubbing alcohol to make a painterly effect on the tile. The rubbing alcohol dissolves the ink a bit, and can make a lot of really interesting effects. I just did a straight brush across, but you could try dripping the rubbing alcohol, or using different types of brushes. If you don’t like what you’ve made, just wash off the ink with more rubbing alcohol and start over.
Step
Once your design is dry, use a coordinating color to paint the unfinished edges. I chose silver because it really makes the color pop.
Step
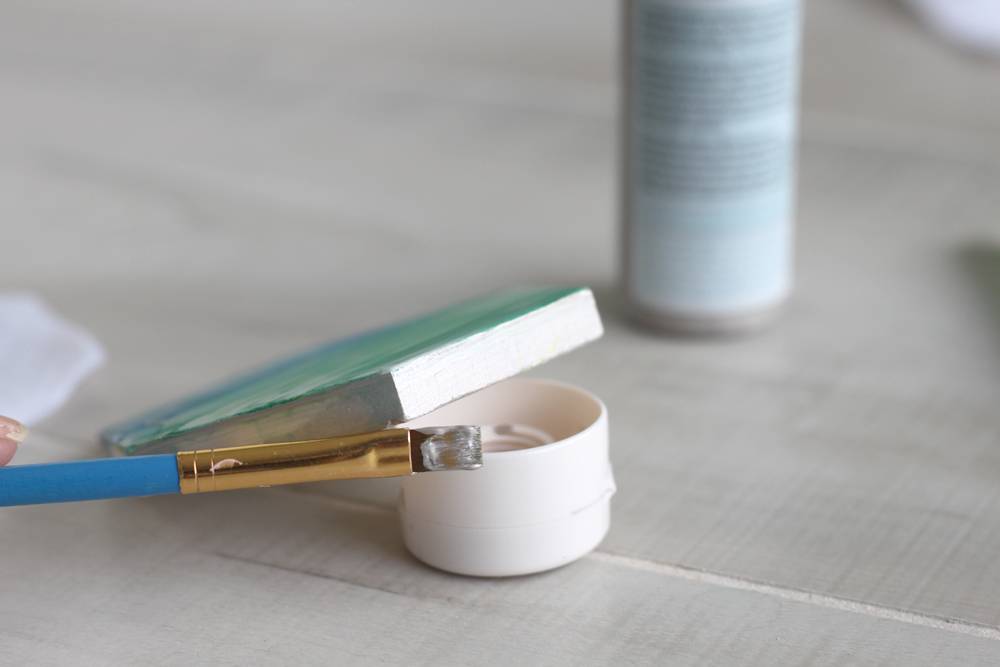
The ink is going to be pretty water safe, but with the moisture of condensation threatening our pretty coasters, we’ll want to add some extra protection. Mod Podge has a dishwasher safe coating that should work perfectly for this. Use a wide soft brush to coat both the top and sides of your tile. Don’t over brush it though, as you might smudge your design.
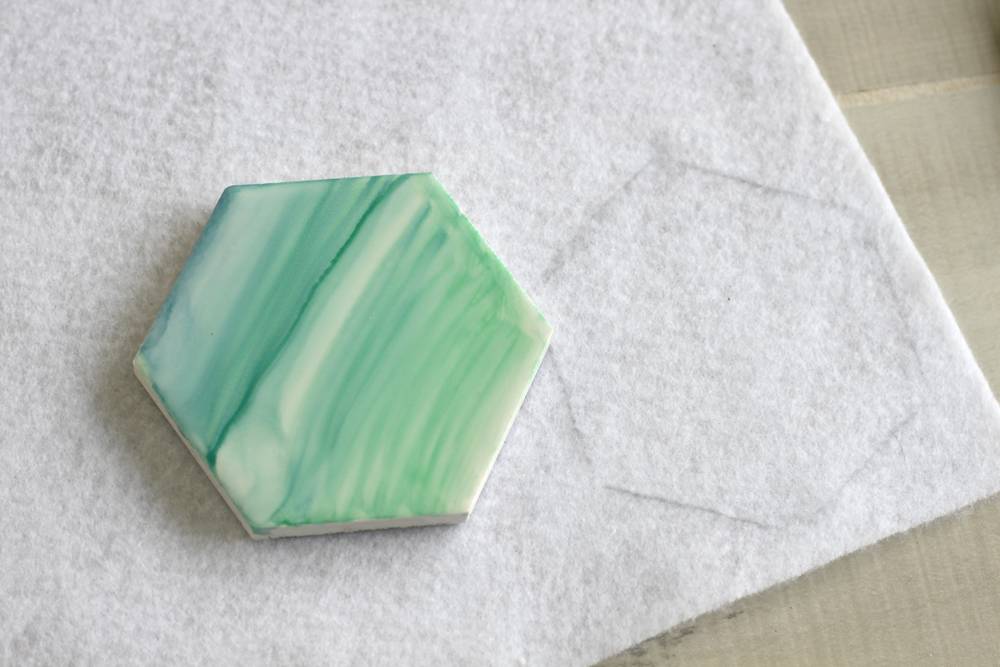
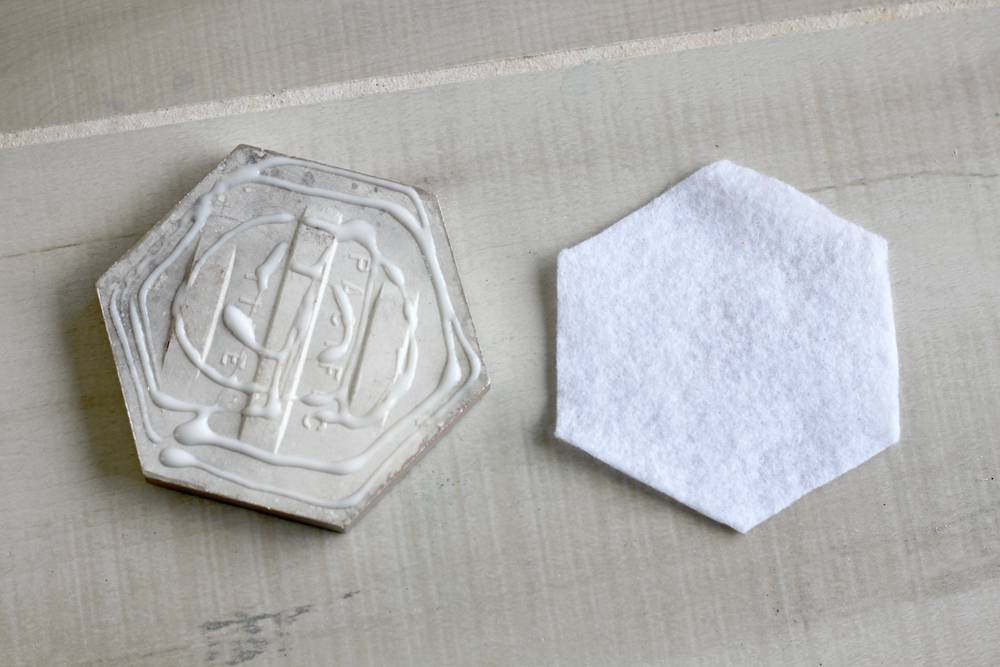
Step
Finally, we will need something to protect table surfaces from the scratchy backside of the coasters. Trace out and cut pieces of white felt and glue them to the bottom of the ceramic tiles.
That’s it! The Mod Podge takes 28 days so try not to get them too wet for a couple of weeks. After that, these should be perfectly water safe and ready for every day use!
 A little about Kayla: I’m a Creative Director for an international crafting company full time in addition to having my own crafting blog at SayNotSweetAnne.com. I’m a wife and a mother, and I work really hard so that I can spend my down time in the warm company of my 15 month old son and amazingly supportive husband. I love to make printables, jewelry, decor items, and I especially adore making DIY gifts. Don’t forget to stop by and say hello on Instagram!