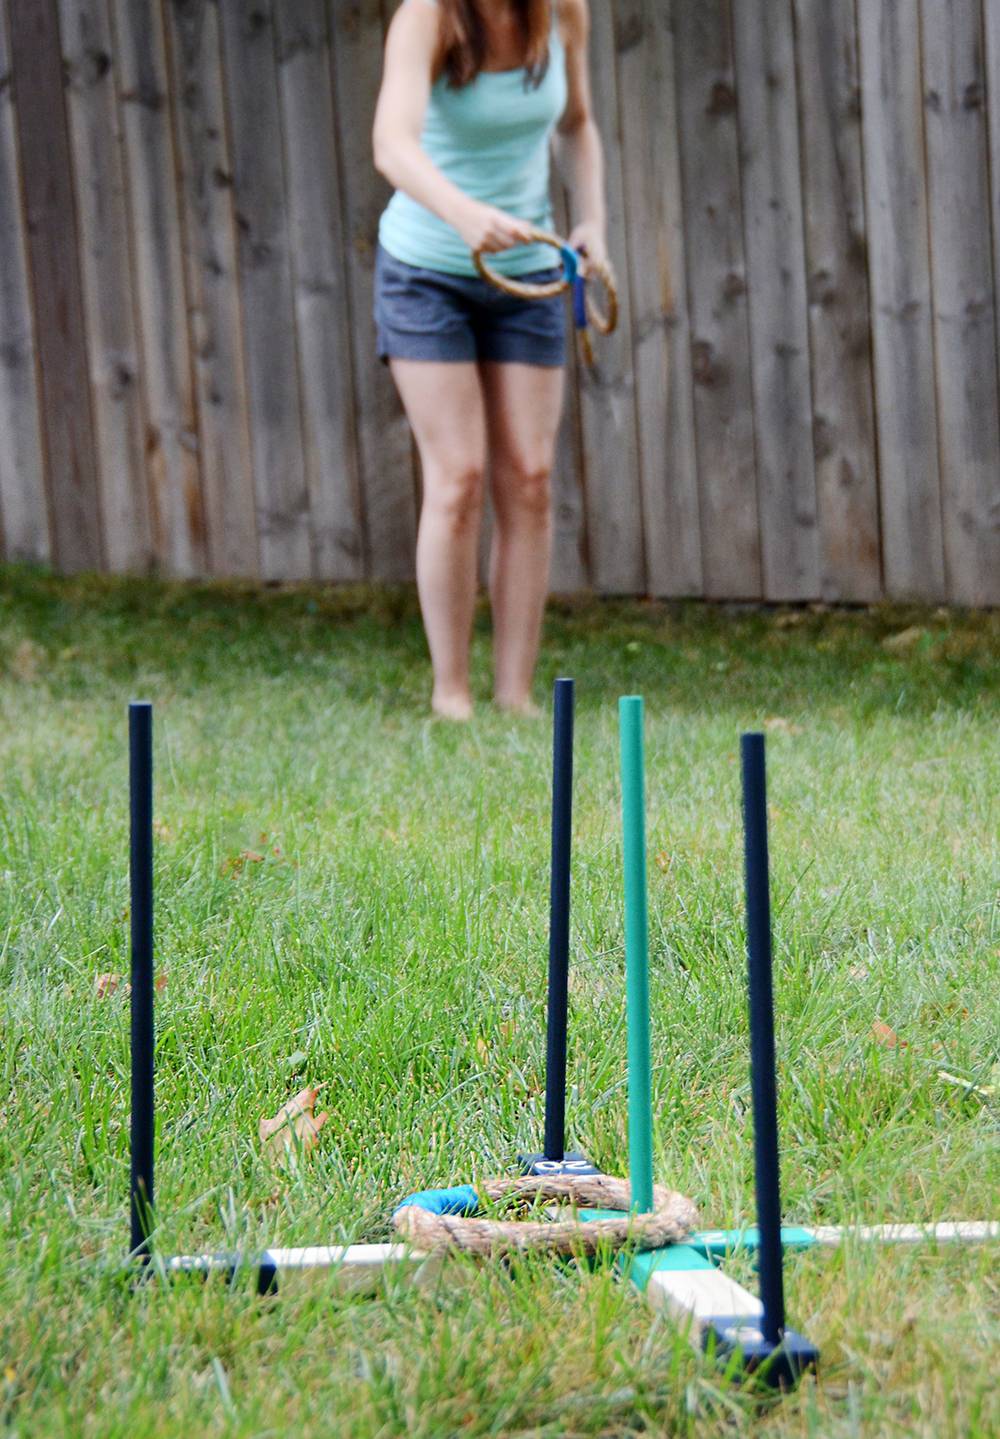
Now that summer is in full swing, so is barbecue season… and you can never have enough backyard activities to keep everyone occupied and having fun. So today I’d like to show you how to make your own wooden ring toss game that’s guaranteed to keep everyone laughing all afternoon long!
You recognize it now, right? This is a great game for kids of any age, and adults will love it too. And it’s simple to make and play. So let’s get started.
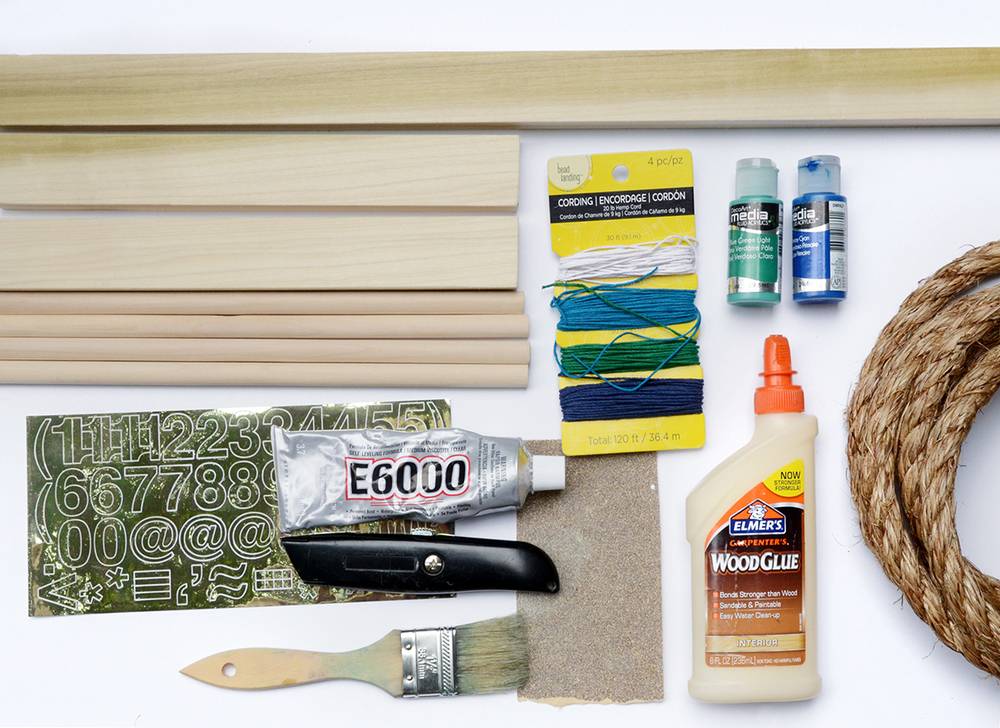
Here’s what you’ll need for this project:
- 1.5x.5 wood: one piece that’s 24″ long, and two pieces that are 11.25″ long
- .5″ wide dowel rods: five pieces that are 12″ long each
- Rope: four pieces that are 20″ long
- Colored string in two colors, about 2 yards each
- Adhesive number stickers
- Acrylic paint in two colors
- Paintbrush
- Utility knife
- E6000 Glue
- Wood Glue
- Hammer and 1.5″ nails (not pictured)
- ScotchBlue painter’s tape (not pictured)
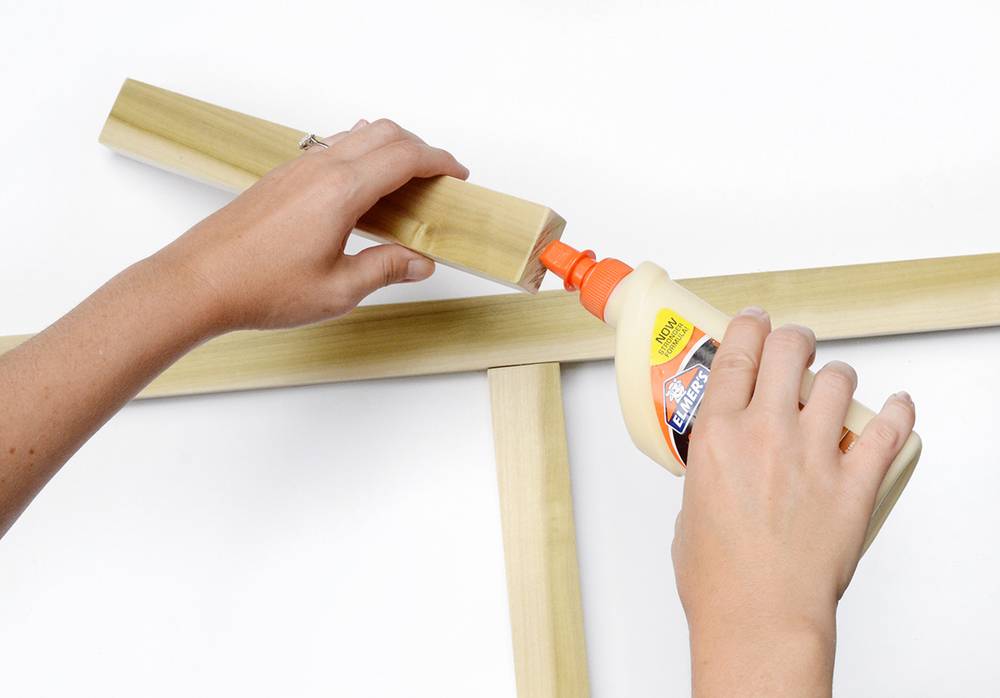
Begin by gluing the shorter 1.5x.5″ pieces of wood to the middle of the longer one, forming an “x” so that each piece is an equal length. Let them dry thoroughly.
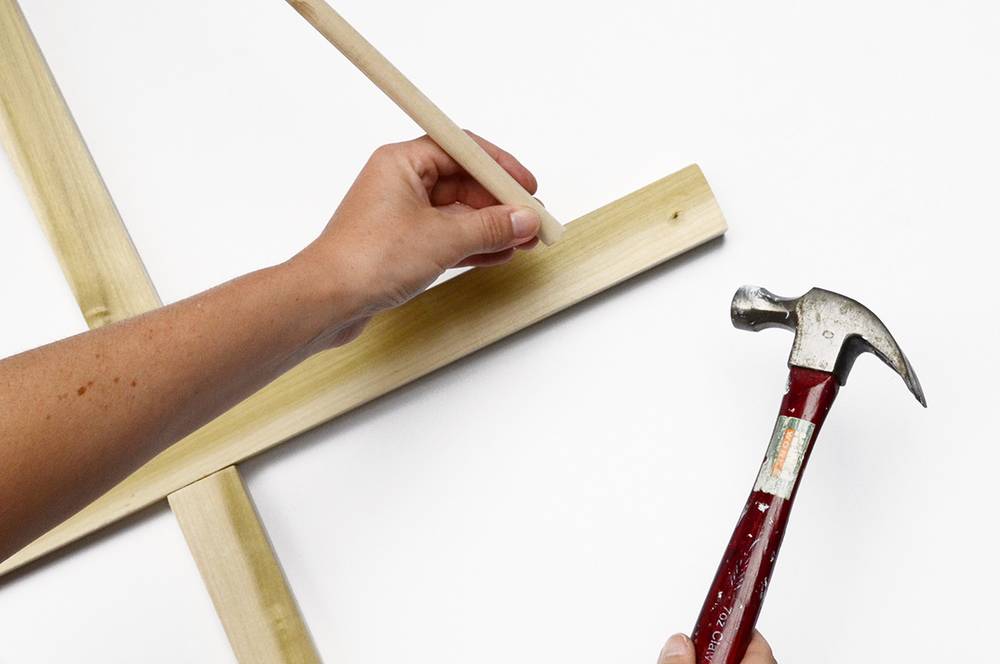
Flip the “x” over so it is upside down and hammer a nail into the end of each piece. Hang the piece off the edge of your work surface so the nail goes all the way through the wood and comes out the other side without going into the surface it’s sitting on. Do the same in the middle of the “x”.
Now flip it right side up so that the sharp nail ends are pointing upward and place it on a flat surface. Dab a bit of wood glue on the bottom of a dowel and position it on top of the nail end. Hammer the top of the dowel down onto the nail until it is firmly attached. Do the same for the other four dowels.
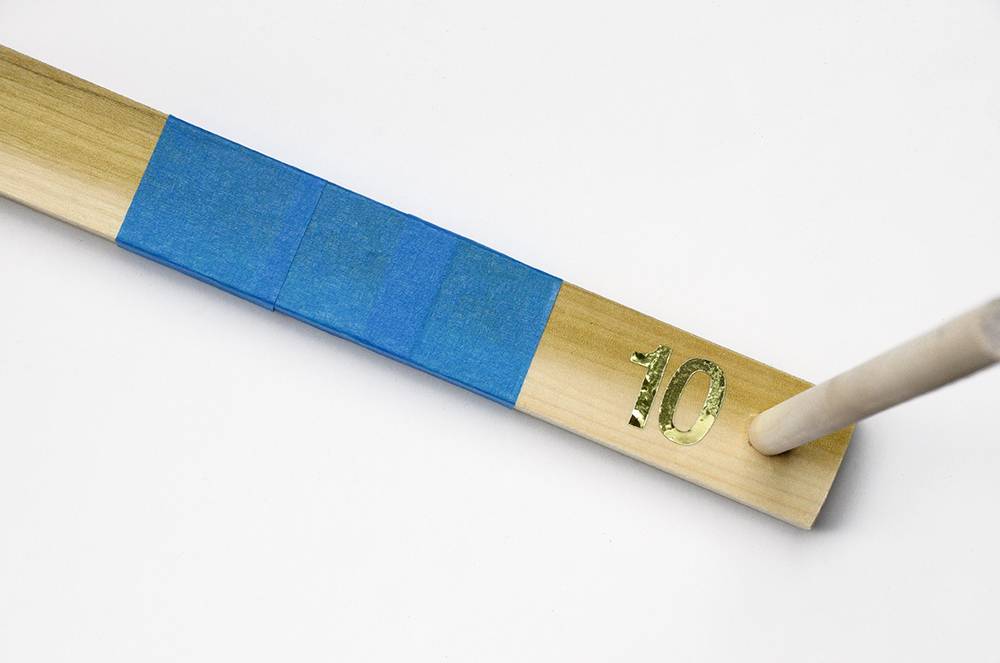
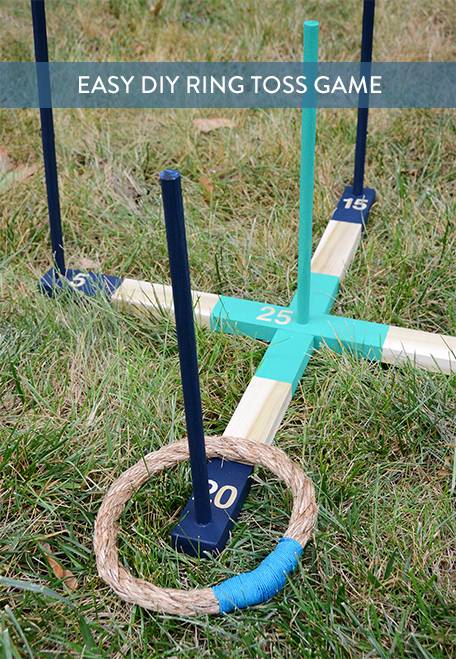
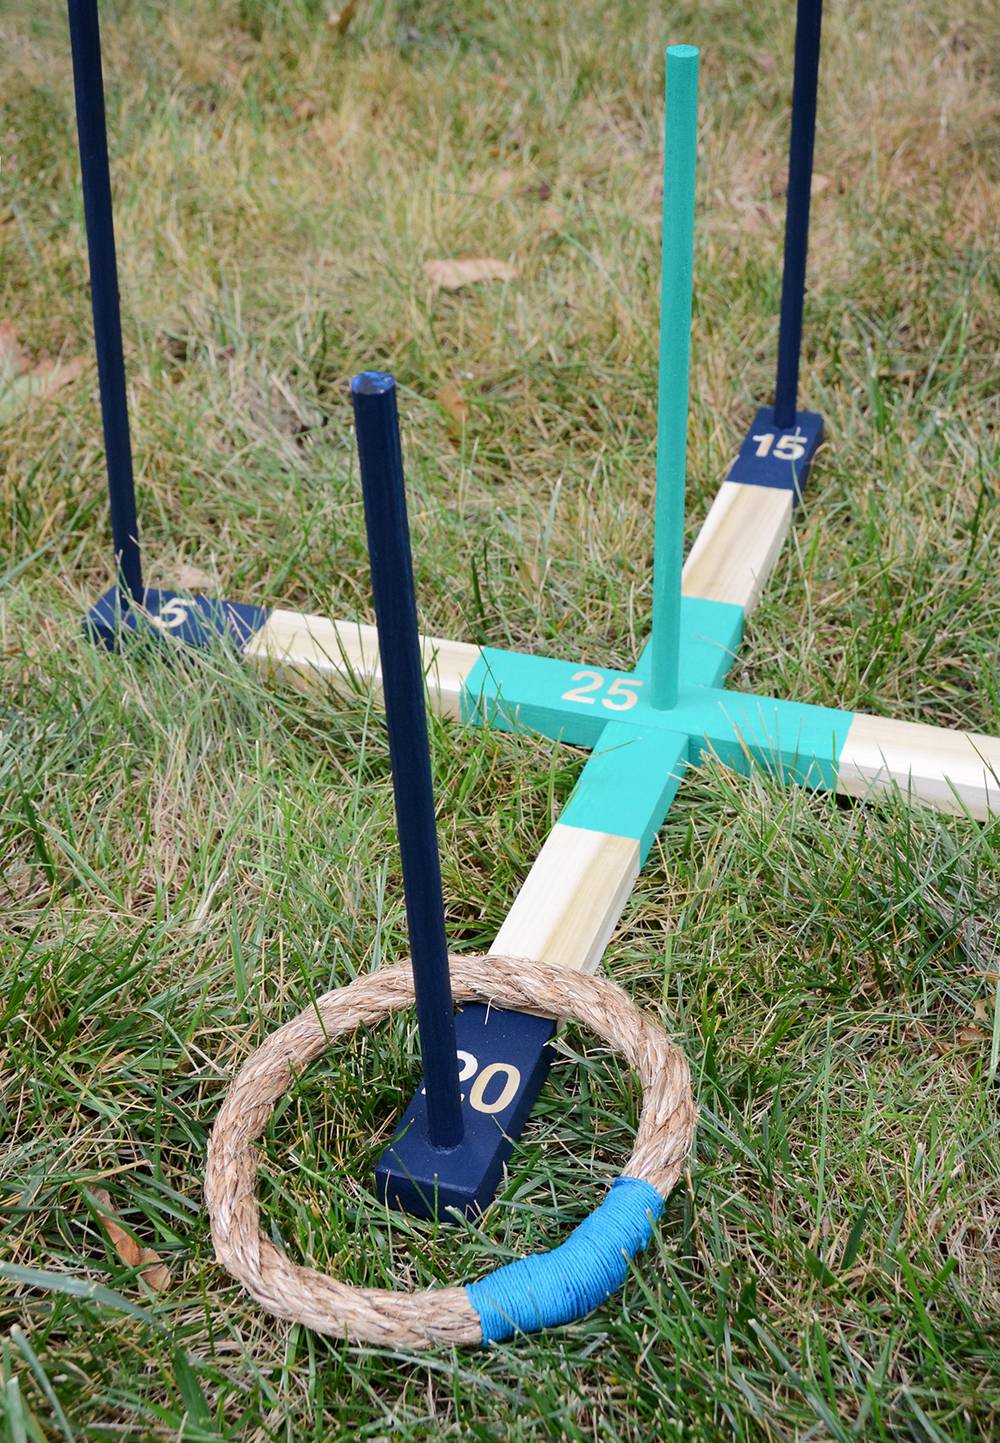
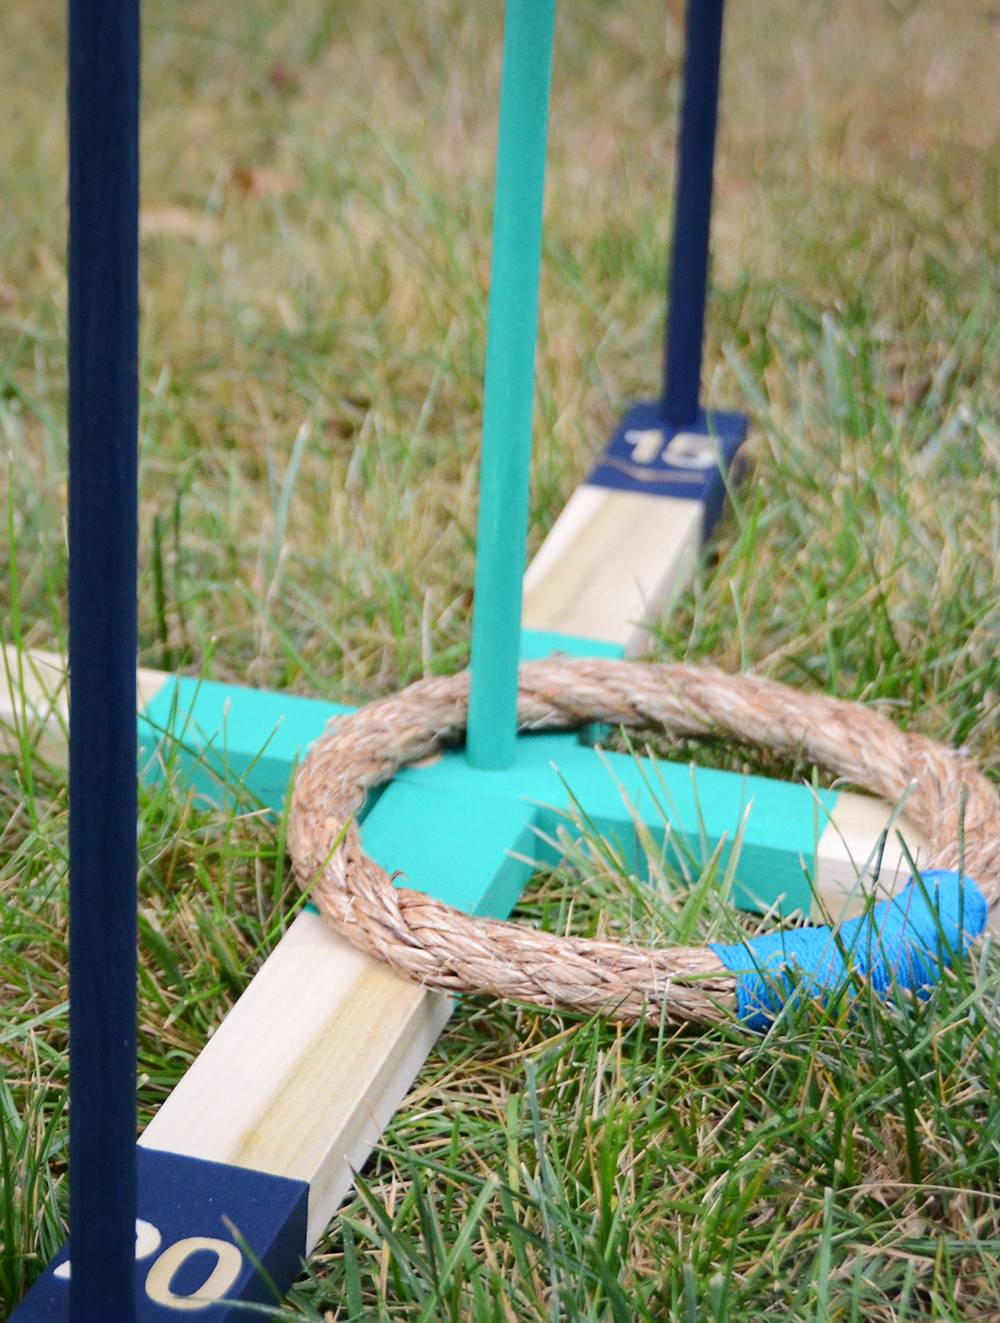
Now mask off the middle of each piece of wood using ScotchBlue painter’s tape, as shown above. Add the adhesive numbers next to each dowel so that you have 5, 10, 15 and 20 with the outside dowels and 25 in the middle.
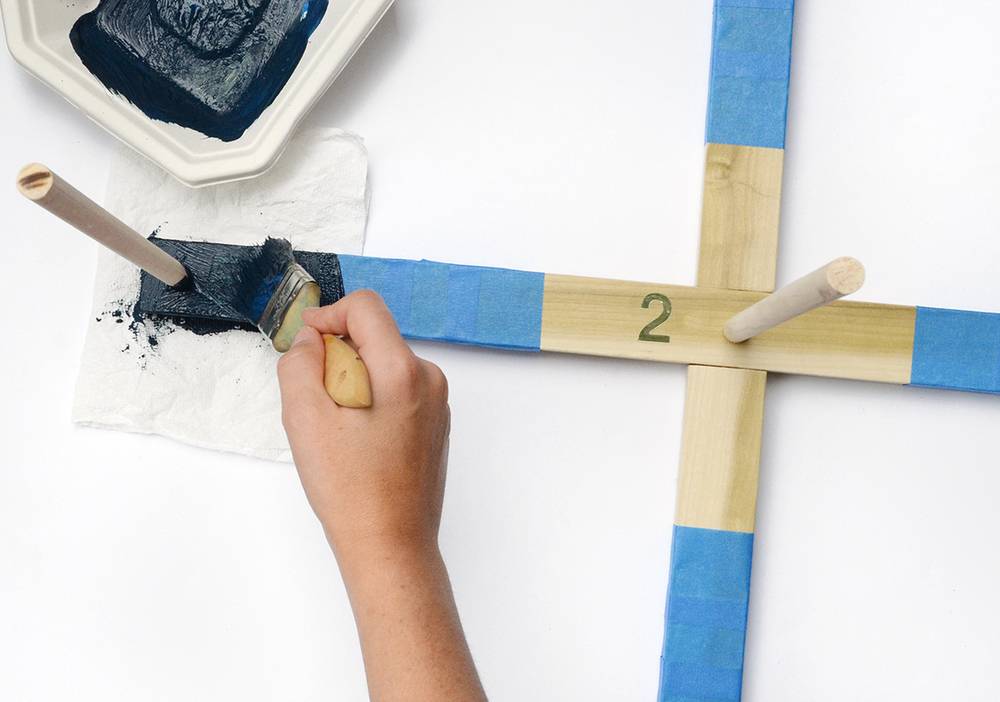
(Yes, I was missing the 5 in this photo. Don’t worry, I added it after). Now paint the ends in one color, all the way up to the tops of the dowels. Using the other color, paint the middle section.
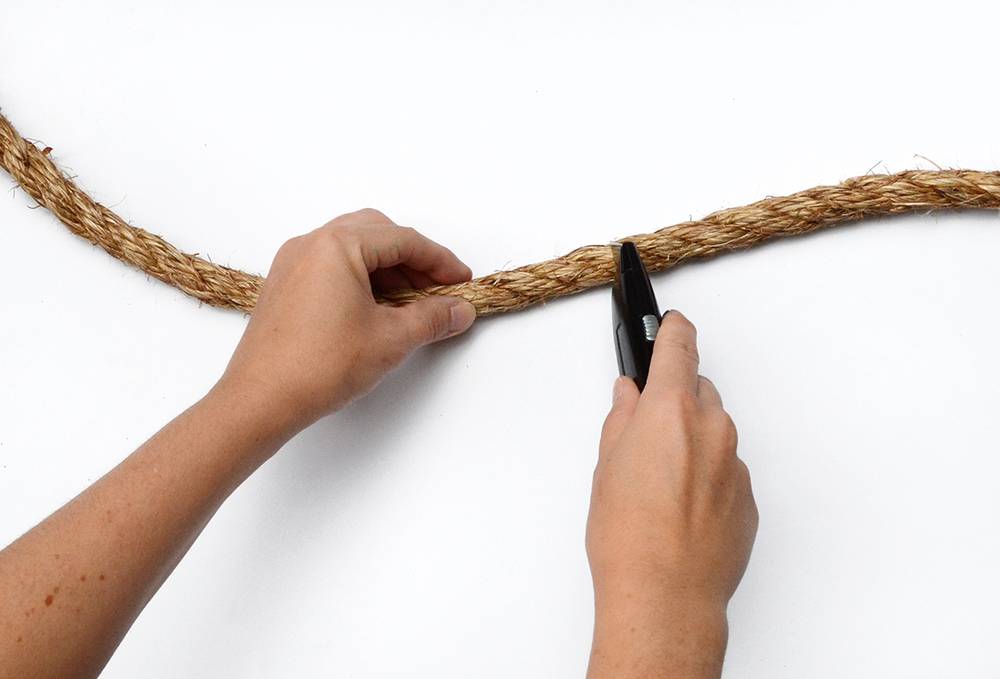
While the paint is drying, cut your rope into four 20″ sections using your utility knife.
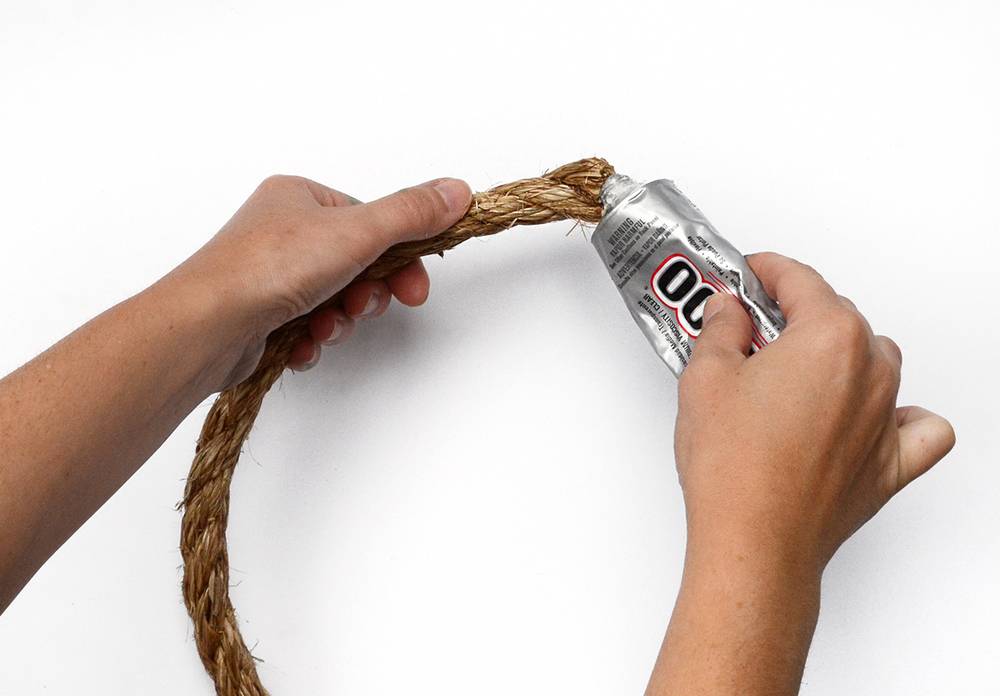
Create a circle out of one section of the rope by putting E6000 glue on the ends and then taping them with ScotchBlue painter’s tape so they are securely attached.
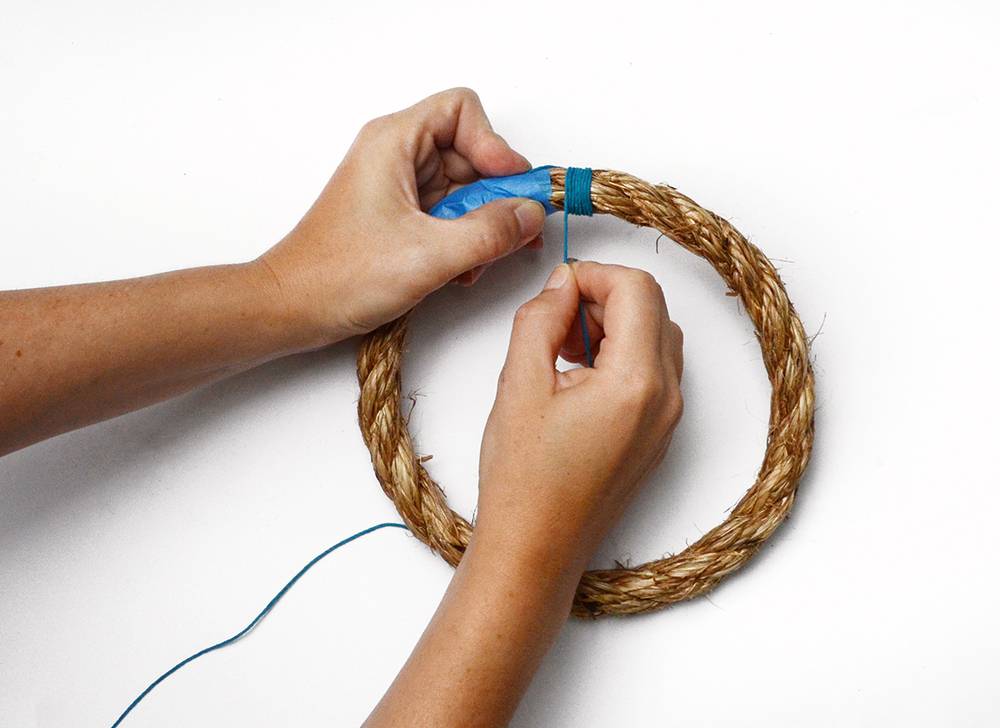
Wrap one yard of one string color around the taped section repeatedly until it is covered, knotting the end and using a dab of E6000 to secure it. Do the same to the other rope sections, using one string color for two of the rope rings and another color for the other two.
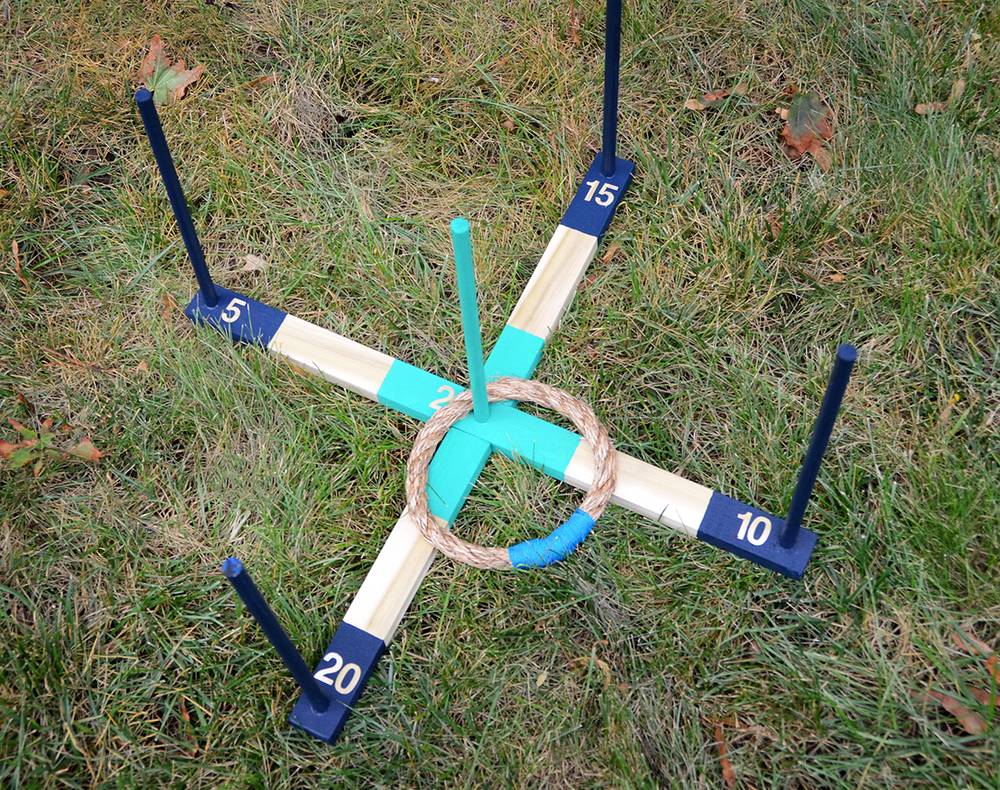
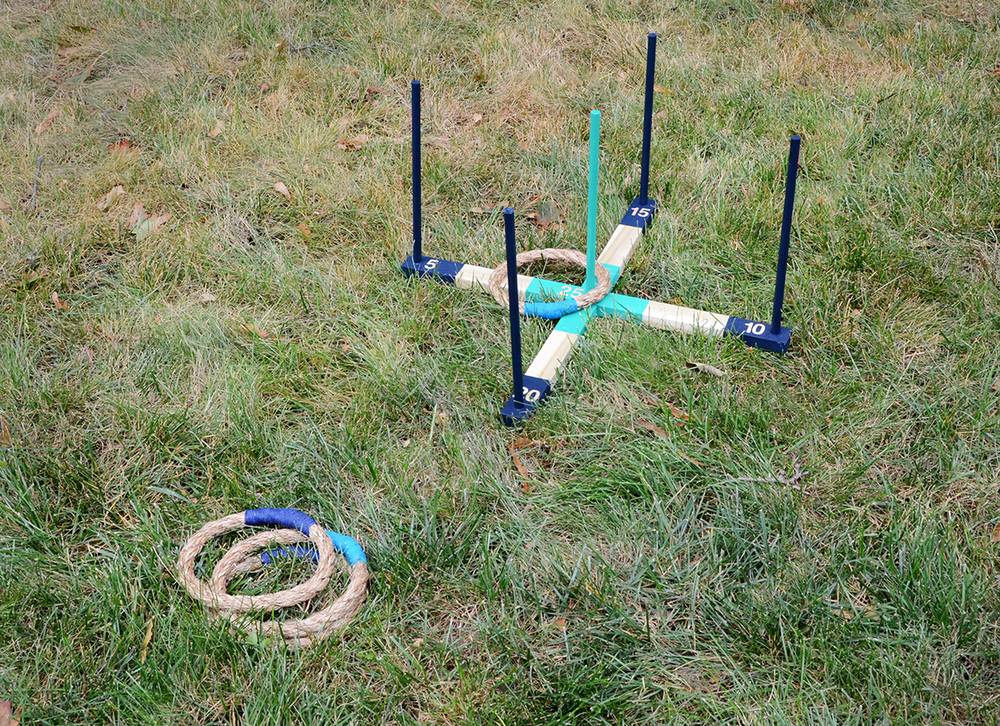
Remove the tape and adhesive numbers from the wood, and your ring toss game is complete!
You could make more rings if you’ll have lots of people playing… why not get the whole party involved?!
And you can also get creative with the paint… you might consider stripes, or even metallic paint for a more glam version. Have fun everyone!