
I wanted my house to be a fun place for trick-or-treaters of all ages to come. My son loves Batman so I decided a bat was probably on the non-scary side of halloween. I have been loving the neon light trend starting to happen in the design world, but I didn’t like the price tag. I decided to attempt a neon-llke Bat sign out of pegboard and flex LED lights.
Here is what you will need:
- Pegboard any size
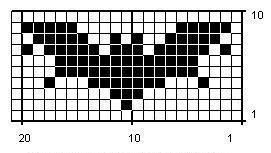
- Cross stitch bat pattern. I used the one shown above. You could do any Halloween pattern you like. A pumpkin, cat or witches had would work too.
- Flex LED lights ( amount depends on size of bat. I needed two 16ft rope but I only used half of the second)
- Drill with 1/2inch spade bit
- nails or screws larger than 1/2inch
- Paint (any color but I chose black)
- Chalk or painters tape
Start by simply free-handing your pattern on the pegboard. I did this with painters tape to keep my lines straight, but you can do it with chalk. I chose this simple cross stitch pattern because it was linear. The pegboard mimics the cross stitch fabric and it makes the bat easy to free hand and be symmetrical. If you have a projector this would work too.
Drill Holes at all the places you will feed the LED flex light through. You will be feeding the rope through and making an outline so drill all the corners of your outline.
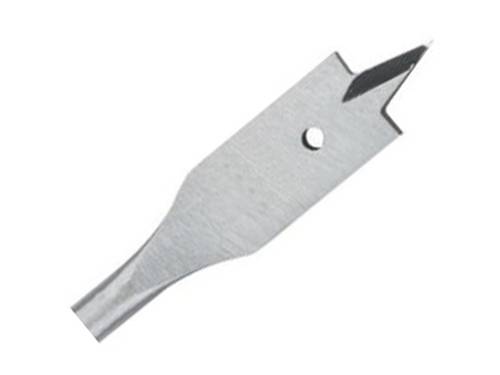
I made my holes bigger with a 1/2inch spade bit.
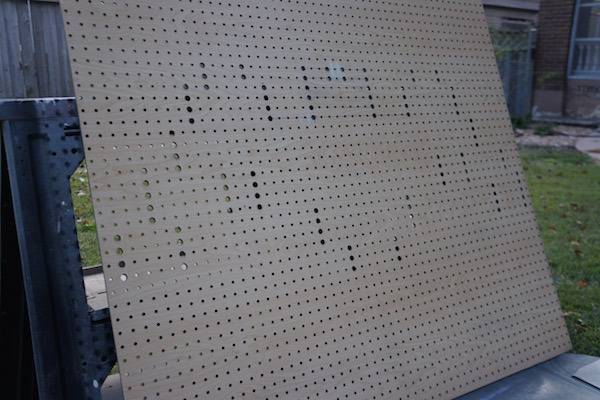
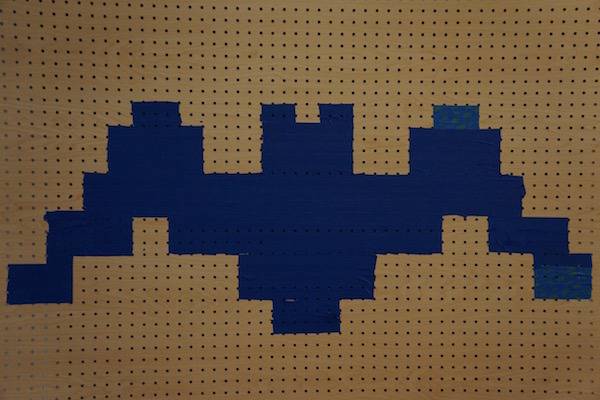
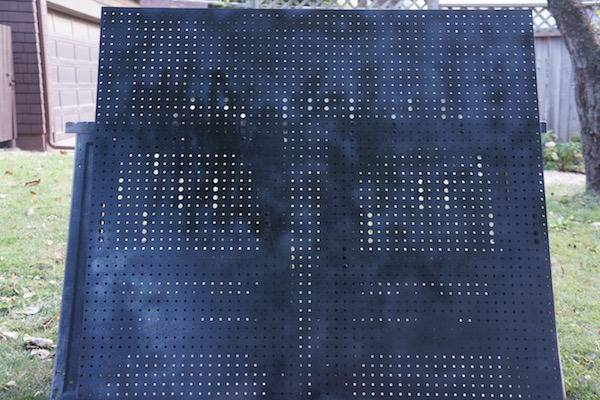
Remove painters tape and paint. Don’t worry about your outline. You will be able to see the outline of the bat with the bigger holes. (note: I drilled holes along the entire outline before I realized that I just needed to drill holes at the corners. Oops, please learn from my mistake. The good news is the rope covered the extra holes)
Now its time to get your rope.
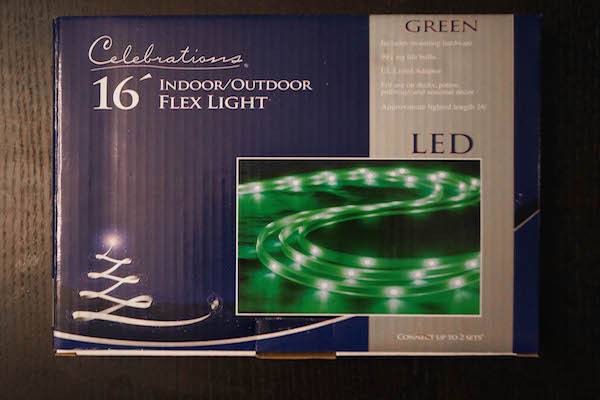
The regular sized LED rope will not work because it is not flexible. The mini LED rope might work as well as the rope made for decorating clothing. I found this LED flex rope at Ace Hardware. My light is going outside so I needed an outdoor version.
Start anywhere on the bat and feed the rope all the way through, attaching the end on the backside with duck tape.
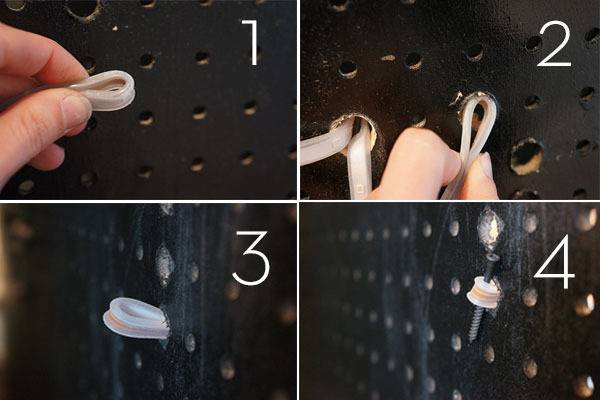
To keep an continual outline with no breaks you must come through each hole twice with your rope. Instead of feeding the rope from front to back and creating a tangled mess, fold your flex rope and feed the loop in the hole. Place a nail or screw in the loop (on the backside) to keep the loop from coming back through to the front. Gently pull tight from the front. Repeat for the next hole along your outline. This took some figuring out for me but once I got my method down I had this bat outlined in 20 minutes.
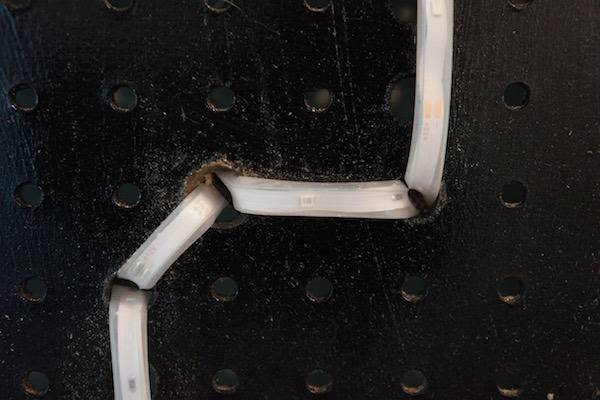
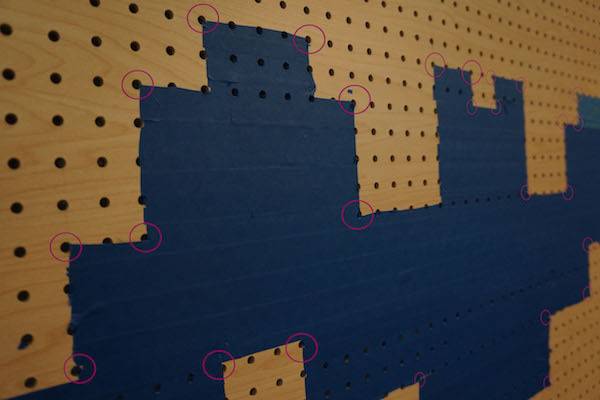
Here is a close up view from the front.
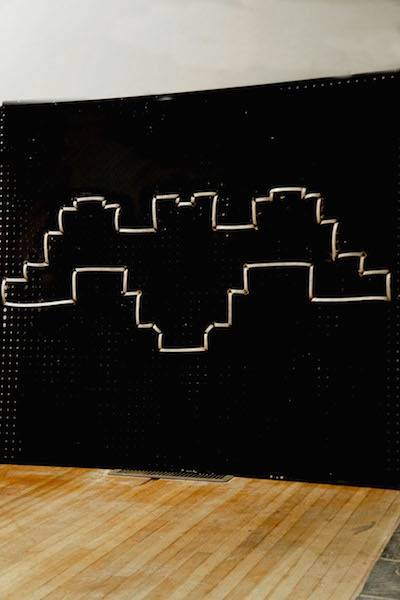
Here is the full outline and you can see here how the loops in the holes keep the outline continual.
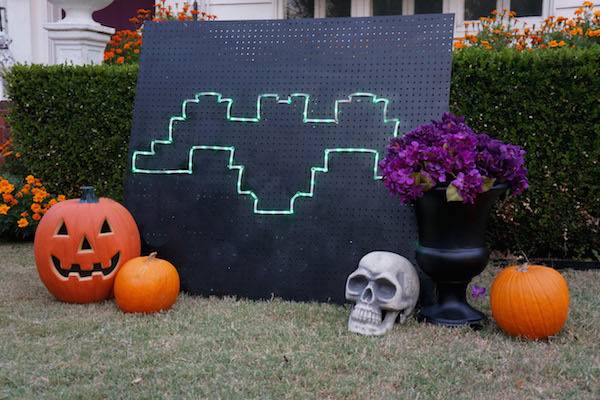
When you are finished feed the rope light to the back through the hole that you started and turn it on!
Now we are ready to greet our trick-or-treaters, or as my son suggested…call Batman if needed. Want more ideas to light up your home for Halloween? Check out this Curbly post for inspiration.
This is awesome!!!! Showing it to K-man tomorrow!