
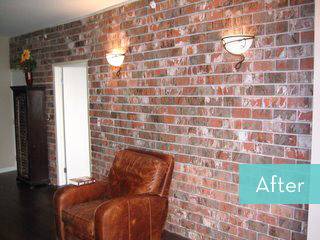
This weekend, we started turning our normal dark beige with orange-peel textured living room wall into a brick wall. We wanted a new york Chelsea kind of feel, so we decided to make the brick wall look old and weathered – like it had been there for 80 years.
We decided to turn the main room of our downtown San Diego condo into a brick wall. Earlier, we put down a dark chocolate wood floor with lots of ridges and an earthy feel. We felt the brick wall would add that New York Soho loft feel. We love those old NYC building/apartments that have been there for 80 years and have a ton of character. We were attempting to recreate that feeling in our condo.
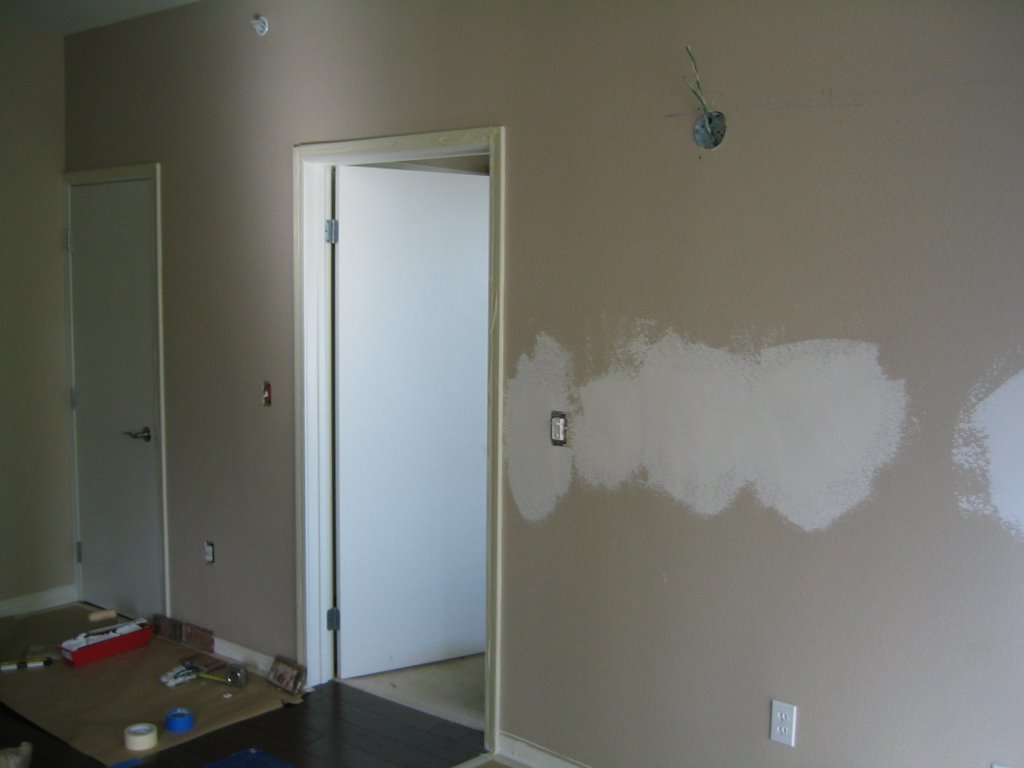
To begin with, the condo had that condo cookie-cutter feel. You know, khaki walls with orange peel texture. Beige carpet. B-O-R-I-N-G!
So we thought it would be fun to attempt something new. We used a thin brick veneer and placed it directly over the painted wall using pre-mixed Thin-set. Due to the weight of regular brick, we opted for a thin (1/2 inch) brick veneer. These are real bricks that are about 33% the size of regular bricks.
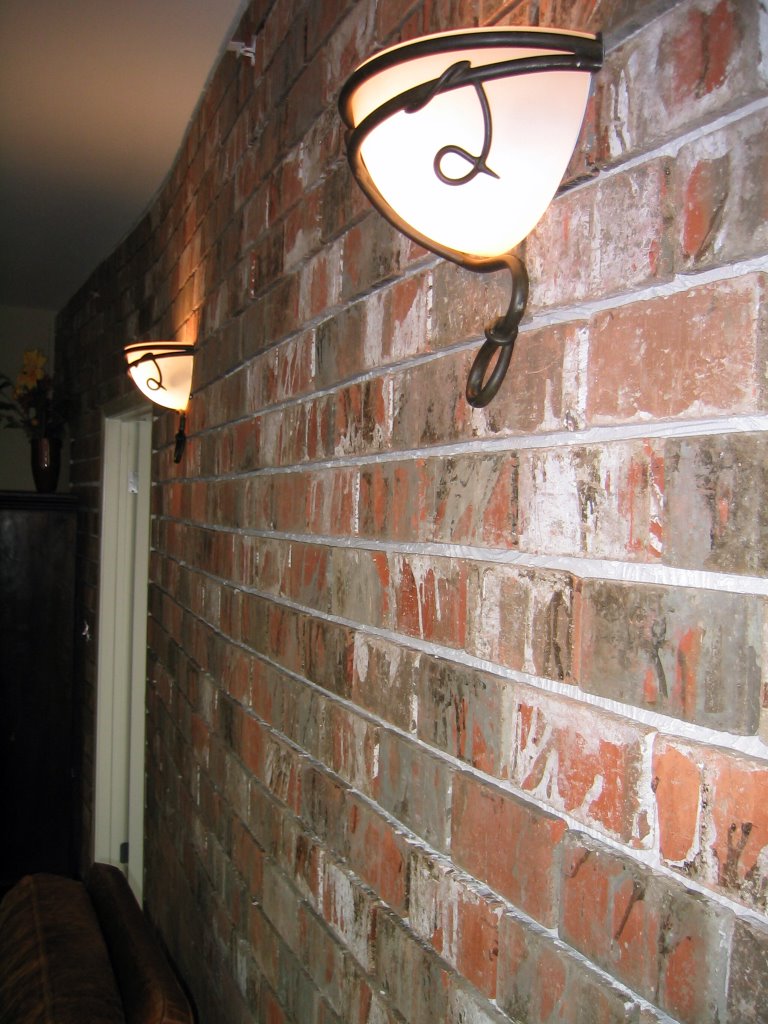
We chose an old “used brick” look because we wanted the wall to appear to have been there for a while. We used a product called Thin Set and applied it directly to the wall. From there, we started on a small section of the wall to get a feel for the layout. We cut the brick with a chisel and hammer and placed each brick one by one.
We didn’t want the wall to appear to straight or perfect. We wanted it a little jacked up. So we didn’t worry too much about having the brick in a perfect line. If you do, then you’ll need to use chalk lines.
After we figured out what we were doing, we moved to the large area of the wall.
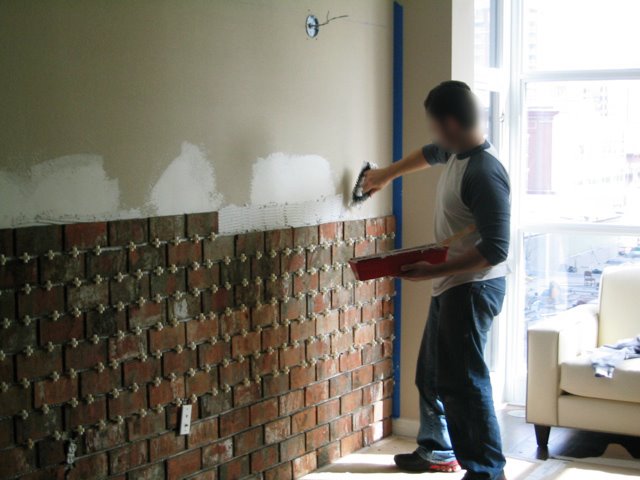
On Day two, the brick wall started to really come together. We took some of the brick and broke them on purpose to give it a more authentic feel. It was tricky working around the lighting fixtures, electrical outlets, and sprikler heads, but we managed without much incident. We used little plastic spacers to keep the weight of each new row in place. That reminds me, always start from the BOTTOM. If not, your bricks will slide and you’ll have a bitch of a time trying to straighten them up.
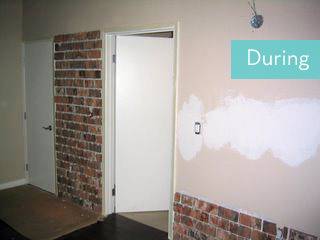
After two days, our wall was in place and ready to dry. Thank God. This stuff has a tendency to work back muscles you forgot you had. 🙂 So, here’s a pic of what the wall will look like. Next we still have to grout. More pics on that later.
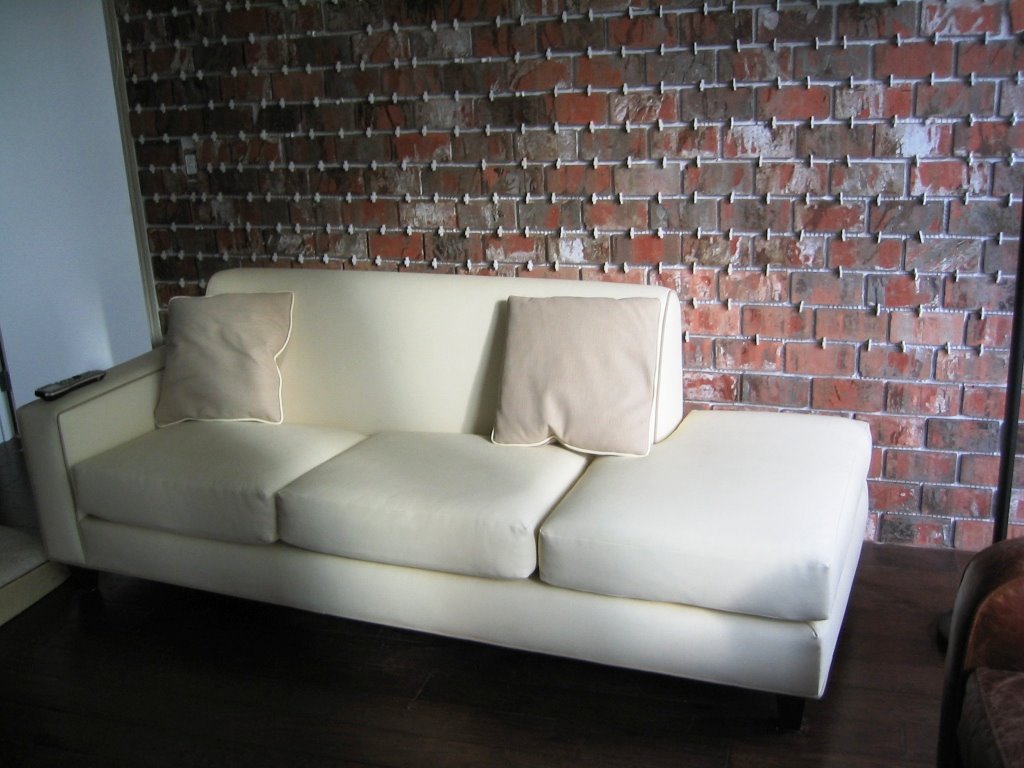
After a few more hours, we installed lighting fixtures and ran them to a dimmer. The glue set against the wall and bricks perfectly. Notice how the bricks are not exactly straight. This is done on purpose to give the effect that the wall was 40-50 years old.

Next, we will be filling in the spacing with grout and then putting up stone crown molding. More pics later!
Interested in seeing other accent wall treatment ideas? Check these out…
As stated before, you must use backer board (cement board). You need to replace the drywall with cement board to do this properly.
***YOU CAN PURCHASE ALL SUPLIES AT HOME DEPOT, LOWE’S and other home improvement stores.
***Check out Pavestone products.
http://www.pavestone.com
They offer an AMAZING range of products.
**THIS IS NOT REMOVABLE!!
*Cost is calculated by square foot.
~KC -Mason and Drywaller with 20 years experience.
Your wall looks great, but the people suggesting cement board are correct. Sheetrock is gypsum sandwiched between paper. Paper can peel. If it does start to peel, your wall is coming down. I did this in my house using special sheet metal that goes over the sheetrock for this purpose. I KNOW how much work it is to install. I really hope yours holds up in spite of the sheetrock base.
If you are putting them up in the kitchen and they are above counters between counter and cabinet, there should be no problem with putting it over drywall. If the drywall has been painted prior to putting up brick, rough it up to give it the holding power. I place tile on the walls between counters and cabinets all the time and it holds. I would use the light weight brick or rock when doing it. Just seal the bottom row by the counters good to keep out moisture. The reason they use cement board is because it is porous and has holding power. Some that are put on outside put a metal screen over the cement board before installing it.
Love, Love, Love your brick wall! Can you tell me exactly the name brand of the brick product you used and also the color? It really has that old warehouse district look which is exactly what I’m looking for.
Seriously? Some of these questions..smh..its like putting up tile people! It’s not something you can take down like a sticky note. Yes,it’s removable,but you’ll be replacing the drywall!
Paint out that White Door !!!! Looks too new !!!! Brick looks great
Love the wall! Does anyone know where to buy these bricks in Vancouver, British Columbia, Canada??
You guys did an incredible job. I’m working on plans to convert the attic over our garage into a man cave/studio. Going to do brick walls. Planning on old brick, uneven lines and chipping the grout and aging it. I have no idea how I’m going to do that yet. Maybe artist ic daughter will come up with something. AWESOME JOB.
The older comments that apparently have the brand and color of the bricks do not show up on my thread. Could you please let me know exactly what you used? Thank you!
looks great what make brick did you use