
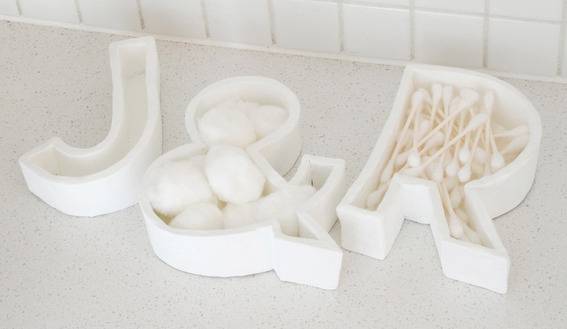
There’s something so fun about a functional letterform, isn’t there? Or maybe it’s just the typography nerd in me. But nonetheless, you have to admit that storing cotton balls inside of an ampersand is more fun than storing them in a plain old glass jar.
I was inspired to make typographic storage containers after seeing ones made from cookie cutters on Pinterest (from Willowday). Instead of using cookie cutters, I simply used clay, a favorite font, and a steady hand!
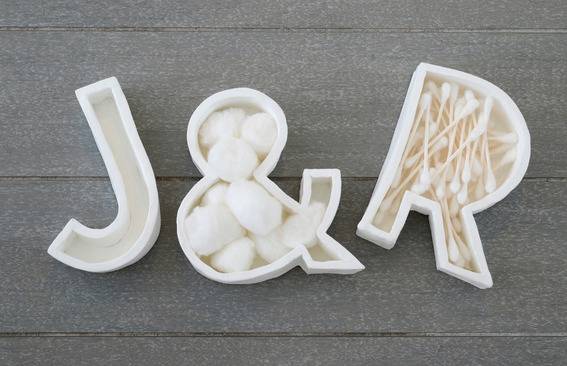
These fun little boxes are easy to make, and have some serious personality. I used the font Neutra Text as my inspiration, but any simply-shaped letters will work.
Here’s what you’ll need for this project:
– Air drying clay
– 8″ – 10″ letter printouts in a simple font
– Scissors
– Wax paper
– Rolling pin
– Knife
– Extra fine sandpaper
– Acrylic craft paint
– Paintbrush
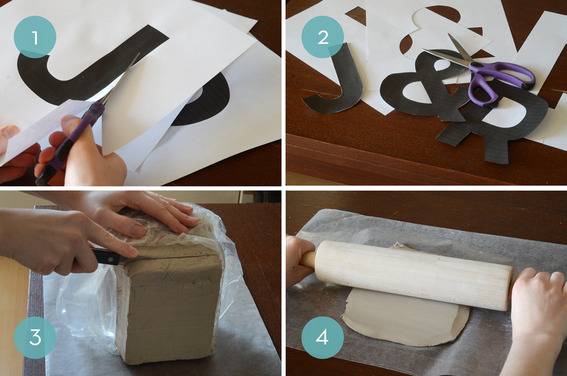
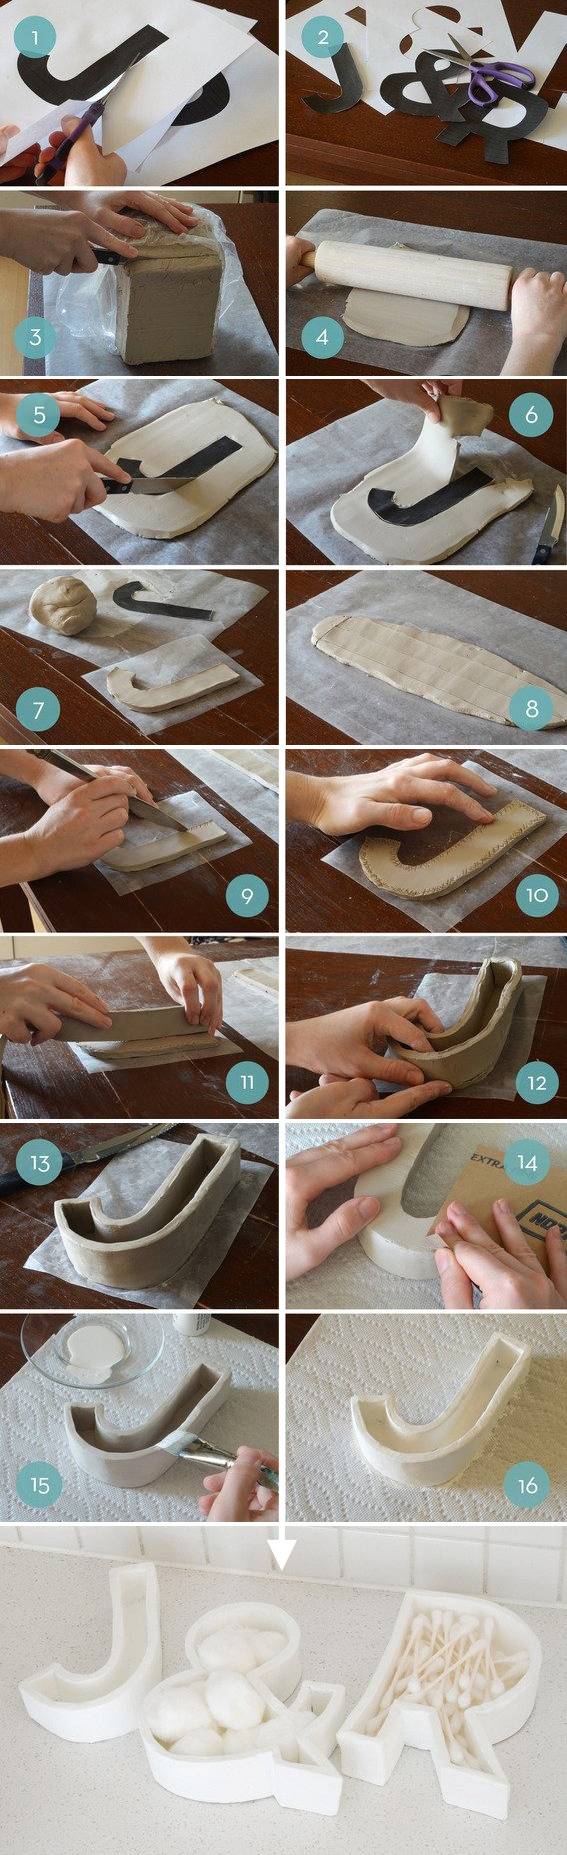
1. Begin by printing out large letters of your choice. Make sure to use a simple, sans serif font. Start cutting out your first letter.
2. Continue until you’ve cut out all of your letters.
3. Cut a slab of clay using a sharp knife.
4. Place it on a piece of wax paper and roll out the clay until it is about 1/4 inch thick.
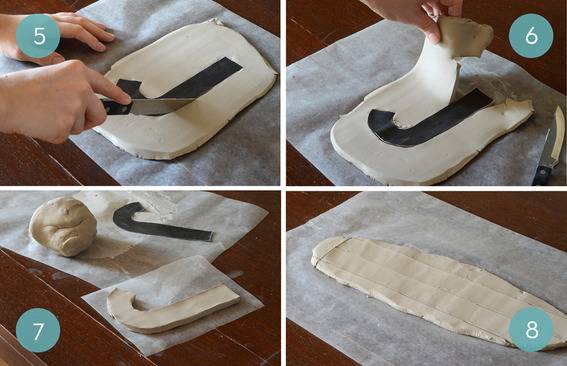
5. Place the first letter on top of the clay and use the edge as a guide to cut it out.
6. Pull the excess away.
7. It should look something like this (see above)
8. Next, roll out another long slab of the same thickness and cut it into 1.5″ strips to form the walls of the letter.
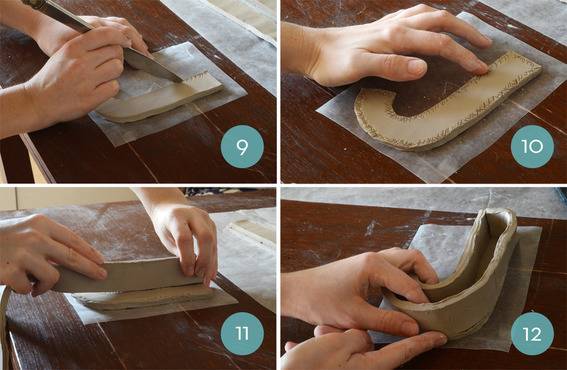
9. Now use a knife to create small criss-cross marks around the edges of the letter. This technique, called scoring, helps adhere one piece of clay to another.
10. Use your finger or a paint brush to put some water on the scored areas.
11. Now begin pressing the wall strip to the outside edge of the letter along the scoring. Press firmly.
12. Smooth out the inner and outer creases with your fingers as you go.
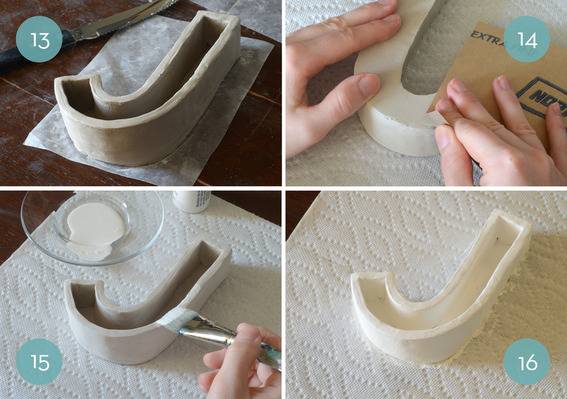
13. Let it dry thoroughly, according to the instructions on the package.
14. Sand down any rough edges with extra fine sandpaper. Be sure to wear a protective face mask so you don’t inhale the dust.
15. Wipe off any excess dust and paint the letter in the color of your choice.
16. And your typographic letterform storage container is finished!
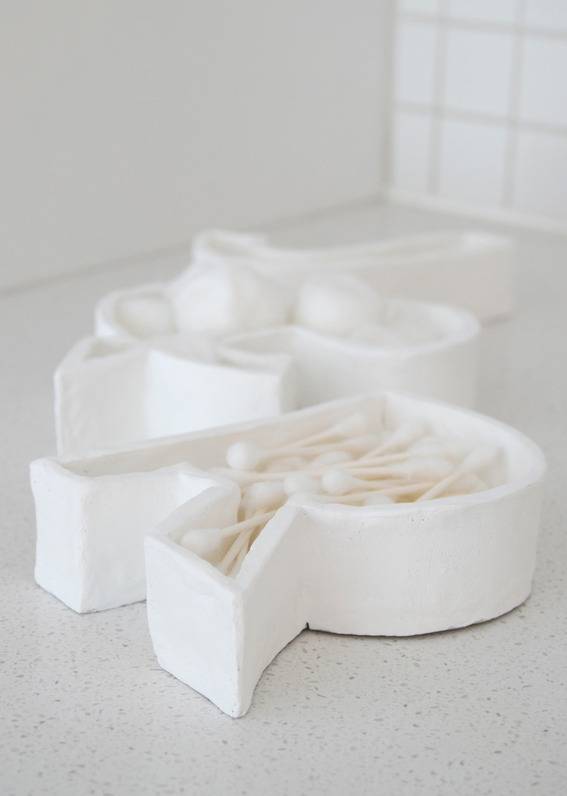
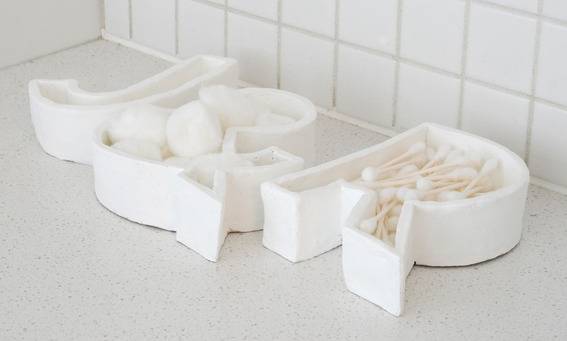
These are great for storing cotton balls and q-tips in the bathroom, but they’re also perfect for holding office supplies. Or beads. Or anything at all, really!
Hey, y’know what we love? When you share our projects on Pinterest! Please help us spread the word! Here’s an image with all the steps for this project that you can click and share with your followers:
Well, these are perfect! Love it.
Terrific idea! Must make one for each of my grandchildren….perhaps their parents too. The only thing I think I add is some sort of cushion on the bottom such as felt or even nonskid material of some sort to prevent scratches on whatever they set these on. Thanks for the inspiration and just in time for Valentines Day…hey heart shapes!
What kind of paint do I use to pain them?
@Alex I used acrylic craft paint, and it worked well.
What kind of Air dry clay do you reccomend?
I used Amaco Air Dry Clay which worked well.