Halloween is fast approaching, and fall is in full swing… which means it’s time to decorate pumpkins! Instead of getting a knife to carve them though and speeding up the decomposition process, go grab your paint brushes and painter’s tape and have your decor project last throughout the whole season.

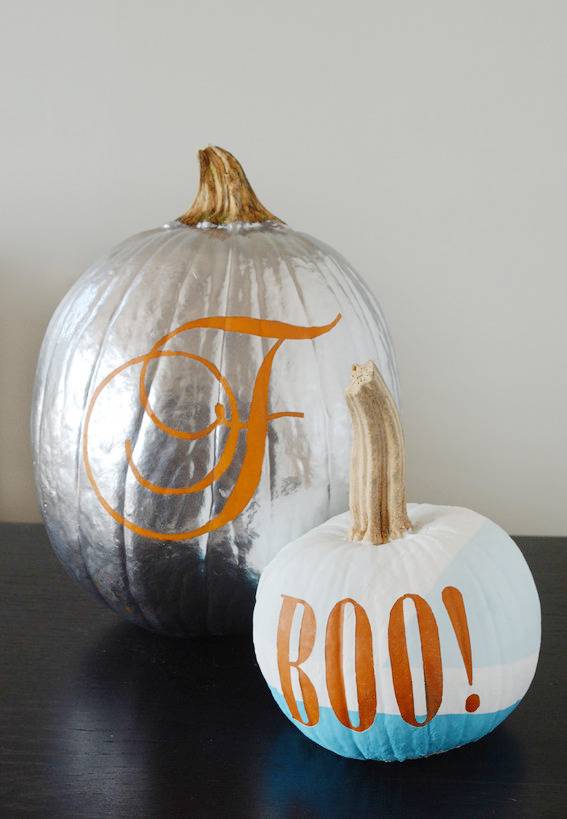 The possibilities are endless with this reverse-stencil technique. Words, monograms, and even pictures could be used. And believe it or not, it’s pretty simple, and you don’t need any special equipment or gear.
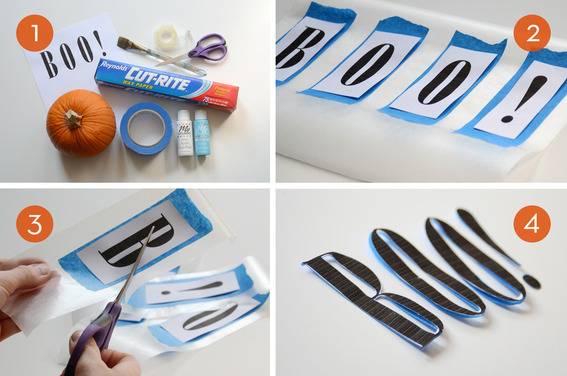 1. First, gather your materials. You’ll need:
- A pumpkin
- Painter’s tape
- Paint brushes
- Acrylic paint (or spray paint)
- Printed letters or words
- Wax paper
- Scissors
- Scotch tape
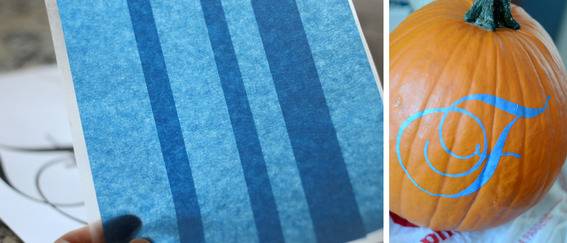
2. Tear off a piece of wax paper and place four pieces of blue tape across it (or as many pieces as you have letters). Cut apart your printed letters and tape each one to the blue tape. Make sure you loop the tape inside out and place it on the back of the letter so that it will stay securely attached to the blue tape as you’re cutting.
3. Now carefully cut out each letter.
4. Here’s what they should look like. Remove the top printed layer from each, leaving only the painter’s tape and wax paper.
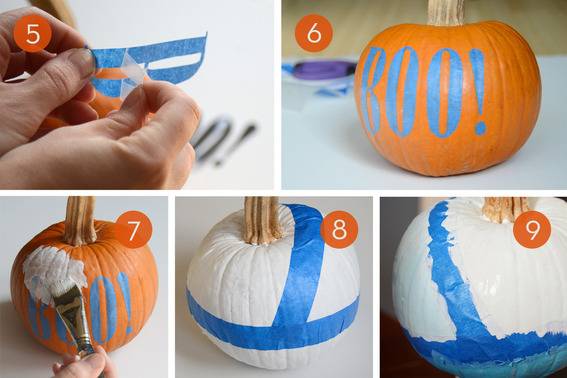
5. Peel off the wax paper layer from your first letter, and place it on your pumpkin.
6. Do the same for the rest of the letters. Press down firmly so there are no air bubbles.
7. Now paint your pumpkin with a base coat of color. You may need two coats of paint; if so, make sure you let it dry very thoroughly in between coats.
8. You can stop at this point if you like, but I wanted to create a color blocked look. To achieve this effect, place one piece of tape on the diagonal all the way around your pumpkin and then attach another piece from the front to the back as shown above.
9. Paint each section a different color. Once it’s completely dry, remove all of the blue tape. You may need to touch up a few areas where the tape pulled up the paint underneath.

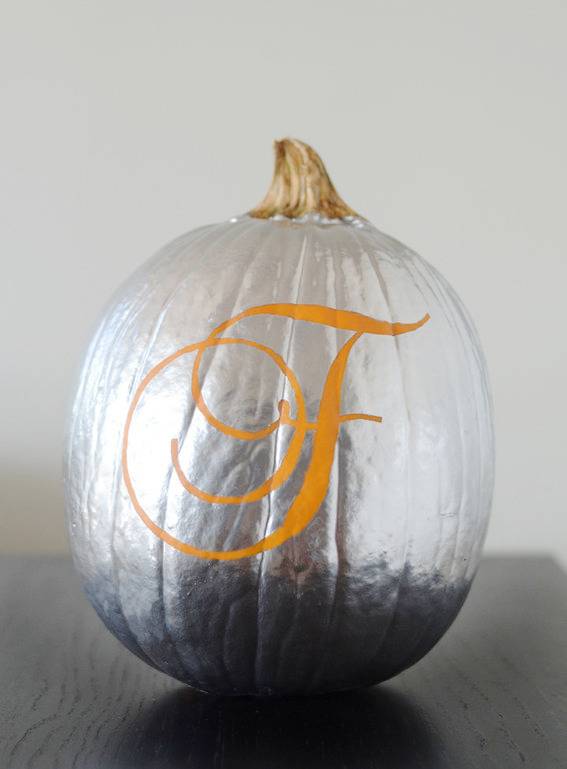
And you’re finished! Now…. if you’d like to add a larger letter to your pumpkin, such as a monogram, you’ll want to combine two or three pieces of tape as shown below. Ensure that they overlap at least half an inch.
Now continue with the same process described earlier. I used metallic silver spray paint for this pumpkin, and it worked just as well as the acrylic paint. Don’t forget to tape the stem if you want it to remain unpainted though – spray paint is not as easy to control as acrylic. Spray two coats, and that’s it! Your very own custom-made monogrammed pumpkin.