
My friend Britany has a hard time getting rid of things. She’s not a hoarder by any means, and her home is actually quite clean and clutter-free. But it is full of beat up, hand-me-down pieces of furniture that she got in college. (And, though I wasn’t there, likely weren’t all that attractive when they were new). Case in point? This chair, in all its early 90s green-and-cranberry glory. It’s rickety, the seat broken and pretty uncomfortable, and the paint worn, but she and her husband still use it daily as their office chair. When I asked her why, she says “I like the shape, and I think the color contrast between the body of the chair and the spindles is interesting.” So, together, we worked on giving it an update: a proper facelift while still honoring the features she likes about it. And all for about $25 in supplies.

![]()
Tools and Materials
- Various hand tools to remove the cushion and old fabric, such as pliers, screwdrivers, etc
- 220-grit sandpaper (I used 3M Sandblaster Pro)
- Spray paint and spray primer, 2 colors
-
ScotchBlue™ Painter’s Tape

- New fabric, 1/2″ foam, and cotton batting
- Staple gun and staples
- Proper safety equipment: protective glasses, gloves, and a respirator for sanding
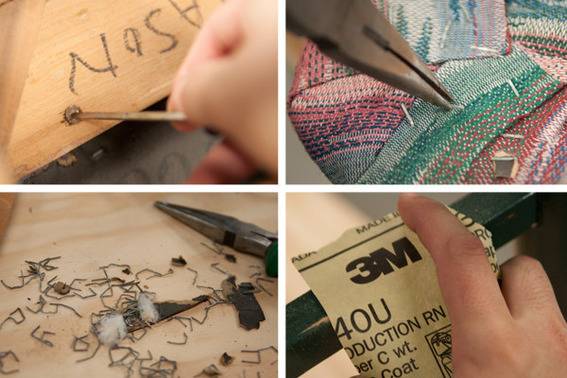 First up, disassembling the current chair. This was a combo of removing screws and staples to separate the seat from the chair body. Then, a light sanding with 220-grit paper to rough up the wood a bit to accept the paint. During this whole process, since there a little bits of metal flying around and all kinds of dust mites, etc, its important to wear gloves, a dust mask or respirator, and safety glasses.
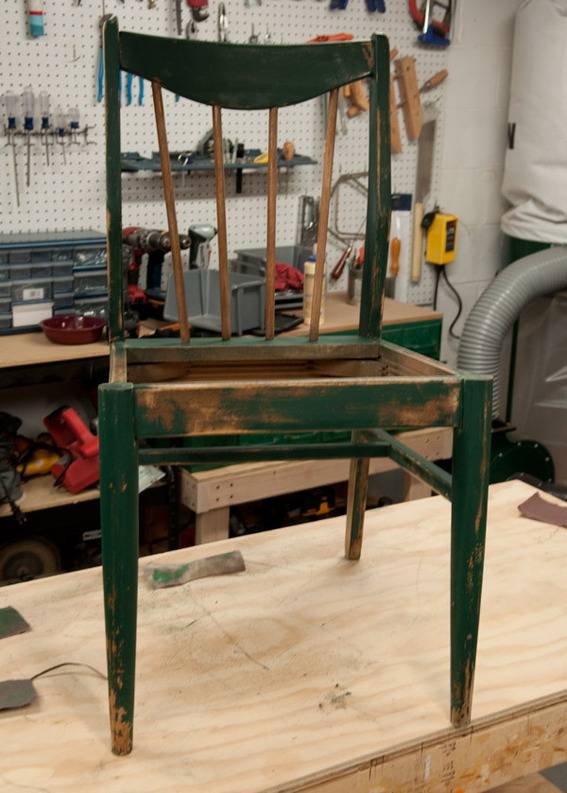
Here’s the chair all sanded up and ready for paint. I also re-glued some of the loose joints with wood glue and allowed to dry overnight.

Next, I covered the whole thing with a coat of flat spray primer. It’s less expensive than the finish coat of spray paint, and helps to cover the old color and wood so I can won’t have to use a lot of paint on the finished product, avoiding any drips. You can also see I’m working outside while spray painting, which is not only cleaner, but lessens the potential to breathe in the fumes. I’m also wearing a respirator designed for spray paint.

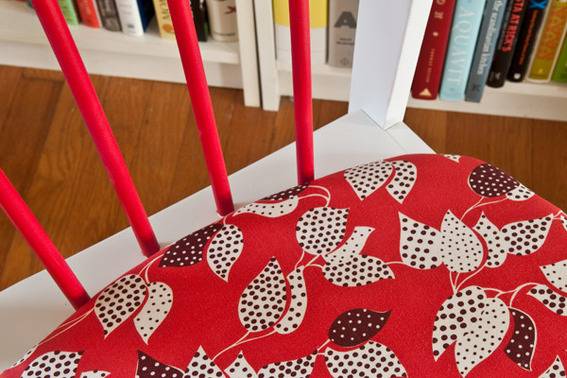
Next, the design decisions. Since I knew Britany really loved the two-tone effect of the chairs previous design, I wanted to incorporate that into the makeover. So, I decided to give the chair body a finish coat of white, but paint the spindles a bright red accent that matched the fabric we picked out. Spray paint gives a great finish, but can go everywhere, so I knew I needed to use ScotchBlue painter’s tape to mask the areas near the spindles so they wouldn’t end up pink with overspray.
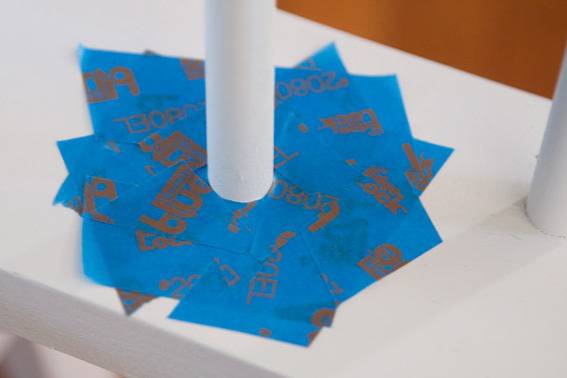
Whenever I work with tape and curves, I like to make little ScotchBlue tape “flowers” to create circles. Just use short lengths of tape to make an octagon around the spindle, then go back and cover any other areas with a second round of ScotchBlue. It’s actually quite simple, and only takes about two minutes each.

After taping around the spindles, I used ScotchBlue to cover other vulnerable areas, as well as to attach some plastic grocery bags to the chair without having to worry about pulling off the white paint. The stuff really does work wonderfully.
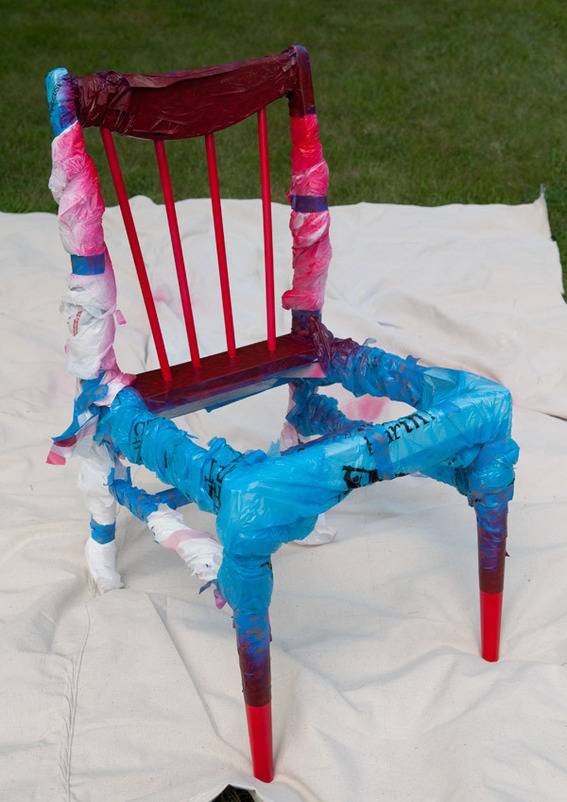
Here’s the chair all redded up. You can see I taped off a little area on the front legs to add just a bit more color.
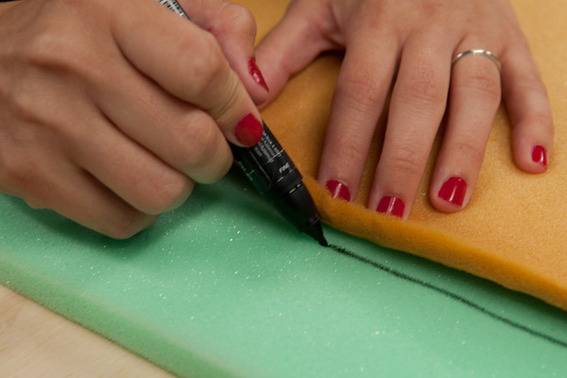
To redo the cushion, Britany and I just traced the old components onto fresh materials to guarantee a good fit. First, a clean piece of 1/2″ foam…
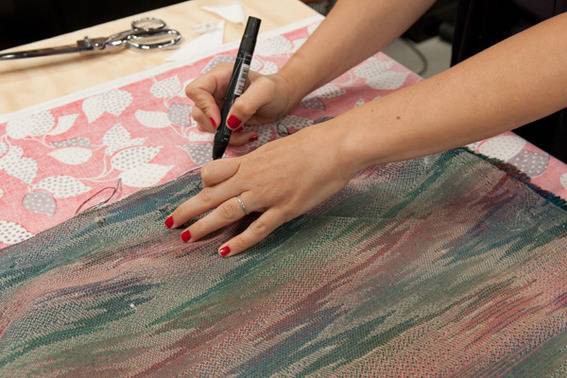
then a new square of cotton batting, and this great bold fabric we found on clearance at our local shop, Sew to Speak.
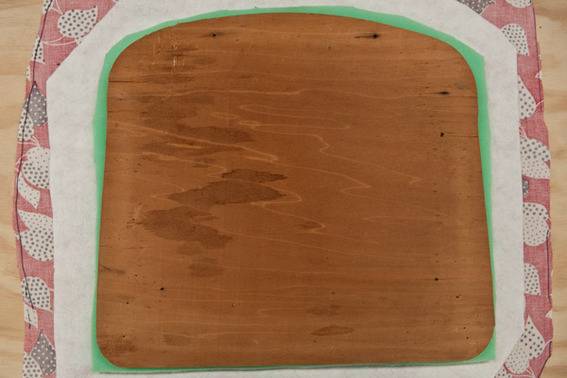
We mimicked the order of the old cushion: fabric (wrong side up), batting, foam, seat.
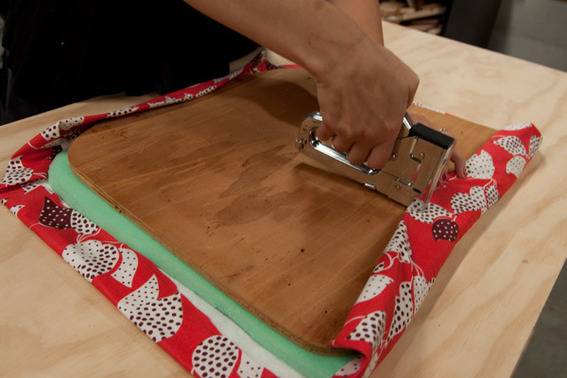
Then, pulling tightly and working from opposite sides, we attached the fabric and cushion to the seat with a staple gun.
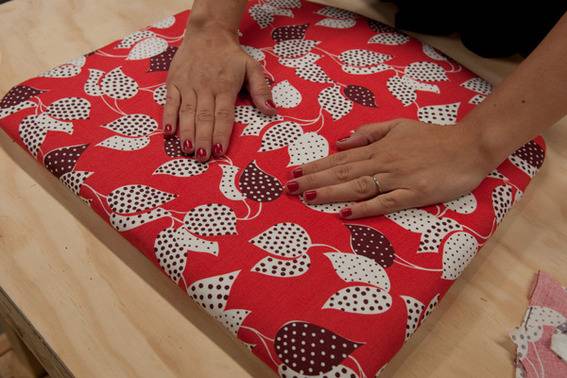
For the corners, just wrap them like a Christmas present, making sure everything is taut. Don’t be afraid to cut away extra fabric once your sure you have coverage. Sink a couple extra staples just to keep everything in place.
And…here it is, all finished up:
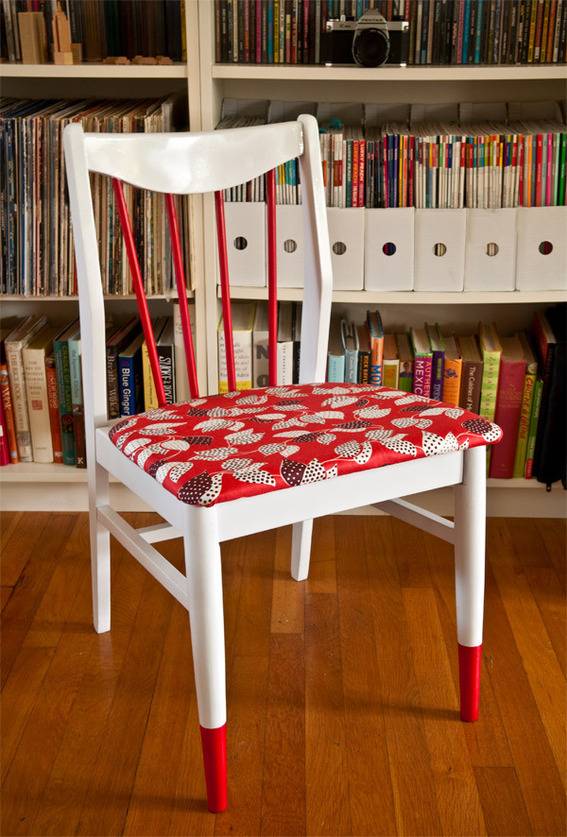
It’s amazing what a clever paint job can do, right? I’m not usually a red guy, but I love the contrast with the white, and I think it really suits the design of the chair well. The brown tones in the fabric, along with its leaf motif, ground the piece and help it to feel really natural and not too in-your-face.
I ended up having to replace the hardware that attaches the seat to the chair rails and stiles, and am happy that the chair is now more secure, and much, much more comfortable.
And nothing needed to be thrown away…except that awful, stained cushion.
This post is part of the Ready, Set, Paint Blog Hop![]() . Check out some of the other projects:
. Check out some of the other projects:
-
Centsational Girl – Textured Panel Dresser Makeover

-
Thrifty and Chic – Framed Stencil Wall

-
The Design Confidential – DIY Concrete Color Block Painted Tables
 ?
? -
Sand & Sisal – Faux Etched Glass

-
The Girl Creative – Summer Chalkboard

-
PB & J Stories – Dipped Effect Outdoor Bench and Front Patio Makeover

-
In My Own Style – How to Paint Outdoor Furniture

-
Making this Home – Embellish with a Paint Border


- Rustic Bench Gets Modern Moroccan-Inspired Makeover
 (by our own DIY Maven!)
 -
DIY Game Table

-
Fun with Fireworks

-
Charles & Hudson – Wood Block Planter

-
Love of Family and Home – DIY Striped Curtain

-
LollyJane – Mailbox Makeover

-
Nesting Place – Painting with Chalk

-
Thistlewood Farms: How to Paint Stripes

-
Live Laugh Rowe: DIY Drop Cloth Table Runner

-
SawdustGirl – Spray-Painted-Striped Lemonade Stand Canopy

-
Make It: Painted Horseshoes

-
DIY Pet Food Station

-
Spearmint Color Blocked Vintage Wicker Headboard

-
DIY Mason Jar Dining Caddy

-
Build a Large Wall Frame for a Chalkboard or Mirror

![]()

![]()
This post was brought to you in partnership with The Home Depot and ScotchBlue™ Painter’s Tape. All opinions are ours alone.