
(HEY! We’re giving away a $200 Home Depot gift card at the bottom of this post! Read on to find out how to win!)
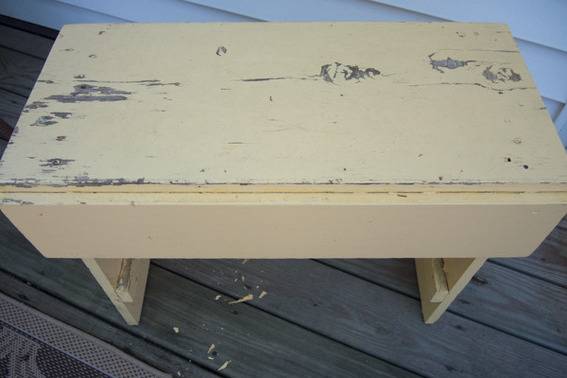
My dad was a jack of all trades as far as DIY was concerned. Plumbing, heating, engine repair. He did just about everything. The one thing he rarely did was make furniture. Only two such projects come to mind: a coffee table that was long gone by the time I came around, and there is the bench you see above. Dad’s bench, as we refer to it, was never meant to be a ‘beauty’ piece, but rather a workbench of sorts for my mother.

It went on the auction block when they downsized about 6 years ago. As I stood watching the auctioneer offer up the bench, I decided I couldn’t part with it and entered into a heated bidding war with a total stranger. I paid five bucks for it.
For being 60+ years old, it’s in pretty good shape, and, thanks to box nails, it’s still super sturdy. All it needed was some love and some Moroccan spice. Why Moroccan? For one thing, I love the style, and for another such patterns utilize straight lines, which means they can be created with ScotchBlue™ Painter’s Tape.
The supplies for this project included the following:
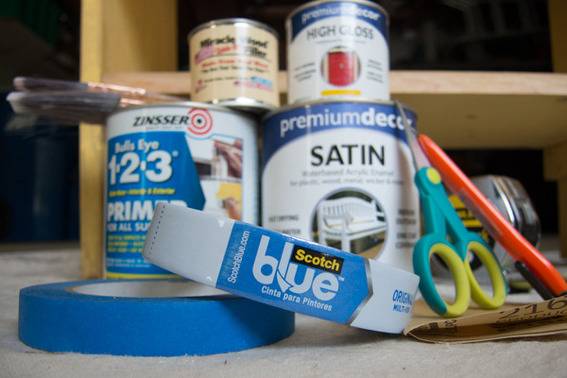
- sander and sand paper (180 grit did the trick)
- wood filler
- primer
- interior/exterior paint, white satin
- interior/exterior paint, yellow high gloss
- paint brushes
- a straight edge craft blade
- ruler or tape measure
- cardboard or heavy card stock
- scissors
- one roll of .70″ ScotchBlue™ Painter’s Tape
I started its makeover by giving it a good sanding and then filled the voids with wood filler. The sanding revealed a lot of issues. So many that I decided to install a new top and re-use Dad’s original top as a lower shelf.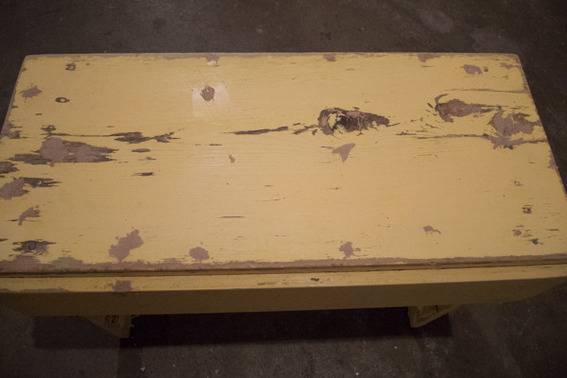 Gentle persuasion with a hammer and pry bar did the trick.
 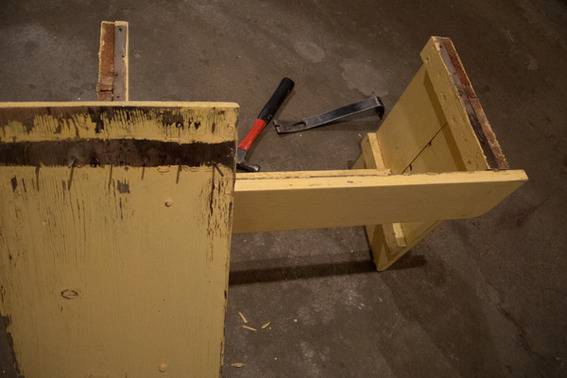 A new piece of 3/4″ x 12″ pine was cut to fit and installed with, of course, box nails–just like the original. The old top was then repositioned below.
 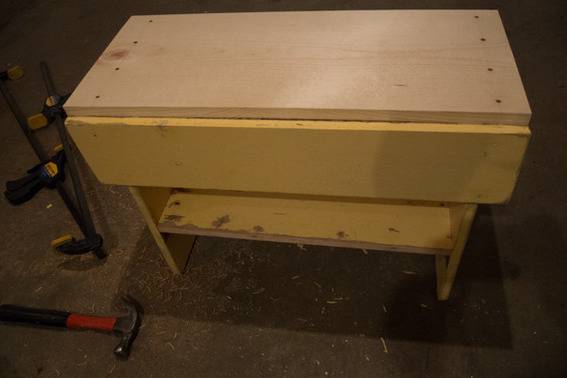 I didn’t particularly like that step between the top and apron, so I installed a piece of quarter-round to smooth things out.
 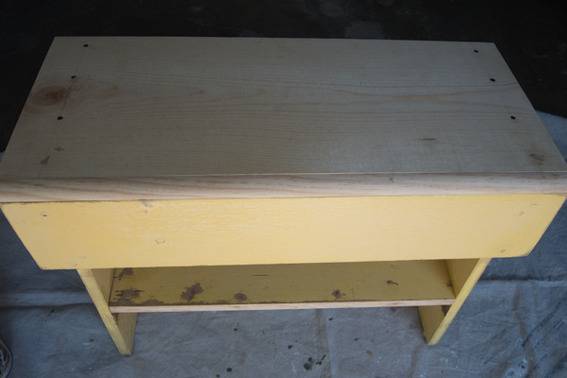 Finally, it was time to paint. That started with a coat of good primer, followed by TWO coats of white, satin interior/exterior paint.
 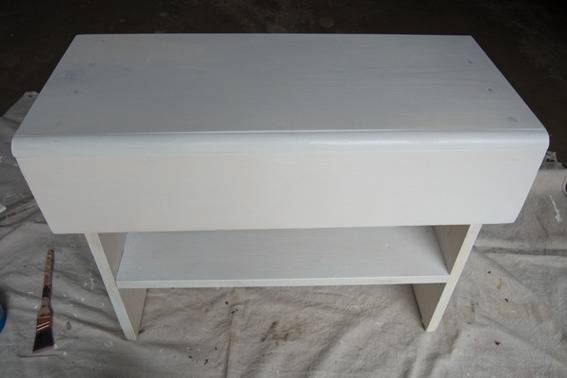 Next came the ScotchBlue™ Painter’s Tape. I started by running a section of tape from corner to the edge and down the apron creating a 45 degree angle.
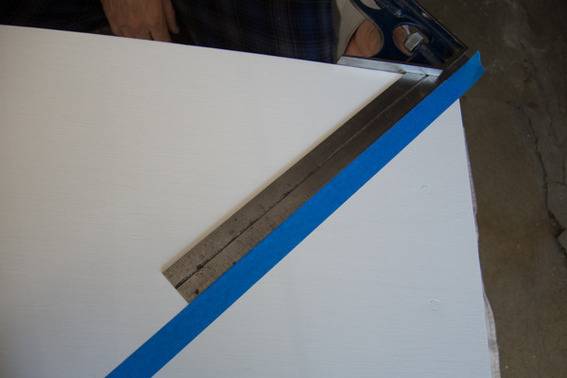 Then using the tried and true math + precision eye-ball combination, I applied more tape creating a lattice effect, making sure that the white squares between the tape were indeed SQUARE. (This is imperative.)
 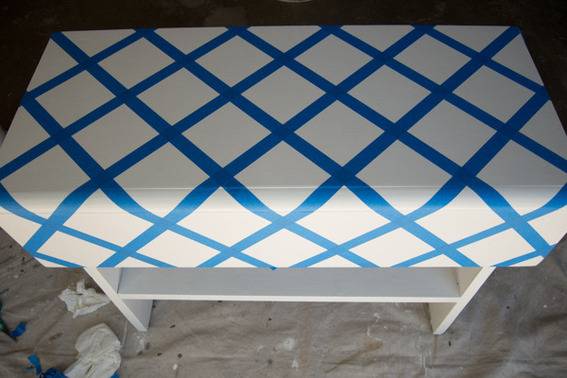 Then I made a replica/template of the center square (another great use for paint chips).
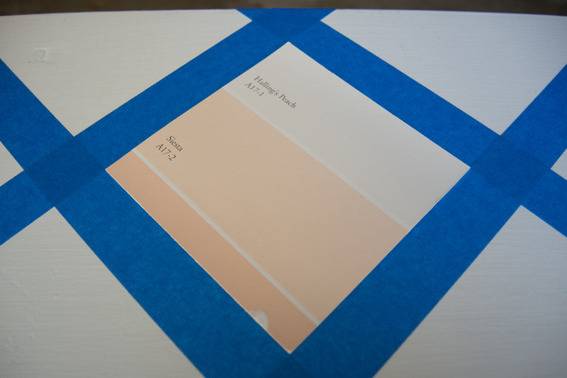 I turned the paper square 45 degrees to the lattice squares and applied lengths of tape running down ALL FOUR SIDES. The first two strips:
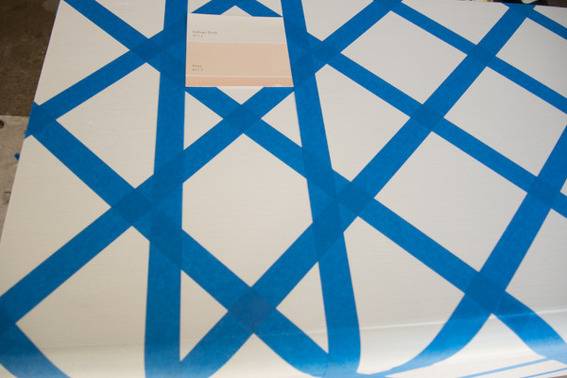 And after the second strips:
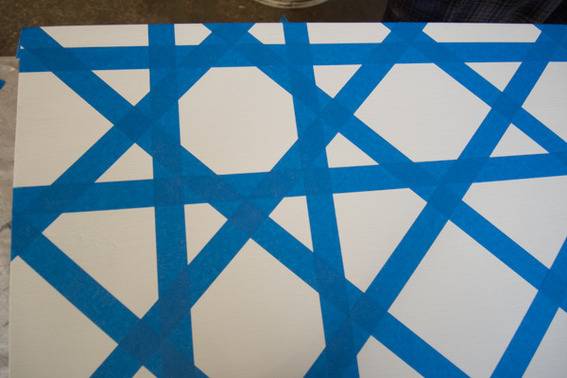 I did that to each square along the top row, and, soon, the pattern you see below appeared. (It was at this point someone made a remark that I’d, “picked a complicated pattern”, to which I replied, “Just wait.”)
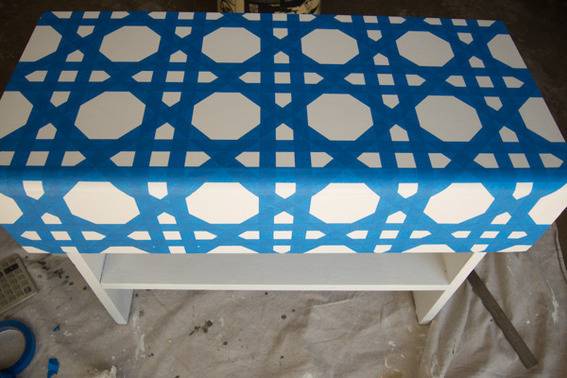 Then I employed my craft blade to cut out the horizontal and vertical center sections of the tape to create “plus” signs, of sorts.
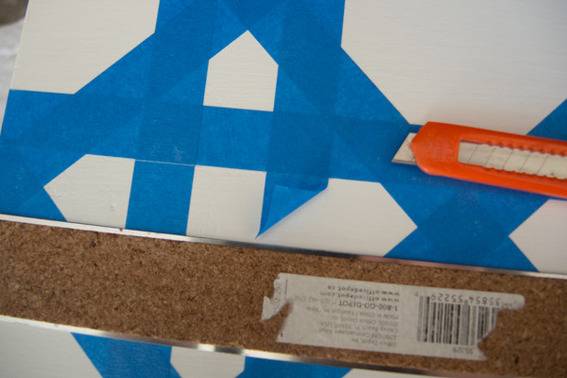 See? Plus sign–with points.
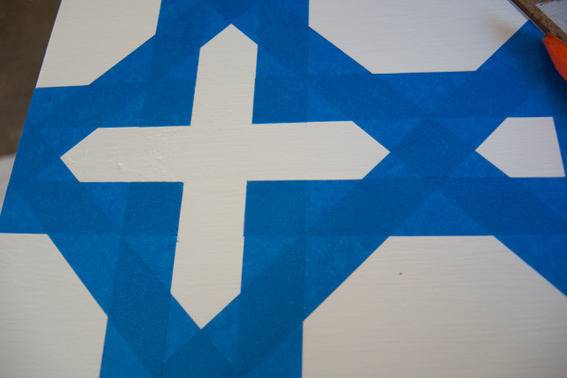 When I was finished with all those sections, this is what the pattern looked like:
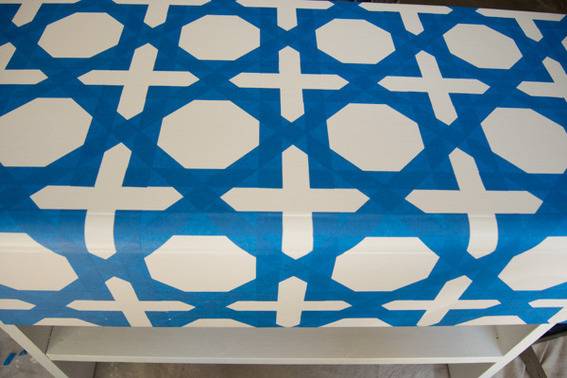 To make the eight-pointed stars, I used my paint-chip template to cut out the “points” of each of the octagons.
  Basically, the star is two squares overlapping each other.
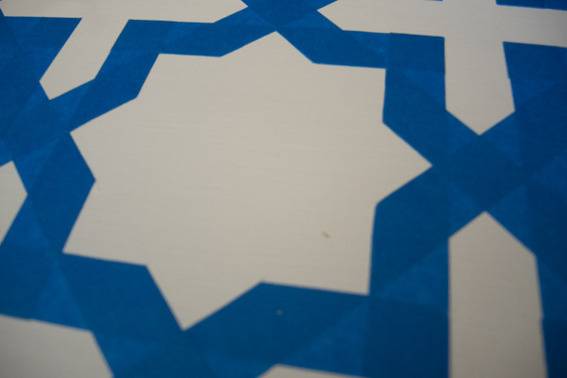 When all the octagons were cut out, this is what the pattern looked like:
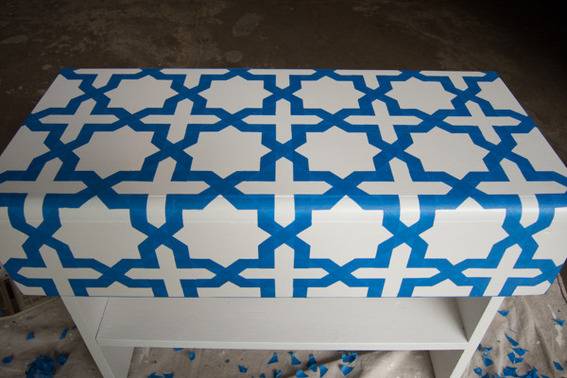 At this point, I almost didn’t want to actually paint Dad’s bench. The blue tape looked so cute! Be that as it may, I cracked open the yellow paint, BUT…NOT BEFORE USING MY FINGERTIPS TO ENSURE THE TAPE WAS STILL ADHERING WELL. Who knows what all that cutting and lifting did?!
I chose a very punchy, super glossy yellow as a nod to Dad’s original color. I chose high gloss to play against the white satin, creating a tile/grout effect of sorts.
When painting a design created by tape, I find it best to brush away from the tape. That way I’m not forcing the paint under the tape. 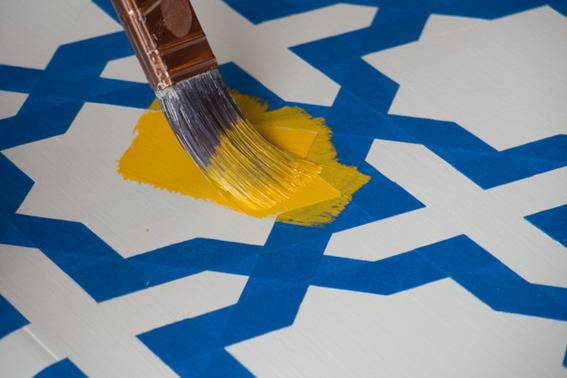 I applied TWO COATS of the yellow. (I didn’t want a wishy-washy stencil effect. I wanted the yellow to seriously pop.)
 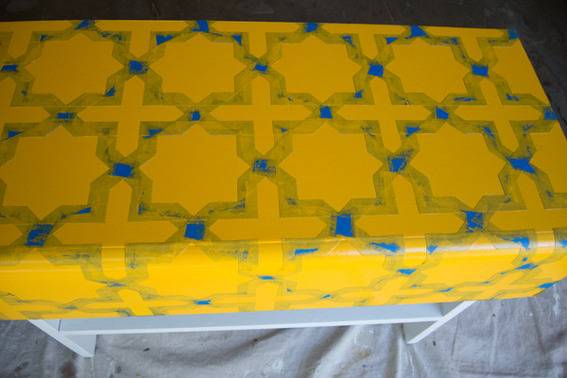 I don’t mind telling you that I was a little nervous about removing the tape. Would it peel off the white? Would my design live up to my imagination?? The answers to those questions was no and yes!
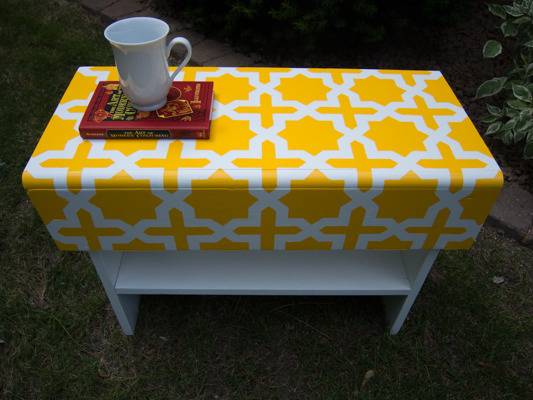
Here’s what Dad’s bench looks like now:
And, once again, the before:
Yes, all that cutting was a bit time-consuming, but this family heirloom was definitely worth it. 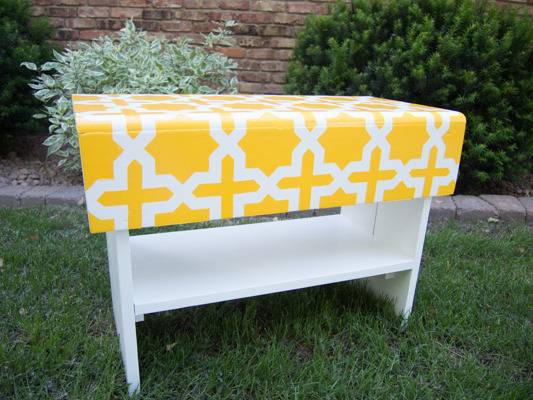
This post is part of the Ready, Set, Paint Blog Hop. Check out some of the other projects:
- Centsational Girl – Textured Panel Dresser Makeover
- Thrifty and Chic – Framed Stencil Wall
- The Design Confidential – DIY Concrete Color Block Painted Tables
- Sand & Sisal – Faux Etched Glass
- The Girl Creative – Summer Chalkboard
- PB & J Stories – Dipped Effect Outdoor Bench and Front Patio Makeover
- In My Own Style – How to Paint Outdoor Furniture
- Making this Home – Embellish with a Paint Border
HOW TO ENTER TO WIN A $200 Home Depot GIFT CARD!
– Find a summer painting project you love (it could even be your own!) and post the link on the comments on this post.
– Check back next week to find out who won! We’ll randomly select a winner. Giveaway ends on Thursday, June 27th, 2013 at 11:59 PM central time. Only US residents are eligible to win.

This post was brought to you in partnership with The Home Depot and ScotchBlue™ Painter’s Tape.