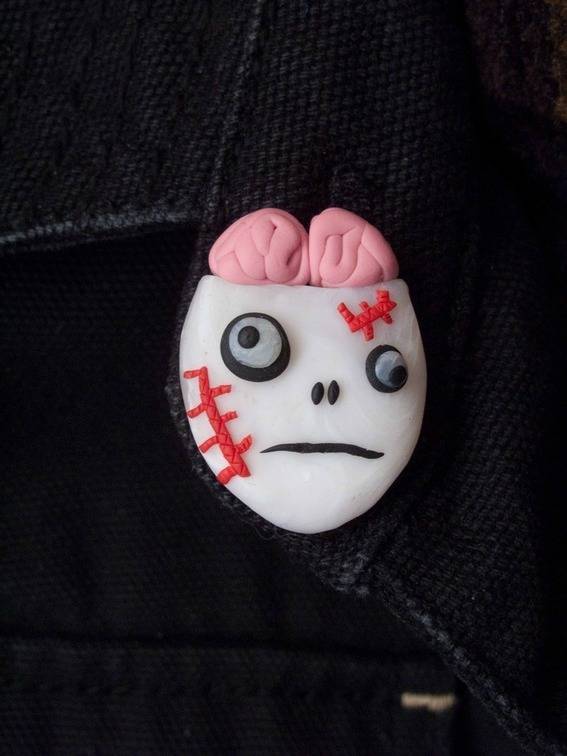
Yesterday’s roundup of Zombie crafts and treats left me with a craving. Not for human flesh but for some Zombie jewelry. This pin (or necklace) is incredibly easy to make with sculpting clay (like Fimo, Sculpy, etc.) and is a perfect nod to the undead this Halloween.
What you’ll need to make one:
- pink, red, black and white translucent Fimo, Sculpey, etc.
- craft knife
- findings, such as a pin for the back or eye pin if making a necklace
- glue
- glazing, if desired
Before we start assembling our Zombie, here’s a couple tips for working with sculpting clay if you’ve never done so. First, the clay must be conditioned before using it. This just means kneading it with your hands for 15 minutes. Also, because this clay is baked in the oven to harden, I find using a leftover wall tile to work on is the way to go. That way, when I’m done shaping the clay, I can just pop the whole thing, tile and all, into the oven to bake.
Now let’s get down to Zombie business.
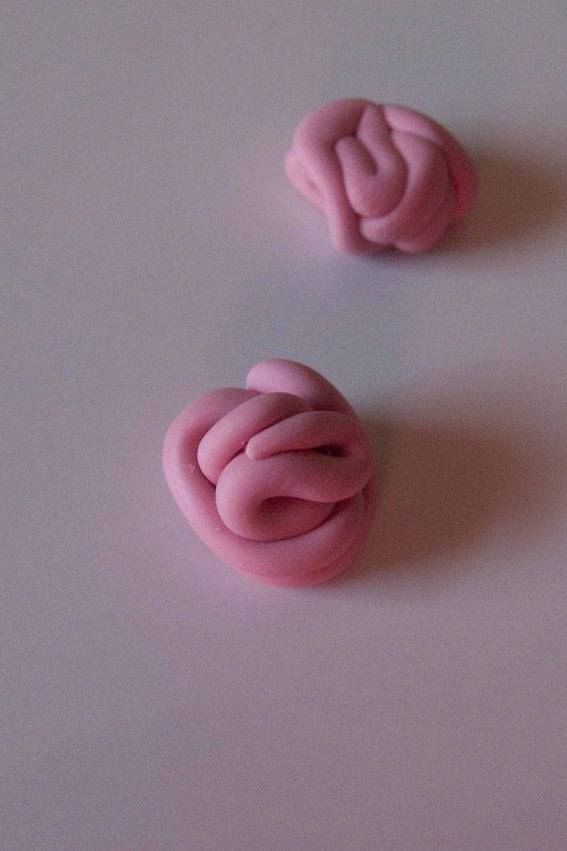
We’ll start with the brain. Roll out a 2″ long x a fat 16th of an inch snake with the pink clay. Then gently fold the snake up into a ball. Do this twice to create both lobes of the brain. Push the two lobes together and form them into a brain shape if looking at the Zombie from the front, if you know what I mean. (Here’s the image I used for inspiration.)
To make the face, form a marble-size ball of the translucent clay and push it down to form an egg shape. Mine is 1″ wide by 1 1/2″ high.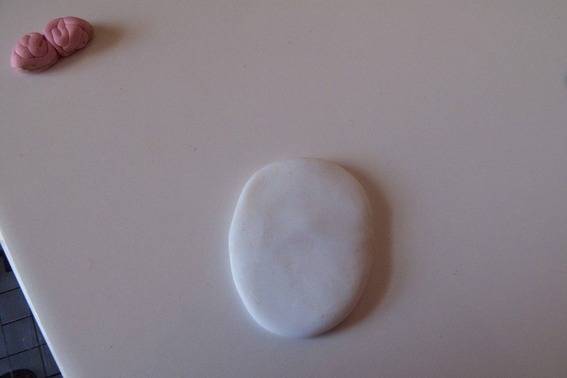
Then take your craft knife and slice off the face’s forehead.
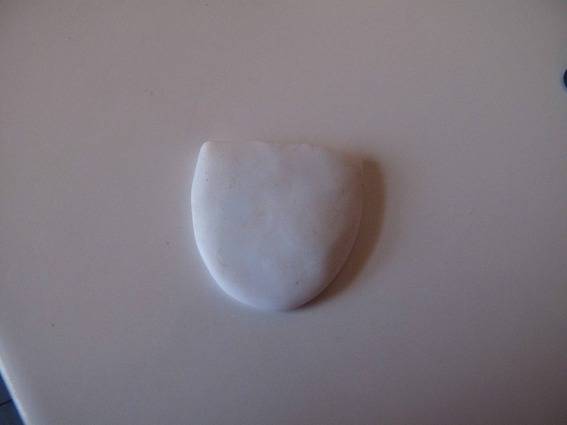
Next, implant the Zombie’s brains, pushing them gently against the forehead. At this point you’ll want to tweak the brains to fit the face.

To make the eyeballs, roll two tiny balls using the black clay and one ball using the white. (Note, when I say tiny, I mean tiny and one smaller then the next.) After making the balls, flatten them slightly and stack them up like so:
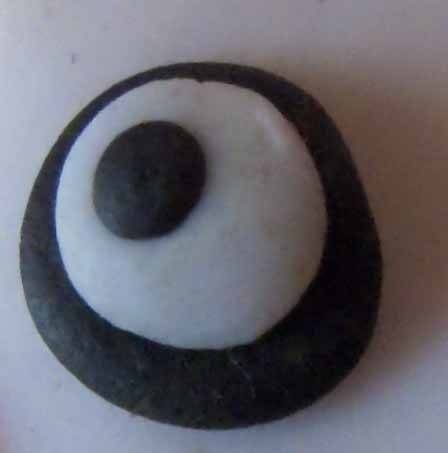
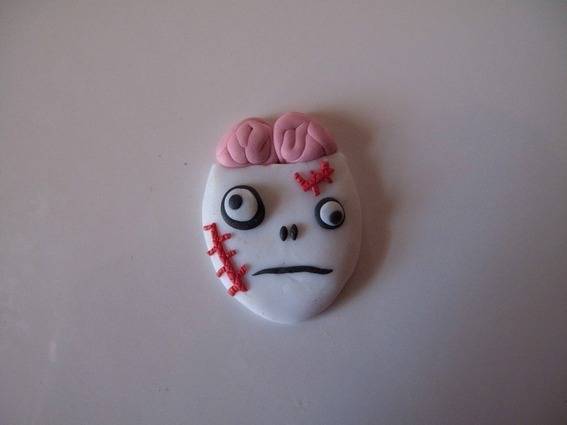
You’ll want to make a second eye, of course. I chose to make mine smaller than the first. For the mouth and nose, roll tiny snakes using the black clay and apply accordingly. Same goes for the wounds but using the red clay.
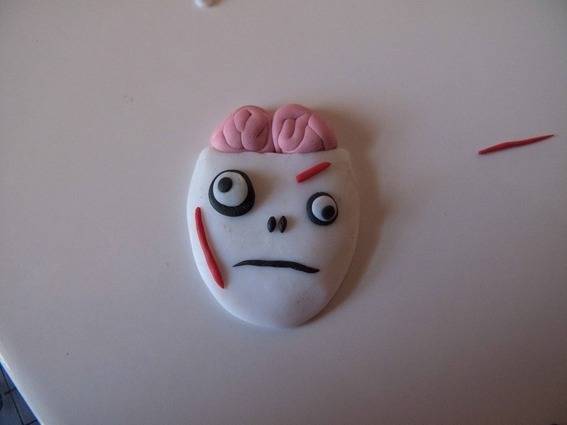
I wanted my wounds to look jagged, so I made tiny snakes using the red and cut them into super-short lengths with the craft knife. I used the tip of the knife to pick up the pieces and place them along the larger slashes. I also added texture to them using the craft knife.
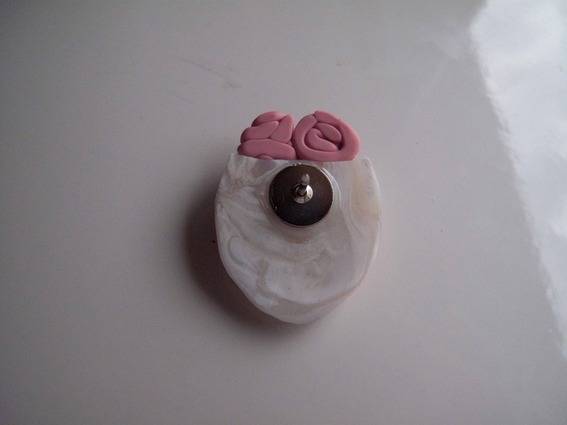
After that, it’s just a matter of baking the clay per the instructions on the package. (About 15 minutes at 275 degrees.) If you are turning your Zombie into a necklace, I’d shove the eye pin down through the top of the Zombie’s head before baking.
If you’re making a Zombie brooch, attach a jewelry pin to the back with your favorite glue after baking. E-6000 is always a good choice.
If you’d like to glaze your Zombie, that’s an option. I’m not sure if I’m going to. He looks quite at home on my coat just as he is: Wan and bug-eyed.