
We inherited a rather large and very wobbly picnic table when we purchased one of our rental properties. It needed a makeover, badly. I recycled what I could from the existing picnic table-the metal frame-and built a brand new one that seats eight people comfortably. 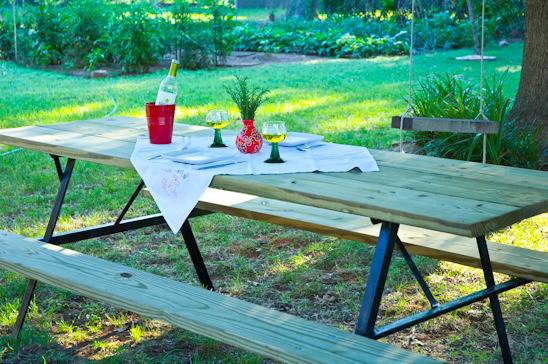
Since most of you don’t have access to the metal legs, I’ll show you how to build your own table with 2 x 4’s instead.
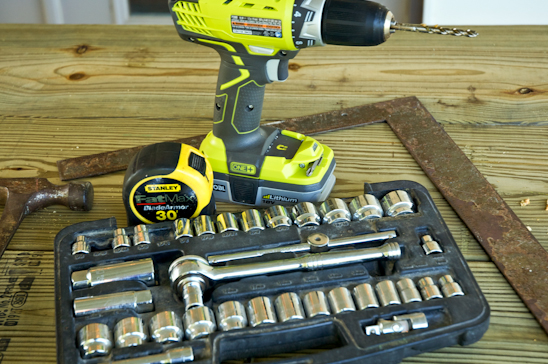
Tool and Materials:
- (5) pressure treated 2 x 10 x 8′ boards
- (4) pressure treated 2 x 4 x 8′ boards
- (34) 1/4″ galvanized carriage bolts (2″ long), washers and nuts
- Builders Square
- Socket Set
- Hammer
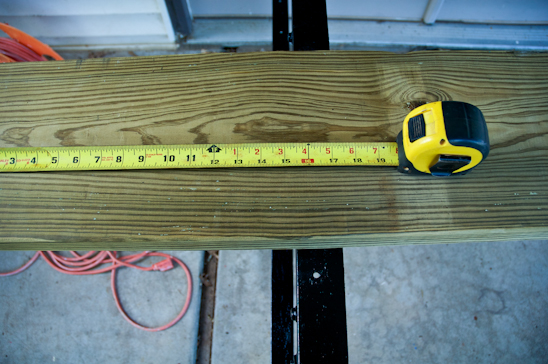
- Tape Measure
- Sand Paper and Palm Sander
- Chop Saw or Skill Saw
- (Spray Paint if you happen to have metal legs)
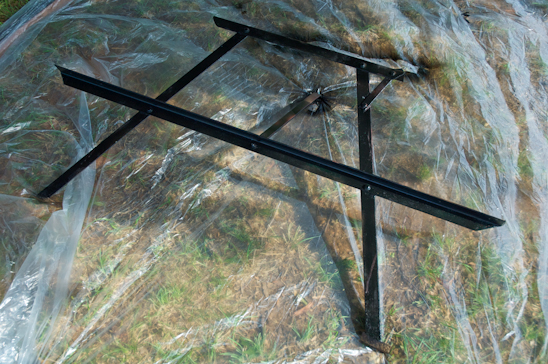
After disassembling the old picnic table, I wire brushed and repainted the two existing metal frames. But, since you don’t have access to the same frame let’s recreate this same concept using wood. 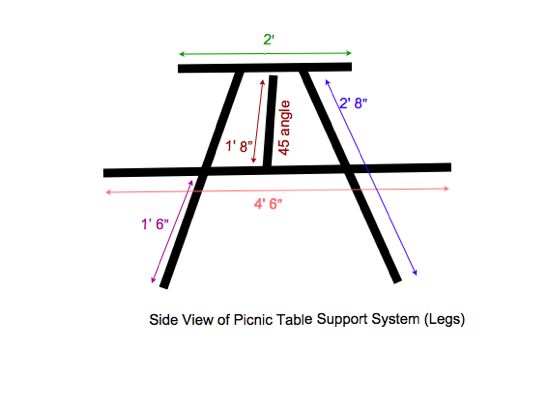 These are the measurements needed to recreate the metal frame using 2×4″s. A few things to note: The 2′ piece and 4′ 6″ piece of 2×4″ should be used on their “fat side” rather than laying flat. You will need to make two of these leg assemblies.
 These are the measurements to fasten the frame together using (12) of the carriage bolts, washers and nuts.
A few things to note: The middle support (the 1′ 8″ piece) should be attached at a 45 degree angle to the 4′ 6″ piece on center, with the other end free floating until the top of the picnic table is in place.
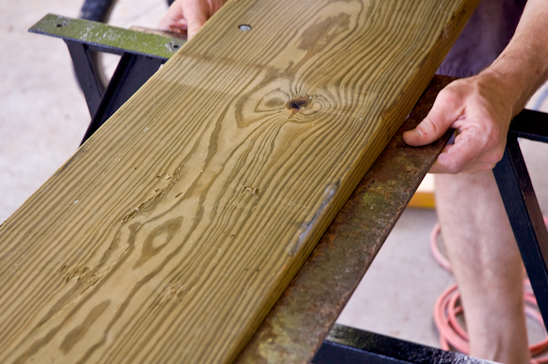
Drill the holes while holding a scrap piece on the opposite side of the 2 x 4 to prevent splintering. Now attach the legs together.
 Now comes the fun part-attaching the benches and the table top to the legs.
 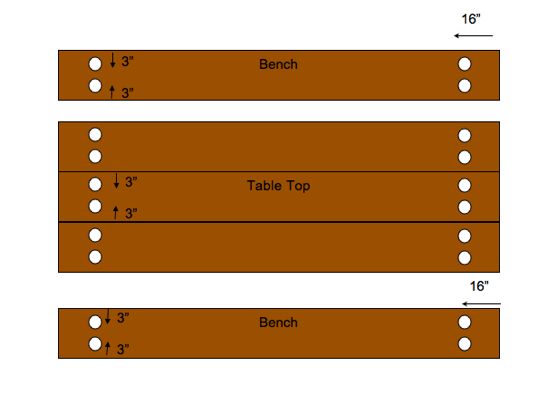 Measure in 16″ on each side of the 2 x 10 x 8’s and draw a faint line. On the 16″ faint line, mark two drill holes 3″ in from each side. Drill the holes while holding a scrap piece on the opposite side of the 2 x 10 to prevent splintering.
 Attach the middle piece of the table top to the legs using one carriage bolt. Using the square, make sure the board is sitting perfectly square. Use a hammer to drive the carriage bolts through the newly drilled hole. Drive the bolts until the heads are counter-sunk to be flush with the table top.
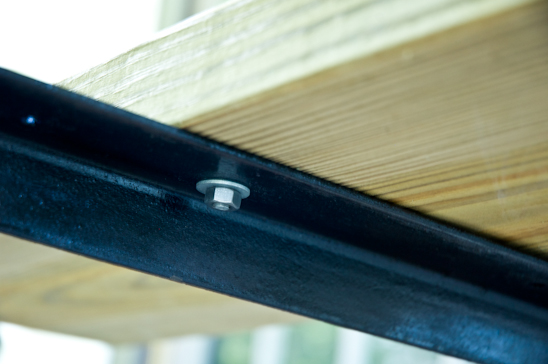 Then attach the washer and the nut on the opposite side. Attach the remaining carriage bolts to the first piece of the table top.
Next, attach the two benches to the legs using this same method. Then, attach the two remaining outer pieces of the table top.
Use a builders square to ensure a 90 degree angle between the table top and the leg assemblies. Then attach the supporting 45 degree angle piece to the table top, drilling down from the table top and using a scrap piece of wood to prevent splintering on the other side.
 Pour yourself a glass of wine, make some bruschetta and enjoy your very own, very large picnic table.
Thanks again, Chris for having me here today. Feel free to stop by my site, Potholes and Pantyhose, for more recipes, crafts and remodeling projects. I would love to hear from you! Love-Rebekah. 
In the instructions for the wood versions of the leg assemblies, the reference to the cross pieces being ‘used on their “fat side” rather than laying flat’ needs to be clarified. Is your “laying flat” instruction with reference to the “flat” horizontal ground plane or with reference to the “flat” vertical plane of an installed leg assembly? It matters.