
![]() This fall, FabricDirect.com is sponsoring a series of fabric-based DIY projects on Curbly!
This fall, FabricDirect.com is sponsoring a series of fabric-based DIY projects on Curbly!
Ok, so yesterday I showed you the unfavorable conditions of our previous living room curtains. When the folks folks at FabricDirect.com kindly offered to supply us with some new drapery fabric, we jumped at the chance (click here to see all the other FabricDirect projects we’ve done this fall).
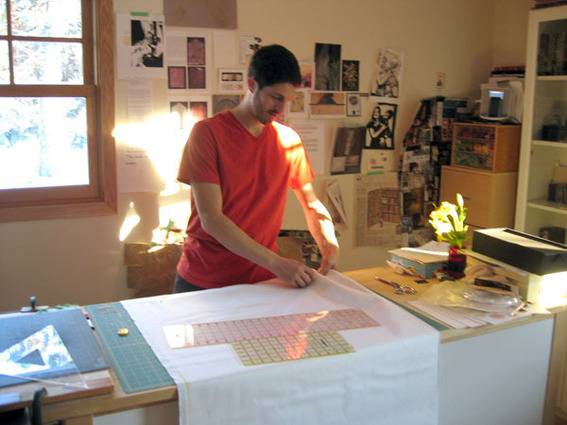
After checking out samples (we looked at patterns, different textures, and several different materials) we decided on a white cotton duck. This is a medium-weight, sturdy cotton fabric often used for drapery, canvases, and even sneakers. Although we were tempted to go with a bolder pattern, we feared we’d miss the airy feel of our old curtains. But since we like to think of ourselves as living on the drapery-edge, we also feared that plain white might be a little ho-hum. So we made a plan…
You can get a 20% discount on the fabrics we used in this project at FabricDirect.com:
Sewing the panels was no easy feat, but it was totally worth it. When considering the last statement, bear in mind that neither of us would describe ourselves as sewers, and so our confidence was a little shaky as we embarked on the project. Happily, a lot of team work, cross-checking, made things go smoothly.
It really did get easier by the panel, and we learned some valuable tips along the way. Here they are:
1. Having a designated measurer and a designated sewer really sped up the process. Initially, we were so unsure of ourselves that it took two of us to do each step. Happily, we wised up after the first panel and were able to divide and conquer.
2. When you are turning up your seams to create your edges, use fabric tape to help hold everything together, and only sew the seam once. Initially, we skipped the fabric tape and were sewing some of the seams twice, which was a royal waste of time and thread.
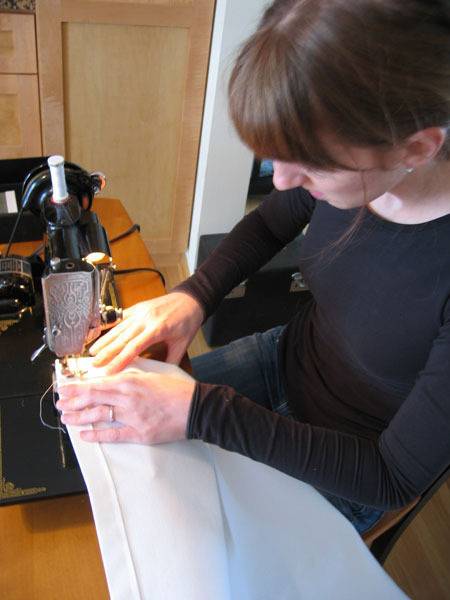
3. Use a tailor’s chalk to mark your lines during the measuring phase. And be certain said tailor’s chalk is new. We mistakenly used an old piece of chalk that my mom had with her sewing supplies. She later revealed that it was probably 10 years old. We ended up having to wash each panel 4 times, stain treat, and hand scrub the lines in order to remove them from the fabric. Whoops!
In addition to tackling the curtains in our living room, we also recovered the fabric storage panels in our built in. Years ago, we covered the panels with a thin taupe-colored cotton, and after more than one encounter with a magic marker (these minor casualties occur when you live with a budding 2-year-old artist), we decided they needed a little sprucing up. Not only did we want a thicker, more substantial fabric, but we wanted something with a print to add a little depth and texture to our storage area.
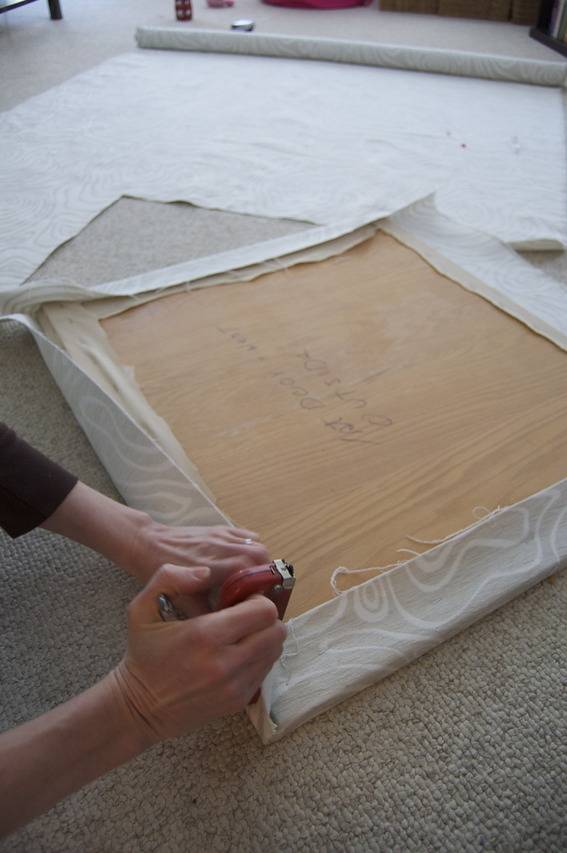
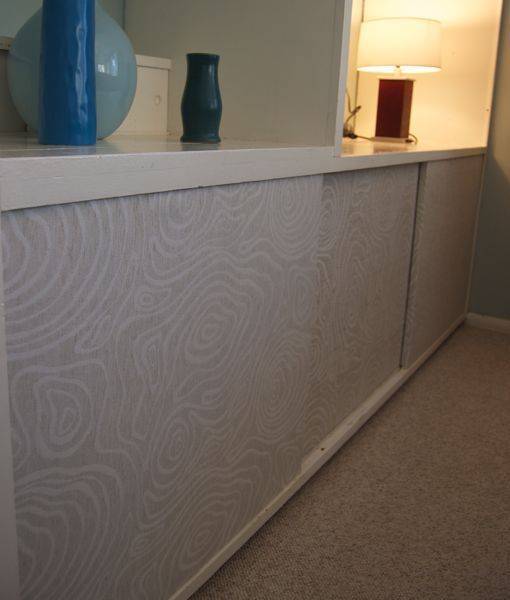
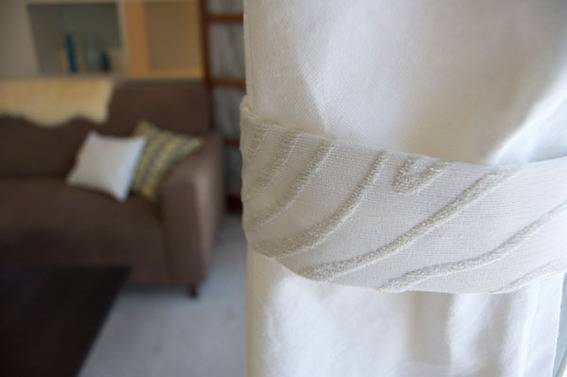
We fell in love with a fabric from FabricDirect called ‘Eco Frost’; it looks almost like an abstract wood grain. We decided to use it to breathe new life into our panels. I’ll admit, however, that we broke some important DIYer rules when applying the panels, and here’s why.
– While we thought about applying runners to the outside of the fabric panel covering, we actually found the that runner ran more smoothly with the fabric covering it. The wood grain fabric is so thick and durable that we don’t think the sliding action will damage it.
– We just used a staple gun to attach the fabric to the panels. We didn’t get fancy with corners, cuts, and we didn’t finish the edges of the fabric. This may be totally taboo to some, but to us it was an easy solution that works well, and looks like it will last.

We also recovered some pillows with leftover scraps of beautiful patterned fabric (once piece of the same ‘Eco Frost’ we used on the built-in panels, and another piece of a print called Kemper Green Tea). By the way, you can get a 20% discount on all the fabric we used by going to FabricDirect.com and using coupon code “DC2011”.
Finally, I took a few more lengths of the ‘Eco Frost’ to make curtain tie-backs; I think it adds a nice, subtle touch. I should also mention that we picked up new ‘Umbra Loft Wood’ curtain rods at Target for $25 a pack (they’re metal, but have a lovely dark wood grain look to them, and were a cinch to install).
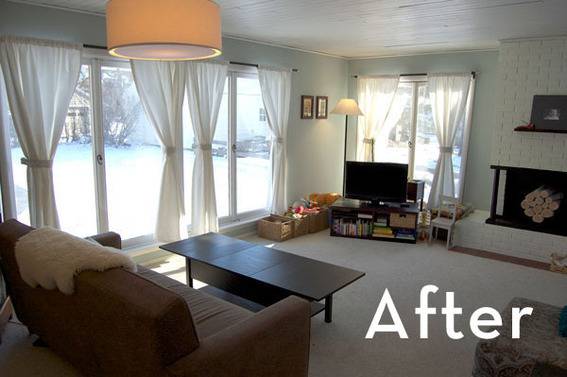
So, after several hours (ok, more like several days) or work, we’re really pleased with the updated look of our living room. It looks a lot more polished and way more durable. And it also affords us more privacy than we had before.

DISCOUNT CODE FOR CURBLY READERS
You can get a 20% discount on the fabrics we used in this project at FabricDirect.com: