The background:
My parents built their house in 1980 and its just getting to the time where things like counters are needing replacement. The original countertop was made using seconds from a local handmade tile shop which were pretty but, after 20 yrs, a bit boring. They hemmed and hawed over what kind surfacing to put in. There were granites they liked but with a 4′ by 8′ island and a 3′ by 12′ counter a slab was out of their price range and tiles had a lot of variation. They liked the handmade tiles but they were somewhat bland over such a large area. They were really looking for something dynamic. I took my mom to a tile mosaic shop for some inspiration and we ended up walking away with boxes and boxes of tiles. The colors! The variety! It was wonderful. So we decided to make the counter a mosaic, albeit not your typical broken tile type. In fact we designed it much more with quilts than mosaics in mind. We made it all up as we went along and my parents like it so much we did the bathroom floor too!
Here is how we did it:
Shopping for tile
We shopped for tile at a tile mosaic store and also at factories near by. We happen to live close to two tile manufacturers: McIntyre Tile and Heath Ceramics. Heath had a whole room of seconds and overstock that were at reduced prices. McIntyre has one large sale of seconds etc. each year, usually in the fall. The mosaic store has since closed but stocked overstock, seconds, glaze samples and experimental tiles from several tile makers. Most of the tile was sold by the pound. We bought a large variety of colors, sizes and textures (including one box of matching tiles for a border) using a very rough estimate of what we needed and headed home. With this method you really need to buy more than you will use so you have some variety and choice while laying out the design.
Design
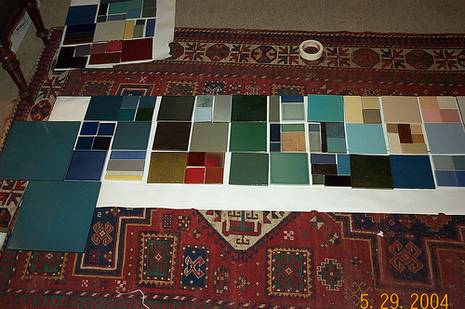
The first thing I did was lay all of the tiles out arranged by color and size. 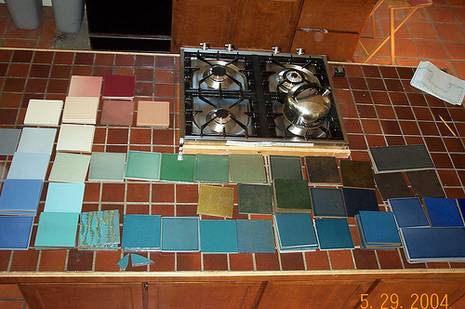
The 6″ tile color pallate. Notice the old tile counter underneath (tiles also from McIntyre)
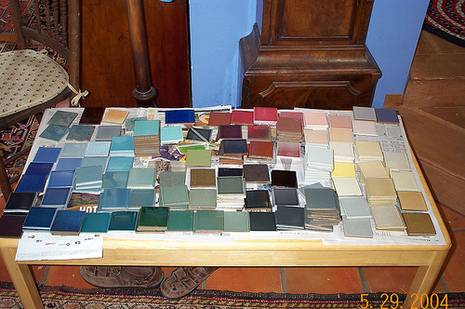
3″ tile color pallate
We set some basic parameters for our layout by deciding that the kitchen counter would have a 6 inch border of large matching tiles and then a 6 inch grid. The back splash and the bathroom floor were much more free form. I made a scale layout of the counter tops out of paper in another room and then walked back and forth choosing tiles out of the color arrays and placing them onto the paper layout.
Mock-up of the kitchen counter on paper.
The grid on the kitchen counter was done with interspersed 6″ tiles and then collections of other shapes and sizes to make a 6″ square. When we abandoned the grid in the bathroom it became much more difficult to account for the proper grout sizing but I was more comfortable with laying out the design by then and I was able to compensate. We had a tile saw available and we used it to cut down tiles to fit in obscure sized holes in the design. We made all of the border tiles (6″ by 12″) from 12 by 12 ” square tiles. With a little more planning (and different border tiles) we could have done without a tile saw at all.
Laying the tiles
For the kitchen we built the counters first using plywood sheets glued and screwed together and then covered with cement board. I drew a grid in directly onto the cement board with a sharpie for guidance. We laid the tiles in thin-set cement which we mixed in a 5 gallon bucket.
Since the tiles were all laid out on the floor in the living room we had to transport them before putting them into the cement. We used a small plywood boards (3′ by 4′ ?) and would transfer small sections at a time to the board and then move the tiles from the board into the cement. This process didnt work as well in the bathroom where we had no grid in the design. It was hard to account for the necessary grout thickness in the design phase so we had too many tiles when we went to put them on the floor. I was fairly comfortable with the shapes and sizes by then so I just re-designed that part of the floor as I was laying the tiles.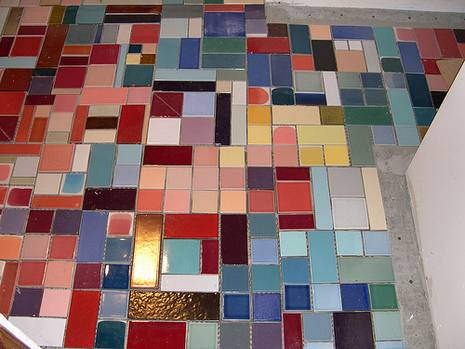
Bathroom Floor before border tiles and grout
There was a large variation in thickness of tiles since we were using anything and everything from a variety of sources. We accounted for this by applying a compensating thickness of cement to the back of each tile. Very thick tiles had almost no cement on the back while thin ones had a generous layer. After all the tiles were laid we used plywood pieces (the same boards from before) to apply an even pressure across the surface and push down any tile sticking too far up.
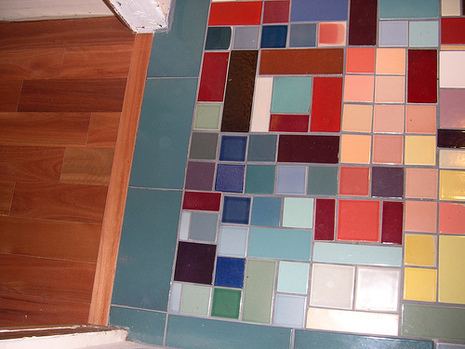
We let the cement set and then grouted using a neutral gray which went well with the range of colors represented. Thats pretty much it! Here is the bathroom floor complete (ok, the tiles are done but the baseboard still isnt on).
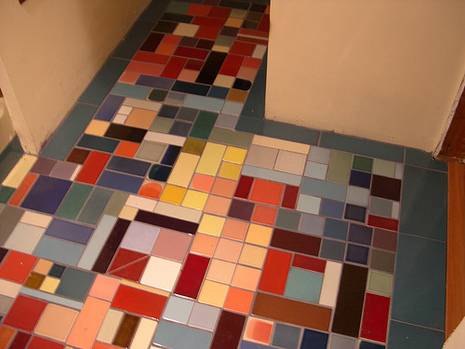
Bathroom Floor with border tiles and grout
the Kitchen Island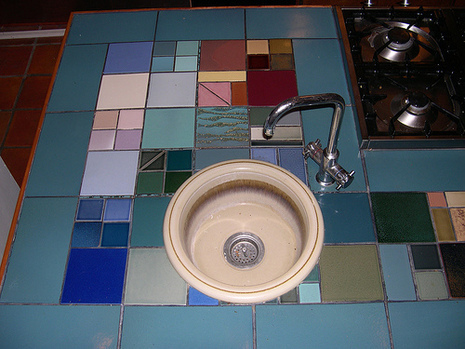
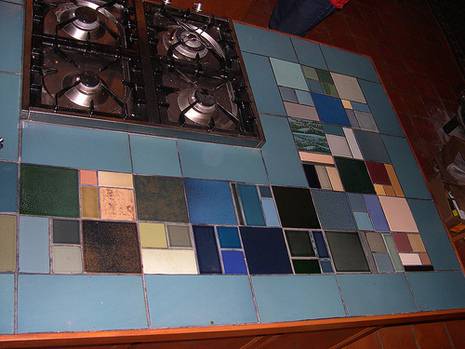
And the backsplash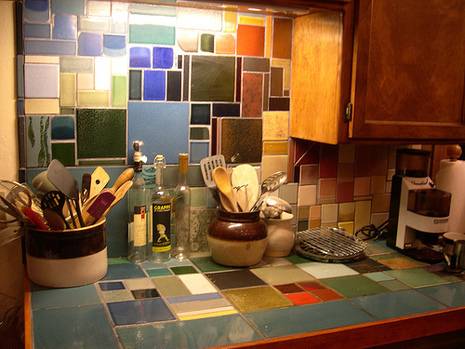
I would love to hear about other people with similar projects, my parents have never seen anything quite like it!