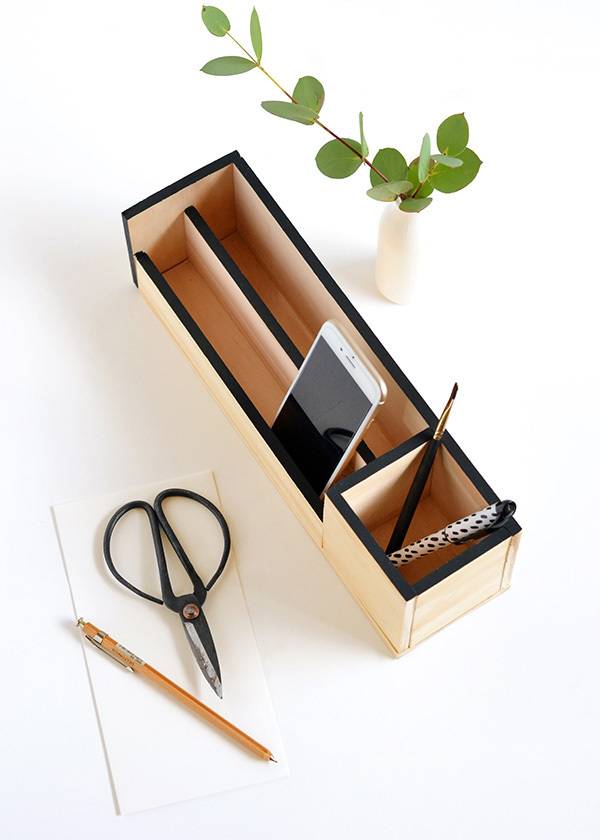
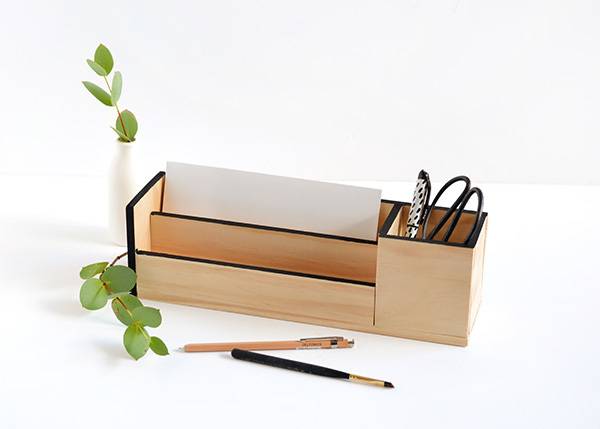
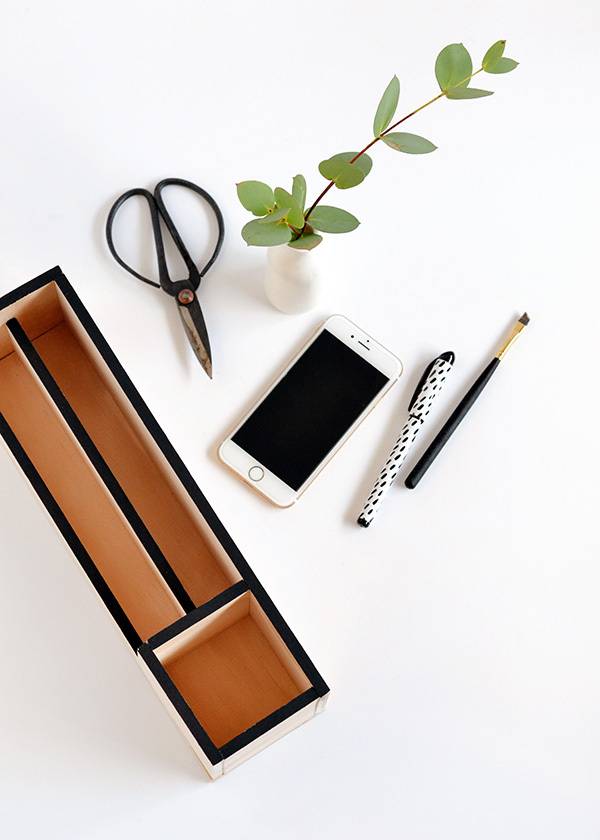
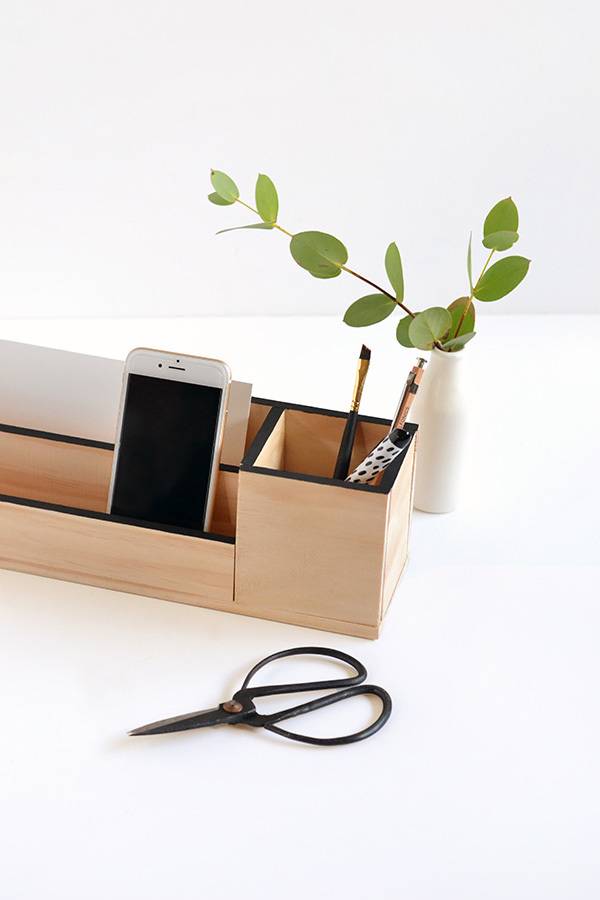
This wood desk organizer is modern, minimal, and surprisingly easy to make (even if your woodworking game is totally weak). Read on for step-by-step instructions on making your own, and getting your desktop all tidied up!

On any given day, if you visit our house you’ll find envelopes and papers strewn all over the place because we’re not yet ready to file them away. Okay, I’ll admit, sometimes we’re just being lazy, but for the most part they serve as a reminder to action something important like paying a bill or scheduling in an appointment.
Regardless, while the intention is well-meaning, the resulting mess is… well, messy! So I decided to put a stop to the chaos and make us a place where we can put all the letters until we’re ready to file them. Follow along for the simple how-to!
Wood Desk Organizer Materials
- Wood (I used pine)
- Ruler
- Pencil
- Hand saw
- Sand paper
- Wood glue
- Painter’s tape
- Paint
Step 1
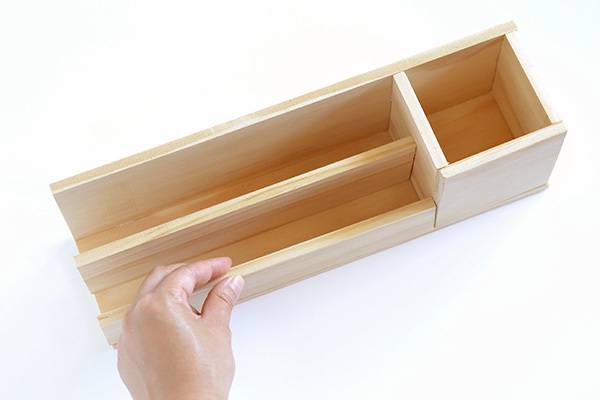
Measure and mark out the pieces for your wood desk organizer with a ruler and pencil. Then cut them out with a hand saw.
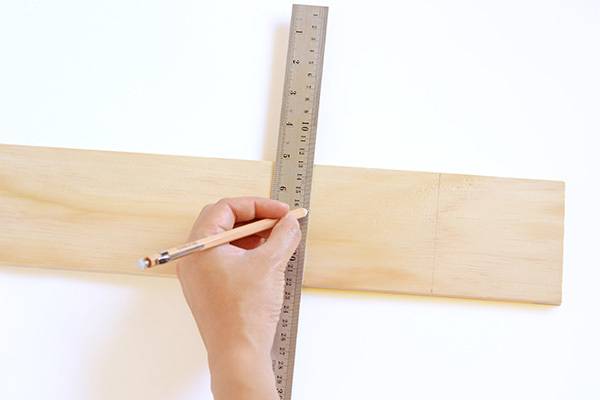

You’ll need to cut 8 pieces in total for the sides, back, base, pencil holder and divider. See the image above for all the pieces and their corresponding sizes below.
Of course, you’re more than welcome to come up with your own measurements to create a desk caddy that’s sized exactly to your liking, but if you’re unsure about the numbers, just follow along with mine. 🙂
- PIECE A, side of pencil holder: 3 inches wide x 3.5 inches tall (74mm wide x 90mm tall)
- PIECE B, side of pencil holder: 3 inches wide x 3.5 inches tall (74mm wide x 90mm tall)
- PIECE C, front of pencil holder: 3.5 inches wide x 3.5 inches tall (90mm wide x 90mm tall)
- PIECE D, base of desk organizer: 13 inches wide x 3.5 inches tall (330mm wide x 90mm tall)
- PIECE E, back of desk organizer: 13 inches wide x 3.5 inches tall (330mm wide x 90mm tall)
- PIECE F, central divider: 9.5 inches wide x 2.5 inches tall (240mm wide x 65mm tall)
- PIECE G, front of desk organizer: 9.5 inches wide x 1.5 inches tall (240mm wide x 40mm tall)
- PIECE H, side of desk organizer: 3.5 inches wide x 3.75 inches tall (90mm wide x 98mm tall)
Important Note: These measurements were based on the timber I found at my local hardware store, which was 8mm/0.31 inches thick. If your wood is a different thickness, it’ll push out the numbers slightly so make sure you adjust your measurements accordingly!
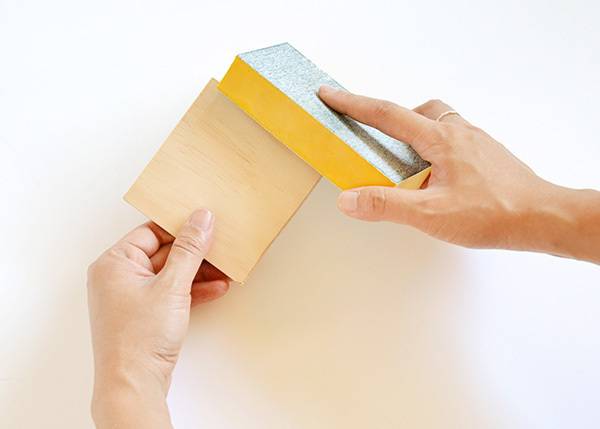
Step 2
Once all your pieces have been cut, give the edges a quick sand.
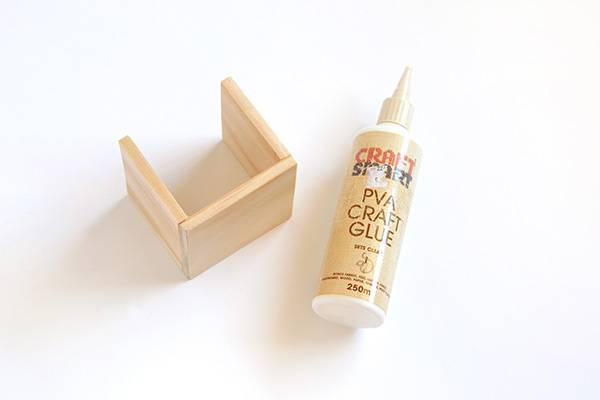
Step 3
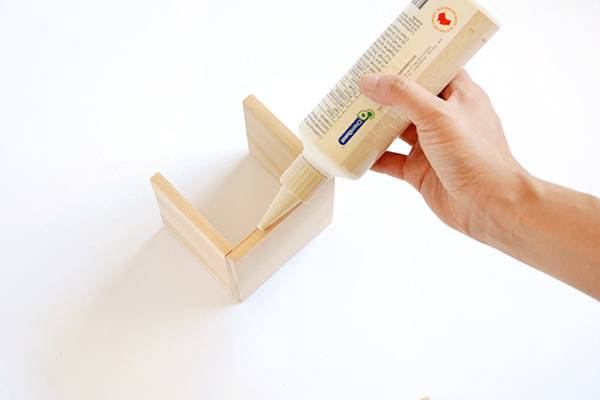
Begin by getting Pieces A, B and C together (refer to the image in Step 1 to see which piece is which).
Glue Pieces A and B (the narrower pieces) to Piece C as shown below to form a ‘U’ shape. This will eventually be the pencil holder part of your wood desk organizer.
Step 4
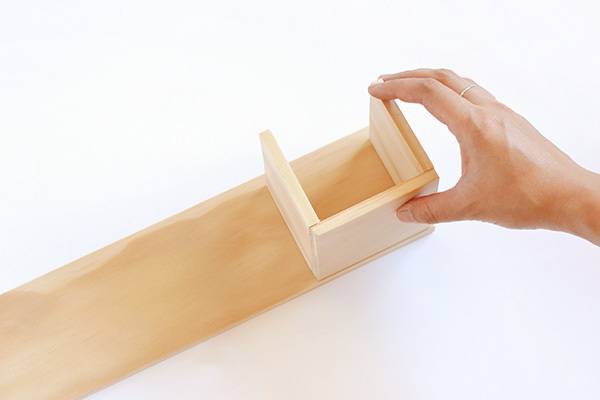
Apply glue to the bottom edge of the ‘pencil holder’ section and affix it to Piece D (which is the base of your desk organizer). Make sure the front of the pencil holder is flush with the front edge of Piece D.
Step 5
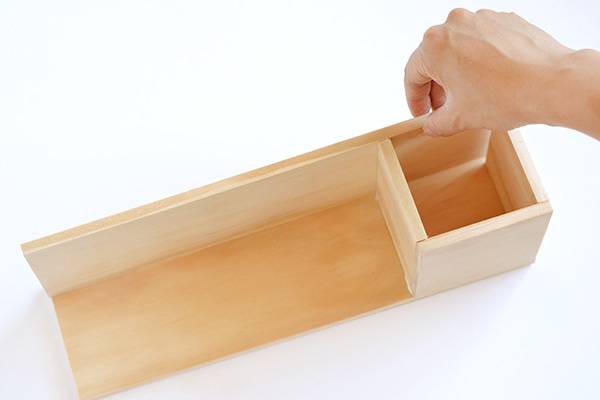
Get Piece E (the back of your desk organizer), apply some glue to the bottom edge and stick it in place.
Step 6
Apply glue to one of the long edges on Piece F (which is the central divider) and attach it to the middle of the base of your desk organizer as shown below.
Then affix Piece G to the front of your desk organizer so that it’s flush with the front of the pencil holder section.
Step 7
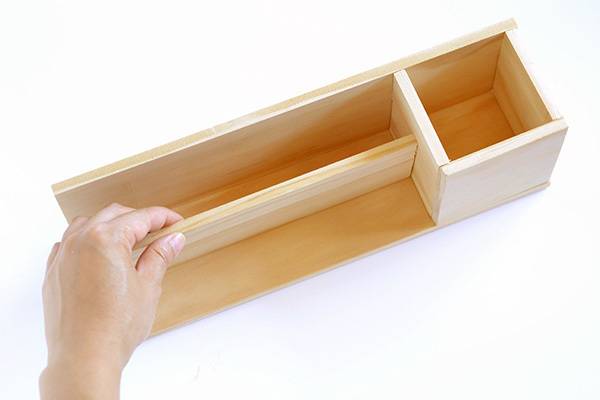
Finally, attach Piece H to the side of the work piece to close off the open end.

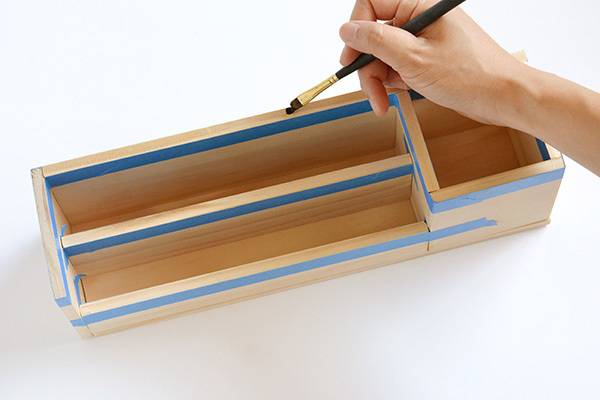
Step 8
Apply painter’s tape all the way around the top edges of your organizer to protect the sides from paint. Make sure the tape is well stuck down, then paint the edges in your chosen color.
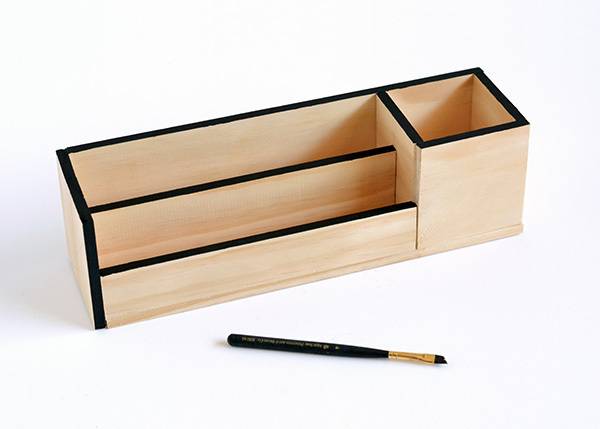
Once the paint is dry, remove the tape and your wood desk organizer is complete! What a cute caddy!
Really easy and cheap project! Thats so good idea. Thanks
Beautiful design and is so easy to do.
how much wood do you use?
Thanks for these plans!! My 8 year old made this for daddy for Christmas. We added a little wood putty for the cracks and it turned out beautifully!
Shelby, that’s so great to hear! And super sweet.
I love this DIY wood desk organizer idea! It looks stylish and functional, and I can’t wait to try making one for my workspace. The step-by-step instructions are clear, which is super helpful for beginners like me. Thanks for sharing!