Brittni Mehlhoff

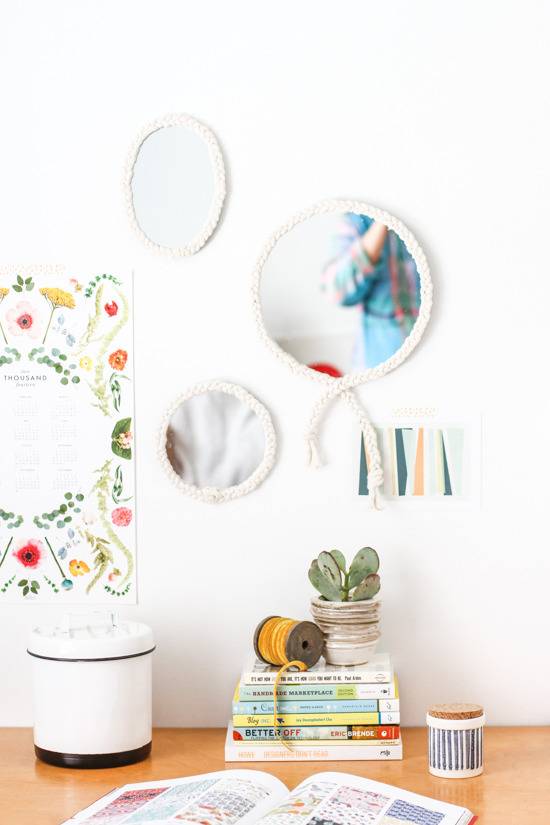
I recently bought a few small mirrors at a thrift store for $2 a piece. They had a couple of marks on them, but were otherwise in pretty decent condition. They were too plain to just hang straight on the wall though. So I started playing around with a couple of ideas, and landed on this one for a braided mirror upgrade. It’s a really inexpensive way to dress up a plain mirror and can be removed easily, if you decide you want your plain jane mirror back. Here’s how to make your own.
 Brittni Mehlhoff
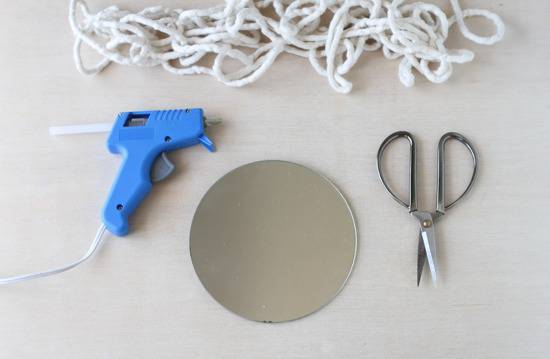
Materials:
- small mirrors in various shapes and sizes
- cotton cording (which can be found in the upholstery section of any craft or fabric store)
- hot glue gun and glue sticks
- painter’s tape or washi tape (optional)
Note: If you can’t find any cheap mirrors to use for this DIY at a thrift store, you can buy them at a craft store for just a few dollars more. They cost around $5 each at most local craft stores and are usually in the same aisle as all of the sheets of glass and glass cutting supplies.
 Brittni Mehlhoff
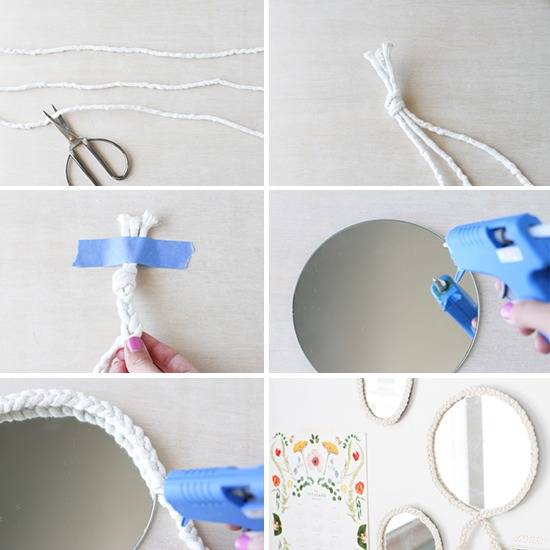
How-To:
1. Cut three pieces of cord that are the same exact length – each measuring approximately 1.5 times the diameter of the mirror you are using.
2. Next, knot the three pieces of cord together at the top.
3. Then, braid the entire length of the cord, securing the end to a hard surface with tape, if necessary.
4. Once the braiding is complete, start adding generous beads of hot glue to the outer edge of the mirror, about 2-3 inches at a time.
5. Every time you apply a bead of hot glue, attach that length of braided cording by pushing down firmly over the glue while it’s still hot. Continue this process (steps 4 and 5) until the entire diameter has been covered.
6. When you have wrapped the entire mirror, cut off the excess and glue down the ends, each with a dab or two of hot glue. And you are ready to hang your new braided mirror wall art. *If your mirror doesn’t already have a hook on the back for hanging, add one at this time. Most mirrors already have a hanger on the back though.
 Brittni Mehlhoff
 Brittni Mehlhoff
 Brittni Mehlhoff
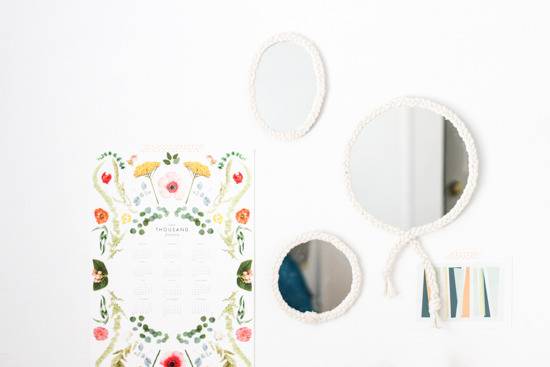
Bonus: Because this DIY calls for using hot glue, it can be removed, which means you can change out the braids or cording design anytime you want. The cording will come off with some heavy pulling and the hot glue can be scraped clean from the mirror as well (without damaging the surface).
Take it further: If you want to add some color to this DIY, you can easily dye the cording (before or after you’ve braided it), by following this tutorial. Once dyed and completely dry, you can glue the cording onto the mirror.
 Brittni Mehlhoff
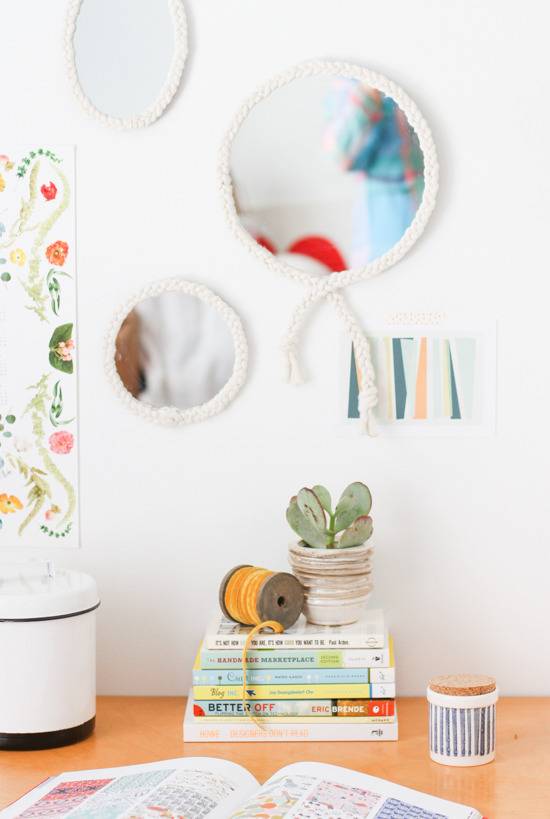
This would be a great project to try over the weekend or a rainy day and can be done by anyone from beginners to more advanced crafters in a couple of hours.
Love it with the braid! Dyeing it will absolutely add more colors to the room 🙂
Ok i know it sounds unbelieveable but I actually just found the same type of two round mirrors at our Thrift Store (where i frequent lol) & paid 2 for $5.00! I have since just let them ret on mantel–now, voila! Your inspiration! Plus, mine came framed (like photo frames), their style can be changed whenever Im ready 😀 TY for the project!!!!
So glad to hear that Jeanine. That’s pretty cool that you found the same mirrors at your thrift store.
And yes – definitely agree with you Onel that dyeing the braid would add a nice pop of color.