
When the holidays roll around, I usually break out my glue gun and come up with a few easy winter projects to tackle. Today though, I’m branching out from the materials I almost always use and picking up a hand saw instead. With a bit of careful measuring and a handful of cuts, I made this hanging wood Christmas tree shelf perfect for storing small gifts and holiday odds and ends.
It doesn’t take up much space, much like my holiday project from last year, so it would be the perfect alternative to a Christmas tree, if you’re really tight on space. Plus, it’s not overwhelmingly Christmas-y, so it will blend right in with your decor, and you can keep it up all winter long by just switching out the items displayed.
 Brittni Mehlhoff
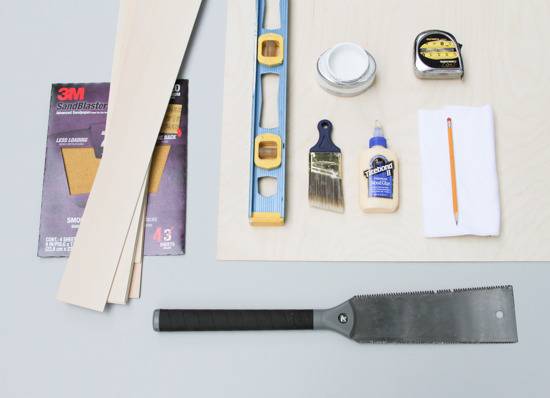
Materials:
- Wood glue
- Hand saw
- Tape measure
- Level
- Rags
- Painter’s tape or masking tape
- White paint
- Paint brush
- Pencil
- Sandpaper (medium grit)
- Sheets of wood 1/8 inch thick (I used a combination of Baltic Birch (in a big sheet) and 3″ wide lengths of Balsa wood )
- 12. Instant bond wood adhesive and activator
 Brittni Mehlhoff
Steps:
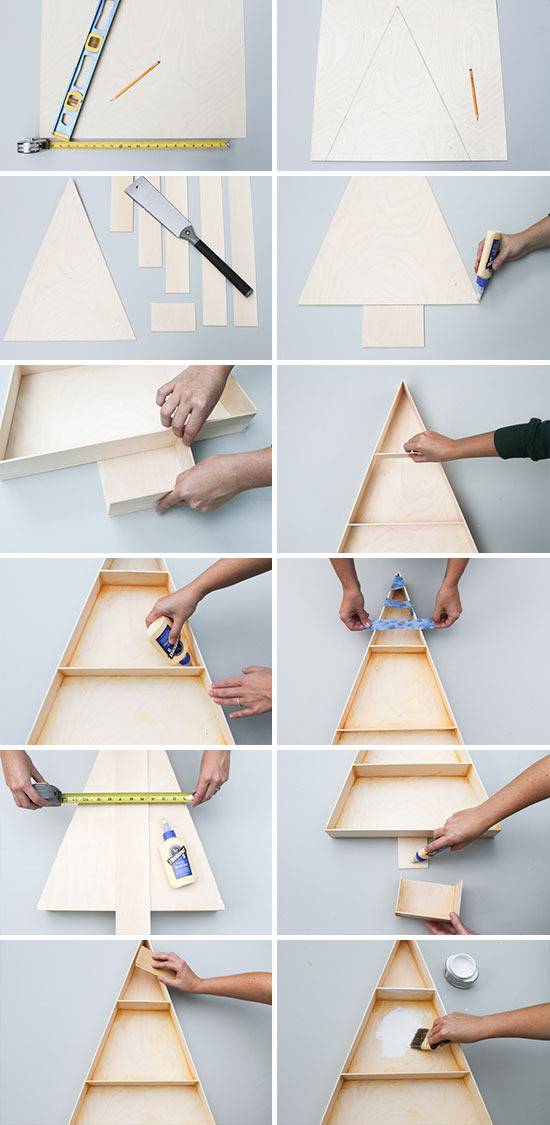
1. Using a straightedge and a pencil, measure and draw a tall triangle. *My triangle is 23 inches tall and 17 inches wide, at the widest point.
2. Then measure each side of the triangle to determine the cuts you will need to make on the smaller balsa wood strips. The strips will be glued on top of the triangle base, so keep that in mind when measuring. You’ll also need to create a rectangular stump for the tree’s trunk, and two pieces that will become the shelves inside the triangle. *To give you an additional guide, my tree trunk is 6 inches wide and almost 4 inches tall.
3. Once each piece has been measured carefully, cut them with a hand saw. *You can also use power tools for this part if you’d prefer.
4. After all the pieces are cut, double check that they all fit together properly. I used tape and and a couple extra pairs of hands to help stand everything up to make sure it would fit correctly. Once that was taken care of, you can start gluing.
NOTE: I quickly realized that the wood glue takes a while to dry and it does not hold the wood up without clamps. So, I used instant bond wood adhesive and activator (a super fast drying glue) to hold the pieces together initially, then I glued everything to the base with wood glue. Apply a thin bead of wood glue to every joint, inside and out. Then smear it smooth with your fingertip. Use a damp cloth to wipe up an excess glue before it dries.
5. For extra security, tape everything with painter’s tape as it is drying to make sure everything is pressed together snugly.
6. Once the wood glue has completely dried according to the instructions on the bottle, flip the triangle over and attach a long strip of wood to the back. Allow it to dangle off the bottom of the triangle 2-3 inches. This will be the support for the tree stump when it is attached.
7. Once dry, flip the triangle over again and attach the tree stump to the overhang with woodgrain.
8. Allow the glue to dry completely, then sand the entire surface (interior and exterior). Then, wipe clean of dust and debris with a damp cloth.
9. Apply several coats of paint to the entire piece and add a hook to the back for hanging. Done.
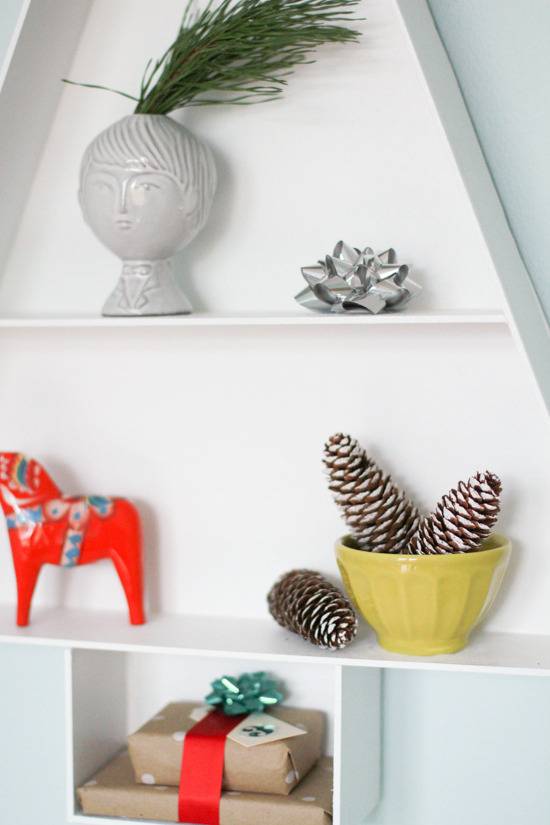
Use the finished tree to store small items, collections, and holiday knick knacks.
 Brittni Mehlhoff
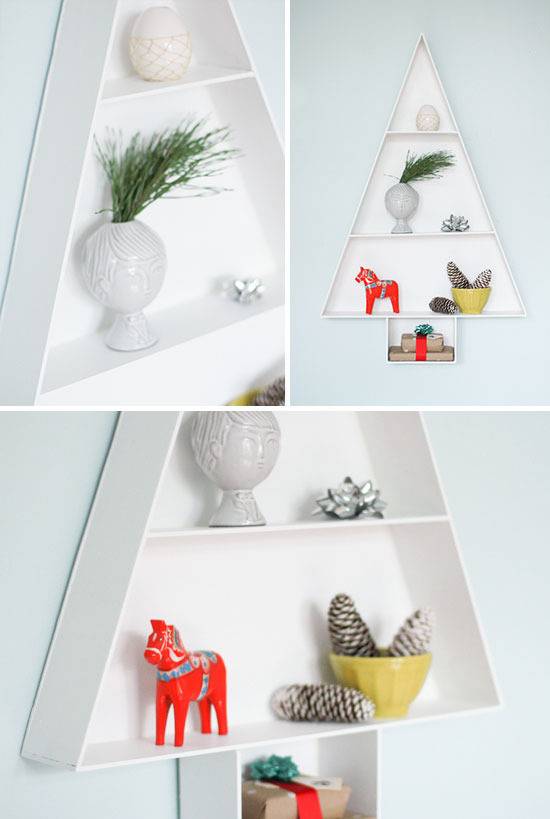 Brittni Mehlhoff
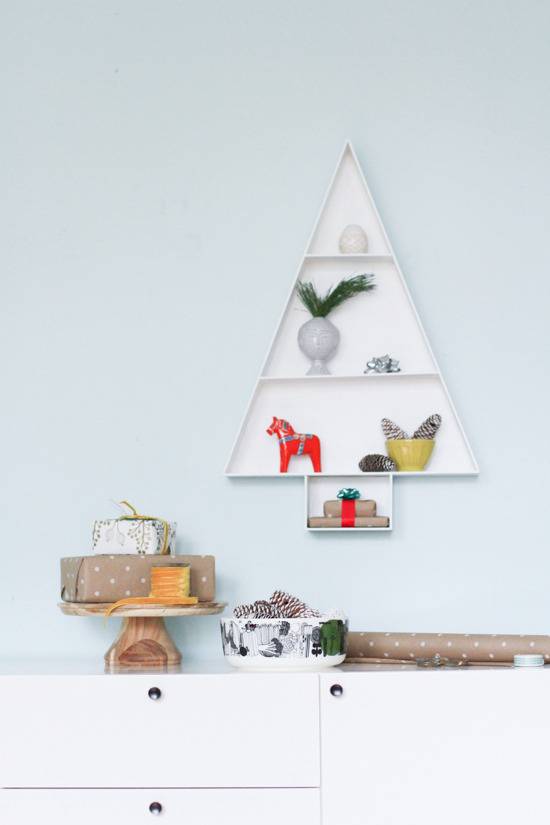 Brittni Mehlhoff
I can’t help but think that the ‘trunk’ portion of this shelf would be great for storing small gifts, which is why I love the idea of using it as an advent calendar of sorts. Each day you could add a new gift with a number on it to count down the days until Christmas.
What do you think? Is this a holiday project you could see easily fitting in to your home decor? Think you’ll make one of your own?


I throughly enjoy this blog! This is a fun DIY that everyone can partake in. Good Job!