
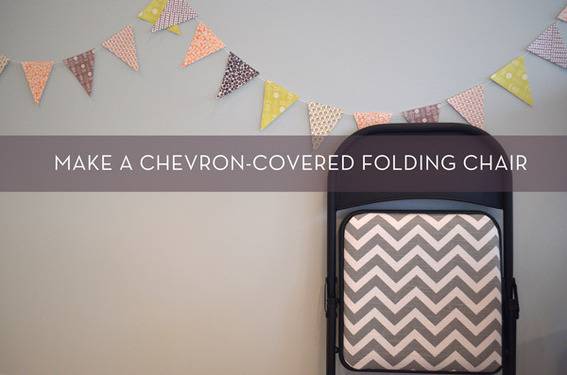
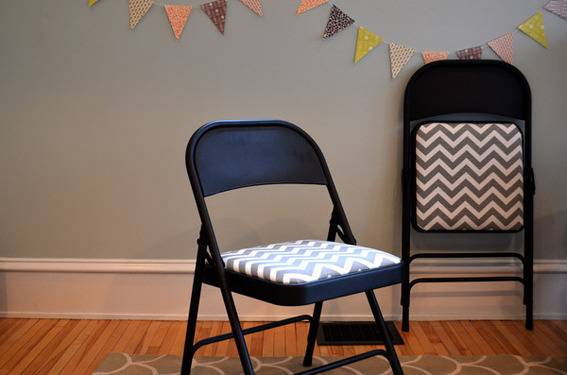
Thanksgiving means turkey, cranberries, guests, and extra seats at the table. As we prepare for the holiday, we decided to purchase a set of folding chairs to create additional seating for our guests. The chairs are super sturdy and comfortable, but they’re not the most stylish kids on the block, so we decided to spiff them up using rivets, a staple gun, and some extra fabric we had lying around the house. Check out the tutorial below!
 Tools and Materials:
- Metal folding chairs with cushions
- Fabric, preferably something thick
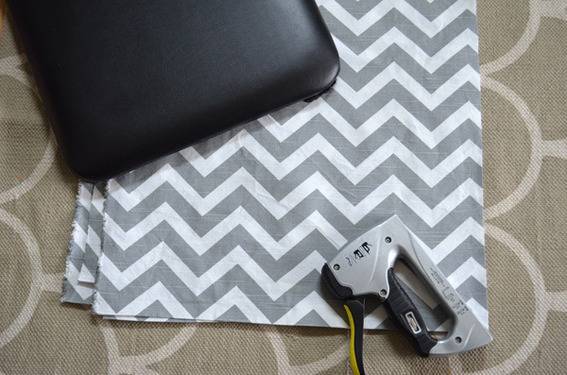
- Staple gun
- Rivet gun
- Rivets
Our chairs’ vinyl covered seats were attached to the metal base with rivets. This ended up being a great feature because our finished chair had no screws to poke your heiny.
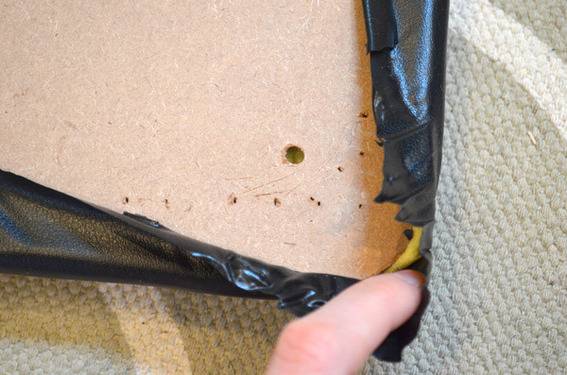
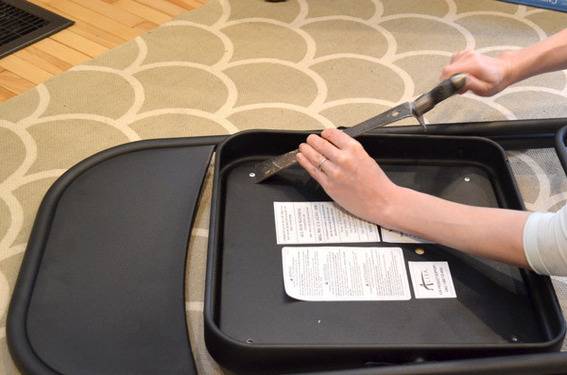 1. Remove each chair’s pad from the metal base. We removed the rivets from our chairs by using a hammer and a glazer bar (a pry bar or chisel will do too). We ran out and purchased a rivet gun and a set of rivets for less than $25. To get the other half of the rivet out from under the chairs’ cushions, we simply removed the staples from the corners of the chair and peeled back the vinyl just enough to fish out the rivet remains.
2. When we first ordered the chairs, we were planning on spray painting them. However, once they arrived, we liked the slate color and decided to skip this step. However, there are some great tutorials that show major transformations using paint. Check out this one from Design for Mankind for some inspiration!
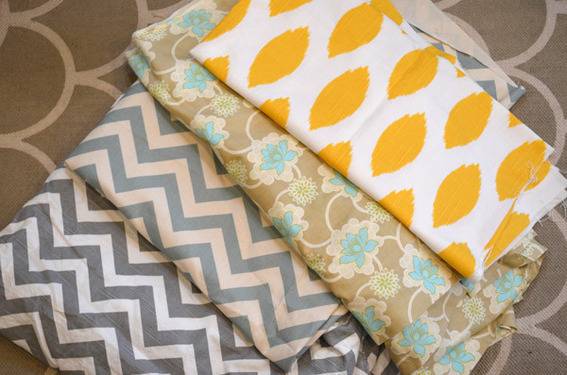
3. Select a fabric to cover the chairs’ seats. A heavier fabric will serve you best. We had several yards of a cotton-canvas grey and white chevron on hand (it’s a medium weight fabric that’s perfect for upholstery).
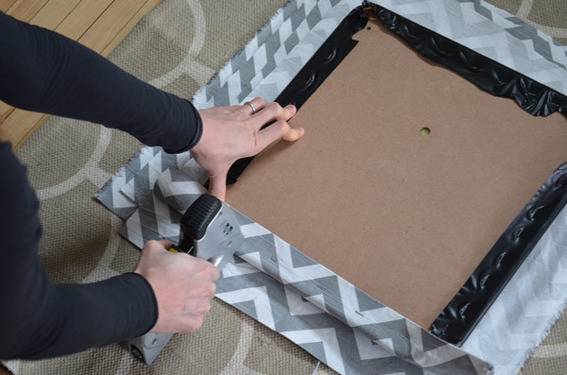
4. Attach the fabric to the cushion using a staple gun. If you’re using a patterned fabric like we did, be sure the fabric is correctly aligned before covering the cushion. We attached the fabric right over the existing vinyl cushions, then cut away any fabric that blocked the rivet holes. When recovering a chair, it’s best to save the corners for last.
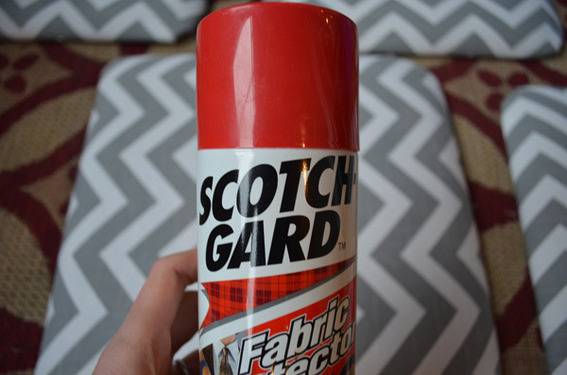
5. Once the cushions were recovered, we treated them with a round of Scotch Guard to protect them from stains and make cleaning them a little easier.
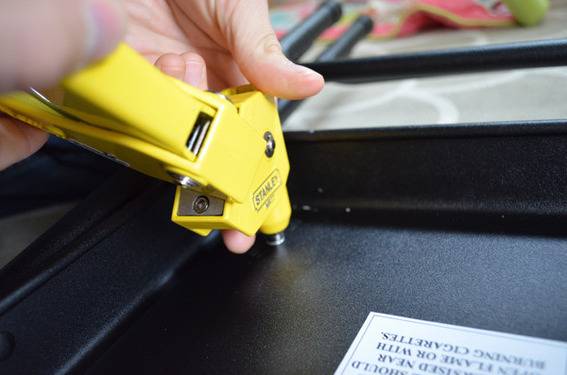
6. Using rivets, reattach the cushions to the base of your chair. We simply fed the rivet in through the original holes and used the rivet gun to fasten it in place. It was a breeze!

This simple DIY project added a little more personality to our set of folding chairs. We think our Thanksgiving guests might actually be excited to sit in the “extra seating” during dinner!
Thank you for inspiration, I haave picked up 12 folding chairs for $40.00 and I will do the same with black paint and wavy fabric…Great tip..