Learn to make a pebble bath mat with simple materials and techniques.

For all those stay-at-home moms who have very busy lives, this DIY is for you! Or anyone who loves an excuse to be pampered just a bit every day.
Unfortunately, going to the spa isn’t a realistic or practical option for many of us. Which is why something as simple as this DIY Pebble Bath Mat can make the world of difference, turning an everyday shower into a treat. So take comfort the next time you get a spare minute to soak in some suds!
Here’s how to make a pebble bath mat to give your bathroom a spa-inspired atmosphere:
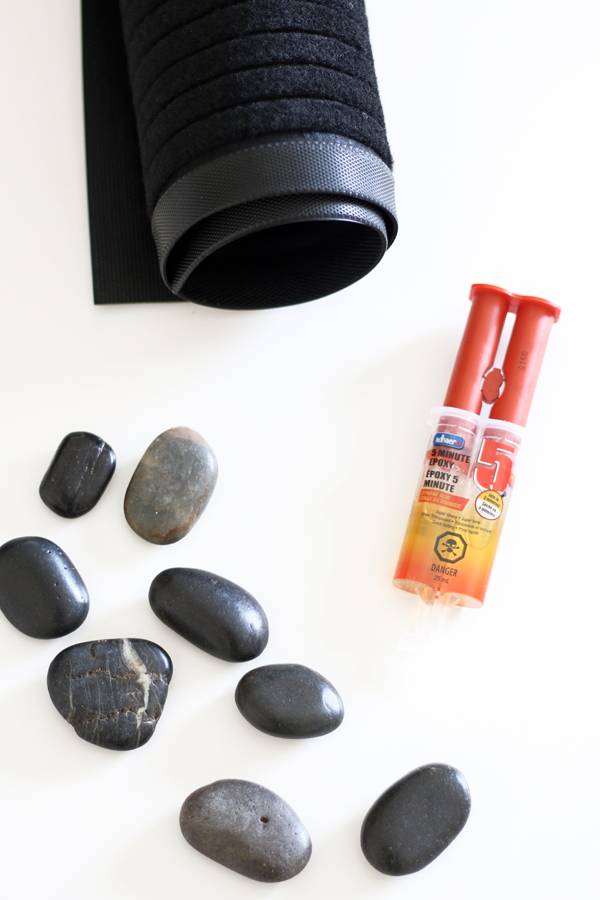
Materials
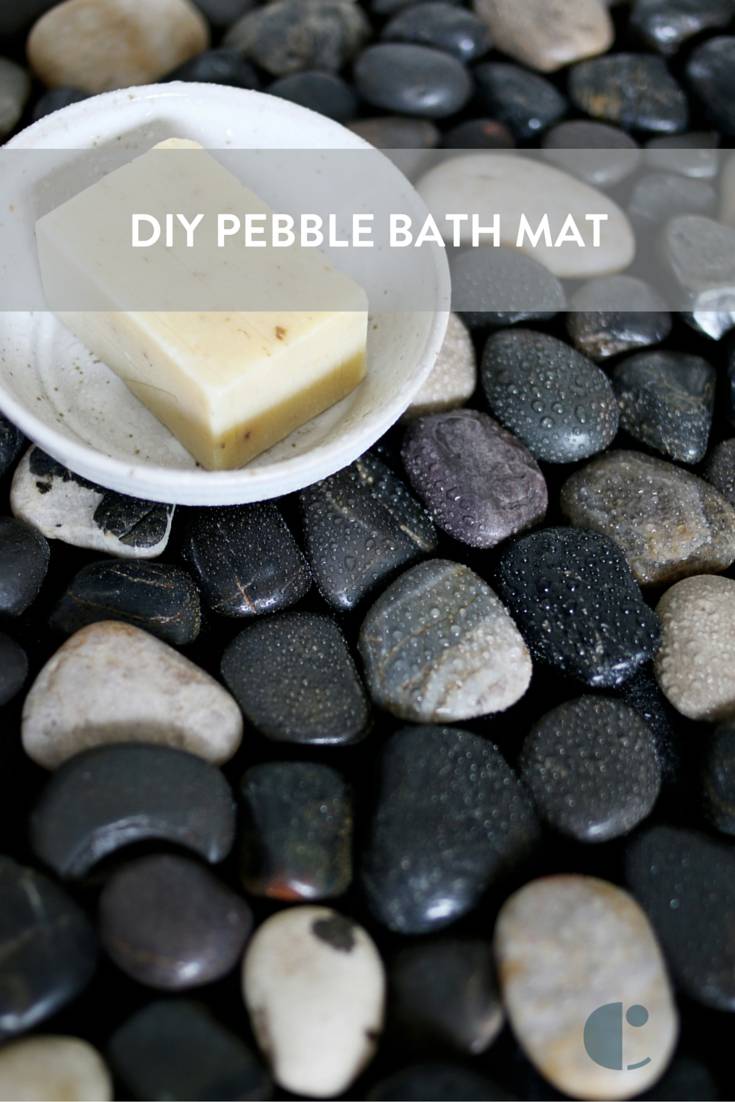
- Floor Mat
- Garden Pebbles: Black Pebbles, Multi-colored Pebbles, or White Pebbles. You can find these labeled as ‘river stones’ too
- 5-Minute Epoxy
- Note: All these supplies can be found at most dollar stores or on Amazon for under $10 in total!
Step
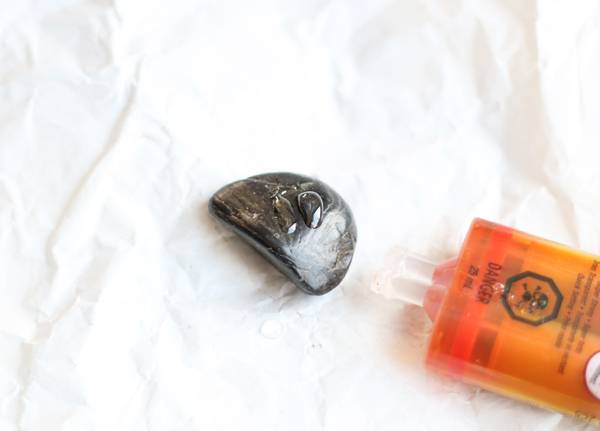
Clean and dry the surface of your rock. Press slowly so that equal parts of the hardener and resin are dispensed. Mix the two parts well for about a minute.
Step
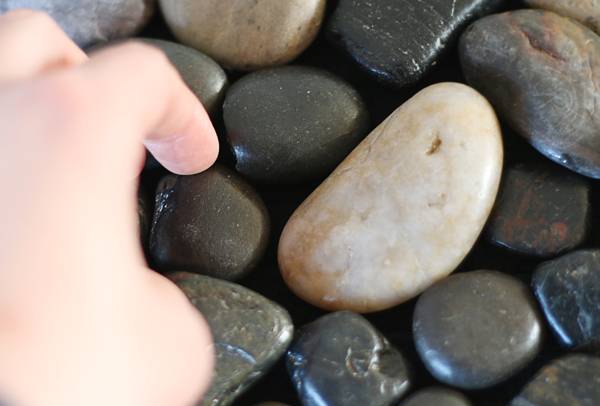
Press the rock to your floor mat firmly for about 3-5 minutes.
Repeat steps one and two until the entire surface of your mat is covered with the stones. Allow to dry for at least 30 minutes before moving your mat or manipulating it in any way.
Step
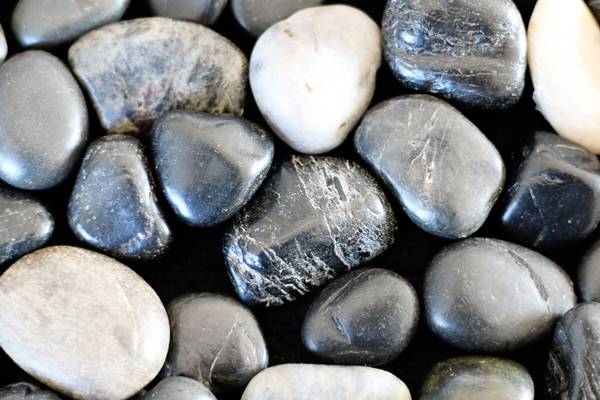
Once your stones have dried completely, simply place in your bathroom or an outdoor area and enjoy!
You can make your bath mat as big or small as you desire, depending on your space. Sticking to mainly black, grey and white stones will give your bathroom an instant modern feel. Not only will your space have that retreat-like feel, but every time you step out onto that smooth stone surface, your feet will be grateful for that mini foot massage!
Here are some pictures of the finished product!
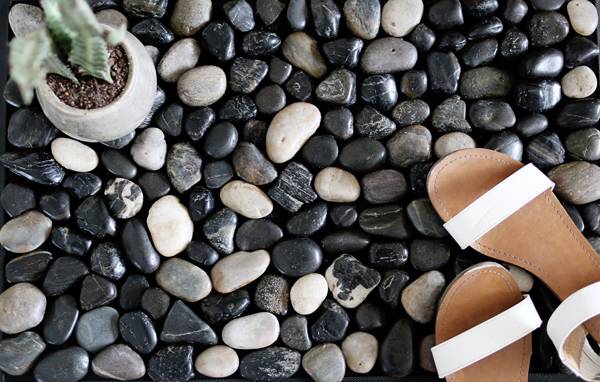
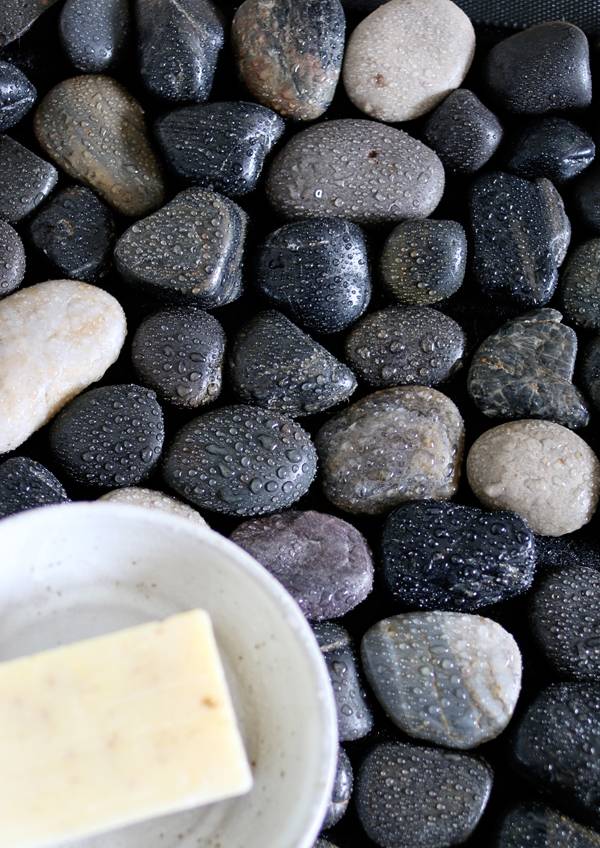
Photo: Lidy Dipert
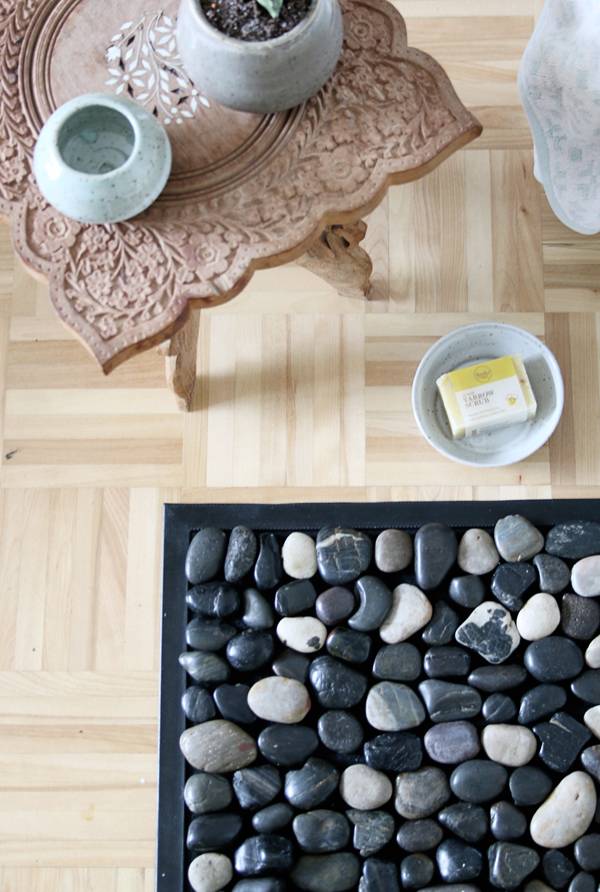
Photo: Lidy Dipert
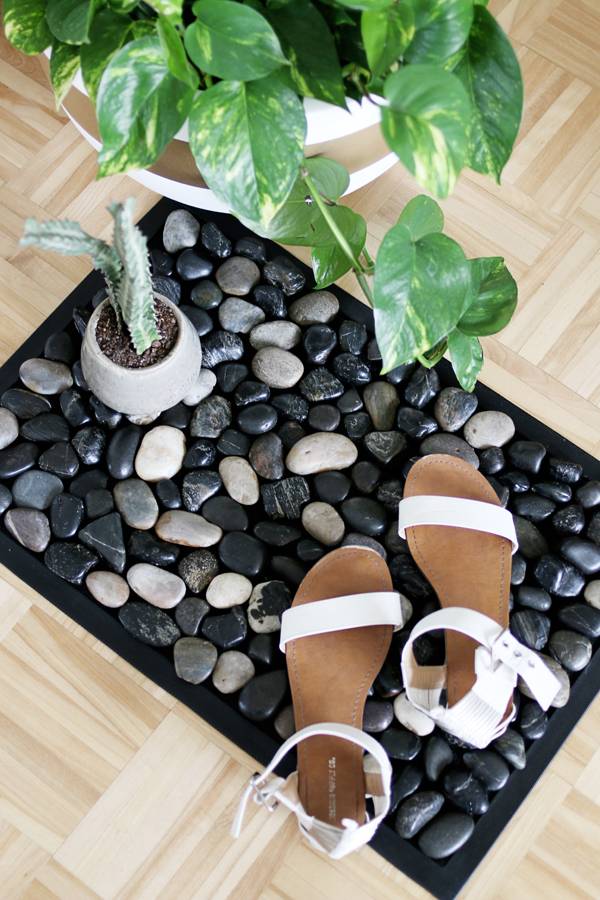
These pebble mats aren’t just great in bathrooms but work wonderfully in entryways and balconies as well. Happy crafting!
How durable is the matt? I want to make a few and try to sell them at my farmers market… do you think the stones will fall off if the mat is handled a bit?
@Bailee Doucette
Great question! Honestly, I had some issues with some stones falling off. This was due to the adhesive I used. I would probably go with a clear waterproof silicone adhesive next time, which you can find at Home Depot. There’s no mixing involved and it’s ready to go. With the Epoxy I found that the two-parts didn’t mix together consistently on some areas on the mat, which in turn caused a couple stones to detach. Hope that helps!
how. THEE. hell is this “under $10?!” Using YOUR OWN LINKS, the monetary cost is: floor mat $42, black pebbles, $12, epoxy $6. Thats SIXTY DOLLARS. SIXTY.
How do you prevent/clean the mold and dust that is created between the stones?
Couple possible solutions:
1. I find bags of the black river stones at the Dollar Tree all the time.
2. If you have the opportunity to be at a beach or river area, take them home as souvenirs.
3. I live in AZ and most yards are some form of rock. It is plentiful and cheap. On OfferUp and craigslist I find people who are changing their landscaping and post ads for you to come and take as much rock as you want for free — everything from the smaller pebbles for this project to boulders!
4. Some of my favorite matts are ones where the rocks are random. Just rocks I’ve picked up here and there, not all matchy-matchy. Every time I find a cool rock, I toss it in a bucket I the garage and in no time I have enough for a project ike this.
5. I make a lot of these mats for gifts so I’m just always on the look out for rocks and if you pay attention you’ll find them everywhere!
6. Also, I get the “naked” mats at Dollar Tree. They make them in grey or black and they’re mold proof.
7. I get my glue at Dollar Tree, too. Works great.
Good luck!
@M@
I’m so sorry to see how upset you are in regards to the prices of our product links. Obviously, that is never our intention, rather we hope to inspire our readers. Clearly, that is not the case.
I apologize I did not specify enough where I found my supplies to help provide more insight into how this project cost so little. But I did make a note that all these supplies can be found at most dollar stores (which is where I found all my supplies) OR on Amazon. In this specific case, we would never suggest or force our readers to spend more money on any supplies than they are comfortable with. I hope it helps you have a little more peace about the cost of this project. However, it is difficult to link specific products found on most dollar store websites, since a lot of those items are found in store rather than online. So really, the links are #1) a guide to show you what type of products to look for to help give our readers an idea of what kind of mat, pebbles and epoxy they can shop around for and #2) a easy option to find supplies online IF they so choose and the price is right. We certainly have not lied to our readers about how much this project cost and we are more than certain you can easily do this project for about $10. Shopping around for supplies takes a bit of hunting and comparing prices, which is always encouraged. Thank you for stating your concern, I hope this clarifies things a bit and gives you much peace.
@lidy – thanks for your kind and patient reply. It’s more than the commenter deserved, in my opinion.
@m – you need to reconsider what really matters to you, and whether it’s really worth leaving screeching, all-caps comments over the cost of a simple DIY project.
This is such a great idea. Have you had any problem with the matter getting mildew on it, since it’ll get wet or stay moist in the bathroom with the cracks between the rocks?
@emilee Thank you! And I haven’t noticed any problems with mildew or moisture, but it also doesn’t hurt to get into the habit of giving the mat a quick wipe down to just absorb any excess water or even hang it over the tub to dry 🙂
What type of bath mat would be best to use to avoid mildew/mold/nastiness from water seeping between the stones?
The linked mat is almost $50 in and of itself. Any other good sources? Thank you!!
Is this meant to be used inside the shower stall while you are showering or when you step out of the shower?
I’ve found the river stones at my dollar store. I haven’t looked for the epoxy or a mat. I’ll check it out next time I’m there.
Great Question! Same thing I was wondering although it looks and sound like outside.
Can i use a rubber bath mat that has only suction cups rather than the traditional “drip tray ” thing on bottom ?